You are using an out of date browser. It may not display this or other websites correctly.
You should upgrade or use an alternative browser.
You should upgrade or use an alternative browser.
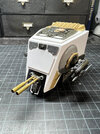
Let's Build An "Empire" AT-ST!
- Thread starter Boxcar Bret
- Start date
Me too! It’s my way of paying forward for all the members that have done the heavy lifting before me.I do enjoy a detailed build thread!
September 26, 2024
GREAT GREEBLIE GOODIES! With the construction of the head completed the time had come for the fun ****: Gluing on kit part and panels! All the little stuff that gives it that Star Wars look.
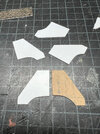
The patterns for the front and top armor panels were transferred to the styrene as described in the earlier post. I used 1mm for the front piece and 2mm for the top. The top of the head has a slight curvature to it so I carefully bent it by hand prior to gluing it on to prevent too much stress on the top. Both pieces were glued on with 5-minute epoxy so I had some working time to finesse the position before clamping in place.

At this point the fun kicked in and I started running on adrenaline. That means things went fast so there's some photos that didn't get taken. I can tell you that the hatches from the 8-Rad and the M3 Lee got glued on front. From there the armor piece from the Lang was cut and put on the "tusk".
The next piece to go under the blade was the top of the Matilda hull. My razor saw made quick work of it.

This was pretty straightforward and required just a little trimming and sanding to sit flat.


Using the pattern as a guide I was able to mock up the top and check the fit/position of the part from the Matilda and the one from the M5A1. The M5A1 part was tapered to fit the roof armor panel and both pieces were cemented down.


The next steps were one of those stressful moments that I'm sure all scratch building kit bashers endure. Cutting into a part that you only have one of from a $200 kit. The rear deck vent cut from the Tamiya 1/25 SU-100 was that kit for me.

The process, albeit stressy, was uneventful. Or so I thought. The piece was to fit vertically to the back of the Matilda part with the corners sanded into the edges and the bottom edge resting on the top of the head. I trimmed it a little short and found myself negotiating a compromise splitting the difference of the gap with the top and bottom edges. After using some CA debonder it's looking a little rough but I plan on going back and cleaning it up. It should be fine.


With the addition of the M16 and Jagdpanther parts it began taking on that familiar look.

Using a compass I marked the distance that the back panel would be recessed into the head. 1/4" angle styrene strips were glued in as mounting points. Since the whole back is comprised of the rear deck of the KV-1 kit trimmed down I decided not to mount it to another piece of styrene. It seemed redundant and unnecessary.
I used the styrene piece that was suppose to be the back panel as a pattern for cutting of the KV-1 part and with some minimal sanding it fit perfectly.


The 1/20 F1 transmission and other engine parts were cut, sanded and glued in place.


It was later pointed out to me that I was missing parts under the running wheels. They were easily popped off and the correct parts from the 312T were added.


I had been feeling kind of out of sorts all day. Like I was coming down with something. I started to get a bad runny nose and so I put myself bed. My instincts were right.

GREAT GREEBLIE GOODIES! With the construction of the head completed the time had come for the fun ****: Gluing on kit part and panels! All the little stuff that gives it that Star Wars look.
The patterns for the front and top armor panels were transferred to the styrene as described in the earlier post. I used 1mm for the front piece and 2mm for the top. The top of the head has a slight curvature to it so I carefully bent it by hand prior to gluing it on to prevent too much stress on the top. Both pieces were glued on with 5-minute epoxy so I had some working time to finesse the position before clamping in place.
At this point the fun kicked in and I started running on adrenaline. That means things went fast so there's some photos that didn't get taken. I can tell you that the hatches from the 8-Rad and the M3 Lee got glued on front. From there the armor piece from the Lang was cut and put on the "tusk".
The next piece to go under the blade was the top of the Matilda hull. My razor saw made quick work of it.
This was pretty straightforward and required just a little trimming and sanding to sit flat.
Using the pattern as a guide I was able to mock up the top and check the fit/position of the part from the Matilda and the one from the M5A1. The M5A1 part was tapered to fit the roof armor panel and both pieces were cemented down.
The next steps were one of those stressful moments that I'm sure all scratch building kit bashers endure. Cutting into a part that you only have one of from a $200 kit. The rear deck vent cut from the Tamiya 1/25 SU-100 was that kit for me.
The process, albeit stressy, was uneventful. Or so I thought. The piece was to fit vertically to the back of the Matilda part with the corners sanded into the edges and the bottom edge resting on the top of the head. I trimmed it a little short and found myself negotiating a compromise splitting the difference of the gap with the top and bottom edges. After using some CA debonder it's looking a little rough but I plan on going back and cleaning it up. It should be fine.
With the addition of the M16 and Jagdpanther parts it began taking on that familiar look.
Using a compass I marked the distance that the back panel would be recessed into the head. 1/4" angle styrene strips were glued in as mounting points. Since the whole back is comprised of the rear deck of the KV-1 kit trimmed down I decided not to mount it to another piece of styrene. It seemed redundant and unnecessary.
I used the styrene piece that was suppose to be the back panel as a pattern for cutting of the KV-1 part and with some minimal sanding it fit perfectly.
The 1/20 F1 transmission and other engine parts were cut, sanded and glued in place.
It was later pointed out to me that I was missing parts under the running wheels. They were easily popped off and the correct parts from the 312T were added.
I had been feeling kind of out of sorts all day. Like I was coming down with something. I started to get a bad runny nose and so I put myself bed. My instincts were right.
Attachments
Last edited:
October 6, 2024
Although the worst of it only lasted two days, it took five to finally shake it and test negative.
When I mustered up the strength to hit the bench again it was time to do the cheeks. The Plastruct domes were put in position easily with double-stick tape and using the reference marking from when the template was transferred over.

From the backside I marked where the domes would need to be trimmed. At first I used a Sharpie to make the markings only to have that all too familiar say "What are you doing?" I then redid it and used something finer.

Rather than using a saw I opted to sneak up on the cut with a 100 grit sanding stick.

After some clean up I went over the dome with a 600 sanding sponge to rough up the surface and help with glue and paint adhesion. Here's a before and after:

My prototype head was sacrificed for it's plastic to make the armor plates on the sides. Thank you for your service. Again, I used the template and transfer paper to copy the patterns onto the styrene.


Since the head and armor plating weren't vacuum formed, that meant I had to make the plating from two pieces on each side. This also meant I had to recreate the curvature of the head. I started by gently bending the plastic by hand to match the form of the head.

Next I traced the top of the head onto a separate piece to mimic the compound curve. This cut was cut out and glued to the side piece and the corner edge sanded to recreate the edge.


These were glued to the sides using scrap styrene as standoffs to give them the proper distance from the head.


More greeblies! The side skirting from the M5A1 was cut into two pieces. One that's glued to the side of the head and one to the bottom edge.

There's a part that wraps around to the back that should be left on if you're going to be doing an "in Star Wars world" version. Those parts went missing on the one-sided, filming model. Since I'm doing the one-sided version, I left them off. Judge me.
The piece needed to be cut and sanded down at an angle which was pretty straight forward.

The hinges on the piece made for great tabs for gluing since the piece glues to the edge with the foremost end going behind the cheek.


I've been busy building but slacking in the posting department so I'm going to make an effort this week to bring things up to date. Cheers!
Although the worst of it only lasted two days, it took five to finally shake it and test negative.
When I mustered up the strength to hit the bench again it was time to do the cheeks. The Plastruct domes were put in position easily with double-stick tape and using the reference marking from when the template was transferred over.
From the backside I marked where the domes would need to be trimmed. At first I used a Sharpie to make the markings only to have that all too familiar say "What are you doing?" I then redid it and used something finer.
Rather than using a saw I opted to sneak up on the cut with a 100 grit sanding stick.
After some clean up I went over the dome with a 600 sanding sponge to rough up the surface and help with glue and paint adhesion. Here's a before and after:
My prototype head was sacrificed for it's plastic to make the armor plates on the sides. Thank you for your service. Again, I used the template and transfer paper to copy the patterns onto the styrene.
Since the head and armor plating weren't vacuum formed, that meant I had to make the plating from two pieces on each side. This also meant I had to recreate the curvature of the head. I started by gently bending the plastic by hand to match the form of the head.
Next I traced the top of the head onto a separate piece to mimic the compound curve. This cut was cut out and glued to the side piece and the corner edge sanded to recreate the edge.
These were glued to the sides using scrap styrene as standoffs to give them the proper distance from the head.
More greeblies! The side skirting from the M5A1 was cut into two pieces. One that's glued to the side of the head and one to the bottom edge.
There's a part that wraps around to the back that should be left on if you're going to be doing an "in Star Wars world" version. Those parts went missing on the one-sided, filming model. Since I'm doing the one-sided version, I left them off. Judge me.
The piece needed to be cut and sanded down at an angle which was pretty straight forward.
The hinges on the piece made for great tabs for gluing since the piece glues to the edge with the foremost end going behind the cheek.
I've been busy building but slacking in the posting department so I'm going to make an effort this week to bring things up to date. Cheers!
Attachments
Thanks! The further away you are the better it looks!It's all looking bitchin' from where I stand
It looks incredible!
October 21, 2024
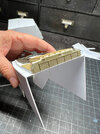
This is my "I haven't posted anything for awhile and I need to post something and I'm too lazy to write something but I'm lucky because I really documented doing the cheek guns well and I don't think folks will mind” post.


This is my "I haven't posted anything for awhile and I need to post something and I'm too lazy to write something but I'm lucky because I really documented doing the cheek guns well and I don't think folks will mind” post.
Attachments
Last edited:
stevielewis
Sr Member
Really nice update. 

Beautiful (and bloody) work!
Three times!! I cut myself THREE TIMES that day! Thought I was going to end up looking like John Doe from SE7EN.Beautiful (and bloody) work!
It did and it got more. I was lucky to still be conscious by the end of the day.Careful, once the X-Acto gets a taste for human blood it just wants more.
November 2, 2024
Ok, I know I said I was going to post more frequently but here's the deal. The reality is I've gotten so far behind the curve that I would literally have to suspend the build to catch up and I'm having too much fun to do that.
I am grateful for all the research and knowledge of those members of the RPF that came literally decades before me and my build threads have been my way of giving back. Based off the feedback I receive here and on Facebook people not only appreciate me sharing my experience but I get a lot of positive feedback too, which is encouraging.
So here's what's going to happen. I'm doing a hard reset. I'm going to post all the photos I've taken to date since I completed the cheek guns. This will take place over multiple posts as we're limited to 25 pics per post. If anyone has any questions about something just post your question and I'll glad try to explain what I did.
After all the pics have been posted I'll go back to posting as I go.
Thanks for everyone's encouragement and support.
Attachments
Similar threads
- Replies
- 17
- Views
- 1,635
- Replies
- 5
- Views
- 657
- Replies
- 0
- Views
- 1,065

