Kill la Kill, ryuko matoi Build log

TheRealMe

Well-Known Member
Been working on a scratch build of the Kill La Kill character Ryuko Matoi. This will be a wearable costume, I'm only making the armor, the soft bits will be made by another artist.Here goes the photo dump!First up we have a reference, It is this version that I am going for.
Unknown.jpg

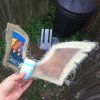
Staring out with some card board.
IMG_0408.JPGIMG_0409.JPG
Fiberglass mat, and resin are next.
IMG_0411.JPG
IMG_0412.jpg
Next I use some foam to sculpt the center piece
IMG_0414.jpgIMG_0415.jpg
 
Last edited:
Re: ryuko matoi Build log

Body Filler and Primer, and lots of sanding.
IMG_0416.jpgIMG_0417.jpg
IMG_0422.JPGIMG_0561.JPG
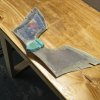
The sward makes it's first appearance here. With a much smoother looking piece of armor, after much filling and sanding of course:)
 
Re: ryuko matoi Build log

And now for the expensive paints ;)
IMG_0566.jpg
And some fancy tape work
IMG_0578.jpg
I want it shinier!!!
Get the gun, Time to spray some clear!
IMG_0583.JPG
And this is where I left the project for today. More to come, I have started the back piece of the armor too, and will post on that. Still a lot to do.
 
Well, it won't be me wearing it! lol
And if that's true, then you my friend have not been to Dragoncon! lol

And I got a video up to show off the clear coat
 
Last edited by a moderator:
Quick update, the back vent.
This is made form foam core, and is in the very beginning stages. Once I get it smoothed out, I'll add the vents and paint it.

IMG_0547.JPGIMG_0548.JPG
 
Got the center medallion painted and cleared, I'll wet sand it, paint the red stripe, and re clear coat, to finish it.
11063135_10205511657818290_1916384639_n.jpg
 
SHINY!

...both in the Firelfy and the literal sense. That pain job looks flawless.

This is going to be awesome.

Thanks guys, I assure you though, it does have few flaws.
Believe it or not, when it's all done, I plan to wet sand and clear one more time for maximum smoothness!
I guess I'm just too much of a perfectionist for my own good.
Plus I really need to build my portfolio up, and I'm going for quality over quantity, so your kind words mean a lot. I'll keep you posted on the progress.
 
11128778_10205588921269828_1738777370_n.jpg
Did a little work on the back armor, still needs some smoothing out, but some other projects have taken a lot of my time… as you can see.
 
Finally put some more time into this thing. It's almost done, and then it will be ready for the fabric bits.
Started by cutting out a support structure for the vents on the scroll saw.
11198693_10205830592511458_1810631076_n.jpg
Then I used some old blinds as vents, glued them to the support structure, and then trimmed until it fit inside the housing.
11216430_10205830592871467_543888522_n.jpg
11125478_10205830593511483_2034276994_n.jpg
Get the, gun. it's ready for paint!
11122458_10205830593631486_1199541005_n.jpg
Let the clear coat dry and re fit into housing
11215905_10205827715359531_267857094_n.jpg
Super happy with how it looks now!
Put it with the rest and snap a photo. I even picked up a cool figure of the character to go with it.
11210176_10205830594431506_1422485844_n.jpg
 
Last edited:
This thread is more than 4 years old.

Your message may be considered spam for the following reasons:

  1. This thread hasn't been active in some time. A new post in this thread might not contribute constructively to this discussion after so long.
If you wish to reply despite these issues, check the box below before replying.
Be aware that malicious compliance may result in more severe penalties.
Back
Top