Phaleure
New Member
I've been working on this build on and off for a few months now. I got most of my inspiration for this costume by watching pep and foam ironman builds that I found here, so I thought I would post some of my build to give inspiration to anyone else out there who needs it.

The down and dirty of it: Kerrigan is one of my all time favorite video game characters. Probably because Starcraft holds a special place in my heart for being one of my first favorite video games, but also because she is simply a bad ass. I loved Kerrigan's ghost armor from the opening cinematic from SCII and though there is no better way to profess my love than to cosplay her!
I'm no stranger to costume making, as I have been doing it for years, but I wanted to try something new this time and tackle EVA foam, since my builds in the past have been bulky, uncomfortable and expensive. My hope is that I can make this armor so that I can wear it for hours easily, pack it in a suitcase for conventions that require travel and not break the bank. Here is some of my progress so far:
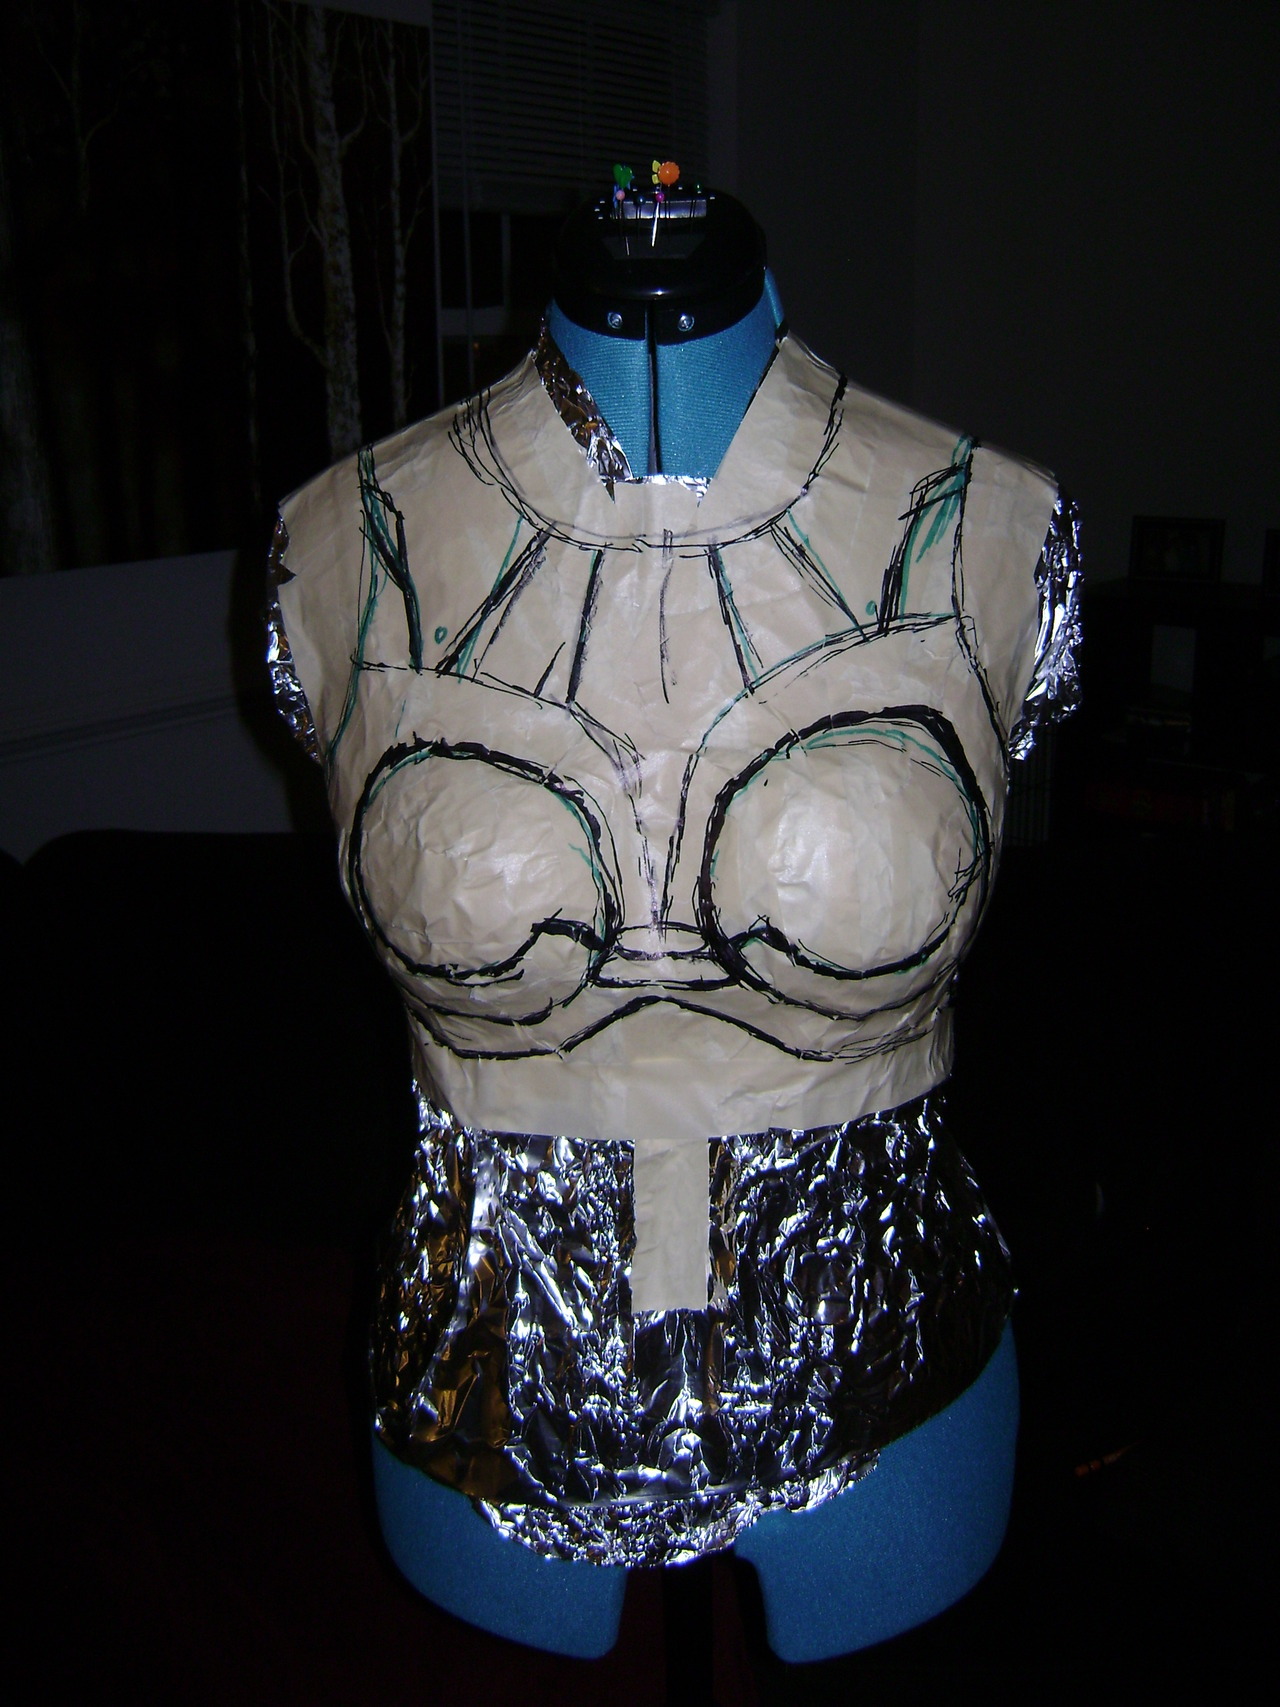
I patterned out the chest piece using a dress form covered in foil and masking tape. Once you draw on your guidelines, you can cut the pattern up and pretty much transfer it straight to foam. I also did this to my legs, and my wrists.
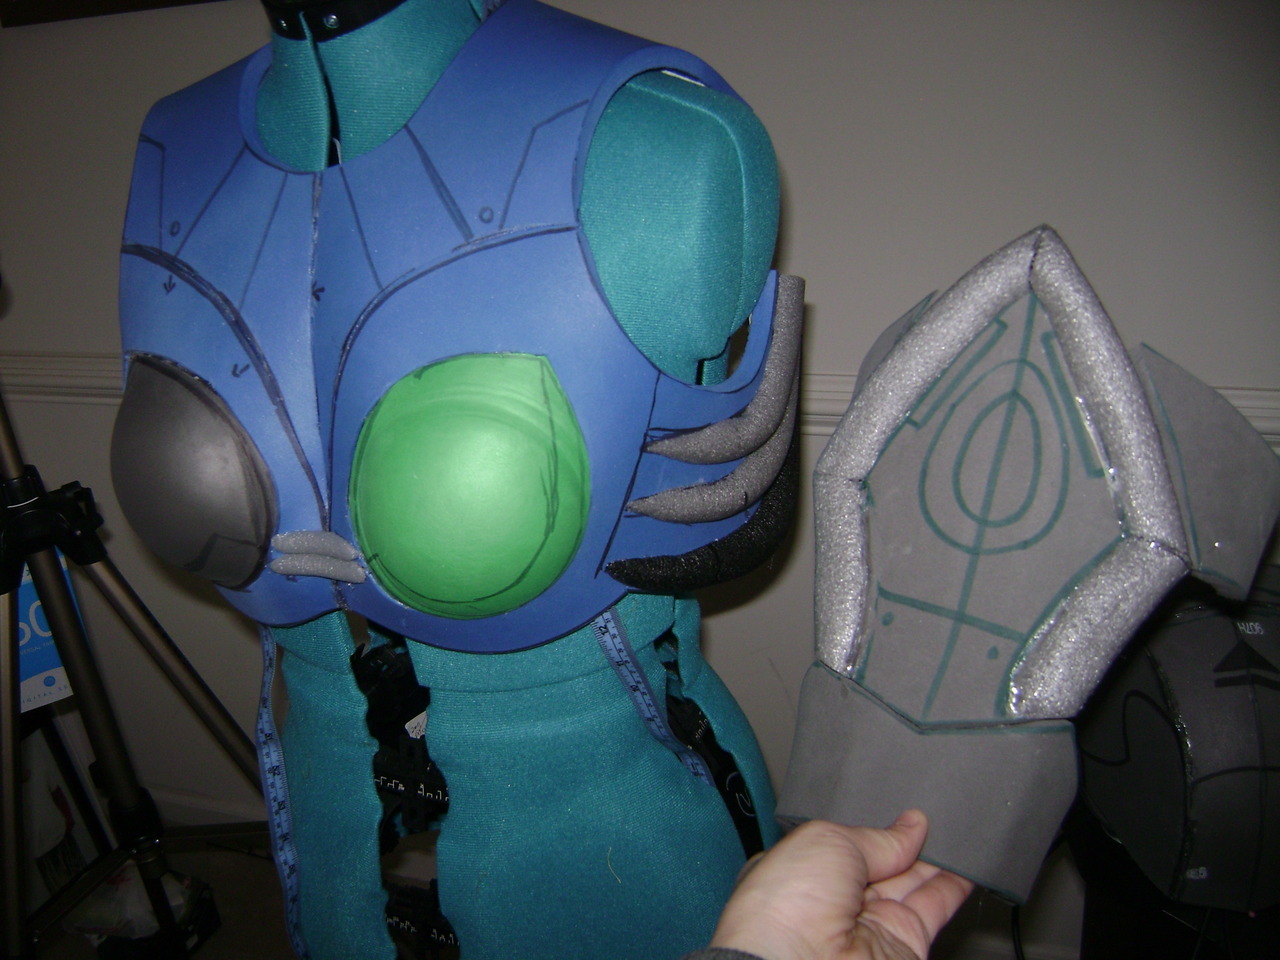
This pic is after I cut out .5" thick EVA foam mats, I had a pack colored ones needing to be used up, but they were purchased from Home Depot. The cups were created by heating the foam in the oven and pressing it over an acrylic sphere while it cooled. The ribs and the edging on the gauntlet were made using backer tube, which is a open cell foam tube used to fill gaps prior to the caulking process, they are a lot like pool noodles.
Since the picture I have re-worked the gauntlet since I didn't like how it was turning out.
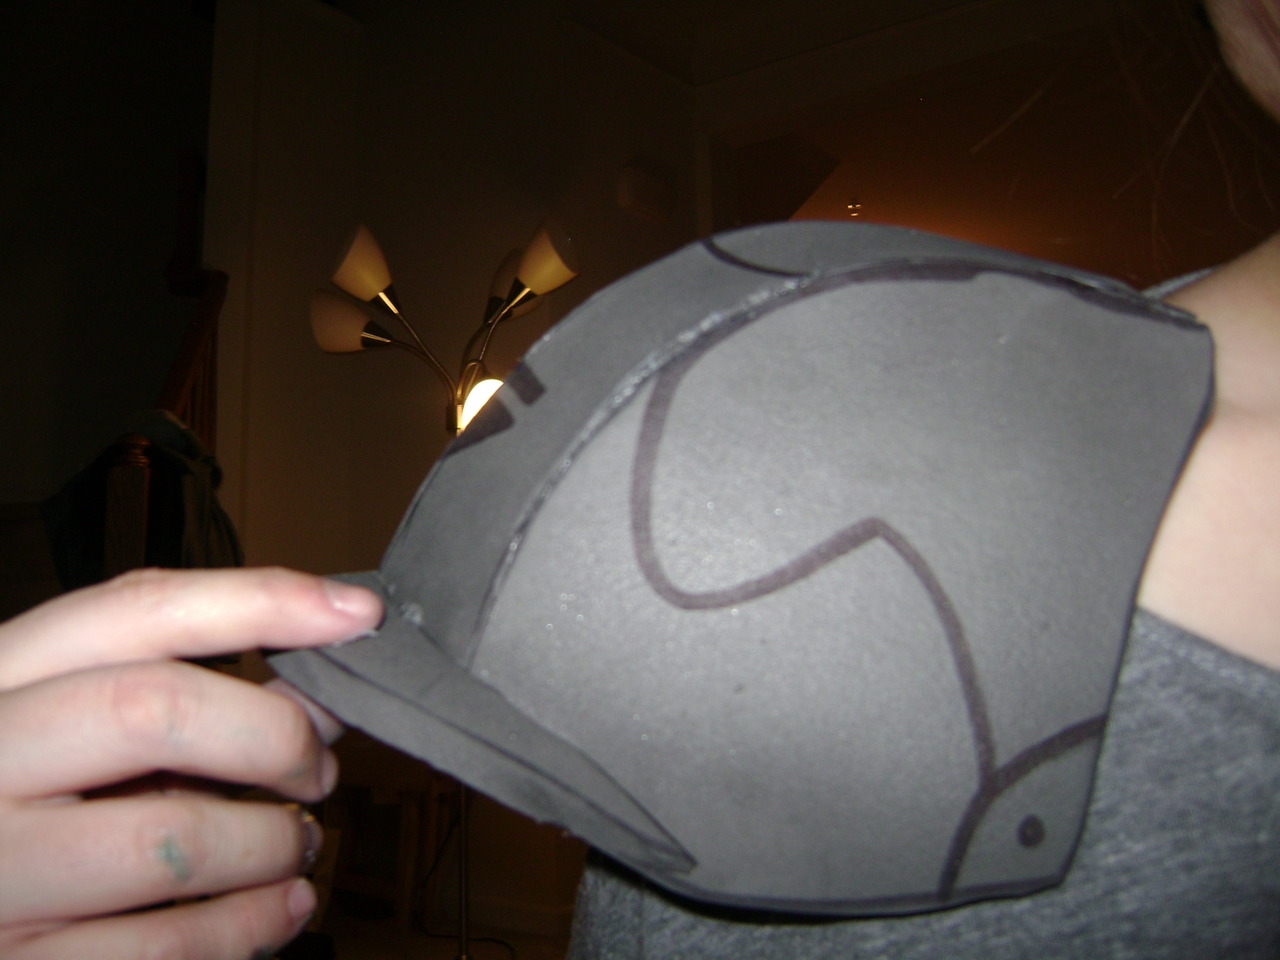 The shoulder pads were patterned using card-stock and trial and error.
I made a video of me working on the shoulder pad, if you are interested.
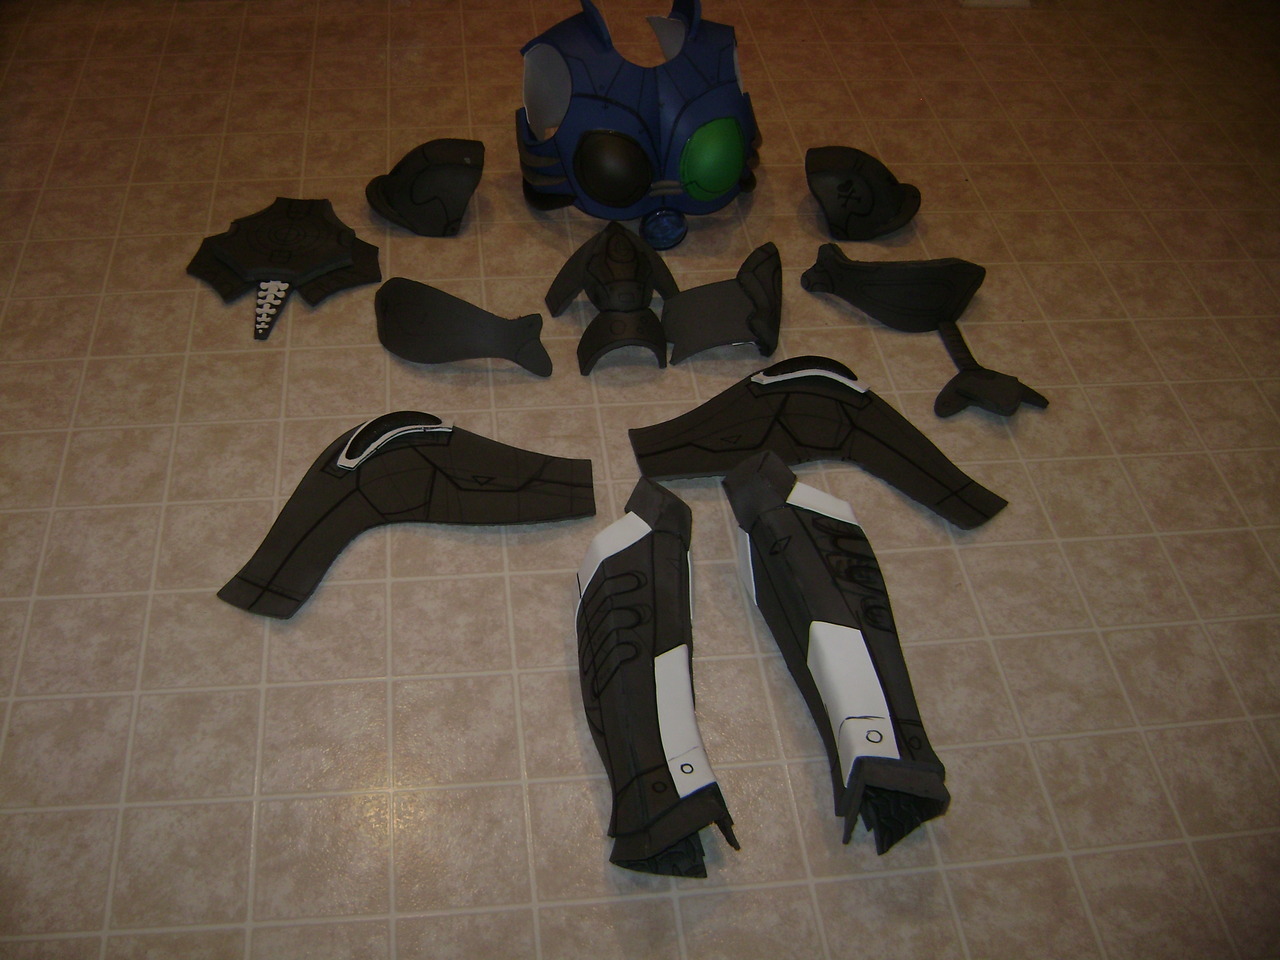
As of now I have all of the armor put together. I have been having difficulties creating closures for attaching it to my body. My original idea was to use velcro, but I am finding that the velcro isn't holding the foam together tight enough and there are large gaps at the closures. It isn't aestetically pleasing to me, but I am not having much luck with alternative methods.
Next steps for the armor are using a wood burner and dremel to add detail, silicone caulk to clean up seams and any mistakes made along the way, palsti-dip and paint. Then I get to get to the most exciting thing for me on this build:

I've never really worked with EL tape so I am pretty excited to get this all together. My only concern is if it isn't dark out, or a picture is taken with flash, the lights all but disappear. I guess it's a small price to pay.
Hopefully I will have some more progress pics for later. Trying to have this done for Otakon this July, and if the whole packing it in a suitcase thing works out D*Con come September.
The down and dirty of it: Kerrigan is one of my all time favorite video game characters. Probably because Starcraft holds a special place in my heart for being one of my first favorite video games, but also because she is simply a bad ass. I loved Kerrigan's ghost armor from the opening cinematic from SCII and though there is no better way to profess my love than to cosplay her!
I'm no stranger to costume making, as I have been doing it for years, but I wanted to try something new this time and tackle EVA foam, since my builds in the past have been bulky, uncomfortable and expensive. My hope is that I can make this armor so that I can wear it for hours easily, pack it in a suitcase for conventions that require travel and not break the bank. Here is some of my progress so far:
I patterned out the chest piece using a dress form covered in foil and masking tape. Once you draw on your guidelines, you can cut the pattern up and pretty much transfer it straight to foam. I also did this to my legs, and my wrists.
This pic is after I cut out .5" thick EVA foam mats, I had a pack colored ones needing to be used up, but they were purchased from Home Depot. The cups were created by heating the foam in the oven and pressing it over an acrylic sphere while it cooled. The ribs and the edging on the gauntlet were made using backer tube, which is a open cell foam tube used to fill gaps prior to the caulking process, they are a lot like pool noodles.
Since the picture I have re-worked the gauntlet since I didn't like how it was turning out.
I made a video of me working on the shoulder pad, if you are interested.
As of now I have all of the armor put together. I have been having difficulties creating closures for attaching it to my body. My original idea was to use velcro, but I am finding that the velcro isn't holding the foam together tight enough and there are large gaps at the closures. It isn't aestetically pleasing to me, but I am not having much luck with alternative methods.
Next steps for the armor are using a wood burner and dremel to add detail, silicone caulk to clean up seams and any mistakes made along the way, palsti-dip and paint. Then I get to get to the most exciting thing for me on this build:
I've never really worked with EL tape so I am pretty excited to get this all together. My only concern is if it isn't dark out, or a picture is taken with flash, the lights all but disappear. I guess it's a small price to pay.
Hopefully I will have some more progress pics for later. Trying to have this done for Otakon this July, and if the whole packing it in a suitcase thing works out D*Con come September.
Last edited:


 confused


