You are using an out of date browser. It may not display this or other websites correctly.
You should upgrade or use an alternative browser.
You should upgrade or use an alternative browser.
Judge Dread , Judge Death armour build
- Thread starter CatfoodRob
- Start date
Dr Feeley Good
Active Member
looking great.............
the DOCTOR
Sr Member
Brilliant! Will either costume be debuting at the Sci-Fi Weekender?
CatfoodRob
Sr Member
Brilliant! Will either costume be debuting at the Sci-Fi Weekender?
Both helmets (Dredd and Death) and shoulder armour will be on the "Galactic Knights" prop display table at the Sci-Fi Weekender. No costumes though as time has run out .
My Daleks and Dr Who b.f.g`s will be on the "our dr who monsters" display .
Should be an excelent event .
Rupert_Angier
Sr Member
This thread and build are awesome and inspiring.
Love the work on Death. If I was 100 pounds lighter...
CatfoodRob
Sr Member
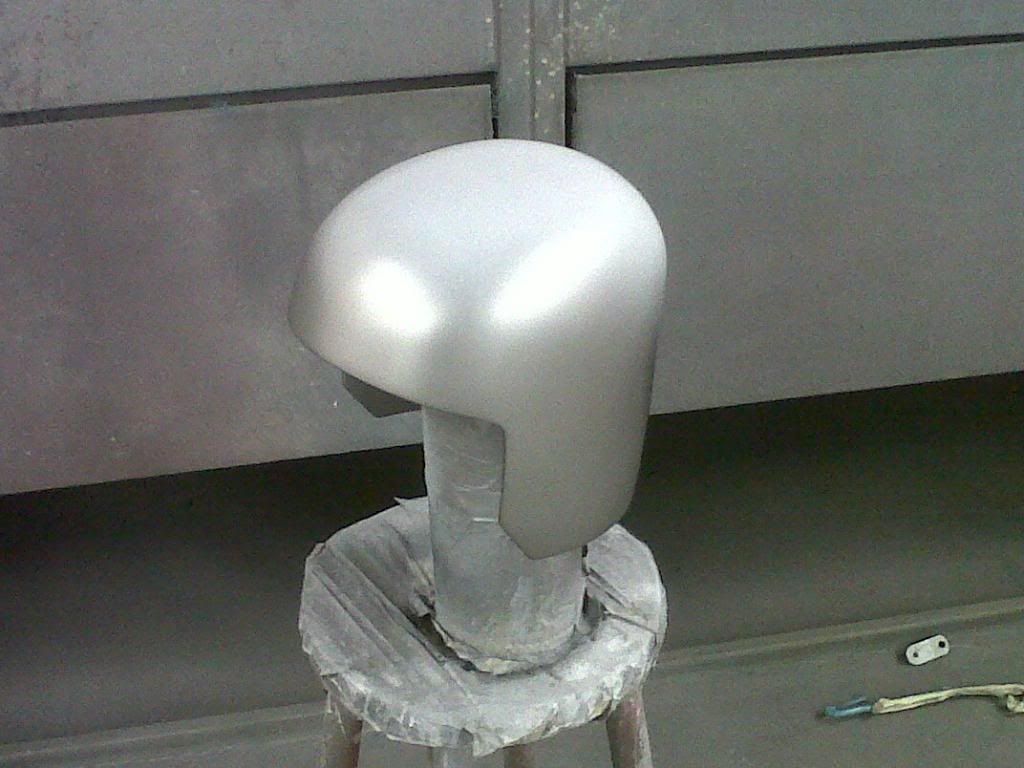
Today I painted the helmet .
First , once I was satisfied with the filler (bondo) over the fiberglass shell , I finished sanding with 240 grit paper . Its never good to sand the filler with too fine grit as the primer needs something to grip on to . It (and subsequent topcoats) may flake off if the bondo is tooo smoooth.
Several coats of thick primer were applied , and when dry the primer was sanded flat with 1200 paper , a tad too fine really , but all I had .
Next the lower edge of the bucket was painted with a silver grey shade .
Once the silver was dry it was sanded with 1200 wet ., the lower stripe was then blocked out in masking tape, I found that one strip of tape gave me the width I wanted .
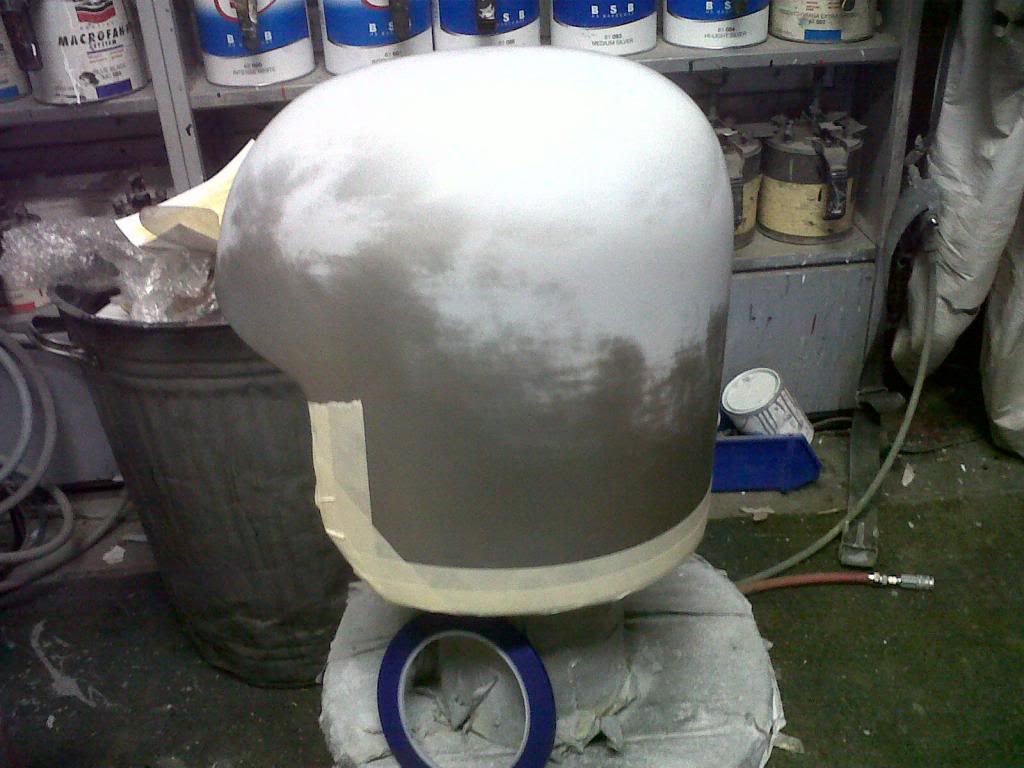
Next some fine lining tape was added to give the actual edge of the stripe.
Then more masking tape was applied to completely cover the lower silver stripe area.
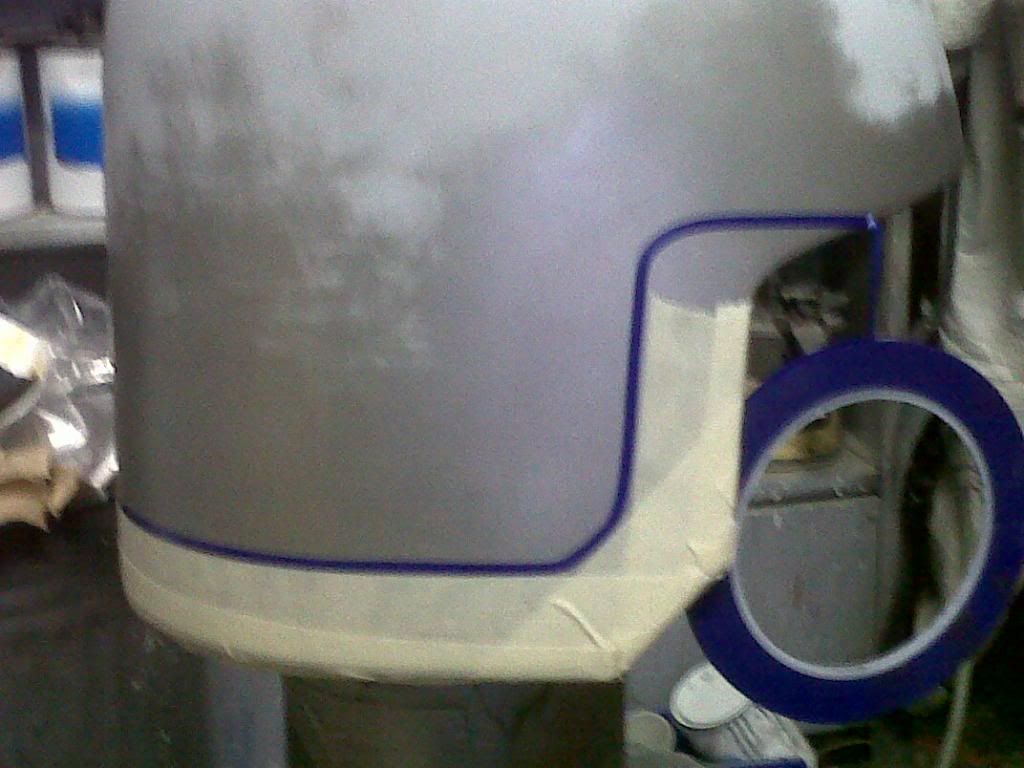
Next a coat of black was applied to the whole lid .
Once this was dry , but not set rock hard , the tape was removed

Thus I had my pattern .")
Nextthe black was hit with 1200 paper (wet) to give it a key , and to slightly flat down the paint ridge where the masking tape edge had been .

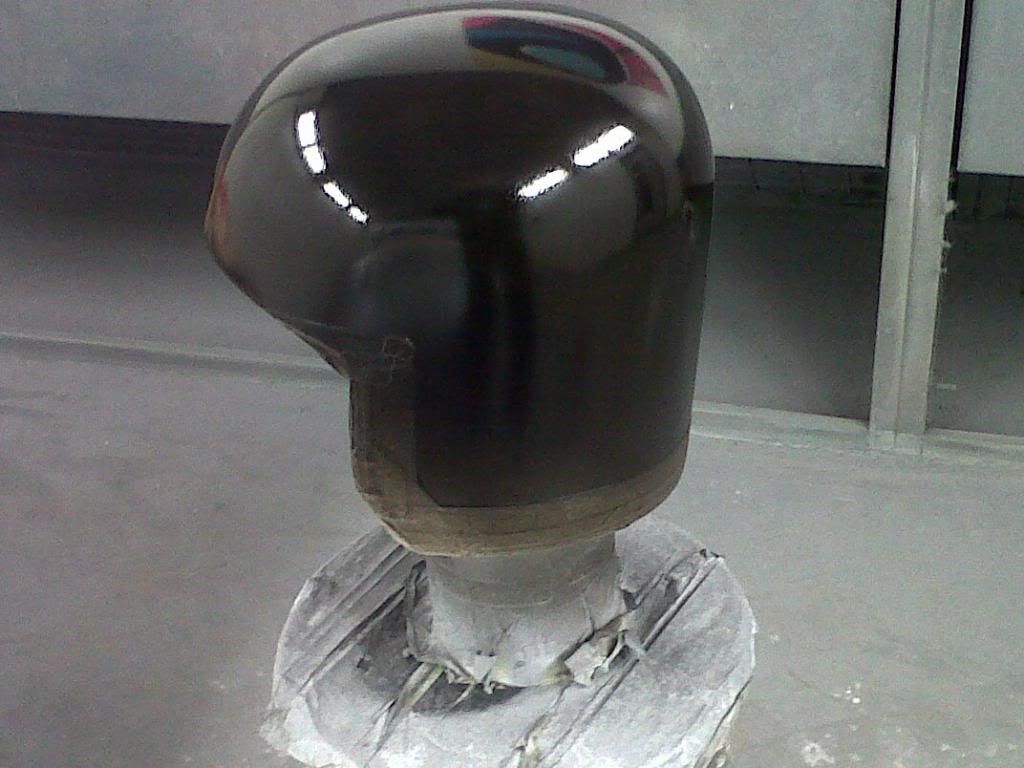
The key was for the clear coat . Three coats of laquer were applied "wer on wet" this means each coat was applied before the previous one was fully dry .
If you apply the next coat when the previous is too wet , you will get runs , so you need to leave each coat around ten minutes to semi dry .
Here it is with laquer applied .
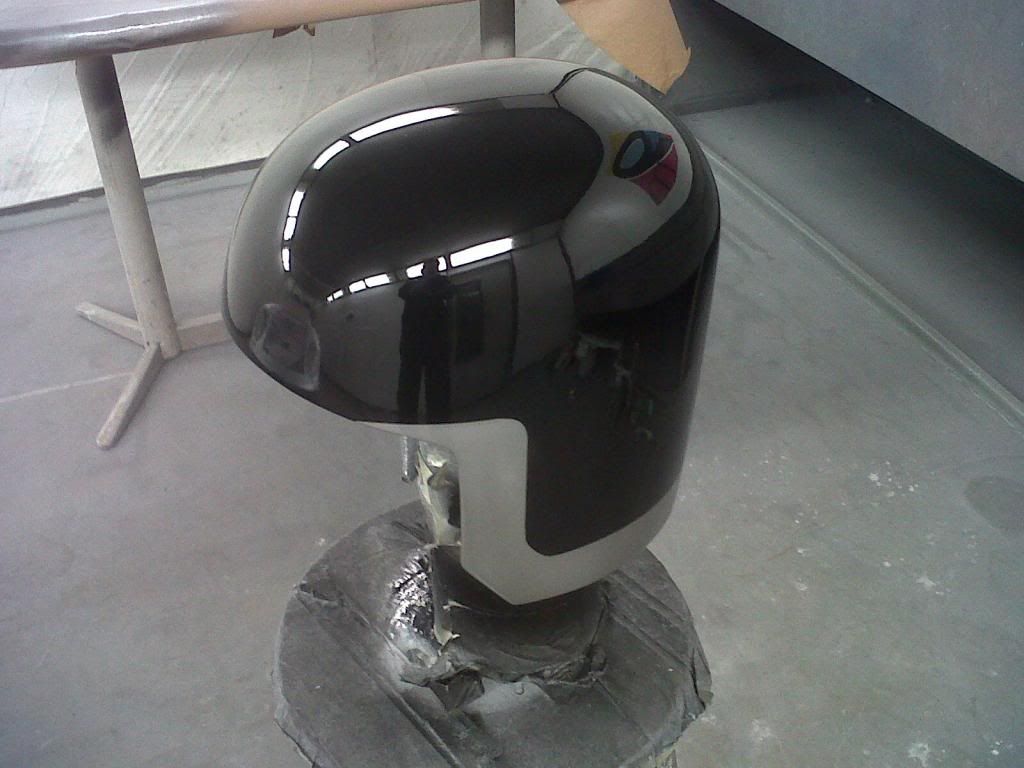
Once the laquer is VERY dry , a couple of days maybe, I will flat the whole lot with 2000 grit wet paper to smooth out any irregulatities etc , then it will be polished to a glass like sheen with cutting conpounds on an electric buffer.
Phew...a long day painting !!!
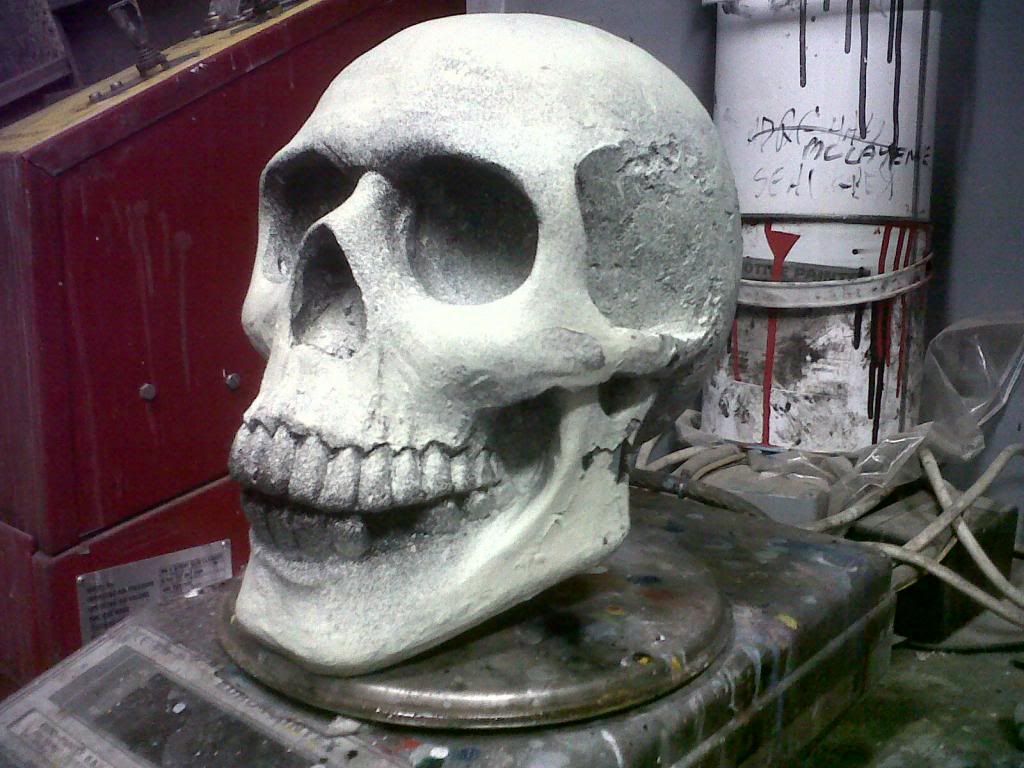
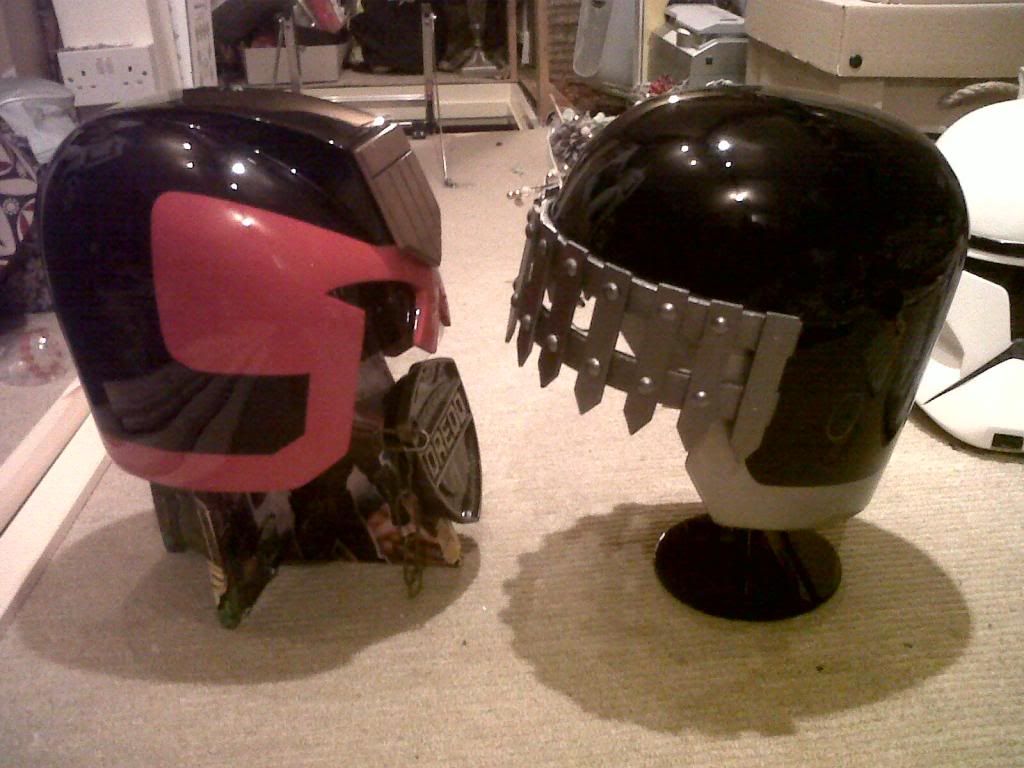
I bought this full sized resin skull at a garden center , and will use it as a stand for the death helmet for next weekends show, as I wont get time to build a "judge death " likeness for it . A bit of a cop out , but the clocks ticking .....
First , once I was satisfied with the filler (bondo) over the fiberglass shell , I finished sanding with 240 grit paper . Its never good to sand the filler with too fine grit as the primer needs something to grip on to . It (and subsequent topcoats) may flake off if the bondo is tooo smoooth.
Several coats of thick primer were applied , and when dry the primer was sanded flat with 1200 paper , a tad too fine really , but all I had .
Next the lower edge of the bucket was painted with a silver grey shade .
Once the silver was dry it was sanded with 1200 wet ., the lower stripe was then blocked out in masking tape, I found that one strip of tape gave me the width I wanted .
Next some fine lining tape was added to give the actual edge of the stripe.
Then more masking tape was applied to completely cover the lower silver stripe area.
Next a coat of black was applied to the whole lid .
Once this was dry , but not set rock hard , the tape was removed
Thus I had my pattern .
Nextthe black was hit with 1200 paper (wet) to give it a key , and to slightly flat down the paint ridge where the masking tape edge had been .
The key was for the clear coat . Three coats of laquer were applied "wer on wet" this means each coat was applied before the previous one was fully dry .
If you apply the next coat when the previous is too wet , you will get runs , so you need to leave each coat around ten minutes to semi dry .
Here it is with laquer applied .
Once the laquer is VERY dry , a couple of days maybe, I will flat the whole lot with 2000 grit wet paper to smooth out any irregulatities etc , then it will be polished to a glass like sheen with cutting conpounds on an electric buffer.
Phew...a long day painting !!!
I bought this full sized resin skull at a garden center , and will use it as a stand for the death helmet for next weekends show, as I wont get time to build a "judge death " likeness for it . A bit of a cop out , but the clocks ticking .....
Last edited:
CatfoodRob
Sr Member
The above painting techniques apply to any kind of paint . I guess most people use automotive aerosols, and they follow my above post exactly
CatfoodRob
Sr Member
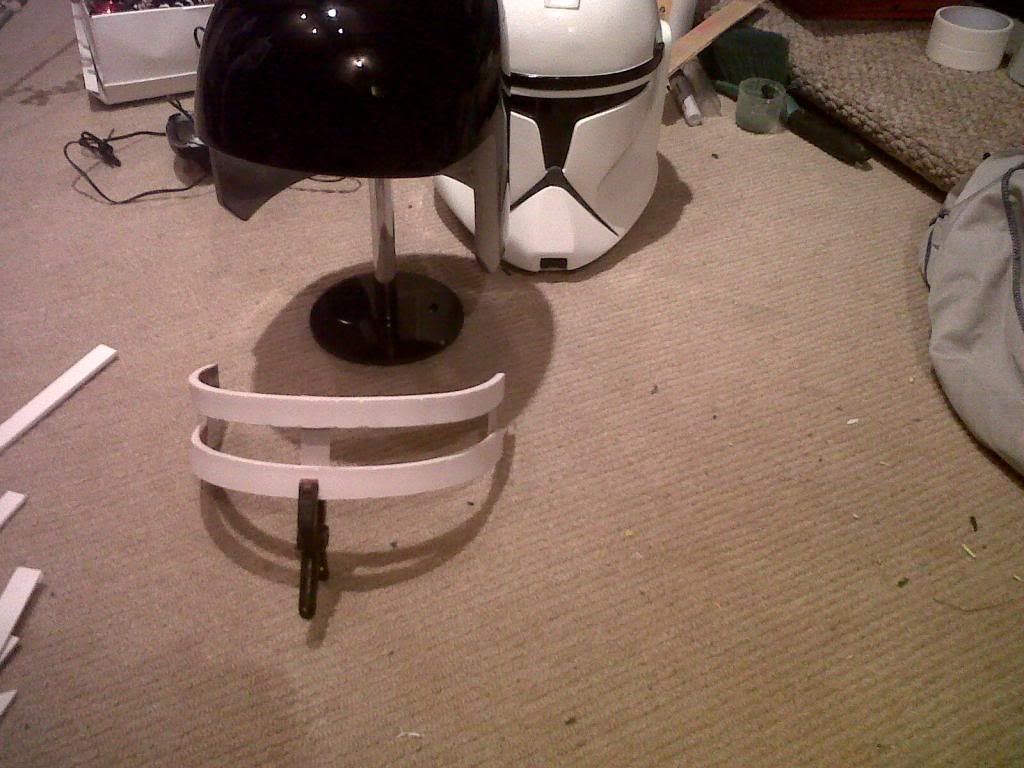
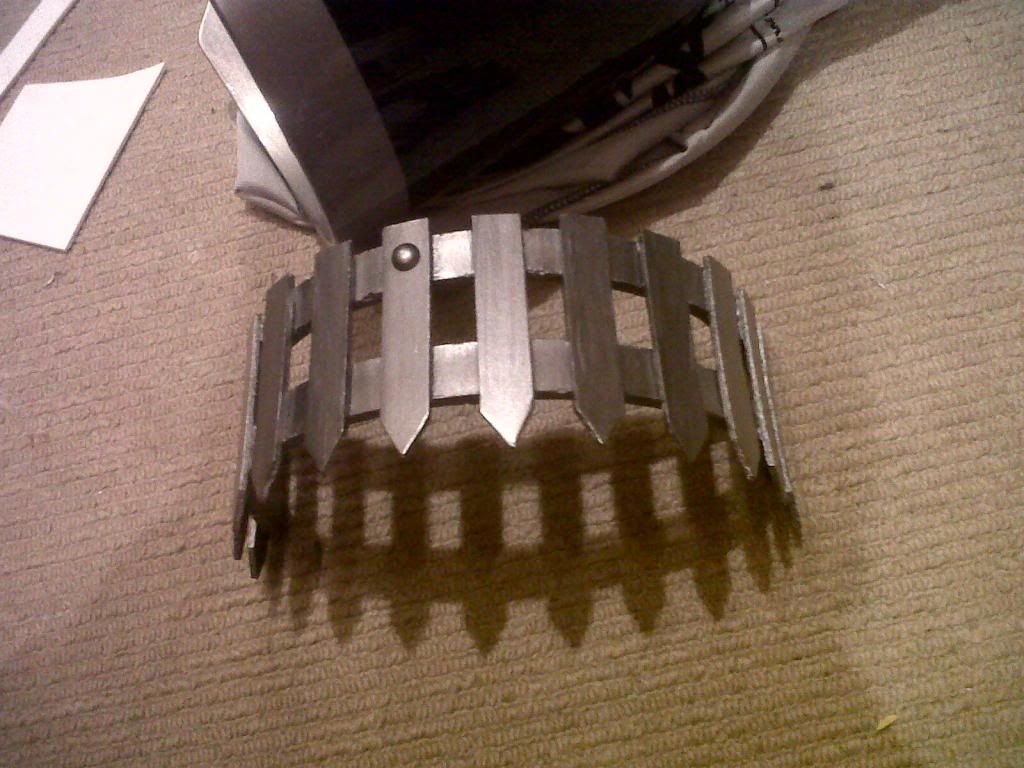
The Portcullis ....
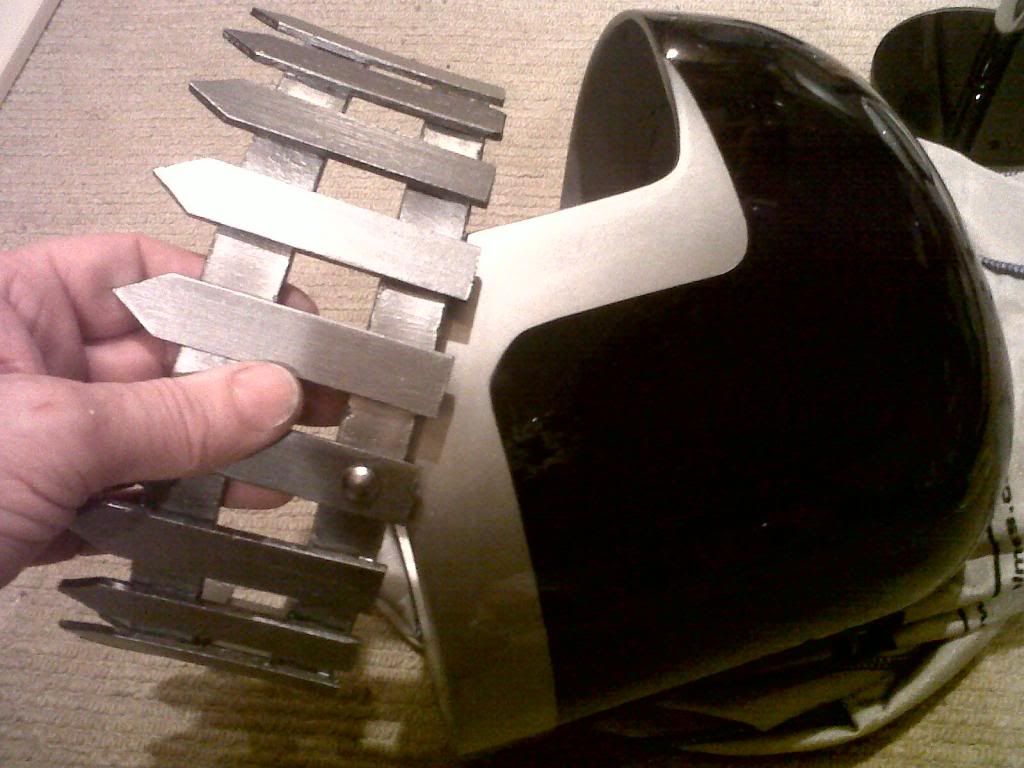
I started with two pieces of 6mm foamex that used to be a garage wall sign (Shell Oils is on the reverse side ! ) I cut two lengths 20mm wide and put them in the oven untill soft , then I wrapped them quickly around the helmet front and allowed them to cool , and set to the shape of the helmet .
I temporarily glued some pieces of cardboard to the two pieces to give me the correct alignment and positions.
Then I cut the smaller pointed pieces out of a piece of 3mm foamex ( a sample piece I blagged off a local supplier)
These I superglued in place one at a time
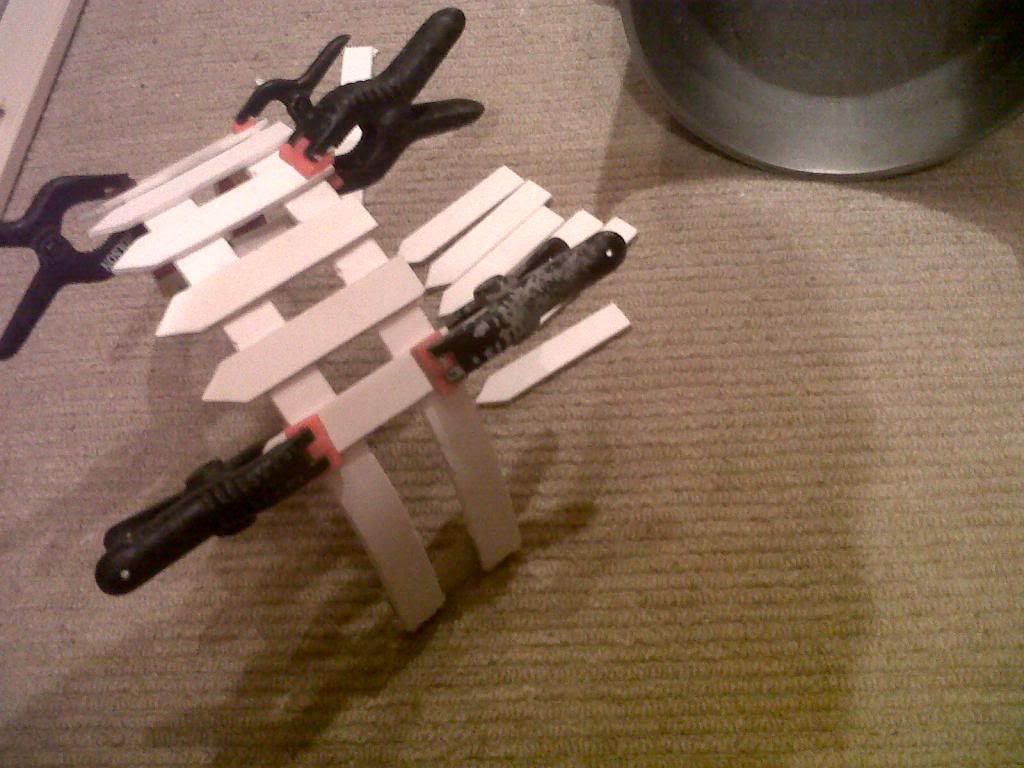
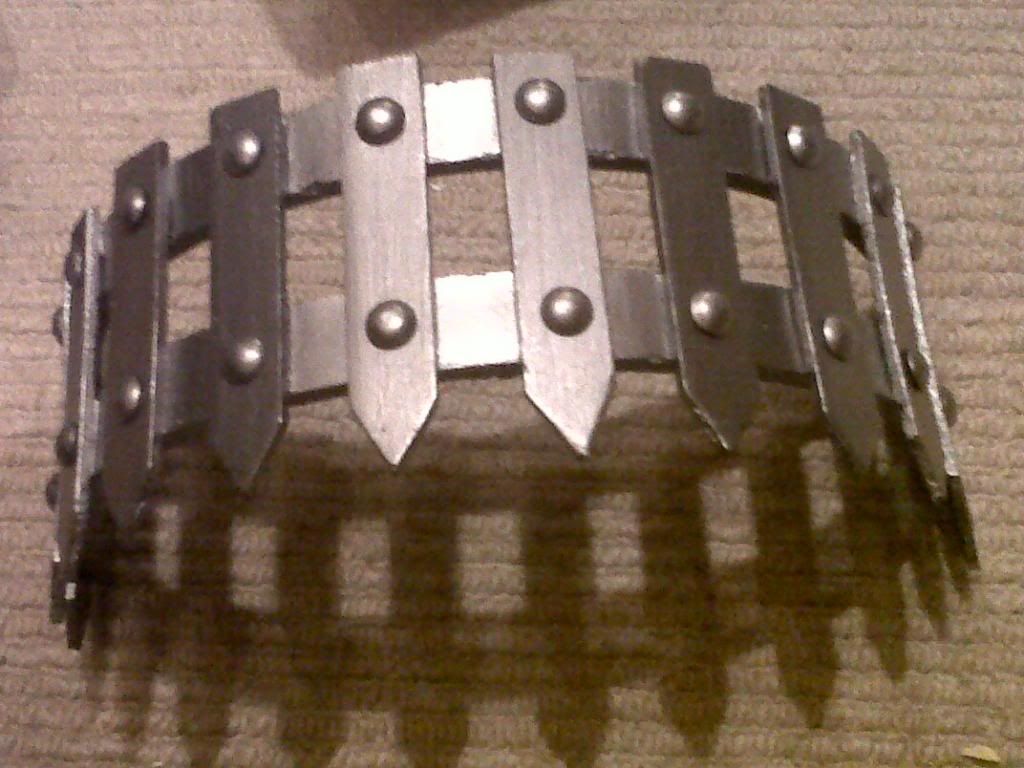
Once twelve pieces were glued in place , the portcullis was built ..it all came together very quickly . I decided to use upholstery tacks for the rivets , I had to cut their nail down to size with a pair of sidecutter pliers . Then I drilled a small hole in each position , and superglued the tacks into the foamex.
I brush painted the portcullis with Games Workshop (Citadel) "boltgun silver" which is a dark silver , slightly darker than my helmet stripe .
So heres the finished portcullis
Although teh helmet isnt finish polished , I fitted the portcullis with a couple of pieces of masking tape just to see how it looked .
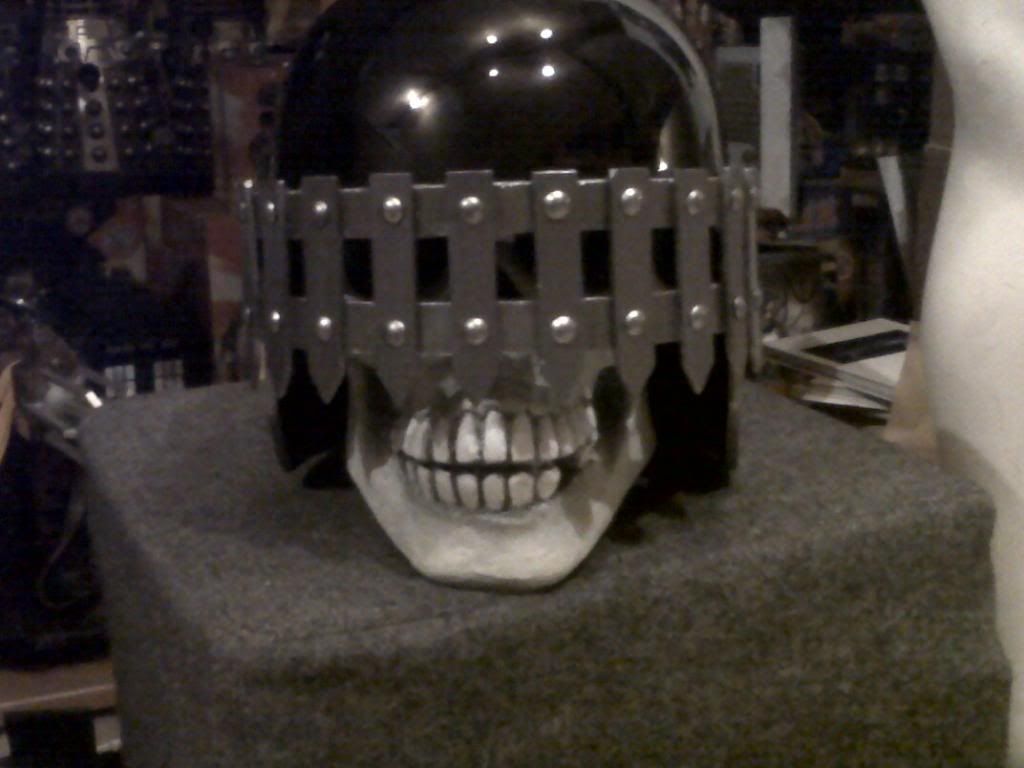
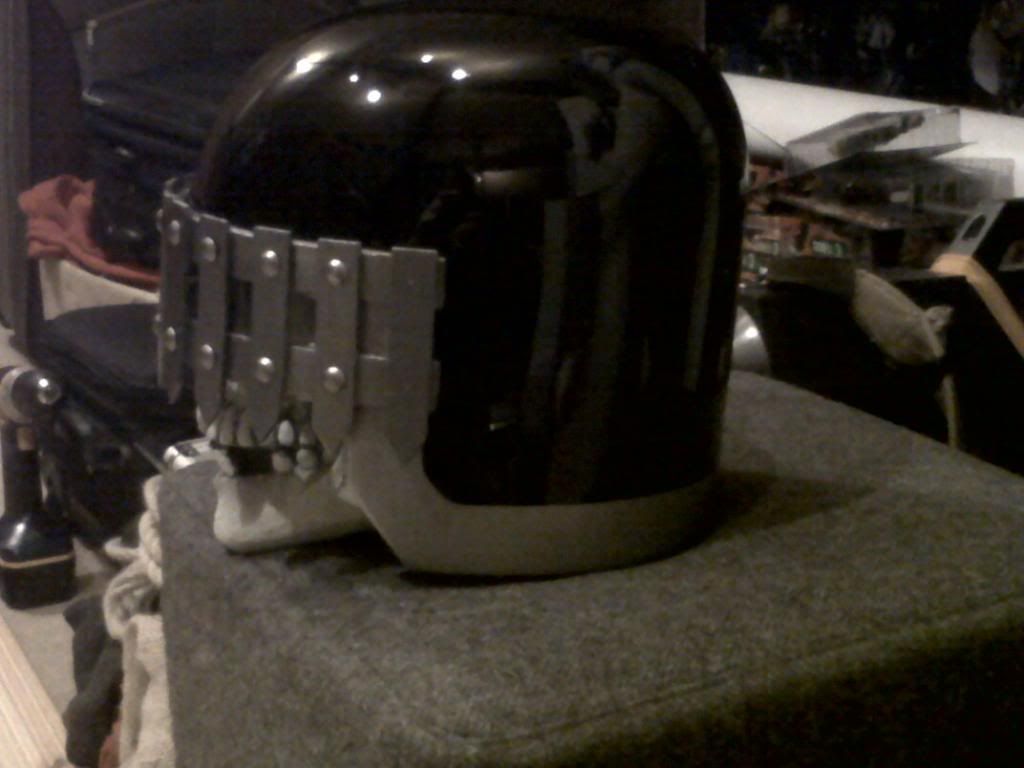
Its soooo nearly finished ...cant wait !!!! :lol
I started with two pieces of 6mm foamex that used to be a garage wall sign (Shell Oils is on the reverse side ! ) I cut two lengths 20mm wide and put them in the oven untill soft , then I wrapped them quickly around the helmet front and allowed them to cool , and set to the shape of the helmet .
I temporarily glued some pieces of cardboard to the two pieces to give me the correct alignment and positions.
Then I cut the smaller pointed pieces out of a piece of 3mm foamex ( a sample piece I blagged off a local supplier)
These I superglued in place one at a time
Once twelve pieces were glued in place , the portcullis was built ..it all came together very quickly . I decided to use upholstery tacks for the rivets , I had to cut their nail down to size with a pair of sidecutter pliers . Then I drilled a small hole in each position , and superglued the tacks into the foamex.
I brush painted the portcullis with Games Workshop (Citadel) "boltgun silver" which is a dark silver , slightly darker than my helmet stripe .
So heres the finished portcullis
Although teh helmet isnt finish polished , I fitted the portcullis with a couple of pieces of masking tape just to see how it looked .
Its soooo nearly finished ...cant wait !!!! :lol
Dr Feeley Good
Active Member
Looking really good...
baron von blondle
Sr Member
AWESOME!!!
Similar threads
- Replies
- 1
- Views
- 4,490
- Replies
- 39
- Views
- 12,359