Troy Downen
Well-Known Member
I’ve been getting bogged down in the scratch-building of new wings for the 1:18 scale Hasbro Heroes X-wing…
http://www.therpf.com/f11/hasbro-hero-series-1-18-scale-x-wing-heavy-mods-224604/
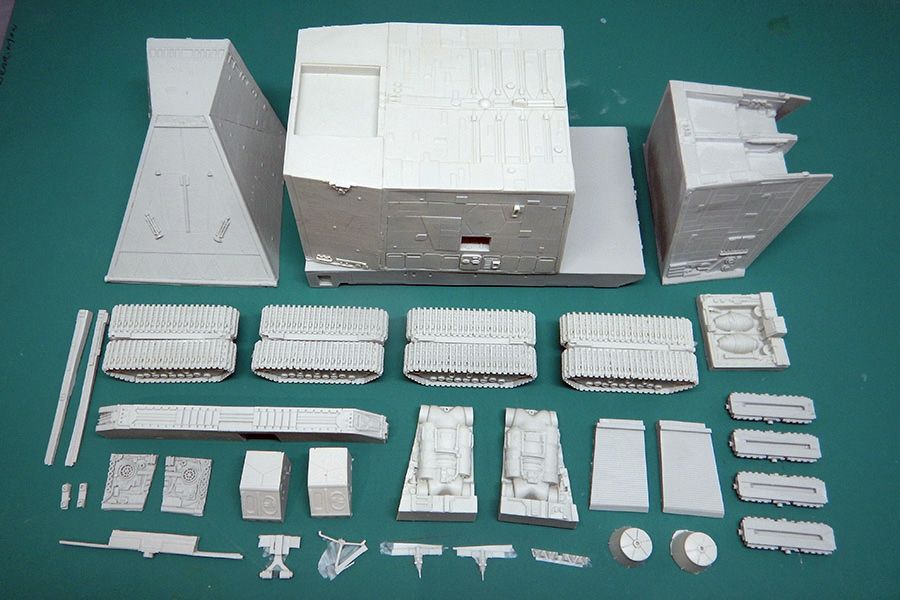
… so I needed a “quick kill” to help end the year in style! The 1/144 scale Jawa Sandcrawler from Multi-Verse Models seemed like a good subject; no cockpit to detail, no scratch-building – not even any decals! Just a lot of fun painting (which I enjoy). So I yanked it out of the stash and started looking at the various parts. All clean castings with little flash. Not too difficult to assemble. This should do nicely…
The main body comes in three parts (forward, mid and aft) all of which mate to a “floor” or foundation. Here I have already attached the mid section to the foundation and am preparing to epoxy the forward section. I didn’t think that the rather heavy resin casting that makes up the forward section would stay attached to the mid if it were ever to take much of a blow during moving or handling, so I drove a short wood screw into the mid section and drilled a hole in the forward section for the screw head to fit into. With plenty of epoxy surrounding the screw head in the hole, I figured at least that would help take some of the weight of the heavy forward section.
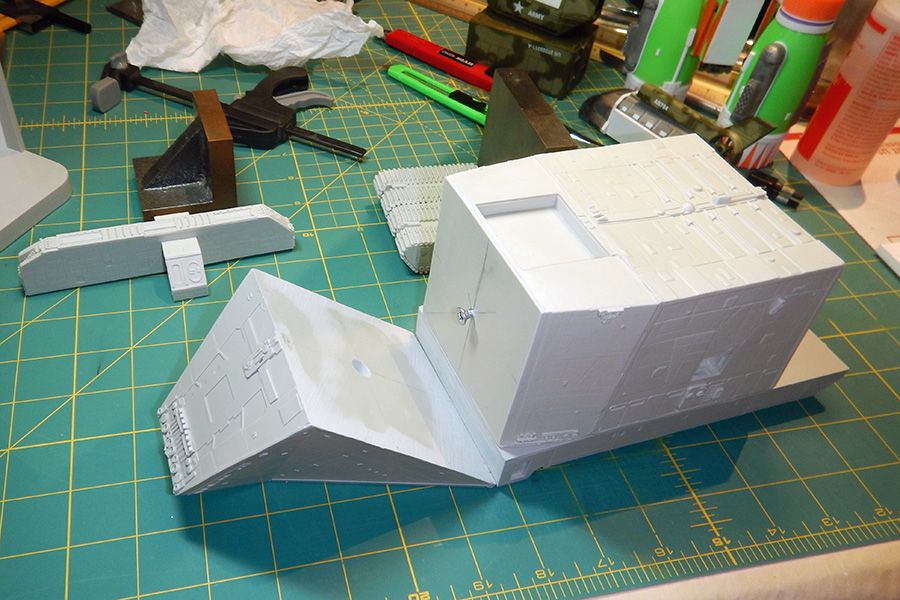
(By they way, a cluttered work desk is a sign of a cluttered mind…)
Here it’s shown that I used two more wood screws to secure the mid section to the floor…
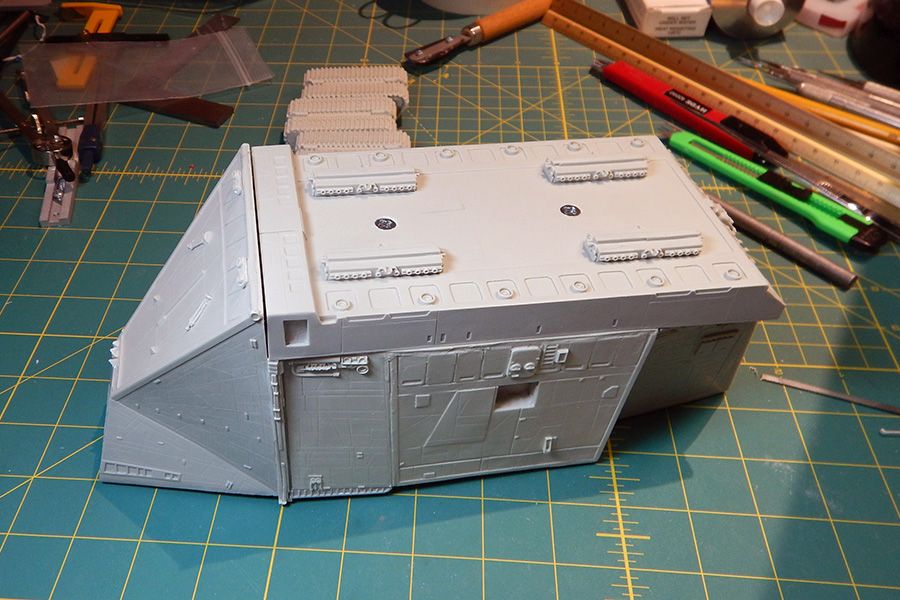
… and those screw heads are then covered with another resin detail on the bottom of the crawler.
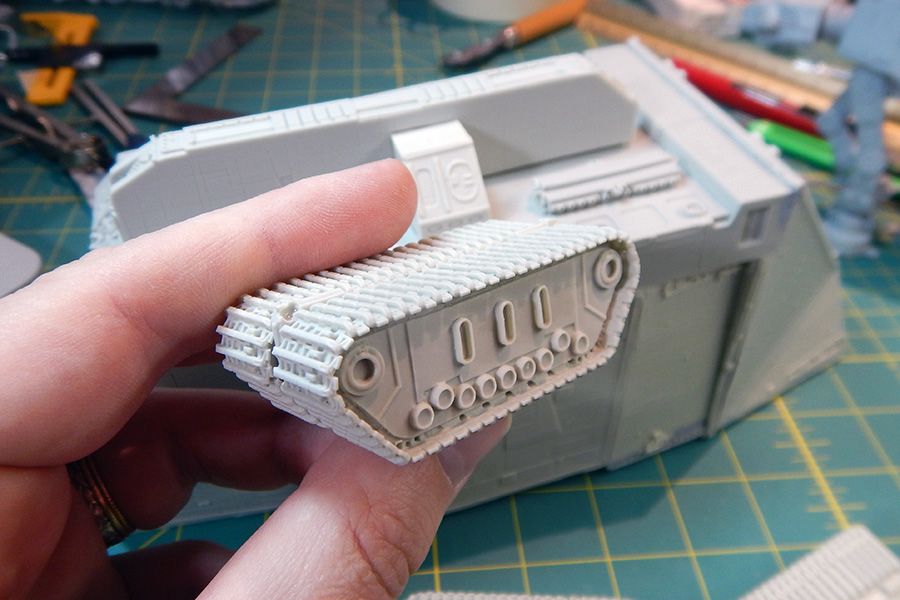
The tracked wheels will mount to the four pads seen in the above photo. I have to say that the detail on the tracked wheels is amazing! I don’t know how Multi-Verse managed to cast those details without any flaws. No bubbles or flash on the parts. They really look terrific!
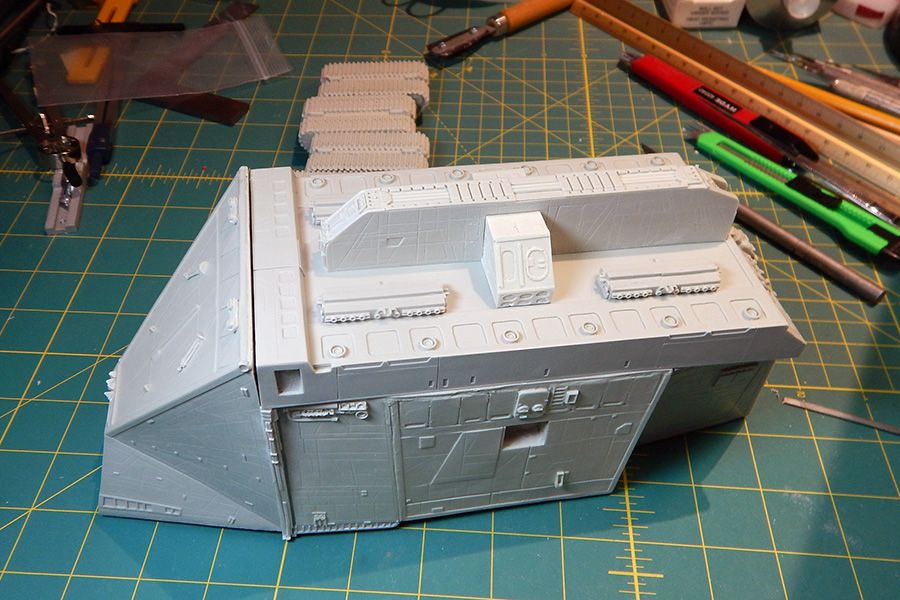
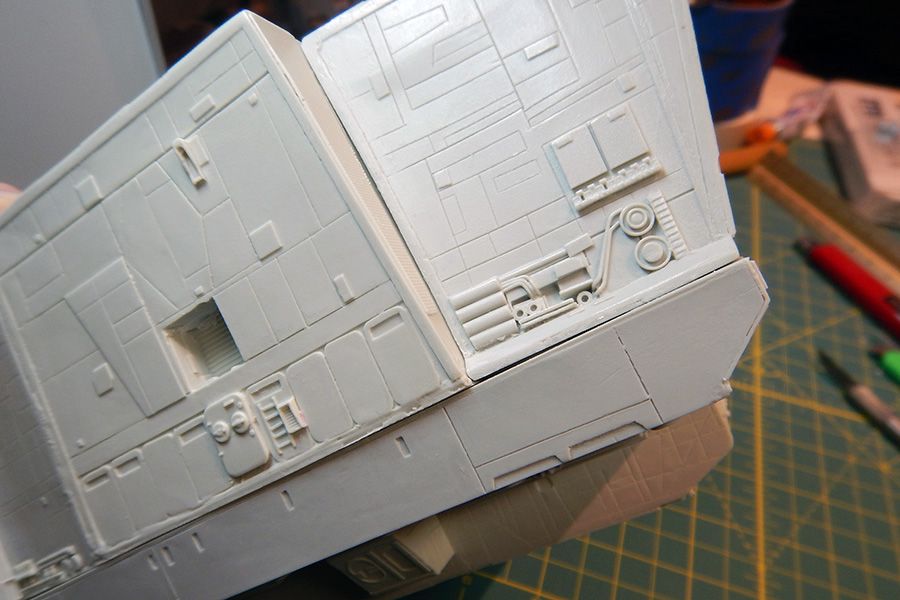
Overall the parts fit together very well with only a minimum of trimming. Here you can see one of the very few areas that require just a minimal bit of filler to clean things up. It really is a pleasure (and a rarity) when an aftermarket resin kit fits together this well.
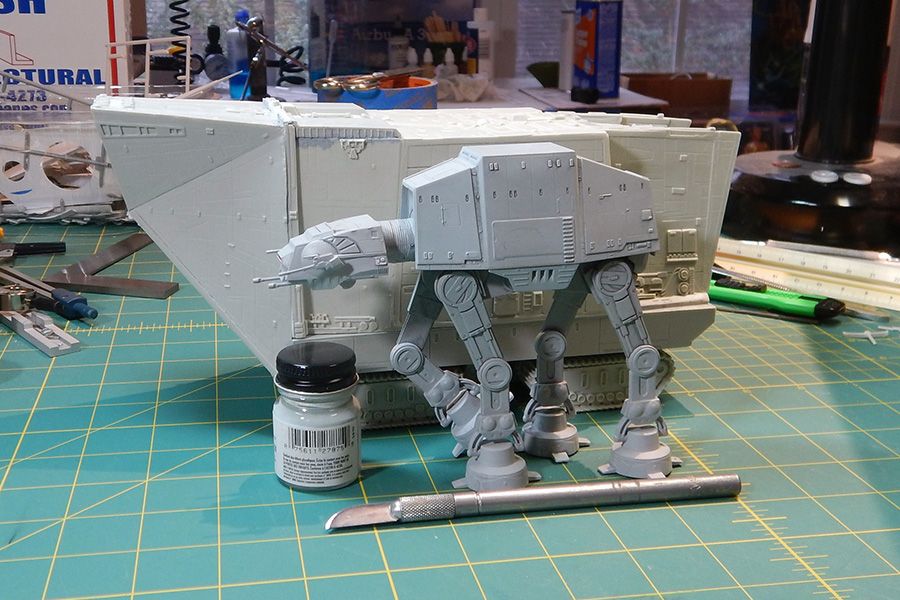
Even at 1/144 scale, the size of this thing surprised me. Here it is compared to the 1/144 scale AT-AT walker from F-Toys. Look at the size of that beast! I had no idea that the sandcrawlers were this large! But it scales correctly to the 40 meter length stated at StarWars.com. Wow!
Right now the crawler sits in my paint booth with its first coat of primer. It’s time for me to begin looking for suitable rust colors among my paints!
http://www.therpf.com/f11/hasbro-hero-series-1-18-scale-x-wing-heavy-mods-224604/
… so I needed a “quick kill” to help end the year in style! The 1/144 scale Jawa Sandcrawler from Multi-Verse Models seemed like a good subject; no cockpit to detail, no scratch-building – not even any decals! Just a lot of fun painting (which I enjoy). So I yanked it out of the stash and started looking at the various parts. All clean castings with little flash. Not too difficult to assemble. This should do nicely…

The main body comes in three parts (forward, mid and aft) all of which mate to a “floor” or foundation. Here I have already attached the mid section to the foundation and am preparing to epoxy the forward section. I didn’t think that the rather heavy resin casting that makes up the forward section would stay attached to the mid if it were ever to take much of a blow during moving or handling, so I drove a short wood screw into the mid section and drilled a hole in the forward section for the screw head to fit into. With plenty of epoxy surrounding the screw head in the hole, I figured at least that would help take some of the weight of the heavy forward section.

(By they way, a cluttered work desk is a sign of a cluttered mind…)
Here it’s shown that I used two more wood screws to secure the mid section to the floor…

… and those screw heads are then covered with another resin detail on the bottom of the crawler.

The tracked wheels will mount to the four pads seen in the above photo. I have to say that the detail on the tracked wheels is amazing! I don’t know how Multi-Verse managed to cast those details without any flaws. No bubbles or flash on the parts. They really look terrific!

Overall the parts fit together very well with only a minimum of trimming. Here you can see one of the very few areas that require just a minimal bit of filler to clean things up. It really is a pleasure (and a rarity) when an aftermarket resin kit fits together this well.

Even at 1/144 scale, the size of this thing surprised me. Here it is compared to the 1/144 scale AT-AT walker from F-Toys. Look at the size of that beast! I had no idea that the sandcrawlers were this large! But it scales correctly to the 40 meter length stated at StarWars.com. Wow!

Right now the crawler sits in my paint booth with its first coat of primer. It’s time for me to begin looking for suitable rust colors among my paints!


")


