Jawa Ion Blaster Build w/ a Real Enfield Mk3

makimc

New Member
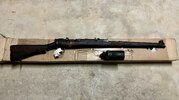
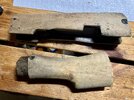
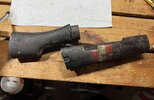
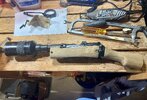
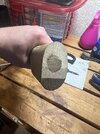
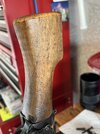
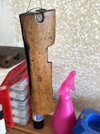
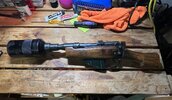
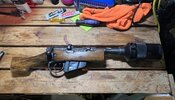
Here’s my fully complete(if you don’t count the power pack/hose…they’re coming!) ion blaster! I purchased a demilled DP Enfield (Ishapore) No1 Mk3 with a grenade cup. Had to purchase a magazine, safety assy and the sere pin separately as they were missing. They do say that they may be missing parts. Step 1 was getting the rifle, I did have to get it shipped to an FFL as it’s still technically considered a weapon. It was in overall pretty decent shape but absolutely covered in cosmoline.
 

Attachments

  • IMG_0942.jpeg
    IMG_0942.jpeg
    2.8 MB · Views: 180
Step 2 was disassembly and getting everything cleaned up. I didn’t take a lot of photos during this but pretty self explanatory. Lots of videos on YouTube on how to strip these down as well.
 

Attachments

  • IMG_0943.jpeg
    IMG_0943.jpeg
    2 MB · Views: 112
  • IMG_0944.jpeg
    IMG_0944.jpeg
    1.7 MB · Views: 115
Step 3 was purchasing the cup and barrel adapters from blaster factory, these are nice/heavy pieces! The modification I had to make for a real build nice a Denix build that these are marketed as was threading the blank end of the barrel adapter to 5/8 - 18. Just used a cheap die off Amazon. Then I blued the pieces with a cold blue, worked great, looks great and was super quick and easy to do!
 

Attachments

  • IMG_1755.jpeg
    IMG_1755.jpeg
    1.6 MB · Views: 107
I salvaged the barrel threads(cut them off from the rest of the barrel) as they’re unique to the Enfield rifles and not ‘common’. I drilled the inside of barrel threads and tapped with a 5/8 - 18 die so I could thread the barrel adapter in. I also had to dremel out the pin that’s welded through the receiver and barrel threads to do this. Pic of barrel threads was pre-drill/tapping.
 

Attachments

  • IMG_1459.jpeg
    IMG_1459.jpeg
    3.6 MB · Views: 115
  • IMG_1224.jpeg
    IMG_1224.jpeg
    1 MB · Views: 119
Next part was cutting the stocks down and getting all the grime off. I took a controversial approach and did a couple rounds of easy off over cleaner to get all the cosmoline, paint, etc. off and it worked great. I did a very light sanding using some 2000 grit I had laying around just to make sure I had a good surface to work with. After I cut and shaped the stocks I gave them 3 coats of boiled linseed oil, using super fine steel wool between coats to remove any imperfections and did 2 coats of a spray on poly. I also made a small circle ‘plug’ out of a piece of the butt stock to fill the bolt hole.
 

Attachments

  • IMG_2416.jpeg
    IMG_2416.jpeg
    2.6 MB · Views: 130
  • IMG_1892.jpeg
    IMG_1892.jpeg
    2.9 MB · Views: 121
  • IMG_2418.jpeg
    IMG_2418.jpeg
    3 MB · Views: 122
  • IMG_2420.jpeg
    IMG_2420.jpeg
    3.5 MB · Views: 116
  • IMG_2435.jpeg
    IMG_2435.jpeg
    1.6 MB · Views: 112
  • IMG_2505.jpeg
    IMG_2505.jpeg
    1.8 MB · Views: 108
  • IMG_2506.jpeg
    IMG_2506.jpeg
    1.6 MB · Views: 117
Last was final assembly which was pretty self explanatory. I did cut the firing pin off so just the part that holds the spring in place remained so it can still be ****** and ‘fired’. All this took some time and money, I’d guess I’m in it about $250-$300 between the rifle, missing parts, tools I didn’t have, etc. I think it turned out awesome!!! And yes, it’s as heavy as it looks…all steel. Happy to answer any questions!! This was definitely a fun and rewarding project! Utinni!!!
 

Attachments

  • IMG_2594.jpeg
    IMG_2594.jpeg
    1.7 MB · Views: 146
  • IMG_2596.jpeg
    IMG_2596.jpeg
    1.6 MB · Views: 171
I paid 350€ for my enfield here in Europe, so you are doing good with 250-300$! good job on the blaster, it looks awesome :)
 
Does anyone make a blaster copy cast solid rubber ?
Not rubber but I also have a yet to be build 3D printed one from ZeeForYourself on Etsy and it's pretty accurate for a 3D printed blaster. Sanding/priming/paint and glue/assembly all required here. I haven't started on that project yet though.
 
Back
Top