Foreshadowing? :lol
You are using an out of date browser. It may not display this or other websites correctly.
You should upgrade or use an alternative browser.
You should upgrade or use an alternative browser.
Ironman Arc Reactor build up from my kit. [IMG heavy + timelapse video]
- Thread starter ThrowingChicken
- Start date
Nice. How do you plan to mount it?
scattrap
Well-Known Member
I am toying with the idea of milling out a light weight but strong back plate that has recessed area cut out of it and a sister plate that attaches to the back of the ARC permanently. (think of two stacked matching tupperware only not more then 2-3 mm tall) Rather then just using the snug fit of the shirt (this is how the kid ARC snaps on to a shirt, my son has one) I want to use magnets to ensure it stays put.
Vew
Member
I'm quite impressed by all these reactors. I do want to note a few things to help you all in realism.
When you wind the magnet wire, you're literally building an inductor. Properly wound inductors start from edge to edge, tight, neat (no over lapping). This gets you as many "turns" as possible. I recommend every turn you make, scoot the new turn with your nail to remove any gap before making another turn. Again, keep it tight.
Typically, they're also dipped in varnish. This keeps the winds together and protects them. After "aging" them with whatever color correction you decide, a clear spray paint simulate this, but it's not a necessity.
Here is a photo of the windings on the secondary of a Tesla coil I'm building. This is 26awg magnet wire.

Edit: I should probably note that being super neat is not critical either. Winds that overlap and appear sloppy tend to have an iron core, but are generally cheaper manufacturing because it can't dissipate heat as well. But I fear I've gone too far on how much you all would actually care.
When you wind the magnet wire, you're literally building an inductor. Properly wound inductors start from edge to edge, tight, neat (no over lapping). This gets you as many "turns" as possible. I recommend every turn you make, scoot the new turn with your nail to remove any gap before making another turn. Again, keep it tight.
Typically, they're also dipped in varnish. This keeps the winds together and protects them. After "aging" them with whatever color correction you decide, a clear spray paint simulate this, but it's not a necessity.
Here is a photo of the windings on the secondary of a Tesla coil I'm building. This is 26awg magnet wire.
Edit: I should probably note that being super neat is not critical either. Winds that overlap and appear sloppy tend to have an iron core, but are generally cheaper manufacturing because it can't dissipate heat as well. But I fear I've gone too far on how much you all would actually care.
Last edited:
Yeah. I agree they definitely need to be tightly woven to match the film. What's odd (or rather, probably just a goof) about the movie is that when Tony is in the cave building the reactor, it is wrapped in the most messy way possible... and the wire appears to be a thicker copper than what we see in the final.
puzzleboxmaker
Member
Pretty damn cool...
FattyMcChubChub
New Member
Absolutely love this kit! Just finished my build last night and it's beautiful. Now I just need to figure out a way to make it detachable from a harness so I can pop it in and out. And while I'm at it, find/make a good harness as well.
But for those that are having trouble soldering the LED's and burning them out, just follow a few easy rules:
1. Clean the tip of the soldering iron with some medium grit sand paper before attempting any soldering. You want to be able to see the copper of the tip.
2. "Tin" the tip of the soldering iron. Once it's heated up, touch a little bit of solder to the tip to give it a light coating of solder.
3. You don't have to hold the iron directly on the contact of what you are trying to solder. Heat is the worst enemy of electrical components and you can burn them out rather easily. Try to touch the tip of the iron to the contact point at the same time as the solder. It'll only take a fraction of a second to melt the solder to the contact point.
Once everyting was prepped it only took me about two minutes to solder all the contacts. Once you get the hang of it you can start moving pretty quickly.
Hope that helps!
MandoMan531
Active Member
TC- are you still thinking of doing the back cage for the Arc? I've just about finished mine and got in on GK's ring and that was going to be my next step.
Slowly working on it.
MandoMan531
Active Member
Awesome, all I needed to know. I'll hold off on attempting that part for now. ")
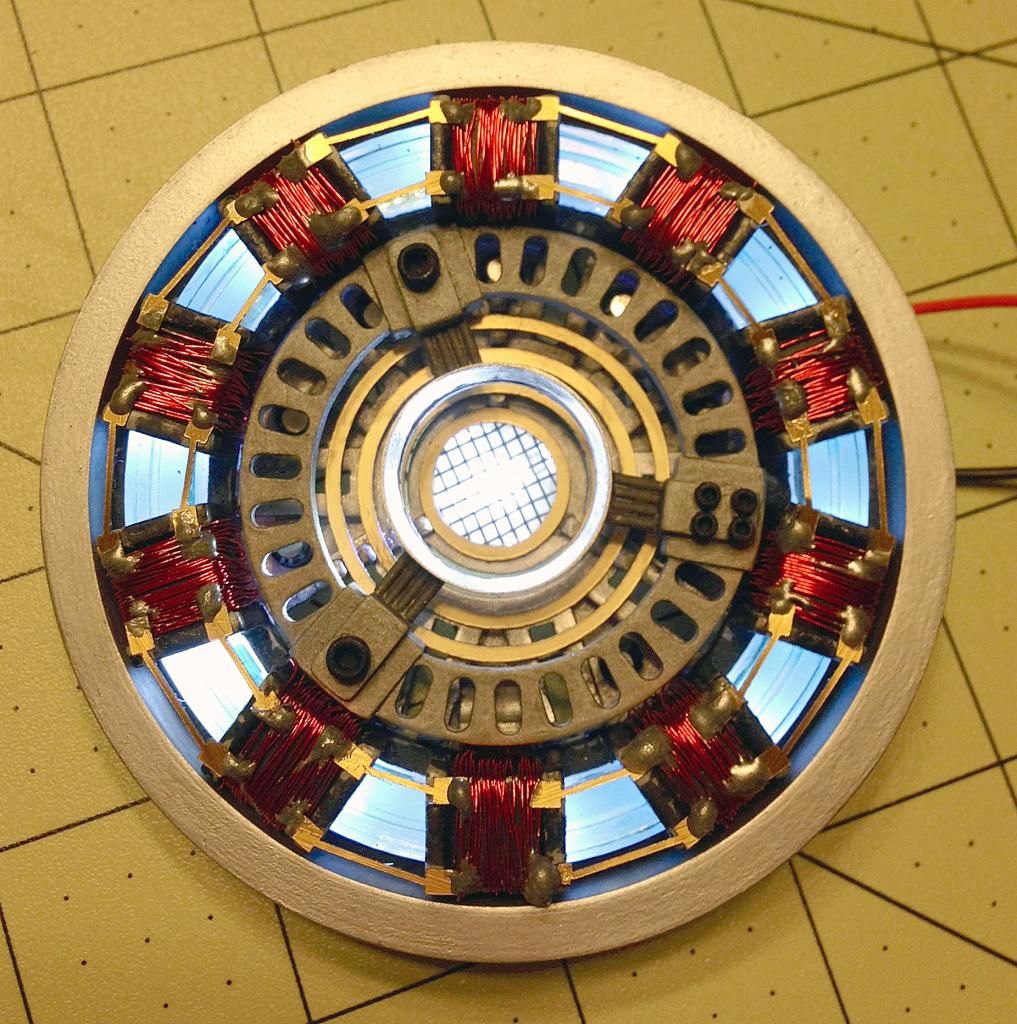
Here's a pic of where mine stands right now. I'm redoing the center ring of wire, and instead of Twisting it, I'm going to secure it with small strips of red electrical tape, as that's what it looks like to me in the reference pics I was using. The coils are the same red magnet wire but weathered with copper liquid leaf. Transformer assembly and vent ring was done in silver and black. I like the more weathered look. Not happy with the center light though, gonna rethink that. Replaced the wire sections of the bridges with some wire I painted gold. Solder is epoxy painted metallic silver.
Sorry pics aren't the best, hopefully I can get some better lighting next time.
Last edited:
FSURobbie
Well-Known Member
Gah. Still waiting on the parts to get my LED's situated. I bought some switches last Friday and just got notification that they shipped this morning. Pretty annoying. Luckily I've made good progress on gathering greeblies to try and build the back housing of the reactor while I wait for my parts to arrive.
I may scrap it later and use TC's build, should it come to fruition, but I've got time to kill so I figured I would give it a shot.
I may scrap it later and use TC's build, should it come to fruition, but I've got time to kill so I figured I would give it a shot.
kriptonyc
New Member
Just bought mine and waiting for it to come in the mail!
Just wondering what your guys thoughts are on wearing it? Whats the best way to go?
Also SGM if you could explain more on how you setup the magnets to work/power it or post more pics that would be extremely helpful! :]
Just wondering what your guys thoughts are on wearing it? Whats the best way to go?
Also SGM if you could explain more on how you setup the magnets to work/power it or post more pics that would be extremely helpful! :]
Jerome
Active Member
Also SGM if you could explain more on how you setup the magnets to work/power it or post more pics that would be extremely helpful! :]
Seconded. :thumbsup
I'm really contemplating using magnets as the connection to the batteries, and making two setups. One on a desktop display (with a switch) and one to wear on the chest. It would be great to be able to remove the arc from the display and pop it on my chest piece and having it light up instantaneously.
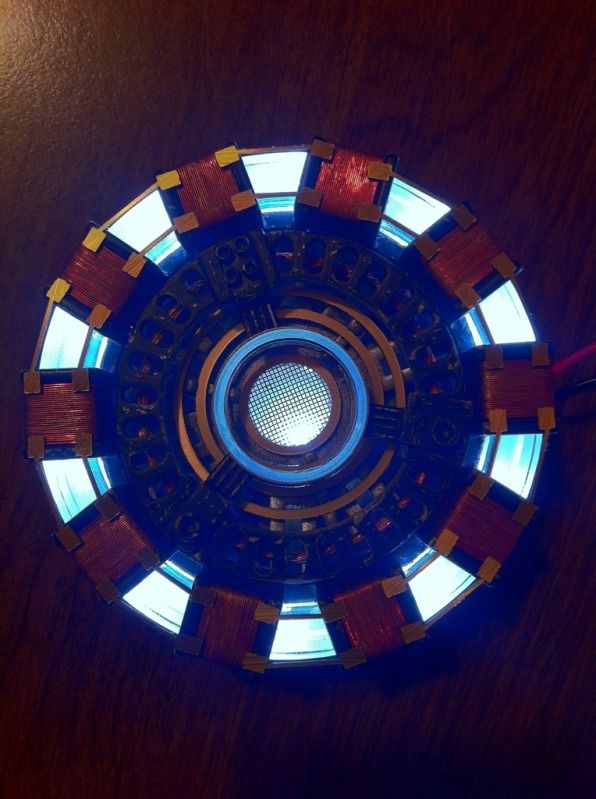
When I first powered mine up using two AA batteries, the whole kit seemed really nice and bright. A few days later after I wrapped everything up and tried it again to make sure everything still worked, it seemed much dimmer (at least half as much). I'm going to try a fresh set of batteries when I get a chance, but two questions:If you use a 6v battery pack remember to wire a 15ohm resistor to one of your leads
1) Any idea how long this setup should last with just the two AA batteries? With LEDs I would expect a long, long time - which is why I find it odd.
2) If I switched to higher voltage, what would be the limit before blowing them out? E.g. if I wanted to use a 9volt it sounds like I would need to add a resistor? How much? And then does the higher voltage really buy anything? I assume the fact that they are wired in serial makes a difference?
Re: magnets
I tried soldering the wires to the side of my magnets, but couldn't get it to stick. I ended up using a hot glue gun to attach the wires next to the magnet and then bend the contacts over. That way when they come together, they just smash the wires together.
I used old magnets from my used sonicare brushes.
Not pretty, but it gets the job done and won't be seen anyway. The backing is a pin I had laying around that happened to be the perfect size, and I hot glued bobby pins so I could feed an ace bandage through it, and fashioned that into a little harness that will go under a shirt I'm planning to cut a hole in.
Similar threads
- Replies
- 14
- Views
- 1,587