Iron Man MkVII Foam Build - Engineered for comfort & ease

DRG

Active Member
So I'm working on a foam Mark VII armor for Halloween. But after having issues with my Gears of War build last year in terms of 'ease of wearing', I knew I needed to change things up a bit with my Iron Man.


These were my needs going in:
-----
The ability to suit up and take it off without assistance
The ability to climb stairs
The ability to pee with (relative) ease without completely de-suiting
Decent arm mobility for taking photos with my camera/posing/drinking/etc.
Faceplate that opens
Helmet that fits over my glasses


I also knew this would be a bit of a challenge, as Iron Man is a full body suit versus my Gears build... so expecting to make it *more* wearable sounds a bit crazy. To try and pull this off I'm creating what I *think* are a few new approaches, combined with many great ideas I've found in this forum.

Legs


The legs are based on JTM's original model using elements from both Gaiatron & JF Custom's foam adaptations of JTM's model.


I originally built two sets of legs, scaled for 'thickness' versus length. Well, I recently realized they were just too long. The thigh and shin and boots were all colliding into each other in a unpleasant way when I tried to walk, and trying to connect the thigh and shin with a hinge proved to be completely unworkable (it would have pushed the bottom of the shin about four inches below my foot).


My goal here was to make all the leg pieces individually attachable/detachable without having to remove the boots or any other pieces. I realized with my first set of shins that I had a difficult time attaching the velcro on the boots while the shin was on. So ideally I want to be suiting up my lower body in this order: boots-shins-cod-thighs.


So my solution was to create splits on the inner seams of each piece where they won't be as noticeable. In the thigh this was fairly easy to pull off.

thigh2.jpgthigh4.jpg

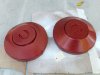
But the shins didn't lend themselves to an obvious straight seam anywhere, especially if I wanted to retain the shape. So I created a weird L-shaped seam as such.

shin.jpgshin2.jpg


The bonus with this approach is that the shins fit like a glove. I'm saving the knees and shin flaps for later as I have a few ideas I want to try with those.

fullleg.jpg

Also, I didn't line the velcro up perfectly in these pics. The velcro was starting to detach from the foam in a few spots when I took these pics so I didn't want to monkey around with it too much. I had to reglue these with a stronger glue after I took the pics. But it does line up fairly nicely if I get it right, to the point where the seams are barely noticeable.

A few more:
thigh1.jpgthigh3.jpg
 
Nice work on those seams. I use velcro all over the place on my suits where buckles and straps give too much movement.

A couple of things with using the velcro I learned:
1) Especially with 'industrial-strength' velcro, you have to glue it on if you want it to last. I apply my hot glue right to the self-adhesive strip and press it in place. After it's cooled, I'll go back and run a little around the perimeter of the velcro piece, to help prevent edges lifting.
2) If the velcro is still gripping way more than you want, you can trim the 'hook' side with a razor or scissors. I cut alternating rows out a little at a time,testing the grip until it's where I want it.
 
  • Like
Reactions: DRG
Yeah, I had hot glued it on but I think my problem was I tried to glue it on all at once. The smaller pieces seem to have bonded with the foam pretty well, but on the longer stretches of velcro the hot glue might have been starting to cool on the ends by the time I actually applied the strip to the foam. I'll have to be more patient with the process in the future and not try to glue it all at once.
 
An update...

Boots


I started with the Iron Man MKVII Boot by Darkside501st (FOAM EDIT BY ironmaided) model. This model seemed to be designed to fit over a boot, but I wanted to make wearable foam 'shoes'. I've had bad luck with shoe cover type setups in the past. In addition, I found the shoe cover approach makes the boot wider, and it wasn't fitting properly with my shin piece.


I wanted to eliminate the arched inner sole/lift to have a more comfortable flat-foot sole, so I made some alterations.
bootsole.jpg

Basically I had to convert the sloped inner heel into a flat sole. My results:
shoe0.jpgshoe3.jpg


The design allows for some natural flex from the foam.
shoe2.jpg

I added a velcro strap to keep them on my feet. Inside I added some extra padding for a better fit.
shoe4.jpgshoe1.jpg

The slightly bad news is that my initial test paint of these turned out awful... I oversprayed one side and the paint began to run. Even worse, the plastic sheet I had underneath didn't stay taped down and the wind caught it, blowing it right into the freshly painted boot and ruined the good side of the finish. I think I need to primer over the whole thing... not sure if I should sand the paint off first? I'm afraid to sand because I don't want to sand into the foam itself.


Meanwhile, additional things I'm working on at the moment:
- Foam helmet with motorized faceplate (having issues with side hinges related to curvature of the helmet)
- Budget unibeam (almost done, but the face turned out a bit sloppy so I think I'm going to redo it)
- Hands with tilt switch repulsors (almost complete... pics soon)
- Arms with 'full' flexibility

Things in the planning stage:
- Simple ab system that's a combo of undersuit and foam 'plate' pieces
- Undersuit knee and elbow pieces

Chest/back piece is also almost complete - I'll have pics of that hopefully in a few days.
 
Nice work on your boots, that's the same principle I use for 'bottomed' boots:


It helps to also get some silicone caulking and run a bead around the inside joins between the sole and the sides of the boots, essentially sealing the bottoms on from the inside. Even with the hinged toe, I noticed on early builds that the flexing and compression of the boots can cause the hot glue joints to break down a lot faster. I fixed this by running a heavy bead of caulking around the inside angles, smoothing it over with my finger. A fat bead of hot glue could work to I suppose, I just trust the flexibility of silicone more. Looks great so far!
 
  • Like
Reactions: DRG
It helps to also get some silicone caulking and run a bead around the inside joins between the sole and the sides of the boots, essentially sealing the bottoms on from the inside. Even with the hinged toe, I noticed on early builds that the flexing and compression of the boots can cause the hot glue joints to break down a lot faster. I fixed this by running a heavy bead of caulking around the inside angles, smoothing it over with my finger. A fat bead of hot glue could work to I suppose, I just trust the flexibility of silicone more. Looks great so far!

Great tip there. I made giant foam Gears of War boots last year and I did hear some troubling 'cracking' noises if I moved around a bit too much in them. Never did see any obvious damage after inspection, but it still makes you cringe to think about something like that coming apart on you. I might have to try the caulking idea.

I still haven't decided how I'm going to handle the 'flaps' (or toe shields or whatever they're called) between the shin and the boot, but I like what you've done with yours. The flap exists in the model, but also in the shin file I'm using. I think it makes sense to have one piece on each... my first attempt at the shins had both flaps connected to the shin firmly in place, but that didn't sit on the boot right.

Looking Gud :)

Thanks!
 
Great tip there. I made giant foam Gears of War boots last year and I did hear some troubling 'cracking' noises if I moved around a bit too much in them. Never did see any obvious damage after inspection, but it still makes you cringe to think about something like that coming apart on you. I might have to try the caulking idea.

I still haven't decided how I'm going to handle the 'flaps' (or toe shields or whatever they're called) between the shin and the boot, but I like what you've done with yours. The flap exists in the model, but also in the shin file I'm using. I think it makes sense to have one piece on each... my first attempt at the shins had both flaps connected to the shin firmly in place, but that didn't sit on the boot right.


Thanks!

Just me, but build your plates, and wear the pieces. None of this fits well for us auto, but then you'll see the space and the sell on it. You'll figure it out.
 
Here are a few pics of my paint woes on the boot. The first one was thanks to me overspraying, the second was when the wind blew the plastic sheet up into the wet paint:

bad1.jpgbad2.jpg

It's Duplicolor paint. I don't want to rebuild the boot, so here are my options as I see them:
- Primer over it (Will this cause problems?)
- Plastidip over it to create a new base
- Try to sand this off and start over (maybe with a primer layer)
- Just keep adding layers of paint to even it out (I don't have a good feeling about this one)

Anyone have experience with dealing with a paint problem like this on foam? Painting has always been my weakest area... I have a difficulty nailing the technique for light coat vs heavy coat, for instance. Often I either overspray like here or I spray so little you can barely see a change in color. I also didn't realize that this paint didn't cover up things as well as other paints I've used in the past... I should have primed just to even out the surface color to hide my notations and the differing shades of foam. I did a lot of tests with this paint before, but they were always on small scraps of foam so I suppose there wasn't enough surface area to cause a run.

Just me, but build your plates, and wear the pieces. None of this fits well for us auto, but then you'll see the space and the sell on it. You'll figure it out.

Well, what I like in yours versus my first attempt (both attached to the shin) is that it actually covers that area of the boot past the toe, where the top of the foot would be. Since I was forced to rebuild both of my shins due to sizing problems, I saw this as an opportunity to correct some of the things I didn't like in my first attempt.
 
Can I just ask you, how are you going to join the thigh to the shin?? I am having this problem at the moment.
 
Right now the plan for my build is to leave them 'disconnected' in the traditional sense. I'll have to connect my thigh piece to my cod since it slides around more, but my shin piece actually fits very snug to my leg by itself. My main goal was mobility, and I figured I can move around a bit better if the pieces are joined in the conventional sense.

I want to achieve something similar to this:
1-9_AVENGERS_IRONMAN_MKVII_4_JULY2012_DRAGON_8610_0.jpg

I also plan on doing something similar with my in-progress arms.
 
Subscribed. I'm also curious to see how you make this work, because I'd love to put on my suit by myself as well (Mk 7, early stages).
 
Okay, update time!

Chest

For the chest/Back, I wanted it in one piece. Again, I started with a combination of JF Custom's and Gaiatron's unfolds of the JTM model. I like the model a lot, but there were a few details I wanted to alter.


chest-adapt.jpg

Looking at the red arrow, I wanted to eliminate this piece. It seems superfluous and in a test cardboard build it was rubbing me the wrong way.


The green arrow was a spot that was to be built with crazy angles, but I wanted to simplify it by just using thicker foam for the front. Also, that whole 'horn' to the left of the green arrow I wanted to make a part of the front panel instead of a separate piece.


The blue arrow shows where the chest meets those rib pieces, but it seemed a bit deeper than I liked. In my test cardboard fit this was giving me problems as well.


And the purple arrow shows where I wanted to make the split for connections.

chest1.jpg
This is the front chest panel. I used the floor mat foam for this as I needed the depth for various effect AND I wanted a stronger base to mount in the eventual unibeam. I engraved the detail in with a soldering iron.

chest2.jpg
I decided to make the rib flaps by layering different thicknesses of foam.

chest3.jpg
Connecting them together. I actually attached them a bit more flush than I wanted, but it helped the fit. I was using the NECA figure as a reference at this point and they are much more flush on that.

chest4.jpg
Here is the back, minus some detailing.

chest6.jpgchest8.jpg
The assembled piece. I notched in some additional detail on the rib flaps and shoulders that you can't see here.
chest9.jpg
And finally, I went with a velcro closure on the side flaps. This seemed like a good spot to do it since I figured I could adjust it if I needed more room. But it fit pretty well as is.

I'm working on my unibeam idea but I haven't finished the prototype yet.

chest-adapt.jpg


chest1.jpg


chest2.jpg


chest3.jpg


chest4.jpg


chest6.jpg


chest8.jpg


chest9.jpg
 
Last edited by a moderator:
Another bump for:

Hands & Repulsors

I started with a PDO I found somewhere on the site called 'Easy Hand.pdo". There is no info on the file itself, but as far as I can tell it is based off the Zabana model as the scales seem to match. I made additonal adaptations to the file to suit my needs.


I constructed this using a combination of 3mm foam (for the outer pieces) and 2mm foam (for the inner parts).

hand1.jpg
I figured it would be easier to create an underbody to mount pieces on.

hand2.jpg
All attached.

A test fit with the fingers.
hand4.jpghand5.jpg
There's a velcro enclosure on the side. I might end up redoing it as it doesn't close the way I want it to. If I have time...

Now on to the repulsors. I picked up 2 SMD LED discs for very cheap on Ebay. They're really bright, but the downside is they run on 12V.

For the circuit, I wanted to make them light up on command. I'm not quite adept enough to handle gyroscopes or some of the other fancy methods I've seen, but I also wanted more than just a hidden button. So I decided to wire them to a tilt switch. When the tilt switch is in the upright position, it completes the circuit.
hand6.jpg
For now I'm powering these from 9V batteries which I plan to mount on the backs of the hands with the handplates covering them. The downside is they are slightly dimmer with the 9V and the batteries are bulky. I also may go with an A23 as it is 12V (making the lights brighter) and smaller, but the battery life is even worse than the 9 volts. Keeping in mind, of course, that these aren't meant to light up constantly anyway, and only when I activate them.

To keep everything in place, I built a foam mount for the wiring.
hand7.jpg
I drilled a hole in 10mm foam to make a 'container' for the switch.

Next I took the clear cap from a beverage bottle and glued it over my light mount. A cheap solution and it does a fine job of diffusing the light. I cut a hole in the palms to make room..
hand8.jpg

Here it is in action:
hand9.jpg
When I have it tilted down or other ways, the light is off. But when I hold the glove upright, the tilt switch is triggered and the light comes on.

Still need to tweak a few things with these gloves, but at least the electronics works!

----

On a side note, I'm continuing to have painting woes. Using Duplicolor Torenado Red, I'm having issues where the paint is dull in certain spots. I had a hard time capturing how it looks, this pic is the best I could get:
paint.jpg
Most of it is shiny but for a few patches here and there. It wasn't humid at all when I painted, so that is not the issue.

So two questions: how do I avoid this, and is it possible to fix this? Is it possible to buff it shiny? Should I just let it dry and try another coat? Or will my eventual clear coat hide this?
 
Did you do any priming coats before painting?

It's usually several layers of PVA to seal the foam, then primer, then paint.

Looks like your paint has been absorbed into the foam in spots.
 
Yeah, I heat sealed it, had multiple layers of PVA, and had primed it. It's just certain spots that turned out dull. And the primer was white underneath, so it took the color. At certain angles when the light isn't directly hitting it it all looks about the same shade, but when the light hits it you can see that most is glossy but some patches are flat.

Edit: Did some googling and found out this is called "blushing". Most sources say it's due to humidity (wasn't humid at all when I painted) but also can be cool weather... I think maybe this was the cause. It was in the upper 60s, which was in the safe zone for using the paint but there was a bit of a breeze and that may have had a detrimental effect. I may try to buff it out with a cloth or even a Dremel polishing attachment.

Edit 2: I managed to get those blush spots out! Put one of those fuzzy polishing heads on my Dremel and the dull blushed spots buffed out instantly.... instant shine!
 
Last edited:
Re: Iron Man MkVII Foam Build - Engineered for comfort & ease

Small update...

Hip Pods

I made my hip pods using a variety of foam types. I started with the base 'cone' in 5mm foam.
DSCF7367.JPG

I attached these to a slab of the 1/4 inch floor foam and wrapped a piece of 2mm foam around the edge of that to smooth it out.
DSCF7745.JPG

The center part I mounted various type of foam together to form the core and glued this 'stack' into the hole, attached to the grey bottom piece.
DSCF7734.JPG

After a paint I had the same blushing cloudy effect, so I buffed them out.
attachment.php

The one of the left is before buffing, the one on the right is the buffed one. You say see the difference in shine.

This is what I used to get out of the cloudy spots in the paint.
DSCF7747.JPG
 

Attachments

  • DSCF7736.JPG
    DSCF7736.JPG
    66.3 KB · Views: 339
Back
Top