Interactive Blast Doors from The Phantom Menace

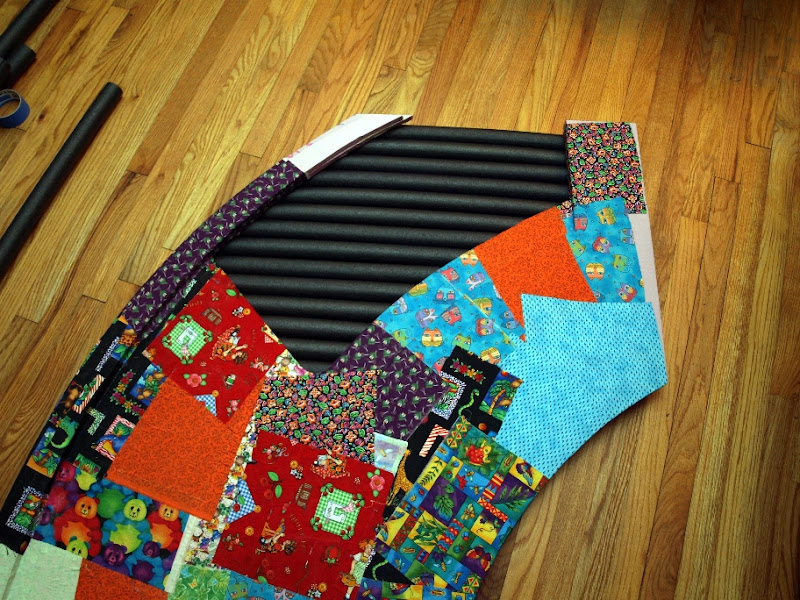
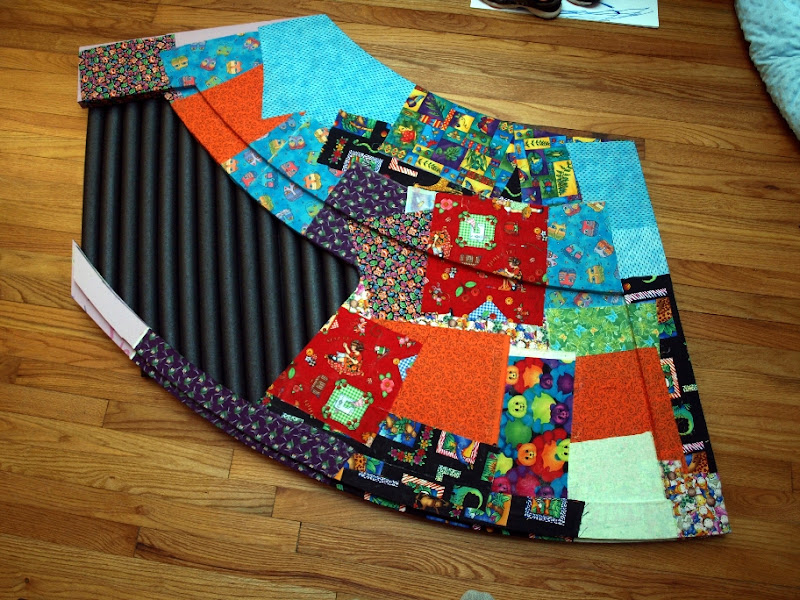
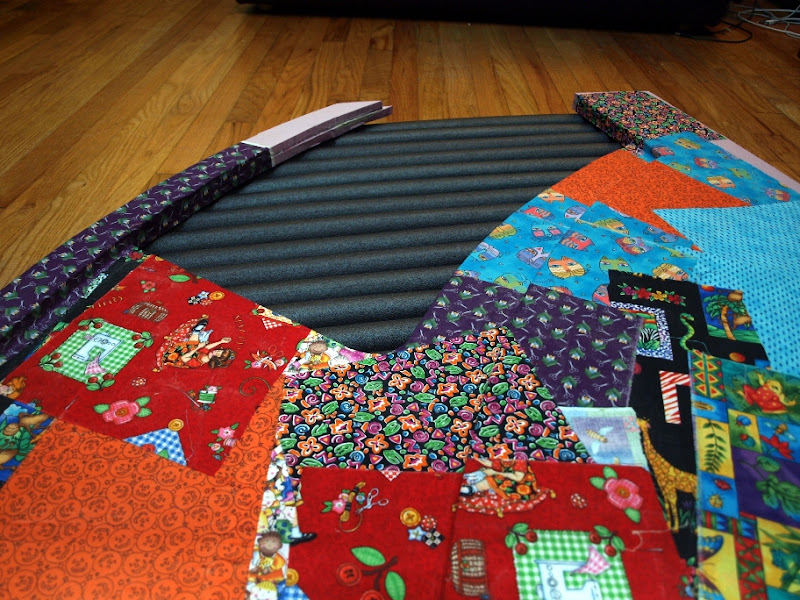
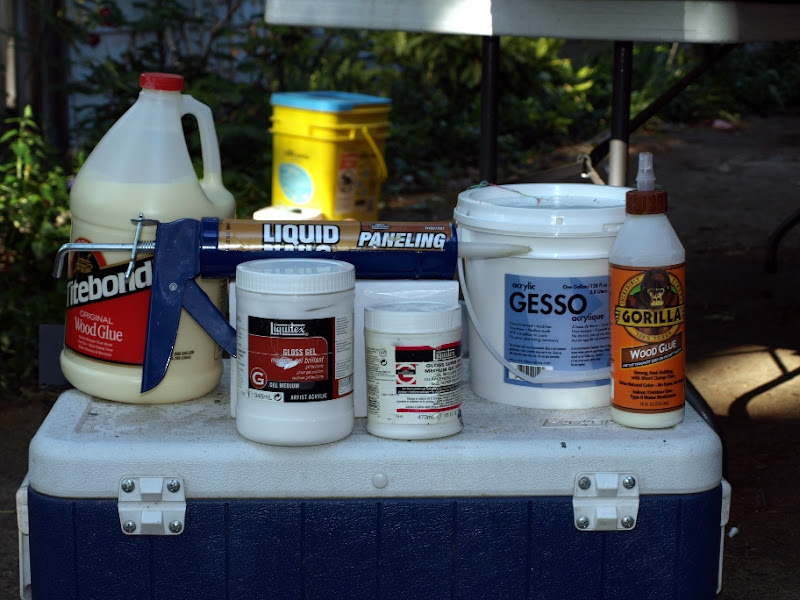
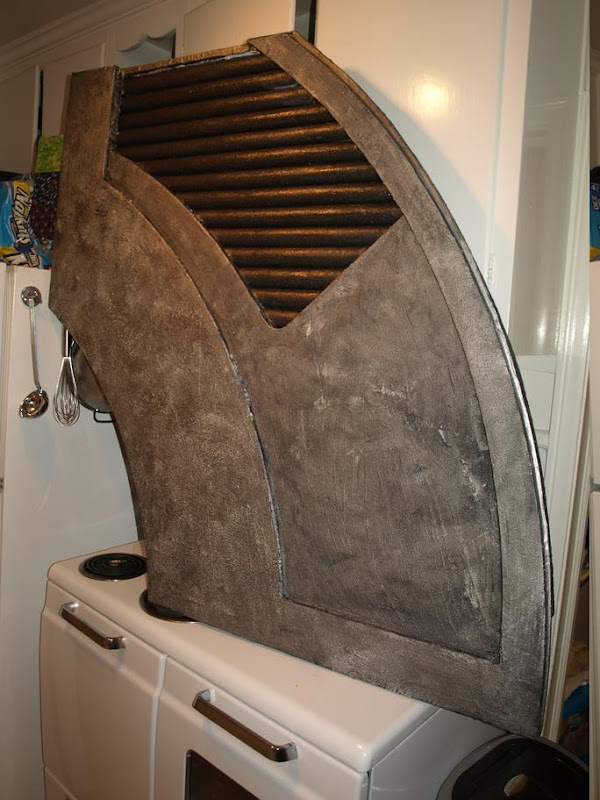
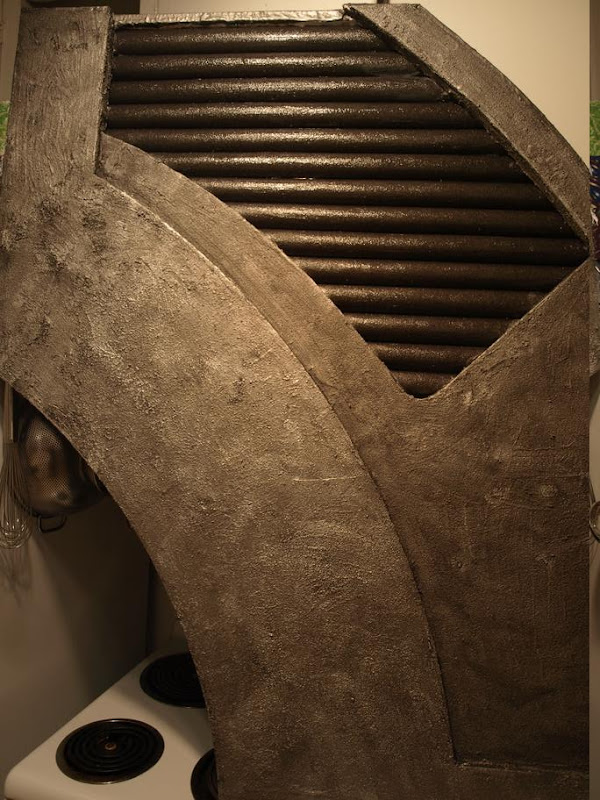
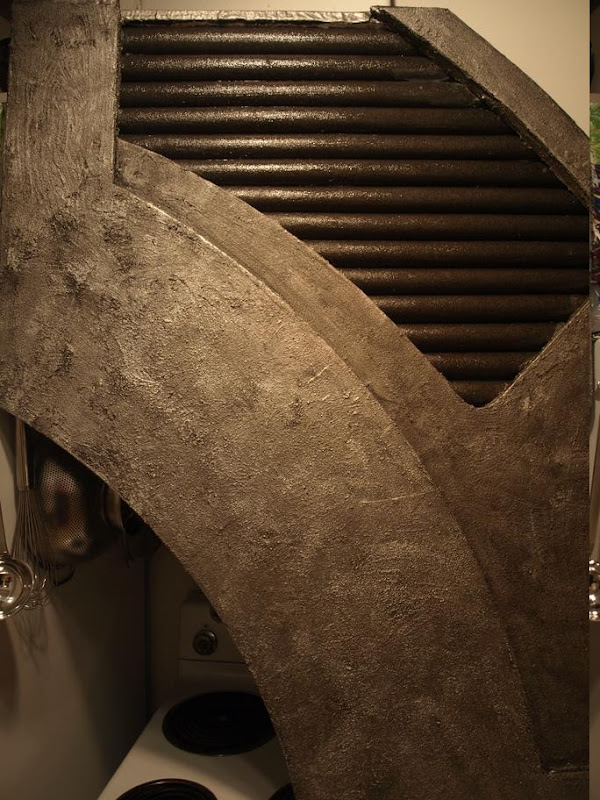
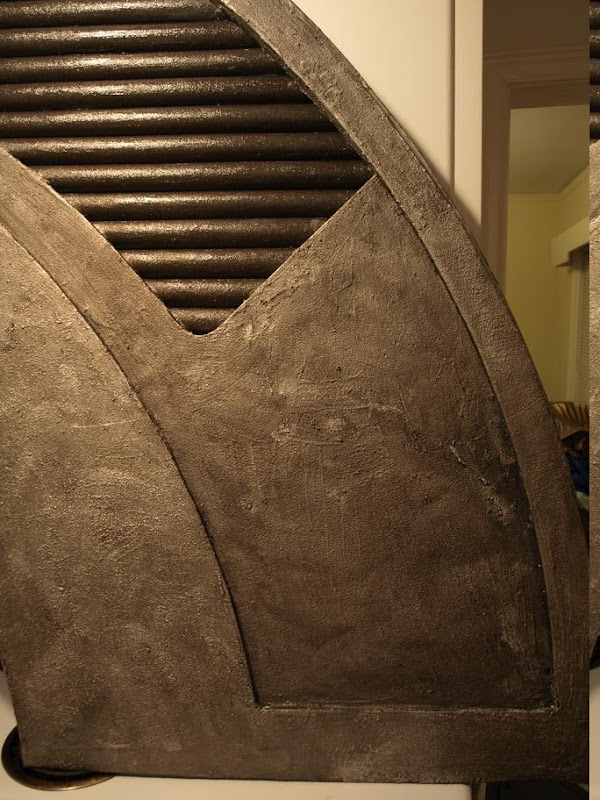
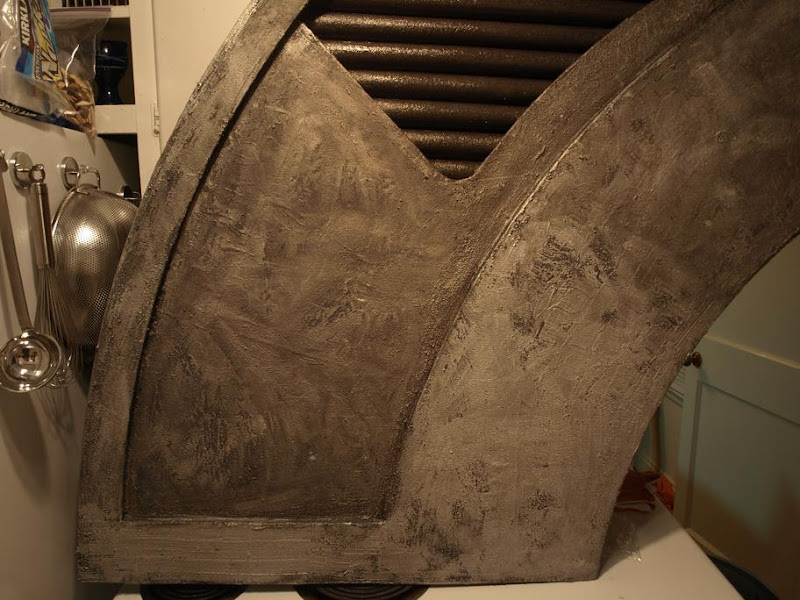
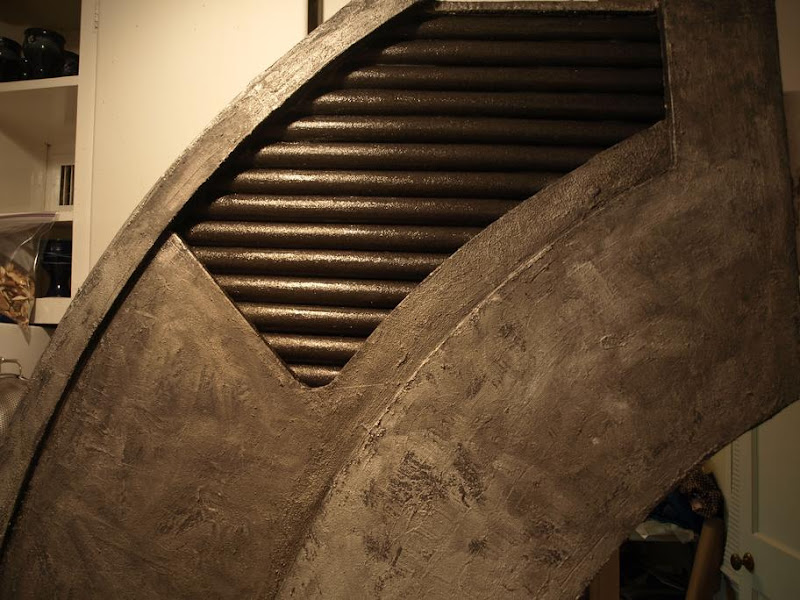
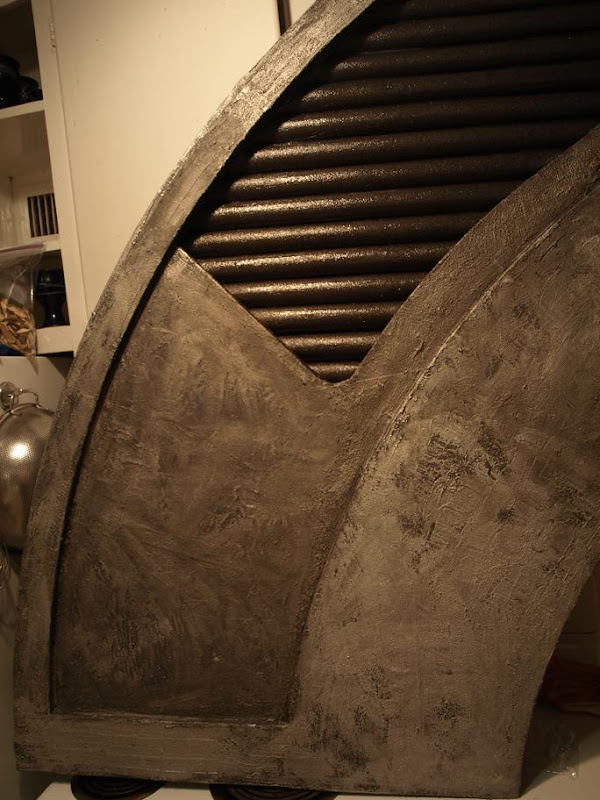
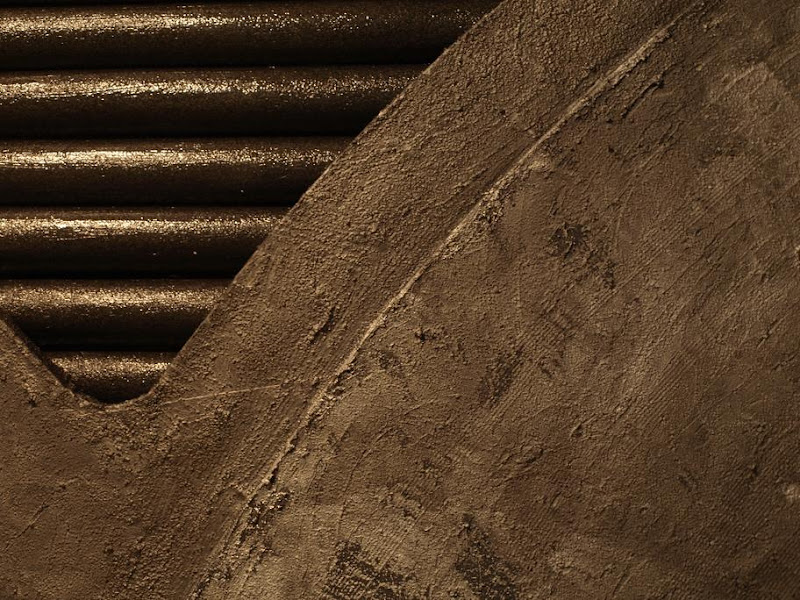
The panels thus far have been scrimmed in tasteful, demure colors. Mostly white cotton and unbleached muslin, with a little bit of orange/cream japanese fabric thrown in for color, maybe some Italian shirtings here and there. But I've reached the end of my wife's scrap bucket so it is time to move deeper into the ghosts of fabric past. Prepare yourself for.... THE PSYCHEDELIC TOP LEFT QUARTER PANEL!

p5033028.jpg


p5033029.jpg


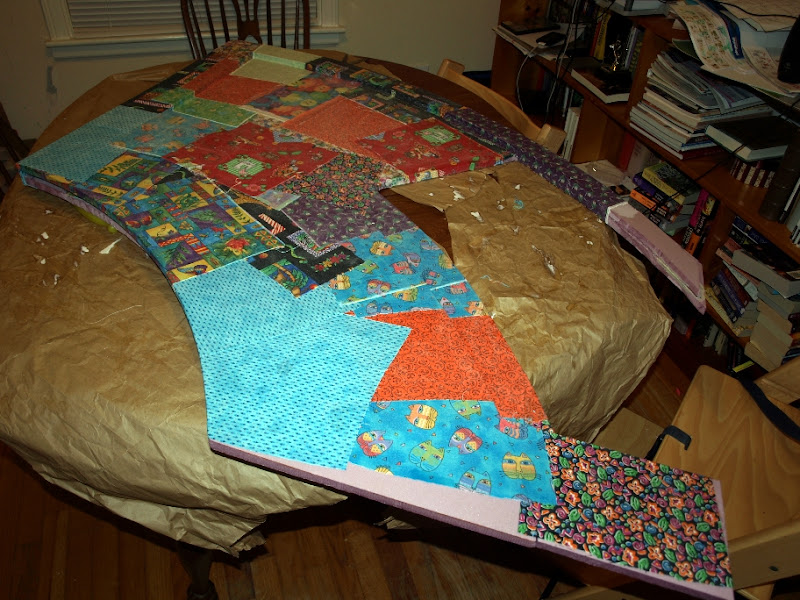
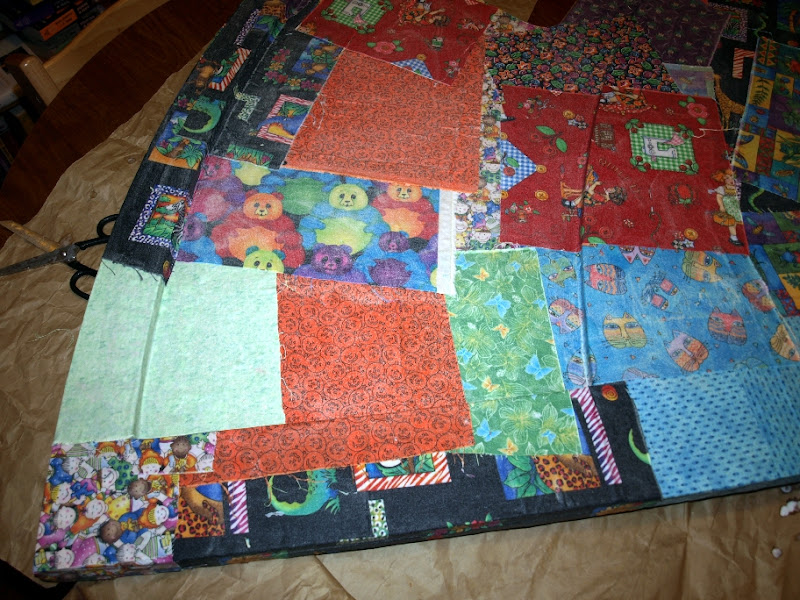
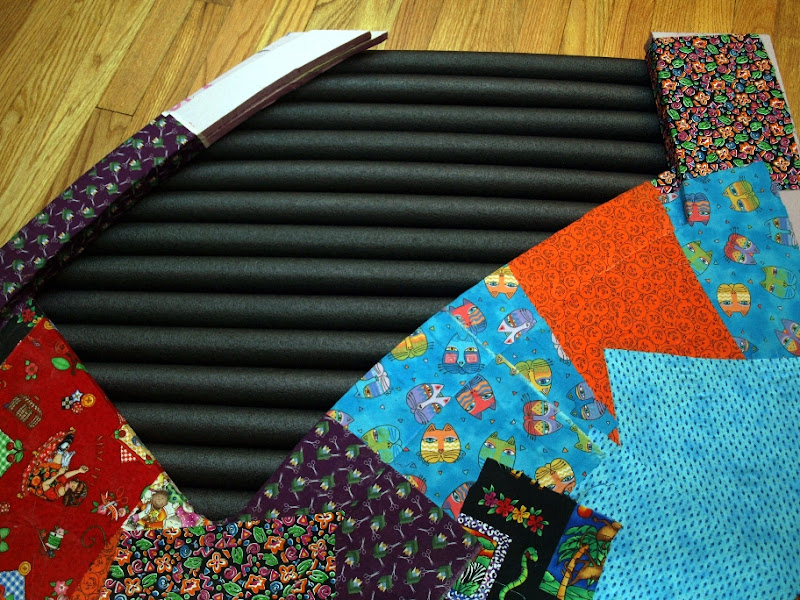
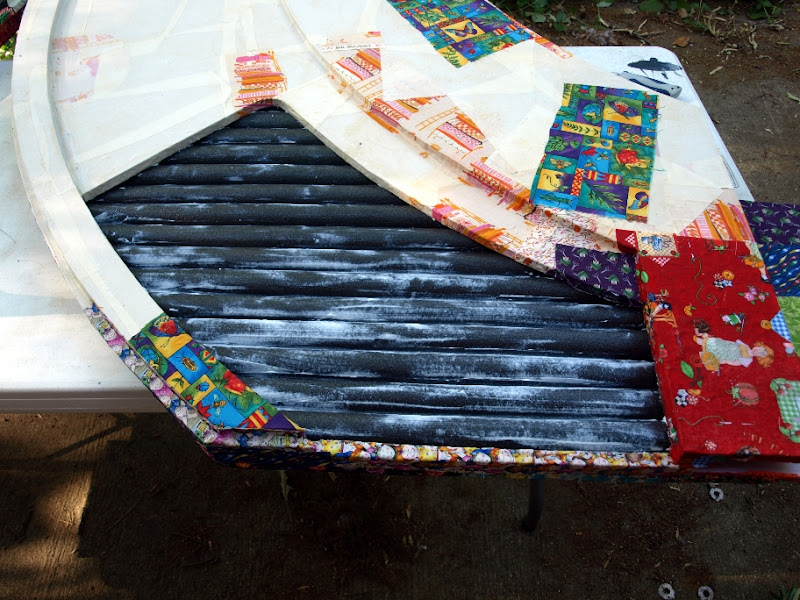
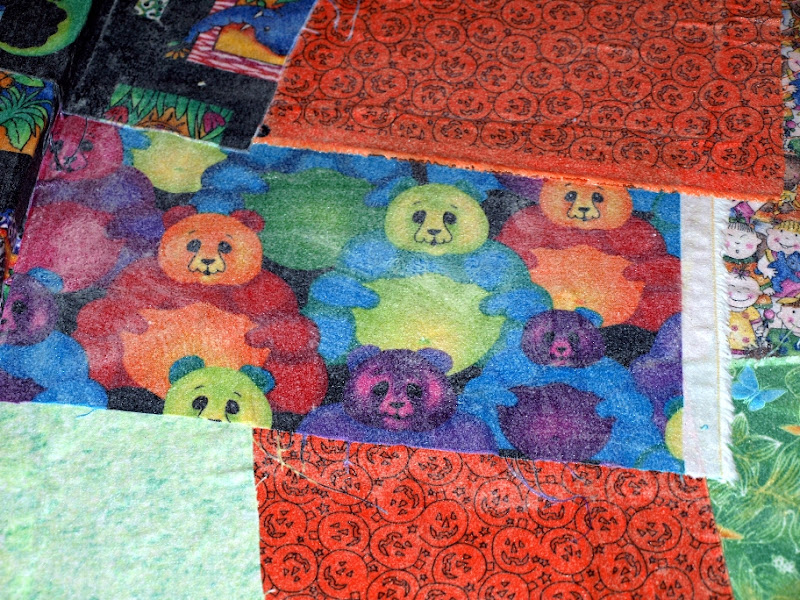
Yes, those were indeed psychedelic panda bears...

p5033030.jpg


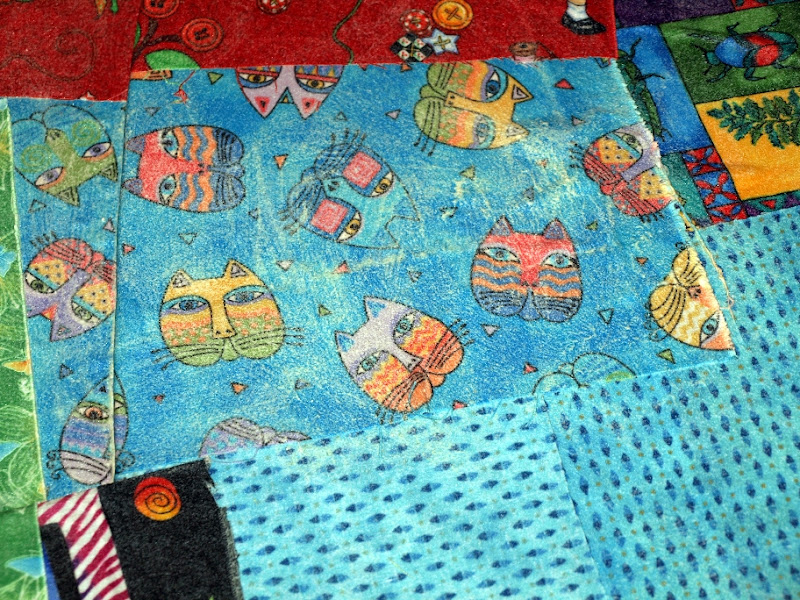
.... and beatnik cats...

p5033031.jpg


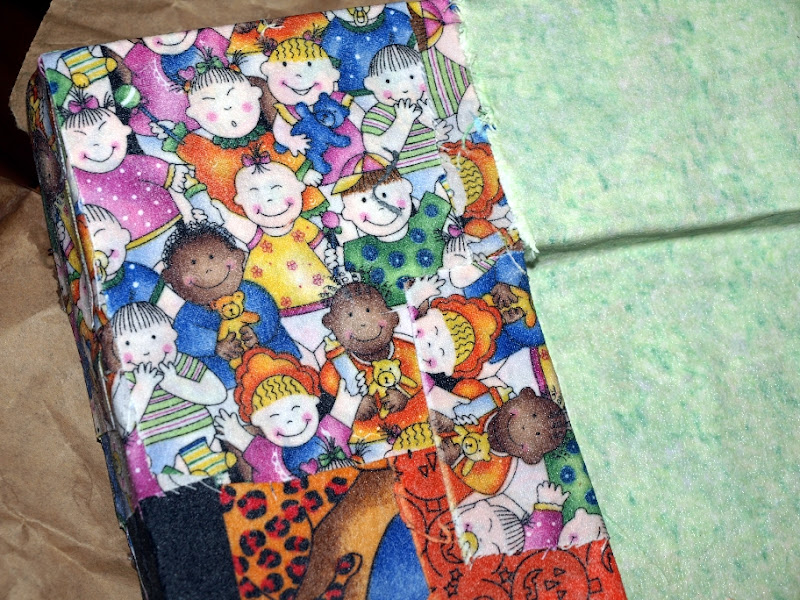
...and bizarrely happy children....

p5033032.jpg


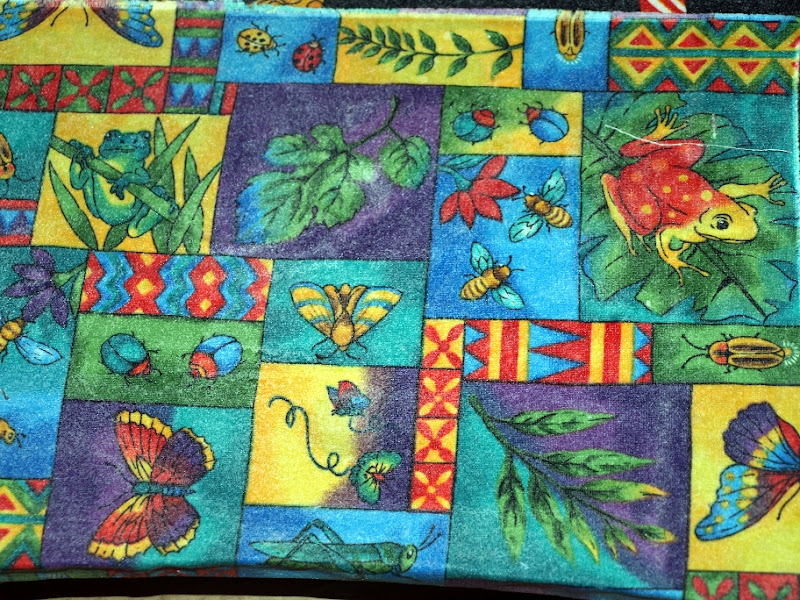
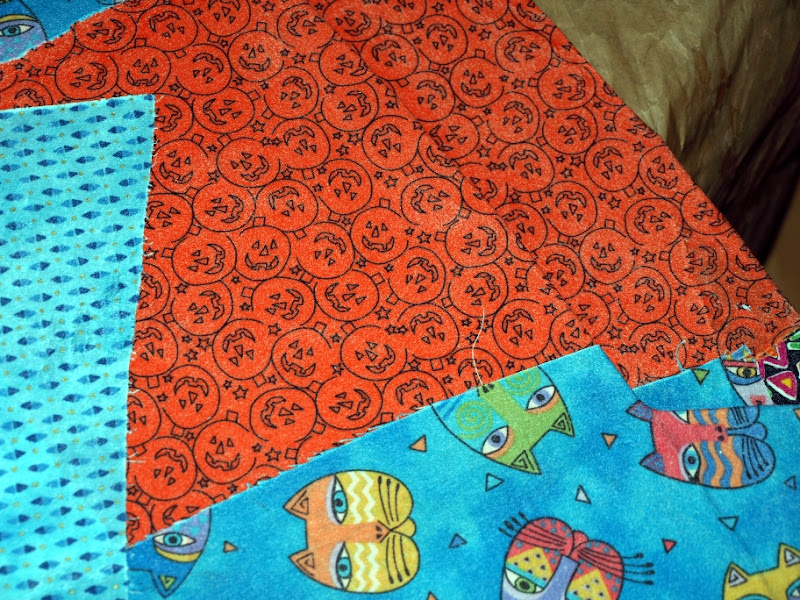
...don't lick the toad, he does bad things...

p5033033.jpg


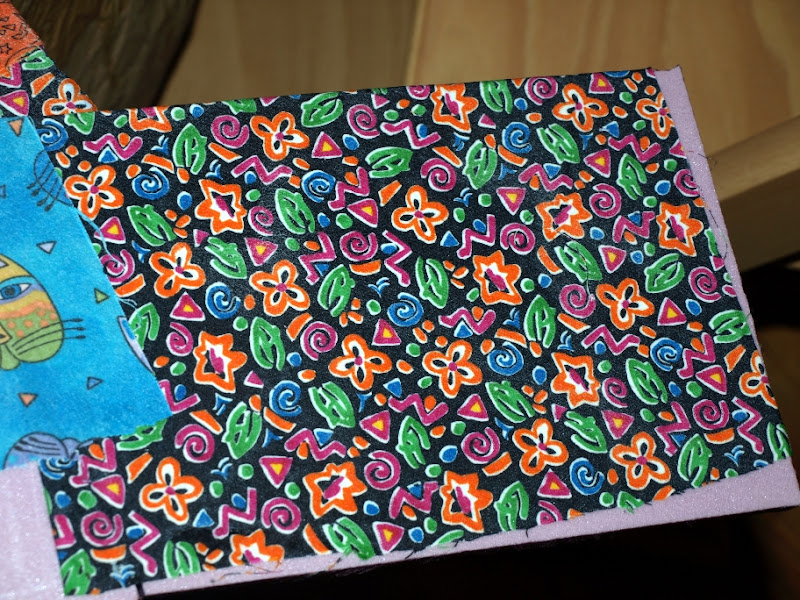
.... whatever this is.... explosive confetti?

p5033034.jpg


...things that go bump in the night ...

p5033035.jpg


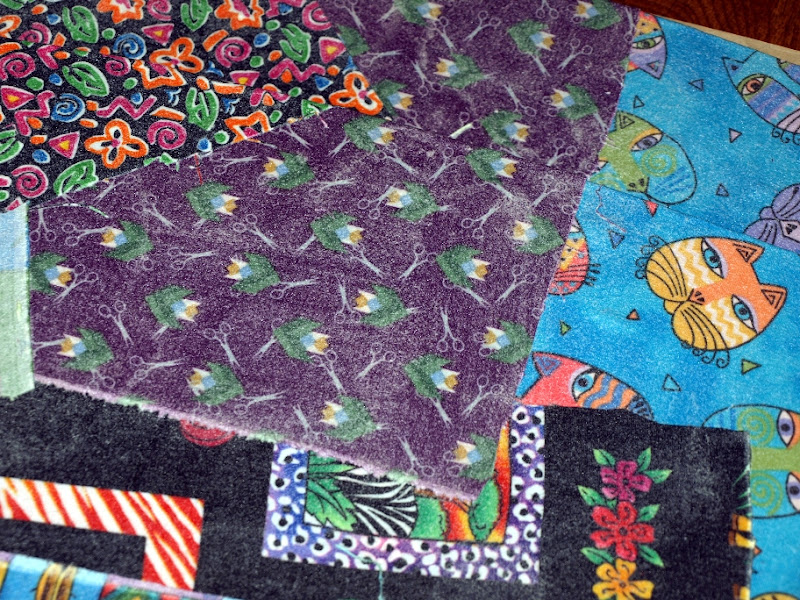
... and deadly scissors attacking origami.

p5033036.jpg


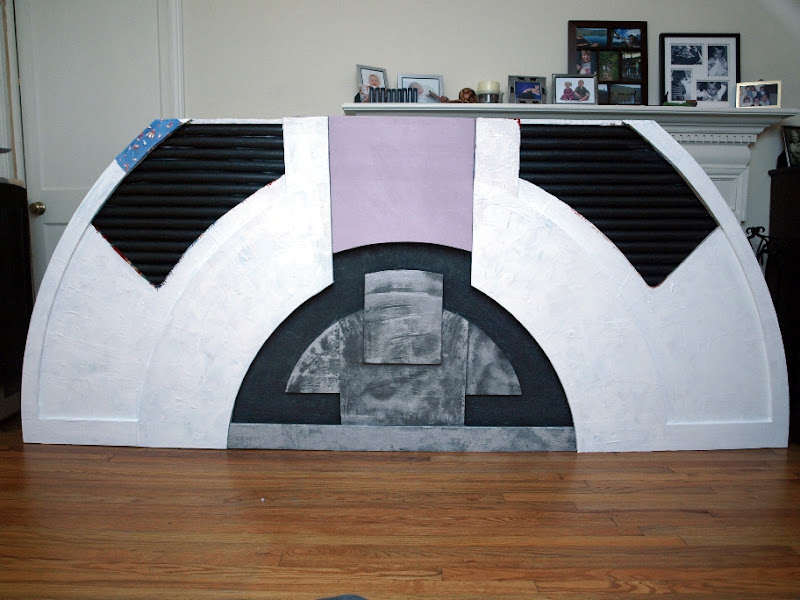
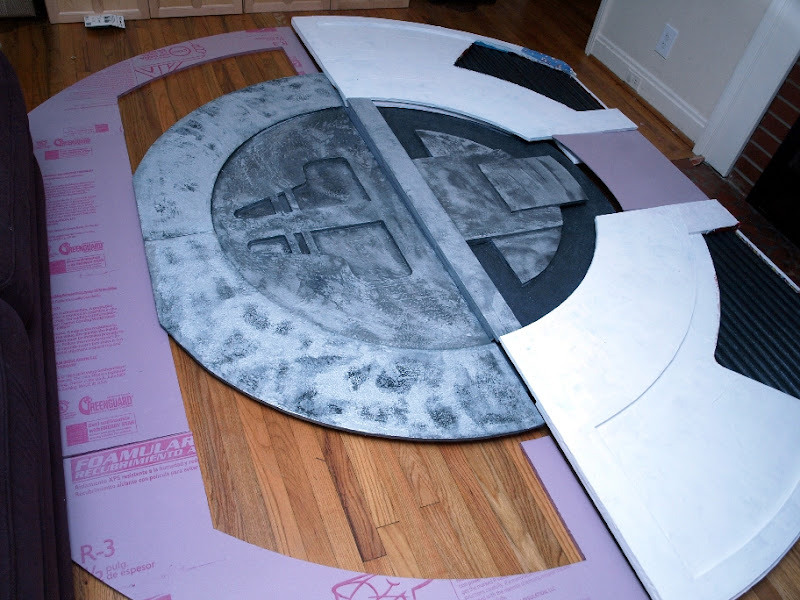
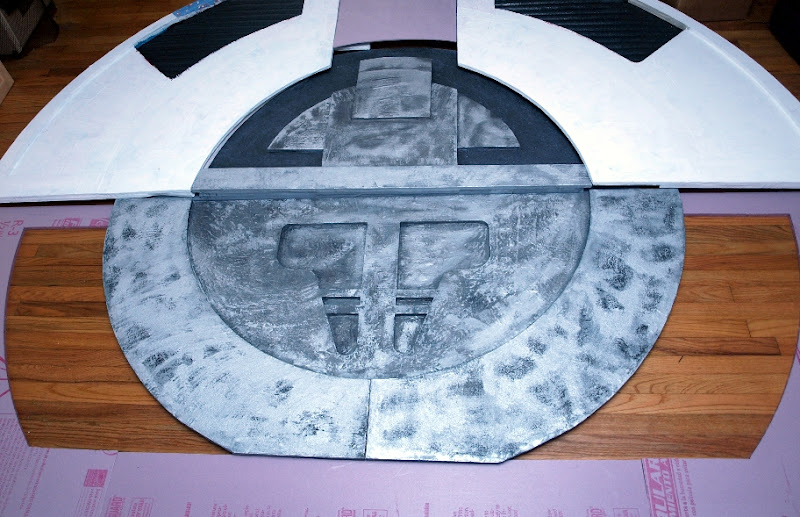
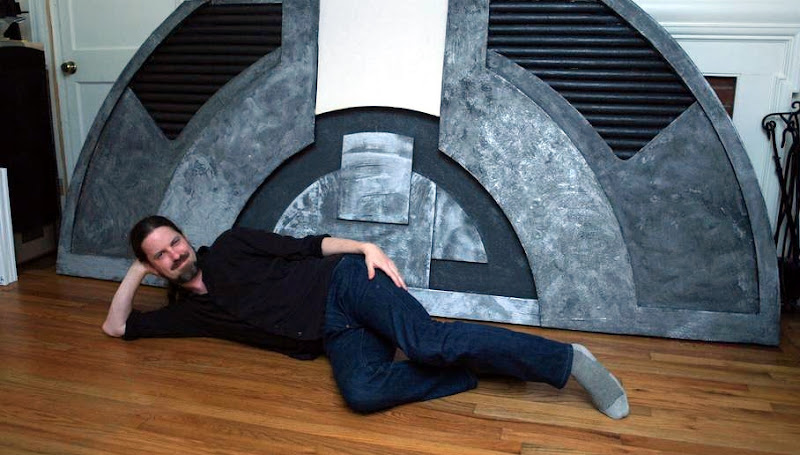
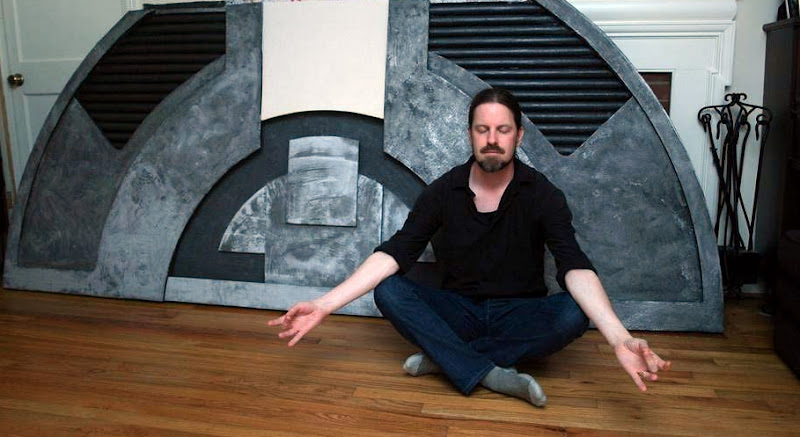
So when you're looking at those shiny metallic blast doors, try not to think about what is buried underneath. It might give you ghastly nightmares. But the worst is yet to come. The next panel shall be clad in: pink flamingos!
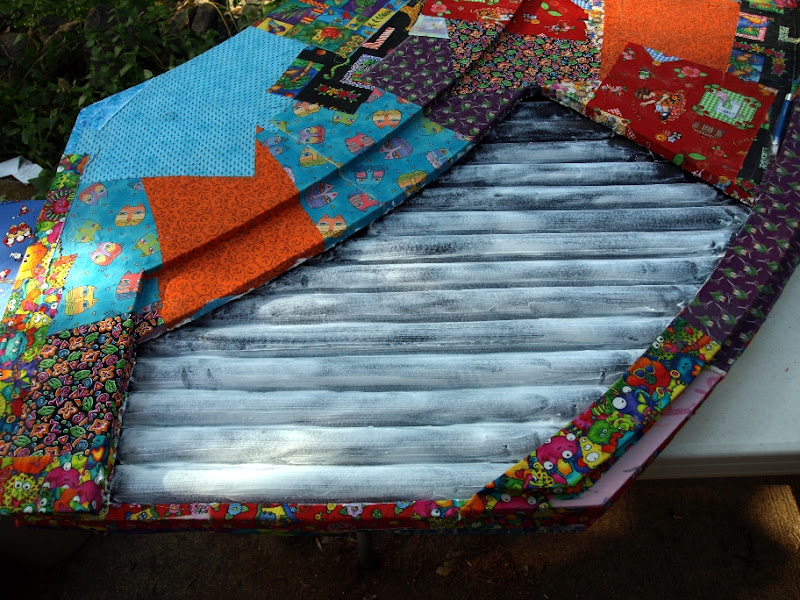
 
There was a bit of a mystery which led to much pondering and some engineering. I say that lightly, of course, it's not like we're building a bridge here.

The conundrum was this. The Rosetta stone screenshot at the 7:11 mark was great:

PHANTOM_MENACE-0.jpg


...except one detail was puzzling: the lower right corner recess beneath the blast showed a bunch of horizontal lines.

Hmm. They look like scanlines, but this is a screenshot, not a TV. They could *possibly* be 3:2 pulldown errors from a misflagged scene in the DVD, but that is unlikely. Finally, it could be a resizing artifact from the screen capture. Or, there could actually be horizontal lines in the recesses.

None of the other images gave me that clear a view into the recessed areas, so I had have faith in trusty old 7:11. I went looking for confirmation, and finally found it:

starwars_thephantommenace_6.jpg


The top left panel over Obi-Wan's shoulder also shows pipes of some sort. Oh goody! a new wrinkle.

I started thinking about how to get pipes in there that were lightweight, cheap, fat enough to be screen accurate yet shallow enough to fit within a 1" space between a couple sheets of foam. Further this shape would be much harder to scrim and paint.

PVC, dowels, cardboard tubes were all on the table at one point. I briefly explored the possibility of building a form from cardboard tubes then molding a set of paper mache "casts" from it. Finally, I decided on foam pipe insulation. These are 83 cents each at Lowe's and already the right color and texture.

Cutting them was a challenge. Eventually I clamped two 1x2s onto a table to make a channel for the pipe insulation to rest in, then ran the hot wire cutter along the tops of both boards to get two even half-pipes. These were glued to a backing of foam core (ouch, one sheet is more expensive than all of the foam pipes combined).

p5043064.jpg


p5043065.jpg


p5043063.jpg


p5043066.jpg


This is a good approach but the pipes will be more fragile than the rest because they will not be scrimmed and gessoed. I will put a thick layer of acrylic medium over the pipes to protect them somewhat and that will have to do.
 
Great attention to detail and way to implement it as well! Now my eyes burn a little though, so thanks for that :p
 
Burn! Burn!

Kinda makes me wonder, though... When Qui-Gon got that miffed expression and then put his saber right through the middle, with chunks of molten metal flaking off all over the place, how did he not sear his hands off into charred nubs? He must have used the Force like a thermostat.
 
Burn! Burn!

Kinda makes me wonder, though... When Qui-Gon got that miffed expression and then put his saber right through the middle, with chunks of molten metal flaking off all over the place, how did he not sear his hands off into charred nubs? He must have used the Force like a thermostat.

Midichlorians
 
Maybe lightsabers are nonconductive. They already know which height to stop at instead of continuing on into infinity. Looking very cool!
 
The doldrums (aka top left and right quarterpanel) of this project continue. In a period of several consecutive days I have made a "pocket" for the foam pipes. scrimmed the backs of the quarterpanels, glued in the foam pipes, glued on backing for the pipes, then scrimmed that.

Today was a good day. Working outside improves the drying speed. So today I:

  • scrimmed some remaining bits
    Roughed up then glued in the pvc "screws"
    coated each section of foam pipes in super-heavy acrylic medium to give them some protection
    bought gesso
    gessoed the quarterpanels

All before the sun went down! Even snuck in some mother's day fun. Next step is to mask off the foam pipes then start the painting process. I also need to dramatically sand down the top cap, scrim/gesso it, and then the top half will be pretty close to it's final state.

Pics:

p5093214.jpg


p5093205.jpg


p5093203.jpg


p5093204.jpg


p5093219.jpg


p5093221.jpg
 
Thanks!

By the way, for anyone wondering if the scrim part of the process is really necessary... I left the top corner of one of the panels unscrimmed. When I was gessoing I was like "huh, what's the worst that could happen?" well, the gesso absorbed into the foam a bit and basically the surface was crazed. I doubt any subsequent layers of paint would have looked any better and probably would have flaked off.
 
Well, looks like I'm stuck here. Trouble is, I don't know where "here" is...

Tonight was the fitting test of the top half. All but the crown have been scrimmed and gessoed and so were basically in their final structural states. Measuring and planning and such mean nothing if the final pieces don't fit. So with some trepidation I placed the quarterpanels upside down, then dropped the top center piece over the pegs. All of the holes *mostly* lined up, so I pressed down. There was a loud creak or two like old bones in the morning and some tension release as gessoed fabric split a little, then all of the pegs pushed their way through. So I put on the locknuts and set 'er up:

p5103235.jpg


Whew, everything still fits. Needs some sanding here and there, and some judicious pruning of excess edges, but it seems like the top half will work. So I grabbed the other pieces and did some more fitting:

p5103238.jpg


There are 1" gaps here and there that will need some shims. Given that it is 10 feet wide and made of foam I'm okay with that. This is the best likeness to the actual doors I can capture by standing on the couch and holding the camera up to the ceiling:

p5103239.jpg


So according to my son, who stretched his hands out as far apart as he could, I only have *thiiiiiiis* much left to go.
 
File this under.... "How freaking long does it take to paint 8 pieces of foam, anyway?"

The answer is, apparently, months.

Anyway, the top quarterpanels finally have been totally scrimmed, gessoed, masked, and today a layer of metallic paint added. The paint needs some work but it is downhill from this point. Shortly, the top half will be totally done. Then I can start on the bottom half.

Here's a couple pics but for more see the actual gallery:
http://picasaweb.google.com/robsspamtrapper/BlastDoors#


p5233295.jpg


p5233306.jpg


p5233307.jpg
 
I'm excited for two reasons. One is that this is all that stands between me and a completed top half:

p5253333.jpg


This is the keystone, the lynchpin, the crown.... it is basically what holds the top arch together. And soon, it shall be painted.

Speaking of paint, the second bit of fun is that the masking has been removed. This is kinda like taking the bandages off after surgery where you get to see how good a job you did. I feared there might be pools of gesso that leaked through the paper, or some other mishap. But aside from some crappy edges where the paint stuck and some bits of paper here and there, it went okay. So I took some "glamor shots" to roughly simulate the conditions under which this thing will be photographed. The left quarterpanel (the second one pictured below) needs more metallic paint added but in general this is how these things are going to look.

p5253317.jpg


p5253319.jpg


p5253320.jpg


p5253321.jpg


p5253325.jpg


p5253326.jpg


p5253328.jpg


p5253330.jpg
 
It occurred to me that I had never tested this backdrop with a person in front, which was the whole point of this exercise in the first place: a backdrop for pictures. I did a cold blue base in order to contrast pleasantly with human skin tones. These are taken in crappy light but I think the color base is doing its job. I won't really focus on lighting until the molten metal unit is in place.

p5263344.jpg


p5263347.jpg
 
Wife has enough of her own projects around, I'm safe.

Get ready to give me that million bucks cause I have an answer for you, propologist! It will be a traveling "exhibit" which will be used at Rebel Legion trooping events. Museums, schools, malls, cons, etc. It will live in my crawl space the rest of the time. Unless... (measures living room wall)

When not traveling you could make them the entrance to your home theater. I always liked that idea since I saw Fan Boys and the blast door opened up into a Lucas Ranch display room.
 
This thread is more than 12 years old.

Your message may be considered spam for the following reasons:

  1. This thread hasn't been active in some time. A new post in this thread might not contribute constructively to this discussion after so long.
If you wish to reply despite these issues, check the box below before replying.
Be aware that malicious compliance may result in more severe penalties.
Back
Top