Interest Indiana Jones Dial of Destiny Props (Anniversary Edition)

graffitilogic

Active Member
RPF PREMIUM MEMBER
DSC_4734.jpg


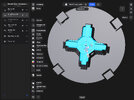
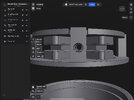
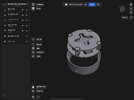
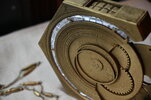
Hey RPF peeps. Over the last few months I've been working on another design for the Dial. My other design had a few cul de sacs that prevented me from being able to create a more dimensional split model like the hero prop image we all obsessed over. But, I think I might have something here.

I'll be test printing the updated compass component this weekend.

Hobby Blog post on it:
https://arcadeshenanigans.com/blog/2024/7/11/dial-of-destiny-a-year-later

If I make a small run of these, they would be:

$420 shipped in the US or $400 + [actual shipping] to our friends across the pond.

optional / maybe, still have some details to work out:

+$150 (ish) for a mother of pearl inlay (veneer) -based glyph disc.
Plan A is to have the pearl inlay laser cut but I need to find someone to do that.
Plan B is to have the lettering applied to the pearl veneer sheet with a spray sealant over top.
Plan F is to mask paint it on. My previous attempts at this have not been great.

I don't have an easy-to-reproduce solution yet for actual mother of pearl outer glyph rings.
I'm totally open to suggestions and/or in-kind trades though if you have the skills and tools to do this.

Yes, I understand the price is a bit steep. This will be a bit more premium-focused though my earlier design files are still available for free to use.

If this is something you might be interested in, please reply, send a pm or comment on the blog post above.

Thanks!
-BillD
 
Last edited:
Cool!

I made some tweaks to the compass mount and redesigned the compass this weekend and have another test print underway as of this morning -I'll follow up in a few days with updated photos on the progress.
 
I have 2 or 3 that are coming around towards completion by probably early next week - I tied up the printer for a few days trying to work out these compass internals. I'm impressed with the hidden complexity of that little thing. The original prop designers really outdid themselves on little details most people will never see or appreciate..

I've got a couple of these finished, just need to run to the hardware store to find the right conical springs and finish out some of the details on the face. I know there are etchings on the inside lip too. At less than a mm I'm not sure how well those are going to stand out but I'll give it a shot.
 

Attachments

  • IMG_0074.jpeg
    IMG_0074.jpeg
    1.1 MB · Views: 31
  • IMG_0073.jpeg
    IMG_0073.jpeg
    1.5 MB · Views: 30
  • IMG_0072.jpeg
    IMG_0072.jpeg
    1 MB · Views: 26
  • IMG_0071.jpeg
    IMG_0071.jpeg
    709.7 KB · Views: 25
Last edited:
It does look like that design is going to work out, though I need a slightly different size conical spring than what my local Ace Hardware carried. These all worked but the feet didn't quite seat flush when pushed back into the assembly, the base of the conical spring was about 1mm too wide, though the conical spring itself is going to be the answer. My first couple prototypes tried to use the straight springs from a mechnical pencil but their compressed-length creates challenges..

IMG_3159.jpg

Amazon had a package of 100 conical springs used for guitar pickups that I think will end up being the solution.

I have a few release candidates rounding completion this week, just needing some final paint work and assembly. Some of these will be RPF-worthy, a few will not quite meet my standard for this audience.

IMG_3157.jpg


.. our basement gameroom has Dial parts strewn about so I'm motivated to get these buttoned up by the weekend when those springs arrive.

IMG_3158.jpg


..one of my large resin printers is down probably for a week or two waiting on parts or for me to get the re-work solder station set up and swap in a new smd transistor on the lamp driver. I still have one large resin printer churning out parts and I think I'll have at least one full of each final part type (12-16) by the time I get off work today and assuming my teenager/helper keeps track of the plate swaps.

I will get some DSLR photos of a few final-candidates before or during the upcoming weekend. I'm having fun. :)
 
Well, the guitar pickup springs appear to work for the two-stage internals of the compass. This is nice, so I don't have to keep buying Delta Faucet repair kits for $7/each in order to get 2 springs. So, I will be able to include a spring-loaded compass with the few Dials that I'm finishing up this week.


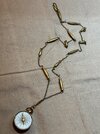
I spent a couple hours trying to source an off-the-shelf beaded lanyard to attach to the compass but haven't had any luck. I really didn't even find the spacer beads to match so I modeled up something and printed a few and this is my result:

IMG_3207.jpeg


I don't mind printing and/or sharing the compass print files, including these resin spacer beads once the design is locked down though I don't see myself making lanyards for folks. This looks the part (or it will, once I alcohol wash it) but it isn't resilient. I'm going to end up cheating and using glue to hold the spacer loops inside these resin beads, which I'm sure is not how this is supposed to work. The clasps seem like a point of failure unless I solder them.

This 1 lanyard took an embarrassing amount of time to complete. Some combination of oaf-ish fingers and strained eyesight that are not optimal for this task. Too many summers using a chainsaw, perhaps. This form of jewelry-making requires a level of finesse that I apparently lack. :)
I will keep an eye out for hippy-bead lanyards and necklaces that could be adapted for this purpose and I do have a pack of D-Rings to include with each compass that I send out. I suppose by request I could include a length of chain, clasps and beads for your those interested in a DIY approach.

The compass above lacks the lettering and tickmarks - I have a plate of these underway for this batch that should be ready this week.
I'll follow up with some final pictures once it all comes together.

IMG_0077.PNG
 

Attachments

  • IMG_3208.jpeg
    IMG_3208.jpeg
    2.4 MB · Views: 21
DSC_4815.JPG
DSC_4817.JPG
DSC_4814.JPG
DSC_4816.JPG
DSC_4822.JPG
DSC_4825.JPG
DSC_4826.JPG
DSC_4829.JPG
DSC_4831.JPG
DSC_4834.JPG
DSC_4837.JPG
DSC_4807.JPG
DSC_4802.JPG


Alrighty, I'm rounding completion on the first two (they are spoken for), they will mail out tomorrow or Friday (August 1st, August 2nd)

I have 4 that are ~75% complete that will be ready early next week. (August 5th or 6th)
I have 2 that are ~50% complete that will be ready late next week. (August 8th or 9th)
I have 3 that are ~25% completed (main bodies printed but not painted) that will be ready the following week (August12th - August 16th)

I can do future runs as well; I'll try to keep 2 or 3 of them on-hand if there is continued interest.

For pricing and deliverables, I've settled on:

$420 shipped to US domestic addresses or $400 plus [actual shipping picked] shipped internationally.
- includes a Dial
- includes a compass

Regarding the lanyard
I [really-really] don't have the aptitude (or time) to make lanyards right now.

DIY Path:
- I will include the painted, resin spacer beads that I used and I'll share the model shortly, though it is nothing special.

Eye Pins:
Amazon.com

Jump Ring Kit:
Amazon.com

Chain and Lobster Clasp Kit:
Amazon.com


I'll shoot a quick video eventually but essentially just using a cheap needle-nose plier, wire snips and super glue:
I put an open super-glue tube on a paper plate. I trimmed the eyepins, shove the the eye-pin wire into the applicator tip of the super glue to very-lightly coat it and then using the small needle-nose pliers, push it into the bead. Do this for both sides though if you are fast enough you will only have to actually apply glue to one eye pin wire per bead b/c they will glue together inside the spacer bead.

- I recommend using cheap pliers instead of your nice stuff so that if you get glue on it / who cares. I'm sure there is a better way to do this.

Then, essentially just cut lengths of chain, open, apply and crimp the jump rings. Build out your segments as desired:
Jump Ring -> Chain -> [Eyepin + Spacer Bead + Eyepin] -> {repeat / alternate bead times}
Get to the length you want, add lobster clasps or rings. Each compass has a D-Ring installed.
 

Attachments

  • DSC_4800.JPG
    DSC_4800.JPG
    11.2 MB · Views: 25
Last edited:
I finished my own Dial:

IMG_3358.jpeg


... even managed to get some pearl in that glyph disc by creating a mask and painting on the lines. It looks fine once in the Dial but painting and cutting down the pearl veneer was not a clean process and the results were not perfect.

I shipped out three examples of different types of finish and waiting to make sure they traveled safely in the 100F heat and get some feedback.

IMG_3396.jpeg


IMG_3398.jpeg


IMG_3399.jpeg


I listed two discounted prototypes on eBay:

visi0n9 on eBay

IMG_3348.jpeg


I think I have couple that could ship any day and a few more in progress, final touchups, etc.
 
View attachment 1838583

Hey RPF peeps. Over the last few months I've been working on another design for the Dial. My other design had a few cul de sacs that prevented me from being able to create a more dimensional split model like the hero prop image we all obsessed over. But, I think I might have something here.

I'll be test printing the updated compass component this weekend.

Hobby Blog post on it:
https://arcadeshenanigans.com/blog/2024/7/11/dial-of-destiny-a-year-later

If I make a small run of these, they would be:

$420 shipped in the US or $400 + [actual shipping] to our friends across the pond.

optional / maybe, still have some details to work out:

+$150 (ish) for a mother of pearl inlay (veneer) -based glyph disc.
Plan A is to have the pearl inlay laser cut but I need to find someone to do that.
Plan B is to have the lettering applied to the pearl veneer sheet with a spray sealant over top.
Plan F is to mask paint it on. My previous attempts at this have not been great.

I don't have an easy-to-reproduce solution yet for actual mother of pearl outer glyph rings.
I'm totally open to suggestions and/or in-kind trades though if you have the skills and tools to do this.

Yes, I understand the price is a bit steep. This will be a bit more premium-focused though my earlier design files are still available for free to use.

If this is something you might be interested in, please reply, send a pm or comment on the blog post above.

Thanks!
-BillD
You have a PM ;-)
 
I was asked by a few people if I could make another version of the compass mount where the two hands could move independently..

Yep, I can, made a quick prototype:

IMG_3519.jpeg


IMG_3517.jpeg


I'm reasonably sure that the hero prop had both hands occupy the same ring and rotation plane:

Screenshot 2024-08-08 at 4.08.43 PM (1).png


But I completely understand the ask, given the motorized twirly-clock version that the production made for a few scenes:

IMG_3433 (1).jpeg


I won't be doing a motorized version but I do have this static-two-handed alt-design for those inclined.
 
IMG_3615.jpeg


I believe I've answered any of the interest that came in, I'll keep a few extra on hand for future interest.

Some Options:
Compass mount with hands that move independently (like the motorized one use in those later scenes)
Compass mount with hands that share a rotation plane (like the hero prop)

Glyph Disc: Plain White, Light Pearl Veneer or Dark Pearl Veneer

I'll maintain a gallery as I finish off Dials: Mk42 Dials

If you see it listed in the gallery, it (probably) is available to ship within 24 hours.
I also set up a small Etsy presence for this and a couple other one-off builds that I've been trying to finish up.

Want to make your own? I added links to the files on the printables page and my hobby blog. I still need to finish making instructions..
 
Last edited:
Back
Top