How to support my Iron Helmet when applying resin?

AwesomePossum84

New Member
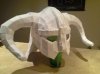
Hey guys, this is my first post on here so hopefully you guys can help me out. Working on my third helmet, and making the Iron Helmet from Skyrim. What's different about this helmet is there is of course no chin/lower half to it, so it wiggles around freely. The top is sturdy and in place, but the bottom half moves about and bends. How would I go about building a support for the inside of it when applying and letting the resin dry?
 

Attachments

  • Iron Helm.jpg
    Iron Helm.jpg
    9.2 KB · Views: 168
i would brush a light coat or two of resin on the inside to help build strength maybe. once it dries it should make it fairly stable without affecting the fit. If it still needs more support, I would maybe place clay inside (non air dry) or a ghetto popsicle stick frame. The clay wont stick to the resin so it would clean up easy. Then you can continue building up possibly. Hope this helps, if not maybe someone else can come up with something :(
 
Can you glue some stablizing crossmembers on the inside to stiifen the shape?

I also recommend spraying several light coats of lacquer prior to resin. A light coat of lacquer will seal the paper without distorting the shape. Then a second light coat, then a third, 4th, and so on until you have stiffened the helmet. Then go with a few coats of resin on the inside. Let us know if that works for you.
 
first coat of light resin. Let it dry, then add a second coat. Then apply from within for strength.
 
Add supports to the inside. Go to Walmart and buy some really thin dowel rods, and then use Pepakura to measure distances between two points on a few key areas. cut your dowels to that length and then glue them in place with just a tiny bit of hot glue, so you can easily remove them later. This is the best method to assure there will be no warping over your model during the resin process.
 
Back
Top