You are using an out of date browser. It may not display this or other websites correctly.
You should upgrade or use an alternative browser.
You should upgrade or use an alternative browser.
Hero Phaser Scratchbuild
- Thread starter robn1
- Start date
Blackbirdcd
Well-Known Member
I seem to recall a couple of these showing up at our local Sci-Fi Model Club meeting... making all of us drool
nwjedidave
Sr Member
the work in this thread is stunning. In the end I will NEED one.
Tiberius Kirk
Sr Member
A thing of beauty!
Amazing! Can't wait to see how you rig up the extending emitter!
Chrisisall
Master Member
Rob, you are THE MAN!
jonpaul0151
Active Member
That's very nice styrene work. Do you cut the patterns by laser or by hand? I'm thinking about getting a laser set-up since the prices have dropped so low.
robn1
Master Member
That's very nice styrene work. Do you cut the patterns by laser or by hand? I'm thinking about getting a laser set-up since the prices have dropped so low.
No, all hand work. The fanciest tool I have is a bandsaw.
Oh yeah. It IS time for an update. Any news?
I have been neglecting updates. I struggled quite a bit with the emitter extender in the P2, something is out of scale because I had to make it too long just to get it to work.
I'll have the repainting done in a few days, then it's just a few more small things and it'll be done.
jonpaul0151
Active Member
Looking might fine
robn1
Master Member
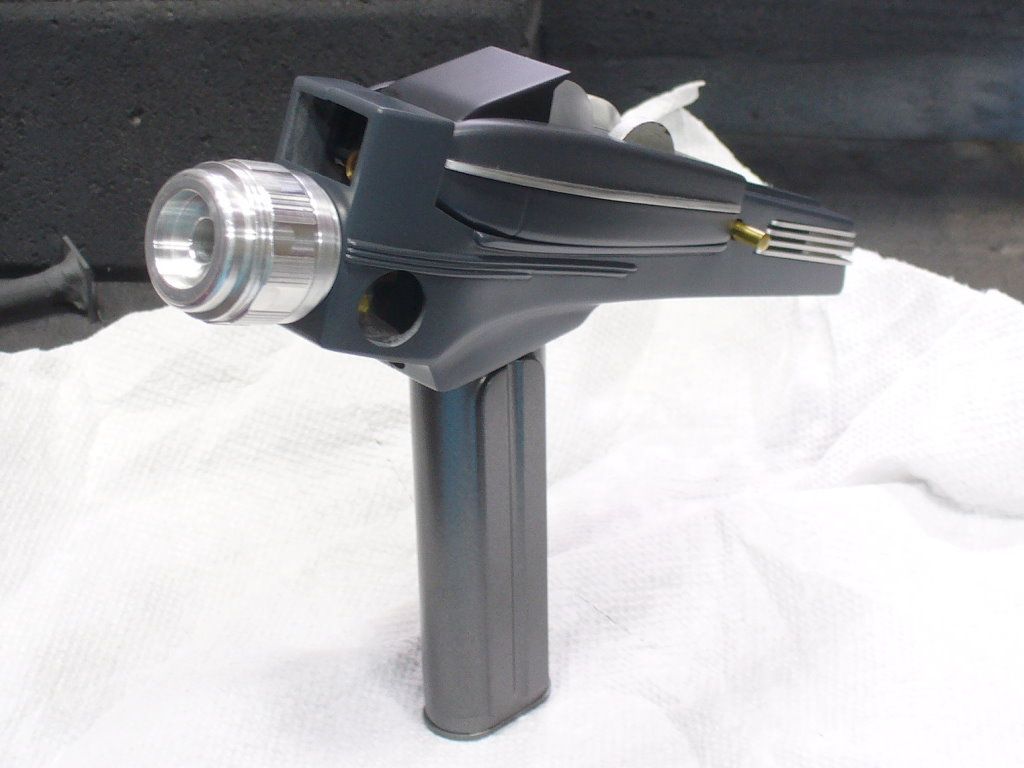
Doing the last few bits before repaint. The trigger mount is glued in

Then a retainer for the sight window has to be made. The window is thin acrylic sheet, I brushed it with some mold release then clamped it in place. Then I applied epoxy around the edge. When this set up I was able to slide the window out, leaving a groove for it to slip back into.

A little clean up with the Dremel.

And the widow sits in nice and snug.

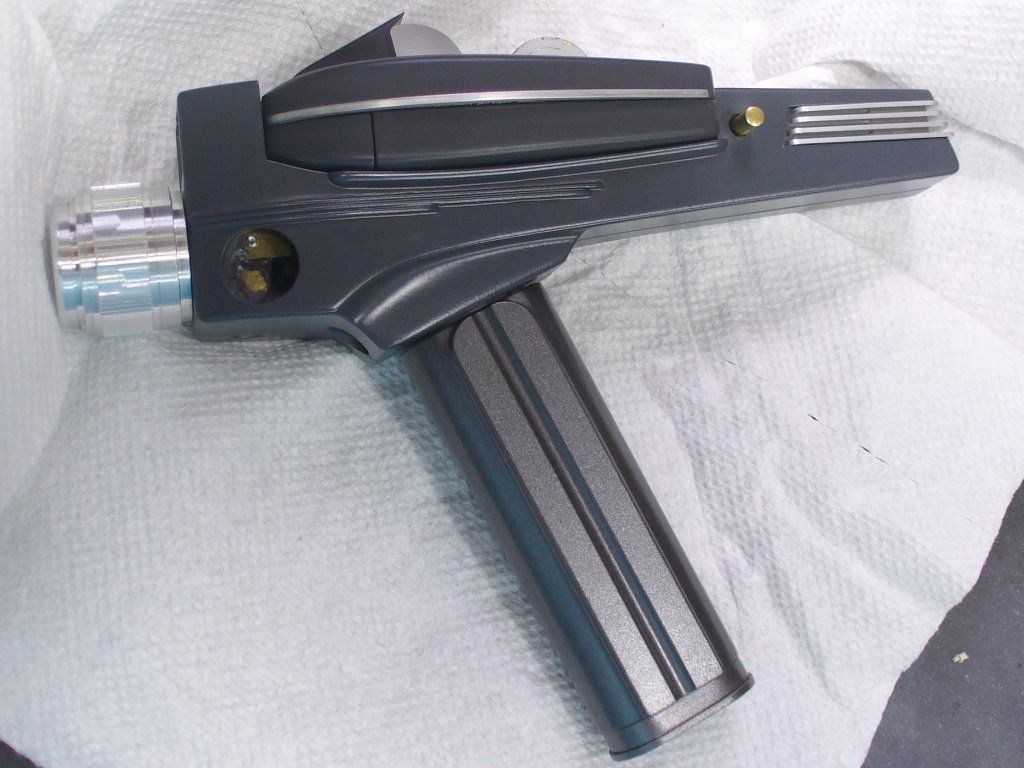
Then I sanded down the old paint to prepare for a new coat.

But I've had so much trouble with these oil based Rustoleum paints that I went looking for an alternative. I stumbled upon an auto paint supplier in Manassas that was willing to work with me. They custom mixed some 2 part acrylic polyurethane car paint to match my color chip, and even gave me my first half pint as a free sample.
They matched Krylon Shadow Gray for the P2 just fine. But the first pass at the P1 color didn't work out, it had a brown tint when it should be a colorless gray. So I lost a few days while I went back for a new batch which came out great.
Before paint I had to do some masking. I masked most of the interior surfaces, as well as anything protruding through the shells, and blocked up any openings.


This is especially tricky on the P1, with the clear sight and metal rails.

I masked the rails and carefully burnished the tape down. The green Frog tape takes to the compound curves pretty well.

Then I cut along the rail edge and removed the excess tape.

I sprayed all the parts with some adhesion promoter, then gave them a light mist coat of primer. They were a little patchy from the sanding so I wanted to give them an even surface coat before paint.
The green tape showing through gives an idea how thin this primer coat is.

I just finished the paint a while ago, I'll have more pics tomorrow.
Then a retainer for the sight window has to be made. The window is thin acrylic sheet, I brushed it with some mold release then clamped it in place. Then I applied epoxy around the edge. When this set up I was able to slide the window out, leaving a groove for it to slip back into.
A little clean up with the Dremel.
And the widow sits in nice and snug.
Then I sanded down the old paint to prepare for a new coat.
But I've had so much trouble with these oil based Rustoleum paints that I went looking for an alternative. I stumbled upon an auto paint supplier in Manassas that was willing to work with me. They custom mixed some 2 part acrylic polyurethane car paint to match my color chip, and even gave me my first half pint as a free sample.
They matched Krylon Shadow Gray for the P2 just fine. But the first pass at the P1 color didn't work out, it had a brown tint when it should be a colorless gray. So I lost a few days while I went back for a new batch which came out great.
Before paint I had to do some masking. I masked most of the interior surfaces, as well as anything protruding through the shells, and blocked up any openings.
This is especially tricky on the P1, with the clear sight and metal rails.
I masked the rails and carefully burnished the tape down. The green Frog tape takes to the compound curves pretty well.
Then I cut along the rail edge and removed the excess tape.
I sprayed all the parts with some adhesion promoter, then gave them a light mist coat of primer. They were a little patchy from the sanding so I wanted to give them an even surface coat before paint.
The green tape showing through gives an idea how thin this primer coat is.
I just finished the paint a while ago, I'll have more pics tomorrow.
Chrisisall
Master Member
The usual awesomeness!
Similar threads
- Replies
- 1
- Views
- 1,117
- Replies
- 9
- Views
- 1,438