wayouteast
Sr Member
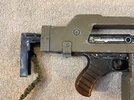
I'm finally calling my NERF M41 pulse rifle repaint done with a few more bits of weathering and grime and the addition of a sling. It may not be movie-accurate, but I love it, and I'm really happy to finally have a representation of such an iconic prop in my collection! The fact that I can still rapid-fire NERF darts at friends and family is an added bonus of course! 'All right, sweethearts, what are you waiting for? Breakfast in bed?' 
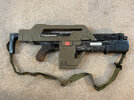
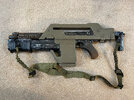
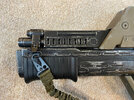
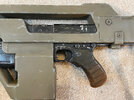
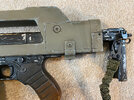
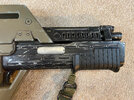
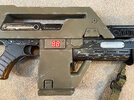
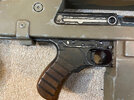
If anyone else is interested in the paints I used:
Primer: grey rattle can auto primer (Simonez)
Metal parts: gloss black rattle can (Hycote), then airbrushed Alclad II Steel and Stainless Steel metallic lacquers, then airbrushed chipping fluid, then matt black acrylic rattle can (Hycote). Scratches and wear done by scrubbing back through the matt black to reveal the metallic lacquer.
Grip: Vallejo acrylics over matt black basecoat (Burnt Umber, Rust and Dark Yellow - deliberately left streaky and inconsistent to mimic woodgrain). Two thin coats of dark brown furniture wax over that to tie it together, buffed to a shine.
Pump: matt black rattle can (Hycote), then airbrushed Vallejo Panzer Aces Dark Rubber.
Shroud: Revell NATO Olive Drab (rattle can). Wear done with hand brushed Vallejo Model Air Neutral Grey acrylic. Weathering and dirt done with sponged and brushed-on diluted oil paints (Paynes Grey and Burnt Umber) and AK Interactive enamel washes (Brown Wash for Green and Winter Streaking Grime).
I gave a couple of areas a light rub of graphite powder to 'metalize' them further, and added a bit extra under the pump to allow it to slide more freely. After several days' use the only areas where the original plastic is starting to show through are a couple of spots on the back edges of the triggers. For some reason the orange plastic they're made off doesn't like to take paint at all, even with careful sanding and adhesion promoter. But they are tiny, barely noticeable, and can be easily touched up with a black Sharpie or similar.
