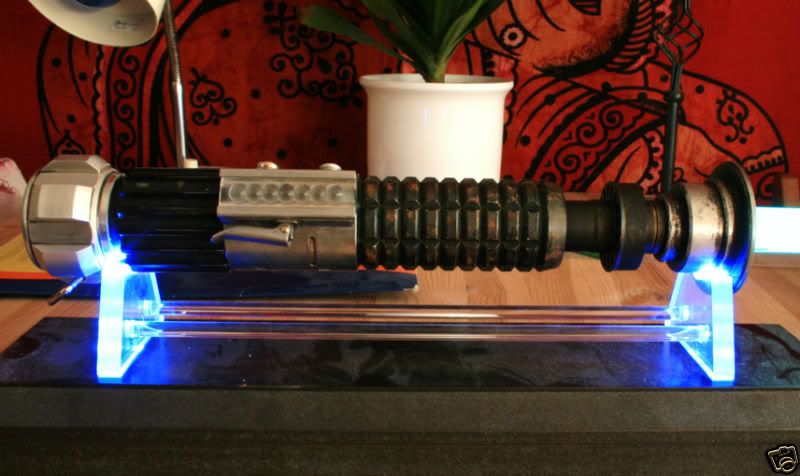
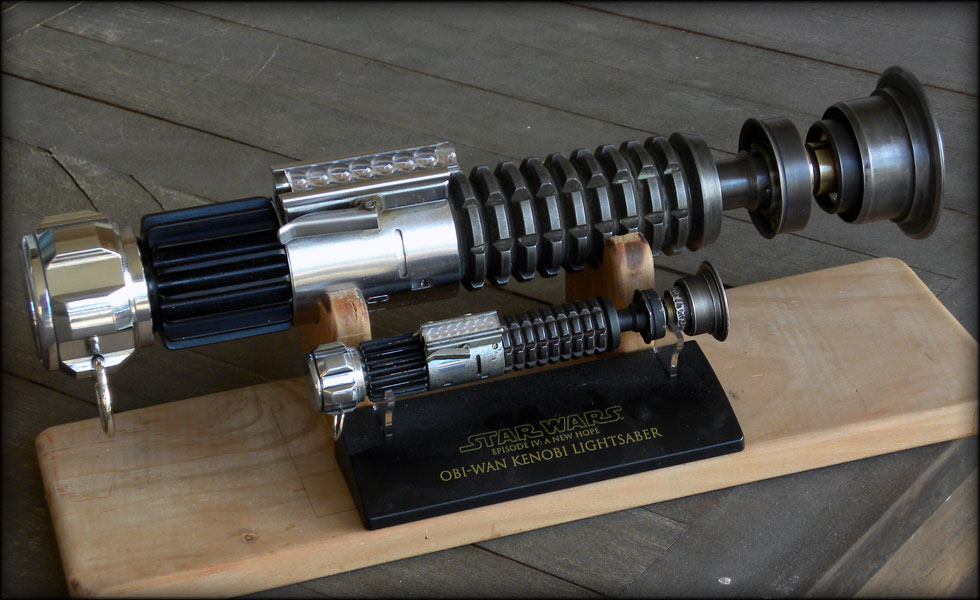
Has anyone made a "correct neck" ANH Obi Force FX or similar?

slothfurnace

Sr Member
RPF PREMIUM MEMBER
Like the title says, I am wondering if anyone has made a Force FX Style illuminated blade ANH Obi Wan Saber.

The offerings from Master Replicas and Hasbro have that extra fat windvane piece that is pretty much meh.

Has anyone attempted this? and if so, has it worked?

I found a section of aluminum tube that I shaved down on the lathe to secure the blade tube to the inside of a RussRep emitter, it's super snug and tight, and with a few set screws on the inside of the emitter, going into a custom machined base on the inside of the polycarbonate tube, it should be sturdy enough to not move much.

Here's a couple pics of what I have so far.

001.jpg


The small aluminum tube is some scrap I had that BARELY fits the light tube. I had to shave it down to fit inside the inner section of the emitter.

002.jpg


Here's the spacer on the light tube. I will have to trim off the excess light tube, and replace the plastic LED base on the inside with an aluminum base I can screw into.

003.jpg


Here it is assembled, I think the tiny aluminum spacer will not detract from the look of the saber too much.

004.jpg


Here's the saber lit. I know I have the wrong color, but this is a broken Vader force FX I scavenged just to see if the parts would fit. The controller board is sitting in the grenade, and instead of 3 AA batteries, I am powering it with 3 AAA batteries. These will fit stacked inside the hollow aluminum booster.

I have a good idea how to attach the emitter to the grenade solidly enough that it won't be flimsy, and still use the "correct" windvane neck from Russ. Wiring will have to be changed out a bit to fit inside the neck, but it's doable. Meaning I will have to relocate the clash sensor, and with those two wires not going through the neck, I can feed the rest through a drilled out 5/8 threaded rod.

I have it worked out pretty much except for the pommel end, and am still sketching that out, but I think that's easier to solve than the emitter.

If anyone has done this already, let me know how it worked out for you, I'd sure like some direction.

Thanks much
 
Hi there,

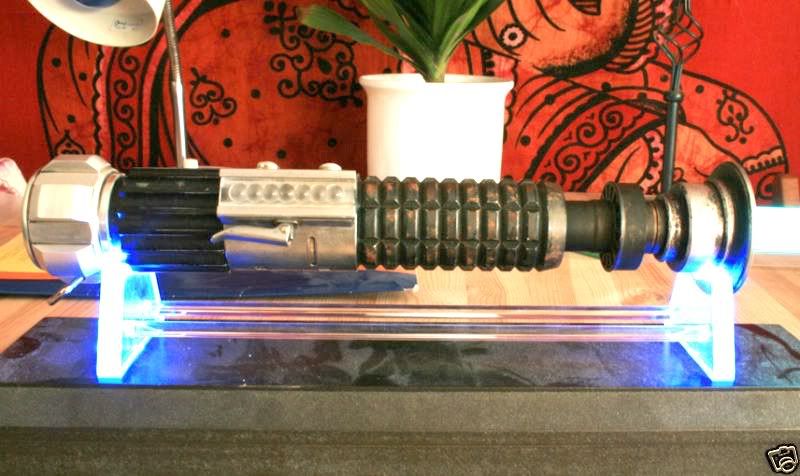
This is the only EL Obi-Wan ANH I have seen with what looked like the correct neck to me :


Obi-WanELlightsaber.jpg


I was just too late on bidding on it :unsure


Obi-WanELlightsaberFX.jpg


On closer inspection with the image being levelled in Photoshop it doesn't seem to be quite the accurate neck after all :confused

-Chaim
 
Last edited:
Didn't someone here do one using a Parks saber? One of the conscessions he made to the build was to locate the LED inside the forward grip rather than the emitter, projecting the light through the neck, but it worked out very well. I believe he posted a video and everything.
 
You would probably have to use 3/4" inch polycarb for the blade, instead of 1" (which is typically used for LED sabers). 3/4" is what most people used for EL sabers, and can still be found, its just not the most desirable.

The problem with using a 1" blade is that you have to cut it shorter, so the windvane is the right size, which makes the blade less stable => easily broken


I think I see what you mean, but what I am talking about is more like creating an anchoring piece of metal that really solidifies in the emitter... kind of like this...


005.jpg


The aluminum plug will really help solidify the blade to the emitter.. I will need to trim out some of the diffuser element from the blade, and thread the plug for 5/8 threaded rod.

006.jpg


Here I have it fit together, and see my plug is too long, and has no recess to let the emitter end of the windvane neck to sit inside. I will shorten the plug and lathe out a recess for the neck section.

007.jpg


Here is the key to the project, a hollowed out 5/8 threaded rod that I will pass the LED string wires through. The aluminum plug is threaded for this rod, and will act as a nut to tighten to once it's assembled.

008.jpg


Here is the windvane/emitter section assembled... Note the hollow threaded rod keeping it all together and the new recess in the aluminum plug that keeps it straight and tight.

009.jpg


Emitter end. The step down is to secure up into the blade to allow the metal to come up a bit past where the internal diffuser plastic tube is.

010.jpg


Just about right, as far as I can tell, on spacing for the emitter to windvane neck. I will drill and tap for screws here forward of the weathring line on the emitter section, these screws will completely solidify the blade, neck, plug, etc.

011.jpg


I don't have the anchoring screws in the emitter yet but this already feels so great to hold. It looks so much better than an MR saber already, and I can tell there's no wobble in the blade, and it will be much moreso when I get it all screwed down.

Now off to make my LED String and find a better speaker.
 
Last edited:
Awesome work thus far mate! I look forward to seeing the rest of this baby finished. Makes me wanna try another Luxeon Obi ANH (the saber Heimidal posted was one i did a while back)
 
Great work sofar ... I wish I had those skills:wacko

While you're looking for your leds and a speaker you should also consider a replica bubble strip from rebelscum. This kind of lightsaber only deserves the best and most accurate don't you agree? Here's where you can find them:

http://www.therpf.com/showthread.php?t=67567

-Chaim
 
Awesome work thus far mate! I look forward to seeing the rest of this baby finished. Makes me wanna try another Luxeon Obi ANH (the saber Heimidal posted was one i did a while back)

Thanks, yo! I look forward to seeing it finished as well. I have been thinking this over in my head for about a year and just decided to pull thr trigger and tear down my busted Vader MR Saber to start it off with.

Hmmm, liking the look of that. I wonder if it could be done for a luxion saber.

Sure it could be. I am going the more complicated route of an LED string in this one, but there's plenty of room for a Luxeon.


Great work sofar ... I wish I had those skills:wacko

While you're looking for your leds and a speaker you should also consider a replica bubble strip from rebelscum. This kind of lightsaber only deserves the best and most accurate don't you agree? Here's where you can find them:

http://www.therpf.com/showthread.php?t=67567

-Chaim

Ah, I would. But looks like he's out of stock. I will definitely get a pair, as I want to make this saber match as close as I can to my first Obi, and that bubble strip isn't right either.

ObiANH_WeatheredBrass05.jpg


wow, that looks amazing. I want one! lol

They are for sale if you want them.... waves hand (no, you don't)

But I suppose if money gets tight I could part with it. What would this thing be worth? I don't ever see these available for sale anywhere, or else I would have bought one already. That's why I never bought an MR luke ROTJ or Obi,, the necks bothered me too much.
 
Or you could search for the real Texas Instruments Exactra 19 or 20 on ebay. Also a TI-2000 which is an Exactra Made in Italy by Texas Instruments :love

-Chaim
 
Or you could search for the real Texas Instruments Exactra 19 or 20 on ebay. Also a TI-2000 which is an Exactra Made in Italy by Texas Instruments :love

-Chaim

I just got two of the rebelscum calc strips in the mail yesterday! Once I get them whittled down to fit, I'll post pics. But for now, LEDS!

012.jpg

The first ten LEDs in the ladder string soldered. That was tedious.

013.jpg

A closeup of the soldering job. I bent the leads over the next LED in the chain, crimped, and snipped the excess, then a very small bead of solder to secure it together, while keeping everything as straight as I could.

014.jpg

Preassembled for wire length and fit, and just so I could see what it looked like lit up. I think once I get the LED string moved a bit closer to the emitter to get rid of that slightly dim spot at the base, and the other 54 LEDs soldered up, this saber is going to be one I am very happy with.
 
015.jpg

I decided to do a little work on this project, I found a scrap piece of delrin to attempt the battery holder/speaker housing, and it turned out to BARELY fit. Three AAA batteries fit inside the delrin tube, which is threaded at the end for the sink knob pommel, and widens out to 1 inch to hold the speaker, with enough room for a resonance chamber behind the speaker to pump up the volume a good deal. The graflex clamp fits snug on that wider spot, with cuts for the tabs to lock in. I'll probably go back and make this piece out of aluminum for stability.
016.jpg

The obnoxious switch haning out of the top of the graflex clamp is temporary till I figure out how to hide a switch in there. I am very happy that I was able to cram all that stuff into such limited space, and still hold true to the accuracy of the saber. I did have to harvest the pommel off my original saber to test, but I think I can come up with a suitable replacement.
The saber is BRIGHT and LOUD, moreso than a stock master replicas Force FX saber. I will wait till I have a bit of extra cash and finish out the LEDs in the blade, and then it will be time to weather it to match my first saber.
 
Absolutely stunning work on this. :thumbsup Thank you for sharing the pictures and letting us see the step-by-step process; I have no skills for this sort of thing, so it's a blast to see someone else do it.
 
Absolutely stunning work on this. :thumbsup Thank you for sharing the pictures and letting us see the step-by-step process; I have no skills for this sort of thing, so it's a blast to see someone else do it.

Thanks! It has been a labor of love, and I am pleased with the results so far. I have to figure out how to hide the on switch and get the rest of the LEDs, and also wait for my new pommel from Russ... and then the weathering begins!
 
Hey guys... some progress on this saber now that I have found myself a job.
017.jpg

First off, I needed to strip any rust off the grenade. There was some light surface rust, and I used a wire brush in my dremel to shine it up for bluing.
018.jpg

I'll be using Birchwood Casey Super Blue on the grenade. This will be the first time I have tried this particular product.
019.jpg

If you do this, make sure to use rubber gloves and do this in a well ventilated area. This is some noxious stuff, so it's not for kids.
020.jpg

That white residue is bad news, I blast it off with some high pressure cold water.
021.jpg

After a few cycles through the chemical and knocking the gunk off that is generated, a nice dark blue is left. I need to let this rust a bit, but it's well on the way to matching my other saber.
023.jpg

Afterwards I will weather and darken the windvane, right now it's too pristine.
022.jpg

Next up is the emitter section. I have two complete emitters to work with, and I chose the unweathered cleaner outer section to go with. This will be easier to clean up and then hit with the Super Blue for darkening.
024.jpg

After using the same process from the grenade on the emitter, I chuck it up in the lathe and use some extra fine sandpaper to clean it back down, leaving nice darkened weathering in the crevices.
025.jpg

I left more darkened blued finish on the inside emitter section.
026.jpg

I still may need to work on this area, as it's not quite as close to my other saber as I'd like.
027.jpg

Also the windvane brass black didn't take hold quite as well as the other saber. I might have to break it down again and redo that part, but it will work for now.
028.jpg

Much closer to my first saber. I still need to add some rust and tweak some values, but I think it's much closer now. The next challenge is hiding the on off switch, and to hide a speaker volume knob someplace. Probably use one of the transistors as a volume control.
I am also still awaiting my pommel from Russ.
 
Short of an all real parts OB1, this is hands down the best OB1 Ep. IV saber I've ever seen!! Kudos on the stellar work on this :thumbsup
 
Back
Top