Fire Spray 31 patrol and attack craft from Oovo IV prison

Thanks Joez much appreciated glad you got something out of it:thumbsup


Lee I actually got a little nicer one.....only because the one
in the picture had a scratch in it!! Arrrrrrrrr It's still not flawless
but realized I am not going to get a perfect one!:facepalm You
can't see anything once you put color behind it, so the cockpit
painted will make it look perfect......that's the plan.:lol
 
Great canopy Mike ! Ten times better than the ILM one !
It's hard to get perfect pulls as there always are some dust particules floating in the air and getting trapped between the buck and the PETG sheet.
The thin styrene pull over the buck is the way to go to vacform clear plastic, great job !
 
Great canopy Mike ! Ten times better than the ILM one !
It's hard to get perfect pulls as there always are some dust particules floating in the air and getting trapped between the buck and the PETG sheet.
The thin styrene pull over the buck is the way to go to vacform clear plastic, great job !

Thanks Julien......

I bought some tack cloth and tacked off the buck, then I flipped the tack
cloth over and left the buck covered right before I pulled the clear PETEG
out of the oven. I also tacked off the plastic in the oven one time while it
was heating.
 
This was almost on page 3. Just hoping to see what you're up to next on this. It's exciting to see how much great progress you've made on this Michael. :thumbsup
 
Ok so this is the new one I did the previous had a scratch
in it that was annoying me....LOL


Taped in....


I used the front part of the canopy and the rear as
templates to begin to make the parts for the cockpit
module.


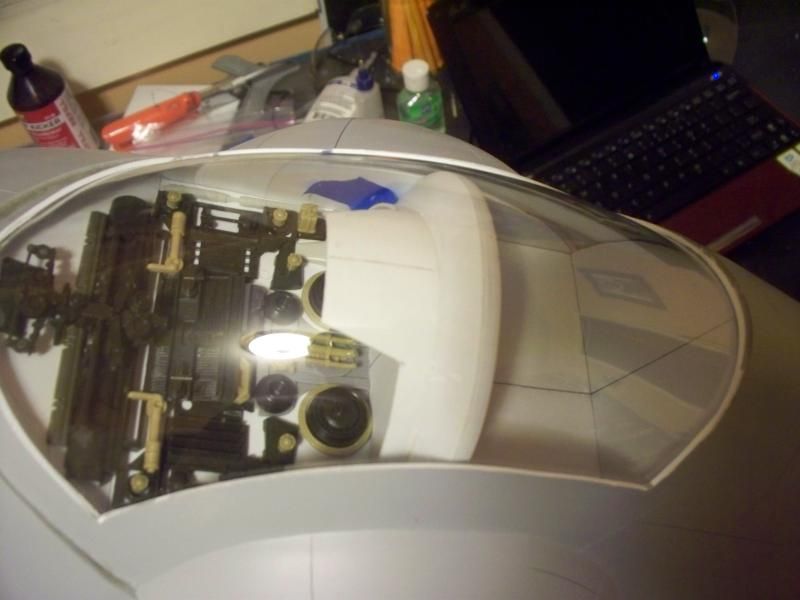
Then I glued it in.....I will just have to keep it
protected by taping it up.


Beginning of the cockpit module....I am not going
for the rounded look inside, I just don't feel like
making another buck at this point and using what
clay I have left.


Sides in place from below....


SHot with sides outside model....


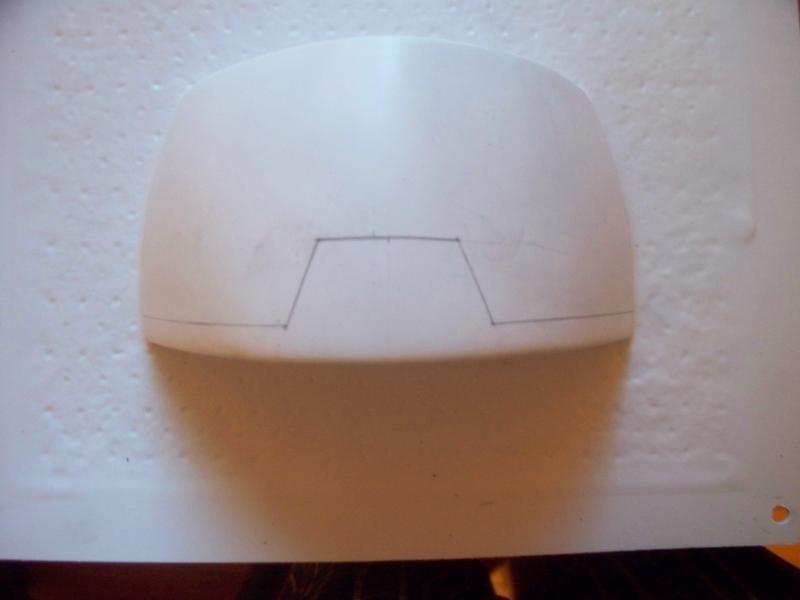
Looking at the FM kit and at the pattern I made for
the fender flares, it looked like I could find that shape
in there. SO I formed one and cut it until it was close.


After a lot of trimming with the dremel the shape
was in there! :)


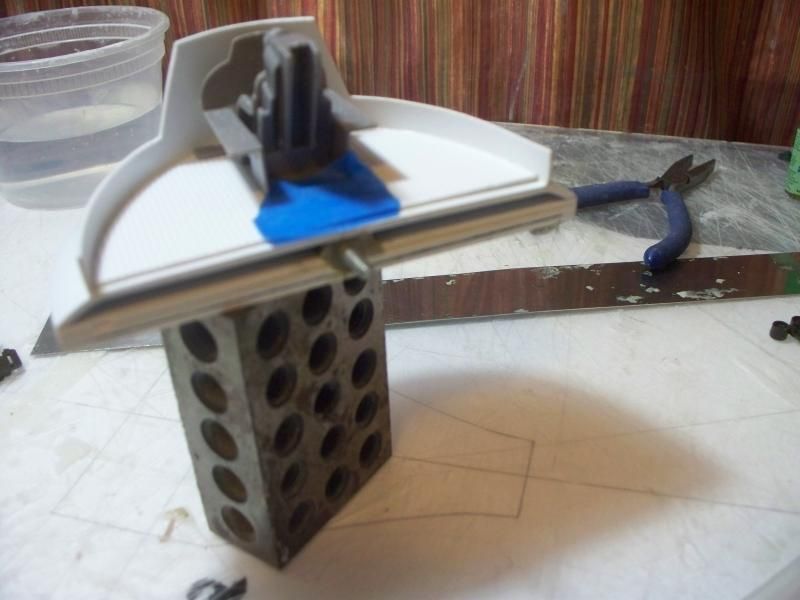
Mock up yea something like this.....


Then I just laminated some styrene
discs underneath to create the lip.
Still needs some cleaning up....
 
My HERO, That canopy came out great.

Lol. You know what works really good. That velvet cloth over the pattern

I don't know what the hell that dude was talking about!!! I should have saved the pic
of that and brought it back to him. He does that for a living I can't imagine that!
 
Wow yesterday marked 1 year since I
started this!:facepalm

I was looking for the shape of the front console I
found it in the front nose part so I formed it and cut it out.


I did some detailing on the back wall of the cockpit......


I went with a F-4 phantom pilot my model is not about Boba Fett...just a Firespray

I clayed in this bolt so it can be fixed in place with a wing nut on the opposite side of the cockpit wall


Last edited:
That looks bloody marvellous Mike, id maybe up the pilot scale though, just a thought? Love that interior, looks a nice array of junk, will be great primed! Loving this!

lee
 
That looks bloody marvellous Mike, id maybe up the pilot scale though, just a thought? Love that interior, looks a nice array of junk, will be great primed! Loving this!

lee

After the Slave hull,may I ask what else that you cant build?


Superb work there Mke,sweet:thumbsup

Don

Lee I was thinking the same i would look at it and it seemed
ok then he looked a little small. This is the pilot from that F-4
kit the X-wing engines come out of is it like 1/30th? Maybe I
need 1/24th? But when i look at the original mini the little fett
looks so small but pics are deceiving......LOL I didn't glue him
in yet, he is much bigger than the fett that comes in the FM
kit I will post pics.


Hey Don thanks funny question......LOL I don't think
it just gets easier but you get smarter and better. It's
more like you get used to doing hard things......so it's
more like an attitude "This is going to be hard but I have
done hard before.....so lets go do hard again" LOL
 
Looks stunning mate, you'll never know how much I learn from your builds, what a years its been!!!! Please hurry up n paint the thing, I can recommend pink and Green ;-)
 
That looks bloody marvellous Mike, id maybe up the pilot scale though, just a thought? Love that interior, looks a nice array of junk, will be great primed! Loving this!

lee

Here is the size difference.....hmmmm my model is about
2.30 x's bigger than the FM kit I know this pilot from the F-4 kit
is at last that.....could be the parts behind him on the wall are
out of scale?:unsure

 
Looks stunning mate, you'll never know how much I learn from your builds, what a years its been!!!! Please hurry up n paint the thing, I can recommend pink and Green ;-)

Can't you tell I am doing everything possible to stay away
from paint including starting over! LOL Thanks Guy I still have
to wrestle the bottom in again....:facepalm I could probably
handle painting it all pink or all green! LOL
 
I was looking in the big book.....you can see fett's chest
not sure if he is sitting or standing? But I think raising him
up in the seat will help sell it.....or lower the console in front
of him right now it's about eye level.
 
Phenominal work!
Just looking at SAG pg 42, and comparing the picture to your image, do you have a figure that's larger, maybe twice the size or 1.5X
039-1.jpg
 
That's looking great Mike !
The pilot looks indeed way undersized.

May I suggest something about your kitbash process ?
Instead of using several parts of the same kits in one and same area, you should not use more than 1 or 2 parts of a kit. Also what makes the Slave One cockpit interesting (and the whole ship, and even most of the models :)) is that nothing is symetrical, I would modify slighty all those thing :).

I would use less parts and smaller ones, making most of the job making styrene basic shape and layering then adding some small parts to details the whole thing and some styrene rods. I would avoid obvious parts like the M16 vents, chassis or wheels. Or add more details on them (being scratched or other kitparts) to conceal their origin !

I don't take the parts from the kits their all just thrown in one
big plastic tote. LOL I have no idea what they are or where they come
from. Makes little difference when you don't know, I try not to take
the fun out of everything. I don't think everything has to be done a
certain way. After a while copying everything to a T starts to be
a drag to me. But I will agree it does need a bigger pilot, I think I
have one now.
 
Back
Top