Final Fantasy 13 X-2 Lightning Armor - Finished

AGFRX7

Sr Member
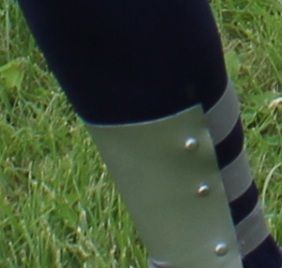
About a year ago, my friend Amie Lynn asked me to build her a suit of armor that, at that time only had two images released. The costume was the armor from Final Fantasty 13 x-2 and she needed it done in a week. So... by the grace of god... I was able to do it and she debuted it at Anime Expo last year. Here's the build photos I have:
9317d00149ee0e6cb1e4d01e4fe45756-d3l81cb.jpg


17437f529caa76af2a8292f25d9a09b8-d3l81ge.jpg
 
this was just craft foam, covered in modge podge and then sanded down and painted with metal rustolium.
final_fantasy_lightning_armor_by_agfrx7-d3l81q8.jpg

293f66c9ca86127a98de85e342dd11ed-d3l81nj.jpg
 
Last edited:
Awesome! How did you shape/curve the craft foam? Heat gun? What thickness did you use?

I tried recently to make some foam armor and...failed miserably. :| Need to do more info gathering!
 
Awesome! How did you shape/curve the craft foam? Heat gun? What thickness did you use?

I tried recently to make some foam armor and...failed miserably. :| Need to do more info gathering!

This was made using a combination of 3mm and 6mm craft foam. I made paper templates and then transfered over the design like a sewing pattern. Using a heat gun I shaped each piece and then glued them together with a combination of super glue and hot glue. The hot glue was to give a welded/soldered look to some of the seams. I then pinned it to a dress form that matched the gal's body and gave it a few thin coats of wood glue watered down slightly. Before I added my first coats, I used airsoft bb's to simulate rivtes. After those layers of brushed on glue had cured well enough, I added a couple of layers of modge podge and used a more coarse brush to simulate metal streaks similar to brushed metal. Making sure that each piece had fully cured, I then lightly sanded the surface of each piece with 600 gritt wet or dry sand paper and followed by adding primer. After the primer had dried fully, I gave it another light sand over the entire surface and started to add color. The paint I chose was a silver metallic paint used on tool boxes and other metal items. The hopes were to transform the surface from foam to metal in appearance. All in all for making this in less than a week, I'm hapy with how it came out.. especially since this was my first time working with craft foam.
 
Last edited:
and youi said you needed help in the first place.....?

Wow, just wow-alicious.

How do you create sea shell like shape? Can foam be bended that far and still maintan the shape? Even shoulder pads is marvelous.

The idea of using BB pellets is genius.
 
Wonderful! Thank you so much for the informative post!! That's very awesome of you. :D

I don't know how much bb pellets are...but for rivets on some small pieces I've made, I've snipped the round tops off of those duo tang bendy things. A bit flatter and rivet-y plus, you get a whole carton for a buck!

58121.gif


ankle.jpg


( actually, I've snipped the tops for nailhead type studs on clothing pieces...for the foam I actually poked them through and bent the prongs to assist in holding the elastic in place...functional AND stylish! haha )
 
Last edited:
Wonderful! Thank you so much for the informative post!! That's very awesome of you.
You're very welcome. =) Those brads work well in my opinion. The look I was going for needed a little more rounded top, so I made a starter hole, put a drop of superglue in the hole and pushed the bb half way in the foam. After the layers of glue and such, they gave me exactly the look I was shooting for. As you pointed out, the brads can also fasten things as well, whereas the BB's are just for looks.

How do you create sea shell like shape? Can foam be bended that far and still maintan the shape? Even shoulder pads is marvelous.
Which part are you refering to? The lower half of the breastplate?
 
It's not very often that I see craft foam looking that good. Now that I've seen what you've done with a heat gun, I might reconsider my armor building methods. It's certainly cheaper than veg-tanned leather, and looks just as quick.

Great job!
 
Wonderful! Thank you so much for the informative post!! That's very awesome of you. :D

I don't know how much bb pellets are...but for rivets on some small pieces I've made, I've snipped the round tops off of those duo tang bendy things. A bit flatter and rivet-y plus, you get a whole carton for a buck!

58121.gif


ankle.jpg


( actually, I've snipped the tops for nailhead type studs on clothing pieces...for the foam I actually poked them through and bent the prongs to assist in holding the elastic in place...functional AND stylish! haha )


Haha, I've been using these as "rivets" for costumes for years.
 
Yes the lowerside, looks not like a sea shell to me now.:facepalm

The breastplate is made in two main parts. The upper and lower section; the Lower section was cut first to have that scalloped look to it, and then using a heat gun, creased and shaped to be concaved. The upper was shaped similarly with the exception that the collar was attached to the upper section which was curved to receive the collar. The back side of the collar was open so that the wearer could slide in and out of it and then attach the two open parts like a belt and then attach it to the upper section of the backplate. By doing it this way I was able to get the look I was going for without making it too complicated... although it sounds like it is in a way lol
 
Back
Top