RedbirdXlll
New Member
I just finished this commission by a very good friend of mine, and I decided I should outline the build here for anyone who would like to follow the process and see how I did it. This was one of my first big replica prop builds, and I learned a ton.
Here are a few pics of the final piece, and then below that I'll rewind to a few months ago when this whole process began:


ALRIGHT.
First of all, I want to thank my good friend for coming to me and asking me to build these amazing swords. I LOVE their design and I was super excited about them throughout the whole process, even when it got challenging. And believe me, it was challenging.
So it all started with this reference image:

I had never seen this sword in full detail so this was incredibly exciting. The first thing I thought was "oh my god I want to build this this is so cool." My second thought was "how in the hell am I going to make this handle."
So I went and I gathered more reference to see if I could parse out how this thing was put together. Kult of Athena turned out to be an invaluable source for reference and really allowed me to understand how this handle was constructed. It's not phenomenally complicated, really. What's challenging about it is how geometric it is; it's not something you can easily hand fabricate (especially if you're like me and not yet a pro at non-organic sculpting and shaping), and it was difficult for me for a long time to figure out what the alternative to hand shaping this piece was.


I was fortunate in that my commissioner gave me several months notice for when they wanted these swords completed, so I was able to take a few months to mull over this handle and how I wanted to tackle it. I'm relatively new to the prop building industry, and am still building my skill set, so for me it was a matter of choosing which method of fabrication I wanted to do, from a list of methods I had never done before. I don't want to say lesser of many evils, but in a sense it was; I had to choose which one I thought I could pick up the fastest and really start cranking these out. I could have made it out of wood, or insulation foam (I actually attempted that at one point and met with no success), or, as a co-worker of mine suggested, I could 3D print it.
3D printing is still a new technology to me - so new in fact that I hadn't even considered it until my co-worker and good friend reminded me that we actually have one at work and employees get a great per gram price to print. So I thought, alright, I'll give this a shot! I had taken a few 3D modeling classes Freshman year of college, back when I thought I wanted to major in game design, so I had a rudimentary understanding of how the process worked. But I didn't have easy access to Maya, which was what I learned on,and I loathe that program with a flaming passion SO, after a little research, I cam across Blender, which I'm sure most of you know, but for those of you who don't: Blender is an AWESOME and FREE 3D modeling program that lets you do a LOT. It's really awesome and you should check it out.
But I had never used Blender before so I pulled up some YouTube tutorials and made a cup, learned some basic hot keys, and thought 'alright this is easy! Let's go make a sword handle!'
This image ended up being my major reference for the handle build. It's a piece of concept art that is great because it shows the handle from multiple angles and gives you great cross cuts so you can see the shape of the handles throughout. It is NOT, however, a high resolution image. So that was something I struggled with.

For those of you who know Blender well, this next part will be painful.
I started this handle with a cylinder.


I used the subdivide and scale functions to get the basic silhouette of the handle, and then things got messy. I'm a sculptor and NOT a math person. Blender is a math program. I can make all kinds of cool organic things in Scluptris, but if you waltz into Blender thinking you can make the mesh do what you want like you can in Sculptris, you're gonna have a bad time. Take the time to learn Blender, how it works, how the mesh is affected by what you're doing, AND, learn about normals.
Here's what I ended up with after a long time of fiddling and head scratching. The top portion of the sword in particular was very challenging for me as far as how to go about shaping it from the rounded form that I started with.

The top still wasn't right, but my reference was too low res for me to really get an idea of the shape. This is where the Kult of Athena reference images came in handy. Many hours of deleting vertices and recreating faces later, I ended up with this, which was (I thought) the final model that I would use for printing:

I changed a couple of things in this model compared to what I originally started with - I didn't include the triangle details and a lot of the other detailing. That was too much for my noobie Blender brain to handle. So instead, I adapted this model to be able to take craft foam details laid on top of of the 3D printed base. So some parts are smaller, some are elongated to account for the thickness of the foam, etc.
Then it was time to print! With great eagerness, excitement, and yes, a bit of pride, I sent in my file with basic instructions to be printed.
 Supports for days.
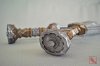
Unfortunately, this print failed.
Miserably.

 <---- Abysmal failure.
That was upsetting. I couldn't figure out why it failed so horribly. Then, one of my other brilliant and gracious co-workers took a look at my model and realized that all of my normals were messed up. Basically, the printer was reading various faces as outward facing and inward facing based on my model - but my faces, because of how messed up my normals were, were all flip flopped around, and so the printer tried to connect outward faces that shouldn't have been connected so I ended up with those weird walls encasing my handle.
My co-worker, glorious human that he is, spent an hour going through and flipping my normals and making sure everything was properly oriented. He was an absolute life saver. I cannot impress the importance of learning about normals and how to use a program properly!
So once it was all fixed, it was off to print again!


And it printed beautifully!


I made a blueprint of the blade using Inkscape, which is AWESOME, and laid it next to the handle so I could see the overall silhouette of the sword.

Many squeals of excitement were had.
Then it was blade shaping time! The blades were shaped from blue insulation foam. I cut down thick blocks to the thickness I wanted for the thickest part of the blades (how many times can I say "thick" in one sentence) and cut out the basic silhouette using a band saw.


Then I drew out my details with a sharpie, and started sanding.


The beveled edge was sanded almost exclusively using some little sanding sticks that I made out of wooden shivs they had in the shop with 180 grit sandpaper super glued around it. They worked phenomenally well, actually. The major planes of the swords were smoothed down using a sanding block and the biceps of another one of my co-workers. That man should make surf boards. He helped me achieve a wonderfully flat plane to work on.
The swords were almost entirely hand-sanded, with the exception of some larger planes that needed to be made that I did with a palm sander.
Then, it was back to the handles for a while, which I'll pick up in the next post!
Here are a few pics of the final piece, and then below that I'll rewind to a few months ago when this whole process began:
ALRIGHT.
First of all, I want to thank my good friend for coming to me and asking me to build these amazing swords. I LOVE their design and I was super excited about them throughout the whole process, even when it got challenging. And believe me, it was challenging.
So it all started with this reference image:
I had never seen this sword in full detail so this was incredibly exciting. The first thing I thought was "oh my god I want to build this this is so cool." My second thought was "how in the hell am I going to make this handle."
So I went and I gathered more reference to see if I could parse out how this thing was put together. Kult of Athena turned out to be an invaluable source for reference and really allowed me to understand how this handle was constructed. It's not phenomenally complicated, really. What's challenging about it is how geometric it is; it's not something you can easily hand fabricate (especially if you're like me and not yet a pro at non-organic sculpting and shaping), and it was difficult for me for a long time to figure out what the alternative to hand shaping this piece was.
I was fortunate in that my commissioner gave me several months notice for when they wanted these swords completed, so I was able to take a few months to mull over this handle and how I wanted to tackle it. I'm relatively new to the prop building industry, and am still building my skill set, so for me it was a matter of choosing which method of fabrication I wanted to do, from a list of methods I had never done before. I don't want to say lesser of many evils, but in a sense it was; I had to choose which one I thought I could pick up the fastest and really start cranking these out. I could have made it out of wood, or insulation foam (I actually attempted that at one point and met with no success), or, as a co-worker of mine suggested, I could 3D print it.
3D printing is still a new technology to me - so new in fact that I hadn't even considered it until my co-worker and good friend reminded me that we actually have one at work and employees get a great per gram price to print. So I thought, alright, I'll give this a shot! I had taken a few 3D modeling classes Freshman year of college, back when I thought I wanted to major in game design, so I had a rudimentary understanding of how the process worked. But I didn't have easy access to Maya, which was what I learned on,and I loathe that program with a flaming passion SO, after a little research, I cam across Blender, which I'm sure most of you know, but for those of you who don't: Blender is an AWESOME and FREE 3D modeling program that lets you do a LOT. It's really awesome and you should check it out.
But I had never used Blender before so I pulled up some YouTube tutorials and made a cup, learned some basic hot keys, and thought 'alright this is easy! Let's go make a sword handle!'
This image ended up being my major reference for the handle build. It's a piece of concept art that is great because it shows the handle from multiple angles and gives you great cross cuts so you can see the shape of the handles throughout. It is NOT, however, a high resolution image. So that was something I struggled with.
For those of you who know Blender well, this next part will be painful.
I started this handle with a cylinder.
I used the subdivide and scale functions to get the basic silhouette of the handle, and then things got messy. I'm a sculptor and NOT a math person. Blender is a math program. I can make all kinds of cool organic things in Scluptris, but if you waltz into Blender thinking you can make the mesh do what you want like you can in Sculptris, you're gonna have a bad time. Take the time to learn Blender, how it works, how the mesh is affected by what you're doing, AND, learn about normals.
Here's what I ended up with after a long time of fiddling and head scratching. The top portion of the sword in particular was very challenging for me as far as how to go about shaping it from the rounded form that I started with.
The top still wasn't right, but my reference was too low res for me to really get an idea of the shape. This is where the Kult of Athena reference images came in handy. Many hours of deleting vertices and recreating faces later, I ended up with this, which was (I thought) the final model that I would use for printing:
I changed a couple of things in this model compared to what I originally started with - I didn't include the triangle details and a lot of the other detailing. That was too much for my noobie Blender brain to handle. So instead, I adapted this model to be able to take craft foam details laid on top of of the 3D printed base. So some parts are smaller, some are elongated to account for the thickness of the foam, etc.
Then it was time to print! With great eagerness, excitement, and yes, a bit of pride, I sent in my file with basic instructions to be printed.
Supports for days.Unfortunately, this print failed.
Miserably.
<---- Abysmal failure. That was upsetting. I couldn't figure out why it failed so horribly. Then, one of my other brilliant and gracious co-workers took a look at my model and realized that all of my normals were messed up. Basically, the printer was reading various faces as outward facing and inward facing based on my model - but my faces, because of how messed up my normals were, were all flip flopped around, and so the printer tried to connect outward faces that shouldn't have been connected so I ended up with those weird walls encasing my handle.
My co-worker, glorious human that he is, spent an hour going through and flipping my normals and making sure everything was properly oriented. He was an absolute life saver. I cannot impress the importance of learning about normals and how to use a program properly!
So once it was all fixed, it was off to print again!
And it printed beautifully!
I made a blueprint of the blade using Inkscape, which is AWESOME, and laid it next to the handle so I could see the overall silhouette of the sword.
Many squeals of excitement were had.
Then it was blade shaping time! The blades were shaped from blue insulation foam. I cut down thick blocks to the thickness I wanted for the thickest part of the blades (how many times can I say "thick" in one sentence) and cut out the basic silhouette using a band saw.
Then I drew out my details with a sharpie, and started sanding.
The beveled edge was sanded almost exclusively using some little sanding sticks that I made out of wooden shivs they had in the shop with 180 grit sandpaper super glued around it. They worked phenomenally well, actually. The major planes of the swords were smoothed down using a sanding block and the biceps of another one of my co-workers. That man should make surf boards. He helped me achieve a wonderfully flat plane to work on.
The swords were almost entirely hand-sanded, with the exception of some larger planes that needed to be made that I did with a palm sander.
Then, it was back to the handles for a while, which I'll pick up in the next post!