Unlimited Run Fallout 4 Holotapes, functional and prop versions

zapwizard

Sr Member
RPF PREMIUM MEMBER
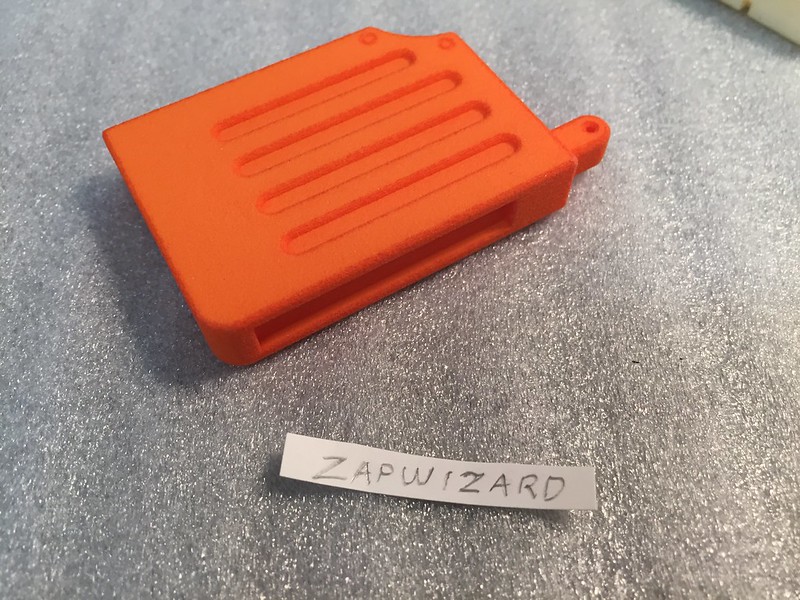
I have designed a Prop Holotape from Fallout 4. These Holotapes are part of my larger Pip-Boy replica project.

You can order these from my Shapeways shop.


25063746749_933bb2b9de_c.jpg


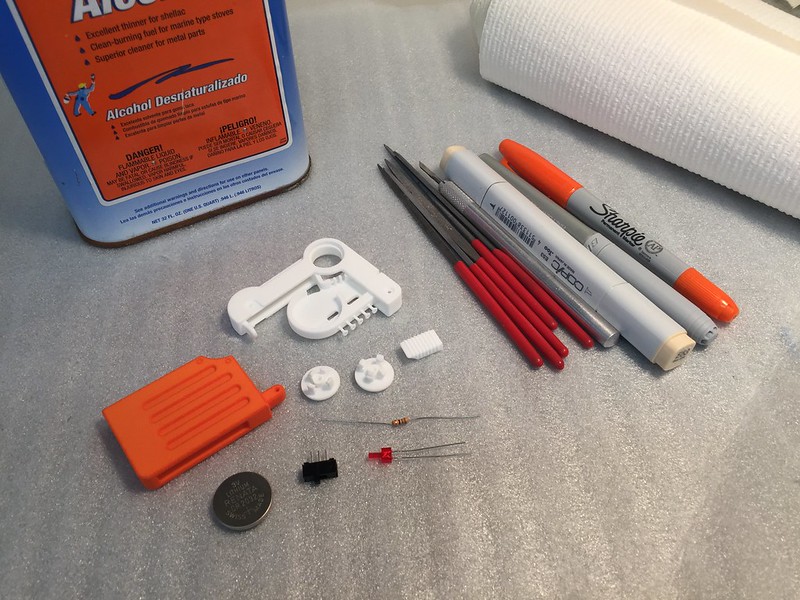
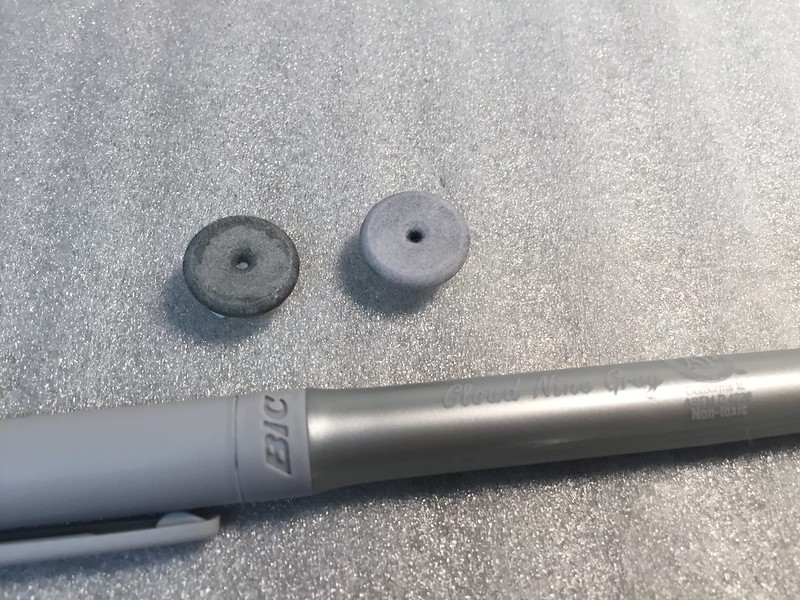
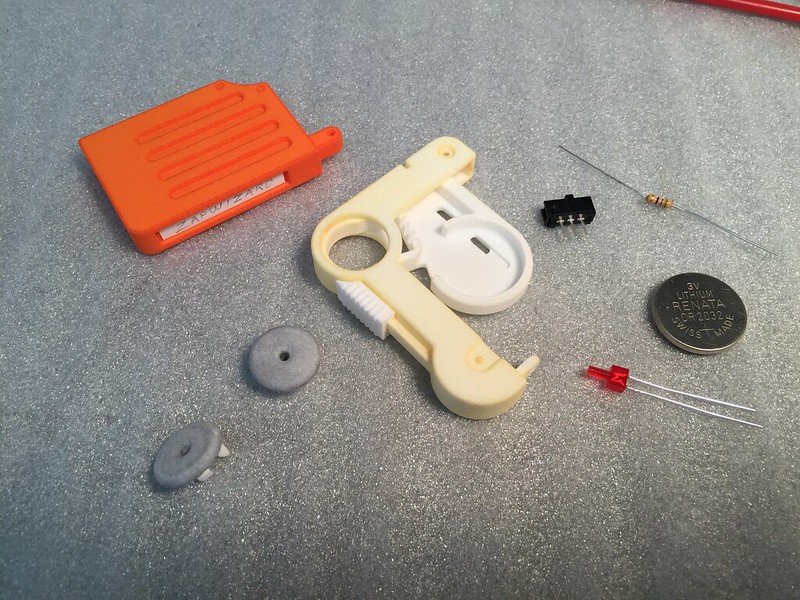
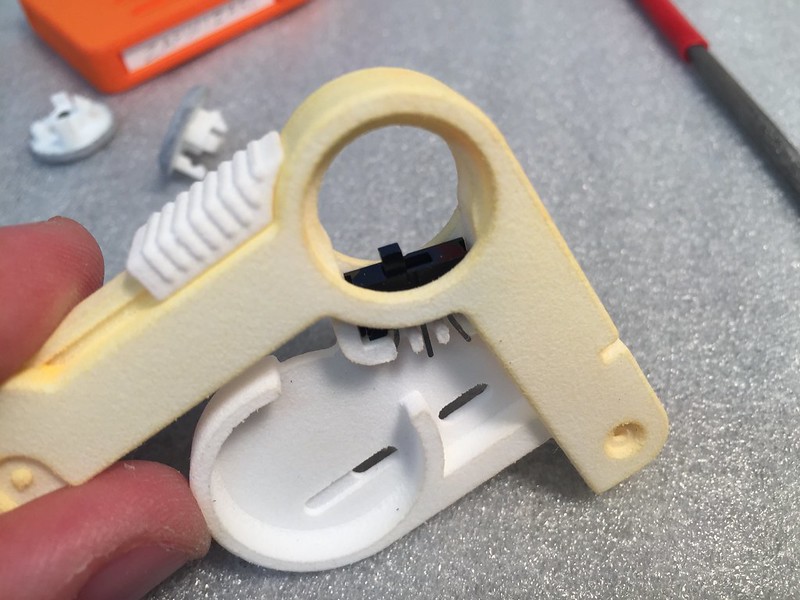
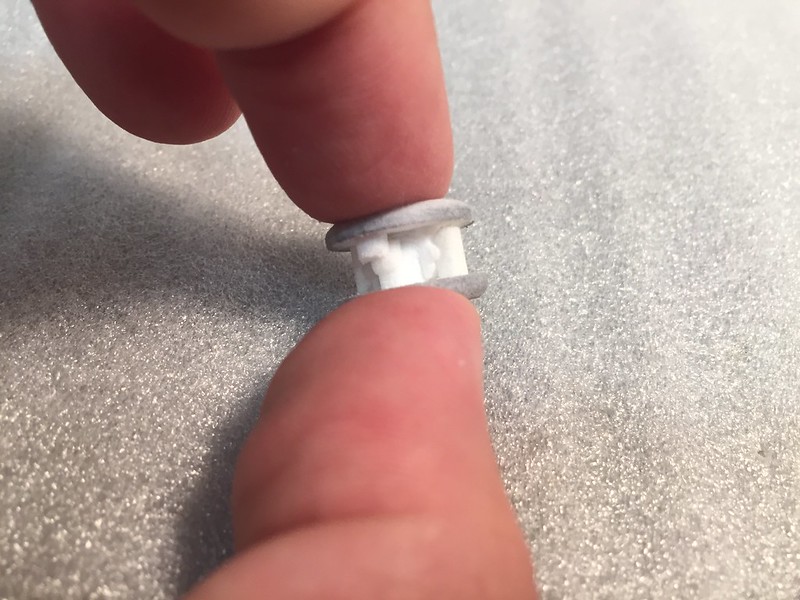
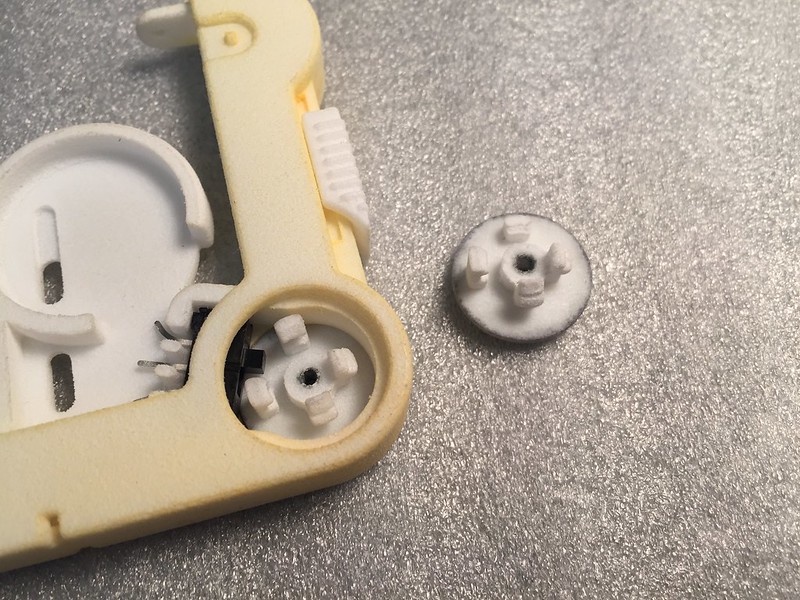
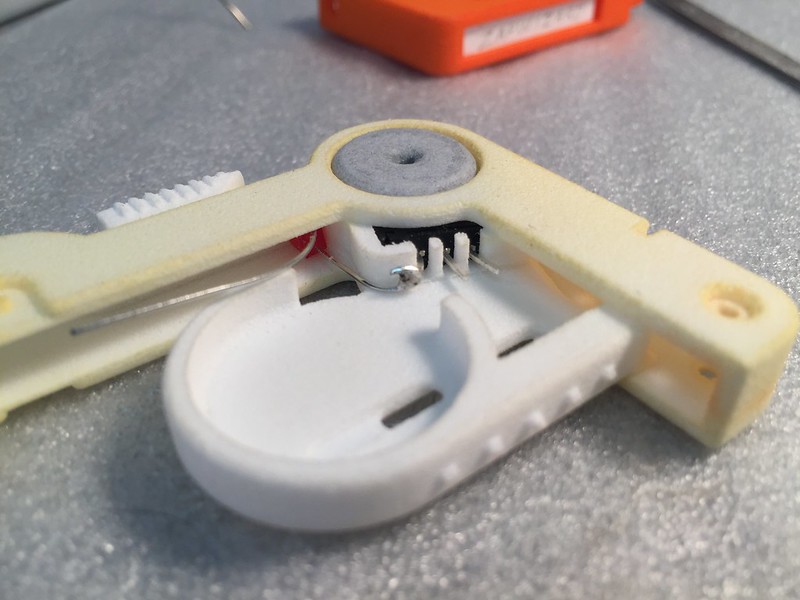
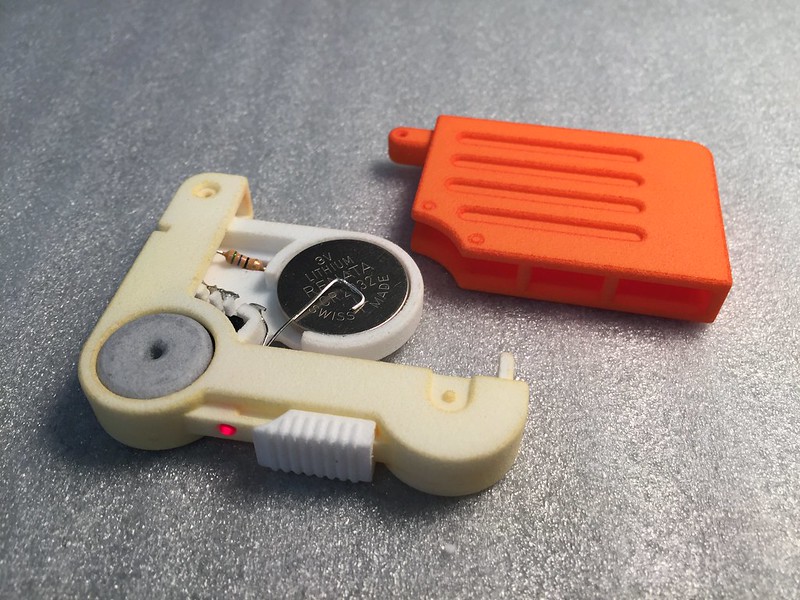
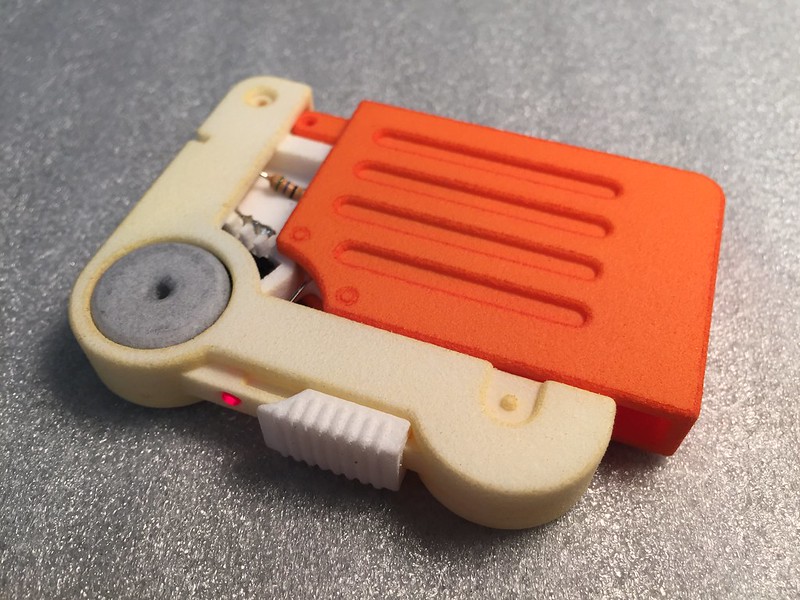
The "Prop" version comes with 3D printed screws, which can be used to assemble the Holotape. (Beta feature), you can still use real metal screws. It can also be upgraded with a LED, switch and battery to act like a simulated holotape.
You need to order the white and orange portions of the functional model separately.

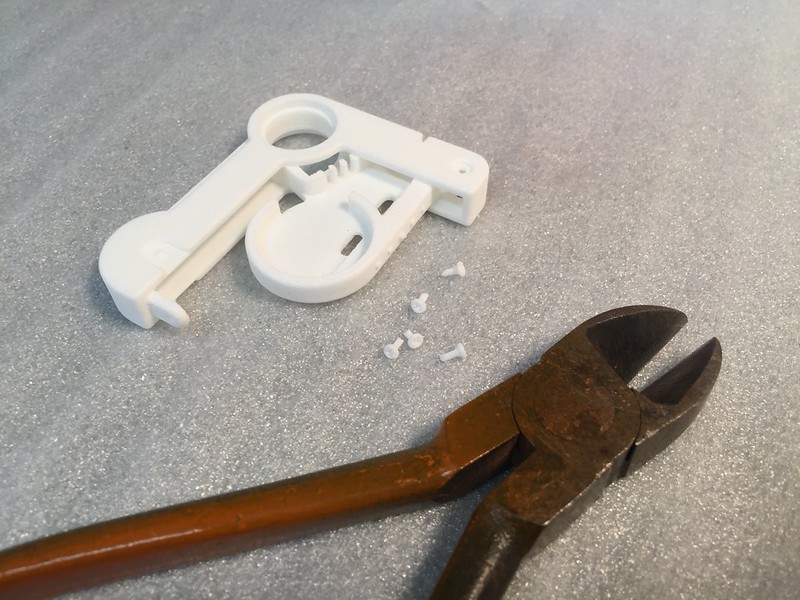
You can assemble the model using real metal screws:
3 qty, Screw, #0x0.125L, Plastic tapping, McMaster, 99461A505

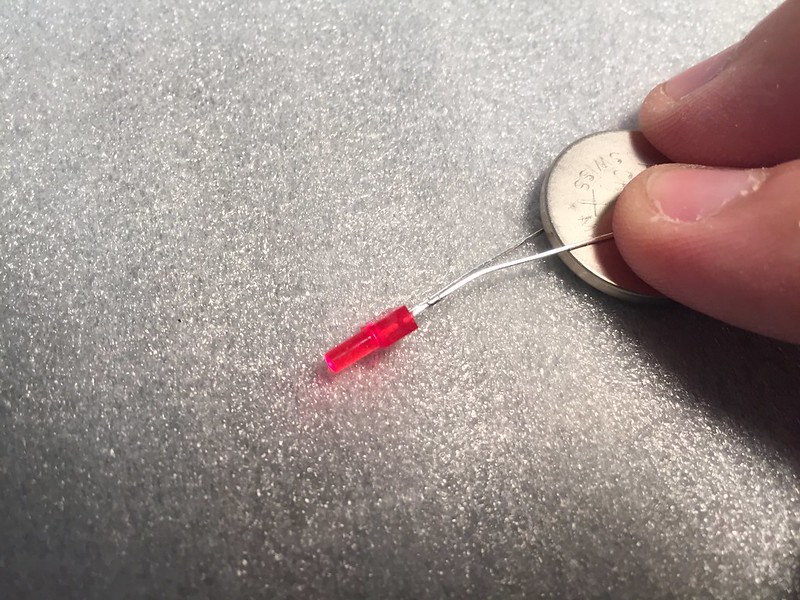
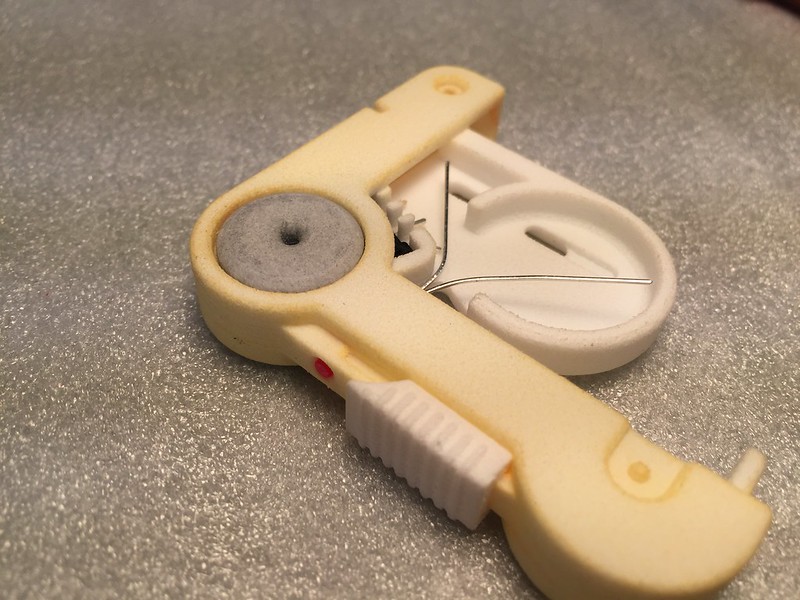
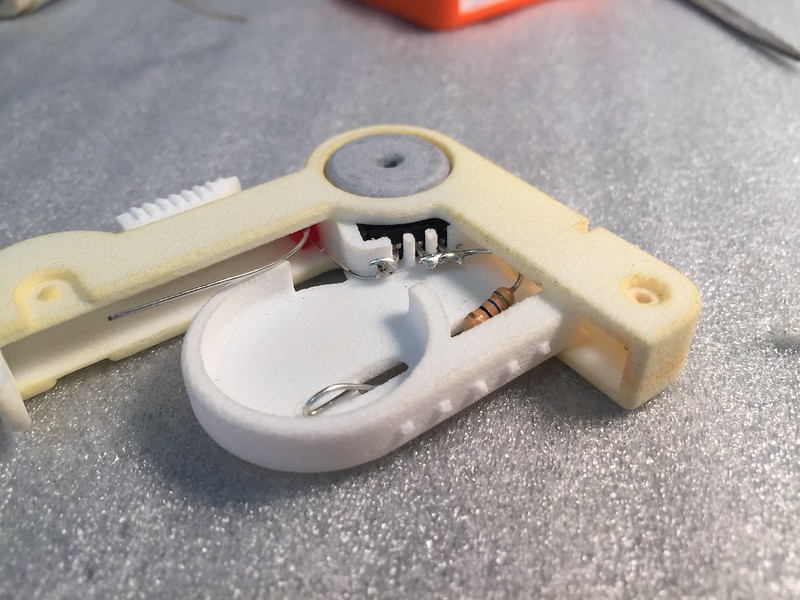
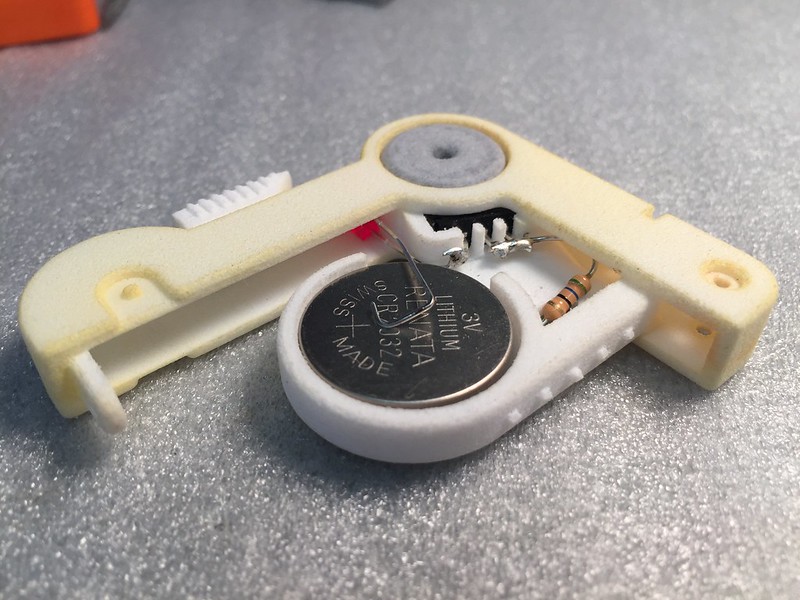
You can also add a LED, resistor, switch and battery to make the prop into a simulated optical Holotape.

See the next post for part and assembly instructions

-------------

25821118621_20fb54f535_c.jpg


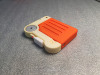
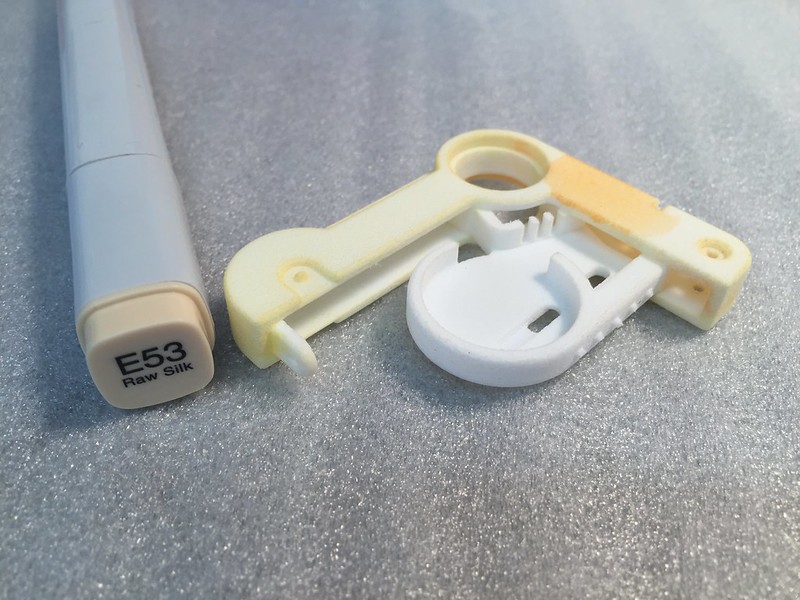
Assembled and dyed prop

-------------

KhsSPSZ.gif


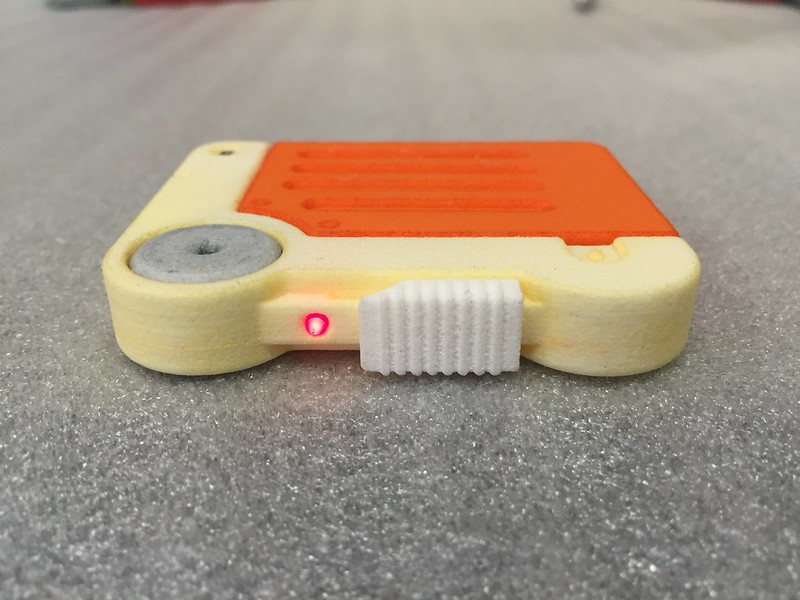
Switchable LED, and moving dust door.

Video version:


----------------------


25335216751_82654ff613_c.jpg


Fits with the Pip-Boy edition

----------------------
 

Attachments

  • 25063746749_933bb2b9de_c.jpg
    25063746749_933bb2b9de_c.jpg
    55 KB · Views: 2,276
  • 25063746749_933bb2b9de_c.jpg
    25063746749_933bb2b9de_c.jpg
    55 KB · Views: 326
  • 25821118621_20fb54f535_c.jpg
    25821118621_20fb54f535_c.jpg
    182.9 KB · Views: 1,099
  • 25821118621_20fb54f535_c.jpg
    25821118621_20fb54f535_c.jpg
    182.9 KB · Views: 300
  • 25063746749_933bb2b9de_c.jpg
    25063746749_933bb2b9de_c.jpg
    55 KB · Views: 413
  • 25821118621_20fb54f535_c.jpg
    25821118621_20fb54f535_c.jpg
    182.9 KB · Views: 333
  • KhsSPSZ.gif
    7.2 MB · Views: 370
  • KhsSPSZ.gif
    KhsSPSZ.gif
    7.2 MB · Views: 389
  • 25063746749_933bb2b9de_c.jpg
    25063746749_933bb2b9de_c.jpg
    55 KB · Views: 302
  • 25821118621_20fb54f535_c.jpg
    25821118621_20fb54f535_c.jpg
    182.9 KB · Views: 298
  • KhsSPSZ.gif
    KhsSPSZ.gif
    7.2 MB · Views: 368
  • 25335216751_82654ff613_c.jpg
    25335216751_82654ff613_c.jpg
    104.4 KB · Views: 317
  • KhsSPSZ.gif
    KhsSPSZ.gif
    7.2 MB · Views: 319
  • 25335216751_82654ff613_c.jpg
    25335216751_82654ff613_c.jpg
    104.4 KB · Views: 612
  • 25335216751_82654ff613_c.jpg
    25335216751_82654ff613_c.jpg
    104.4 KB · Views: 344
Last edited by a moderator:


Parts needed:
-White 3D printed parts
-Orange 3D printed part
-1 qty, LED, 2mm Red, Panasonic, LN222RPX
-1qty CR2032 Battery Buy this part locally to save on Digikey Shipping. They are available at almost any grocery, convenience or electronics store.
-1 qty, Slide Switch, E-Switch EG1218
-1 qty, Axial Resistor, 1/4W 56 Ohm
-3qty, #0-42 plastic tapping screws

For this design I only needed the files and exacto-knife when fitting the spindle together. Everything else is direct from the 3D print, no sanding needed.

--------------


If you didn't order the screws, you can use the faux 3D printed screws provided as part of the 3D printed model.
Simply clip them off of the rest of the white parts. 5 faux screws are a included incase you lose or break one.

--------------


Next dye the larger portion of the Holotape. I used a Copic brand marker, "Raw Silk" color. The marker goes on darker then you would expect. So I first apply the marker, then use denatured alcohol to remove as much as possible. This left a nice off-white finish on the part. You could also use an airbrush to paint the surface.

--------------


This image more clearly shows the before and after effect of dying the parts. On the left is the part after applying the marker, and on the right is the part after removing the marker.
The grey color here is "Cloud Nine Grey" from BIC.

--------------


The orange parts comes pre-dyed by Shapeways and needs no additional work.
I made a label to the orange part by cutting up a adhesive shipping label.

--------------


The dust cover door simply snaps onto the rest of the assembly.

--------------


Next up is the electronics.

--------------


Install the toggle switch. It simply slides into position, no glue needed.
To temporary hold it in place, you can splay out the legs a bit.

--------------


[

The two halves of the spindle are designed to snap together around the switch. I found I did need to carefully file the snap-fit parts a bit to get them to mate, even then one leg ended up breaking off. Even with three legs the spindle holes together well. You can separate the two parts by twisting them apart from each other.
You can also glue the two halves together if needed. Take care not to get glue on the edges or switch.

--------------


Test the LED and battery. You can do this for a few seconds without the resistor in the loop.
Take note of which leg of the LED needs to contact the positive (+) side of the battery. It should be the longer leg of the LED.
Install the LED into the hole. I found that test-fitting it from the back helped clear the hole of powder, but no drilling was needed.

Bend the short leg of the LED towards the switch, and the long leg towards the battery holder. Take care that the legs don't cross.

--------------


Clip, and then solder the short leg of the LED to the nearest terminal on the switch.

--------------


Bend on end of the resistor into a small loop. The loop should be no larger than the recess shown in the battery holder area. Position the loop such that it acts like a spring against the battery.

The other end of the resistor goes up into the slot, and solders to the other two terminals on the switch.

--------------


Install the battery. Then bend the long-leg of the LED into a loop. You should be able to twist the spindle and test the circuit. If the LED doesn't light up you may have wired it backwards. If you did this you can simply flip over the battery, however you will need a piece of electrical tape to insulate the leg of the LED against the edge of the battery.

--------------


The orange portion should easily slide into the rest of the assembly. Secure the orange portion with screws, or use the faux screws as pins.

--------------


Assembly is complete, enjoy your new Holotape and show it off to your friends.
 
25924626165_80d2dbfbfa_c.jpg

(Rendering!)

For those who haven't played the game, there are five mini-games that come on Holotapes.
These effectively look like old video game cartridges. What I did was design a new piece to replace the orange component. This piece is 0.5mm thinner on three sides, in order to accept the application of an adhesive label.

Now if you want to build a game version of the Holotape, you just order the "Label ready" component. You can order it in white and dye it, or try and see if you want to use one of the shapeways pre-dyed colors.

------------------

25898721976_d98894b231_c.jpg


25624052230_12a7ee39cd_c.jpg


25295919353_dd720bfa7f_c.jpg


25291926094_72174833fe_c.jpg


25898722646_bb037b7fd4_c.jpg


I also designed artwork for each holotape. I extracted the in-game texture for each tape. The in-game texture didn't included a backside, so I made one up. Carefully matching the existing themes. I also applied a halftone effect over the whole thing to simulate a cheaply printed design.
Print the images at 49.6mm wide in order to scale correctly to the Holotape

Note, the middle text on each is flipped to keep in line with how the label looks in-game.

Collect all five!

------------------
 
I bought an holotape from you, and it looks amazing! I'm still waiting for the switch as I couldn't find one in shop for some reasons. I was wondering, do we ever see the led light in the game? I can't find anything from it for some reasons. I have bought a clear led that lights up red, thought it would look nicer, but I was wondering if it was ever seen how it looked under this sliding bit...

zapwizard
 
Last edited by a moderator:
No, you never see the LED on the Holotape in-game, nor do you see the dust door open. That was my own artistic licence.

The switch can be purchased from Digikey. As well as the LED. (linked in the 2nd post)

If you swap the LED, make sure it's 2mm, not the more common 3mm size. Most clear LEDs are ultra-bright, I selected a less bright "indicator" light. If you find the LED you selected to be too bright you can change the resistor, or use it as a holotape flashlight.

Yeah, I'm in the UK, so I'm trying to find these here ;P

For the led, I carefully picked a 2mm like indicated. I guess, I'll know when it will be installed ahah! Thanks!
 
You would probably have to try a variety of resistors to determine the correct brightness. You could also use a small 10K Ohm potentiometer which would allow you to adjust the brightness.

I did see that RS components carries the LED, but it has a minimum order quantity.
Mouser.UK lists the switch, but it won't be in stock until next month, and they may operate the same as Digikey.

I think I found their equivalent on Ebay, but I'll be leaving soon, so I'll try it out after my holidays x)
 
This is a unusual sort of post, but hopefully within the RPF rules.

I have been working for years on a design for the Fallout 4 Pip-Boy 3000 Mk IV. However the work isn't finished, and I have moved on to other projects.
So I am releasing the CAD files to the community to continue the project.

To recoup some costs for my efforts, I am making the CAD files available to anyone who purchases an item on my Shapeways store. The Holotape is of course the obvious choice.

Once you purchase an item: E-mail me (zapwizard+holotape at gmail dot com), or message me on the RPF, or Shapeways with the order number. If you PM me, please include your e-mail address for access. (What ever you use for google login). Then, once I confirmed your order, I will send you access to the files via Google Drive.
 
You do some amazing work, I'm having a blast with these tapes! I know this thread has been silent for quite a while but by any chance do you have the art work for Nuka Tapper or Cpt. Cosmos in Jangles Big Day?
 
I haven't made those, I have quite a few on a list to make. I got to dig up the photoshop template I made.
 

Your message may be considered spam for the following reasons:

If you wish to reply despite these issues, check the box below before replying.
Be aware that malicious compliance may result in more severe penalties.
Back
Top