Empire Strikes Back Dak Ralter Helmet Build

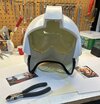
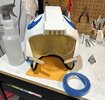
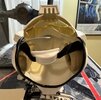
The next step is to add some foam inside the helmet. The easiest way to glue it in place is to use some glue spray.
First, I use some 220 grit to lightly sand the inside of the helmet, then measure the inside with a piece of paper that's used as a template to cut out the foam. Once cut out and test fitted, I spray the inside of the helmet and then one side of the foam.
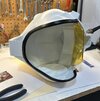
After pressing the foam inside the helmet for a few minutes, I test fit the visor and check the reference photos to make sure it's in the right spot.

With that done, I mark inside the helmet with a pencil where the visor should go:
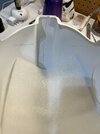
IMG_5831.JPG

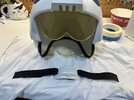
I cut some narrow pieces of foam that will act as a brow that should go just behind the visor. These are placed just behind the two lines using more glue spray. Once the glue sets, I apply contact cement to the edge of the visor and then place it behind the brow pieces:
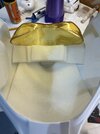
IMG_5832.JPG
 
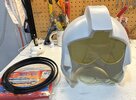
The glue has sent on the visor, so now is a good time to add the car/truck trim:

IMG_5843.JPG

I did a quick measure reference and then cut it to length with a wire cutter. The hard part was getting around the very bottom of the helmet, so I used a heat gun and a screw driver to help open up the trim:

IMG_5844.JPG IMG_5845.JPG

I used a little contact cement to keep the ends in place.

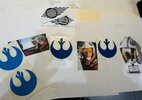
Next up are the blue emblems. Looking at what I have, I've decided to go with the darker blue vinyl decals. The lighter blue ones may work better for an ANH helmet:

IMG_5846.JPG
 
The standard procedure for applying the vinyl decals is to use soapy water in a spray bottle applied to the surface (helmet) and to the back of the decal. The recipe for the water is one drop of dishwashing detergent to one quart of water (4 cups). The spray bottle in the picture is one quart, so I filled it with water and added the one drop of detergent, shaking the bottle slightly.

The trick to removing the decal is to use painter's or masking tape on top of the decal to remove it from the backing. The back of the decal then gets sprayed with the water along with the surface of the helmet. It took some patience to remove the covering from the actual vinyl once it was on the helmet, but using a heat gun seemed to help.

IMG_5848.JPG

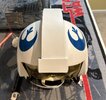
I used a plastic card to help smooth down the decal, removing any air bubbles between it and the helmet. Once in place, I realized that it was a good time to attach the mohawk front piece, so I did that with a little contact cement. At that point, I let everything set in place over night.
 
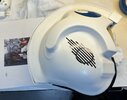
Now on to the side details. These are really tricky due to the very small rectangular pieces near the center of the entire decal. I had some trouble removing these from the backing, so I used a heat gun to try to loosen the glue a bit. Then, I used some painter's tape to pull the decal off. It seemed to work, but I also used a putty knife to help release them from the backing. I also used a little of the soapy water.

IMG_5849.JPG

With one side done, I left it to dry. I happened to be in the Dollar Store today, so I picked up some actual masking tape hoping to avoid using more of the expensive painter's tape.
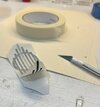
I used two pieces, one overlapping the other to help get the entire decal off the backing. I also used an X-acto knife to help it along:


IMG_5851.JPG

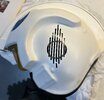
Once on the helmet, it was a real chore to get the vinyl off of the tape, so using the painter's tape may have been better.
I used the putty knife to get it started. Due to all of the small pieces, I tried rolling my finger over the entire decal while peeling back the tape and that seemed to do it.

IMG_5852.JPG

So we're just about done. The final detail left is the chin cup.
 
The chin cup is ready to go.
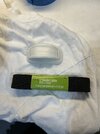
I'm using 1" braided elastic from Joann's. This stuff has been hard to find recently:


IMG_5853.JPG

I ran some of the elastic on the inside of the measurement and then cut it to length. Not much is needed.
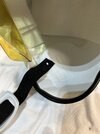
This version of the helmet uses the elastic on the inside of the chin cup:

IMG_5854.JPG

I'm going to attempt to use contact cement to keep it in place. We'll see how it goes.
 
I let the contact cement dry overnight and it seems to be working, so here's how I did it: I used some 220 grit to sand the area where the elastic needed to be, then applied a generous amount of glue. I cut a hole near the end of the elastic to help anchor the cement:


IMG_5856.JPG

I did the same with the other side and then re-attached the ear cups. The ear cups just cover the elastic to help keep it in place, just in case.

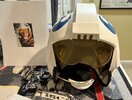
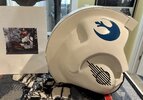
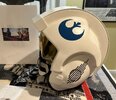
And it's finished! Here's some beauty shots:

IMG_5859.JPGIMG_5864.JPG IMG_5860.JPG IMG_5861.JPG IMG_5862.JPG IMG_5863.JPG
 
Last edited:
Back
Top