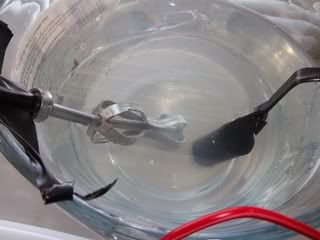
Electro Etching - Brass

amg

Active Member
Hi Y'all :)

I'm about to have a go at electro-etching some brass tubing.
Looking to use a salt bath or copper sulphate as the electrolyte and a 12V car battery charger that produces 2.7amps. The aim is to use electrical tape & sign vinyl as the resist. The tape inside the tube will help hold on the wires.

How To Electro-Etch a Solid Metal Plaque

Prepare-to-Electro-Etch.jpg


I'm fairly confident I'm not going to blow myself up :lol
If anyone here done this before. Any helpful hints greatly appreciated.
 
"Like"

I think I might just have to give this a try... In Germany it is murder trying to get your hands on all the chemicals that you normally need to etch with.

Thank you very much for sharing! :cheers
 
This is the great idea. You don't need any dangerous liquid ?!

Here in Japan, some one use the Xerox copy machine to print the resist on the thin brass plate.
 
This is the great idea. You don't need any dangerous liquid ?!

Here in Japan, some one use the Xerox copy machine to print the resist on the thin brass plate.


The recommendation is laser copy ink on glossy inkjet paper, then iron transfer. I'm going to give that a go but transferring the design onto a tube (19.5mm OD) might prove "interesting". That's why the sign vinyl might be easier. Doing tests though with all methods.

Some people use vivid markers as the resist. Perhaps my voltage/amperage is too high, but it just peals off with the bubbles :confused


I did a lot of research into chemical etching but getting the Ferric Chloride was expensive and it's quite dangerous. The table salt seems to be working or there is Copper Sulphate - either using "Root Blast" neat from the bottle or mixing up "Bluestone".

I'm doing this in my kitchen, so I'm opting for the chemically safe option. For the salt solution, it's just one heaped tsp per 1 litre water. I'd recommend a soak-hole for disposal or on the weeds in the drive :rolleyes


I put the cicuit together like it is the picture...but no bubbles on the etching plate :confused Only bubbles on the steel sacrifice.
100_2145.jpg

It was only after I switched the clips around that I got the same results (!) I thought the positive went to the plate for etching??
100_2148.jpg


I think the wiring of my car battery charger is screwy :wacko
 
Last edited:
I decided to give the saltwater etching a try last year, started with a cheap second hand laserjet, cost under £30 from Ebay- it still had enough toner for over 5,000 A4 prints, a car battery charger, a polyethylene box, and an iron.

First try was for a plate on my mobile phone cover:
IMAG0099.jpg


Which worked first go!

After more tries, and fails, I've got the method down pat: the best paper to transfer from is shiny cheap colour newsprint; here in the UK I've found that the Radio Times works best; the brass has to be really, really REALLY clean first: I clean it with Scotchbrite, get it almost to a dull shine, before cleaning it with lighter fluid until the kitchen towel stops picking up black from the brass, I also found that an iron just didn't heat evenly enough, so I tried a cheap hot laminator: I just run the print and the thin brass through it a few times, until it's stuck firm, and finish it off with the iron. The paper comes off after a soak in hot (not boiling!) water, then dip it into the saltwater solution with the positive side attached to the brass plate, and the negative side to a length of copper pipe, I just keep checking to see how it's going.

For single-sided relief etching I coat the back side of the brass with rattlecan primer, and also don't clean off the oxide, which is a pretty good resist on it's own.

I've got braver, and even tried some double-sided etching, coming up with this:

IMAG0259.jpg


Which when folded, makes this:

CIMG2945.jpg

(LEGO man for scale)

Finally soldered on railings to make a 1/35 scale spiral staircase:

CIMG2946.jpg


It's great fun; although I know a lot of this is useless for your tubular etching, let us know how you get on!

:)
 
Alrighty...

Test #1
This is what happens with things when you use a 7% saline solution for a couple of hours, sign vinyl and have the wires back to front...Oops? Well, no :) I was actually trying to simulate what happens on those websites I visited. hardly any bubbles on the plate to be etched, so I did a switchie, to see what happens - Bubbles go mad on the surface of the brass and actually lifts off the vinyl off - it would seem the adhesive of the vinyl is enough of a resist to stop the colourisation. Using a steel sacrifice...the copper comes to the surface of the brass and anodises it !!
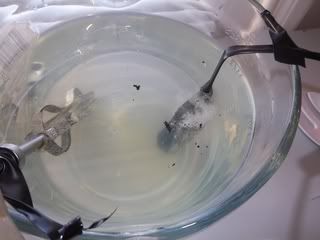
thumbsup.gif


100_2153.jpg


100_2159-3.jpg


Test #2


Putting the wires the right way round...+ on the metal to be etched... and using the same solution, nothing seems to happen :confused

So, increased the salt solution a whole heap more...1/4 cup salt per litre...What would that do? :eheh There is action but it's not so dramatic. Might have something to do with my low amps (2.7) I have also switched to a brass sacrifice on the negative clip.
The solution becomes clouded to a carrot soup :sick colour

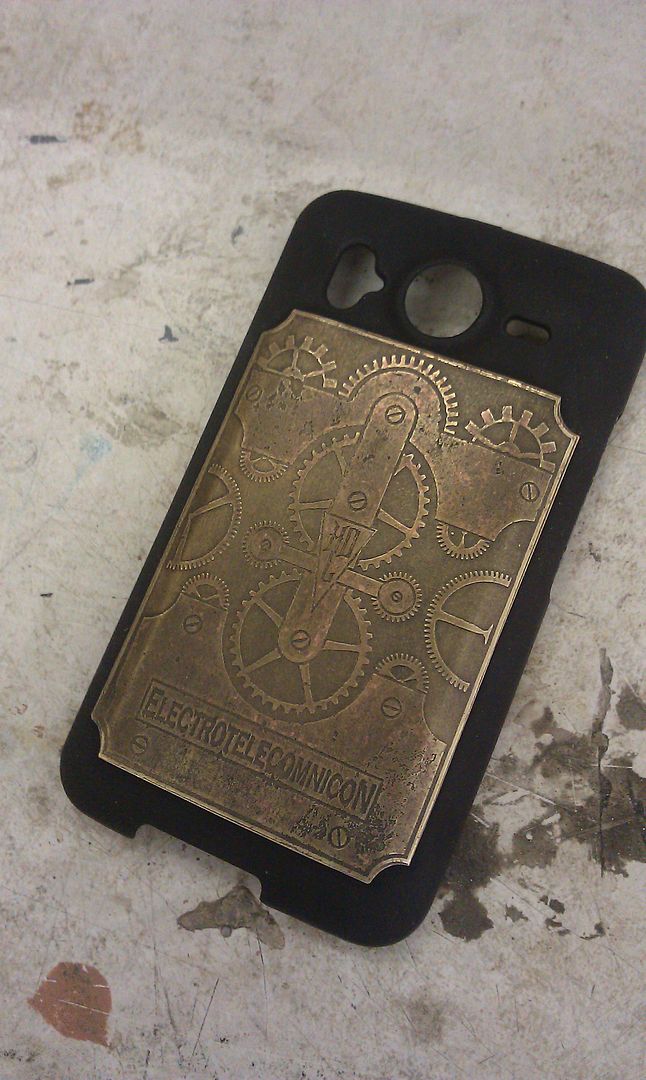
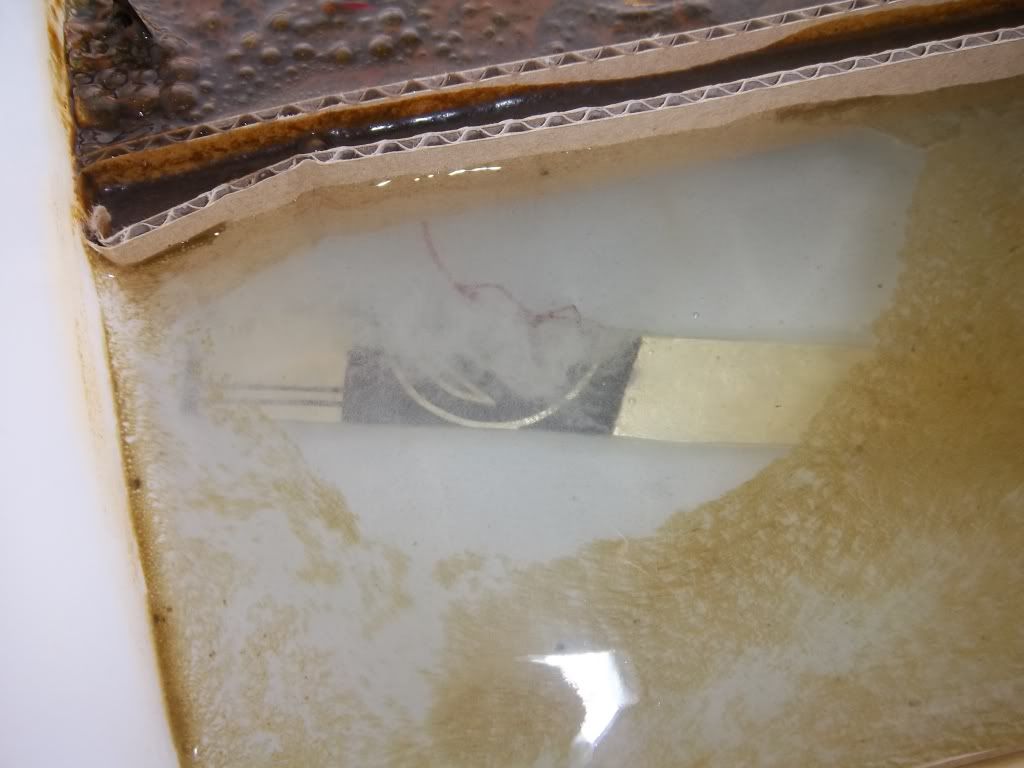
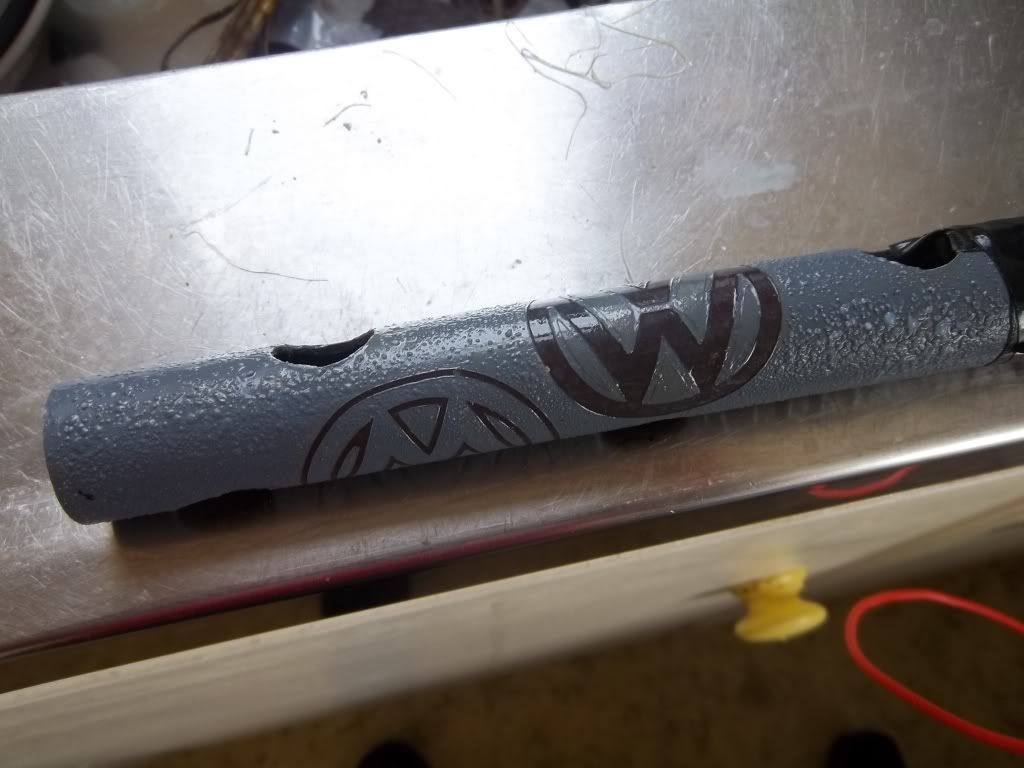
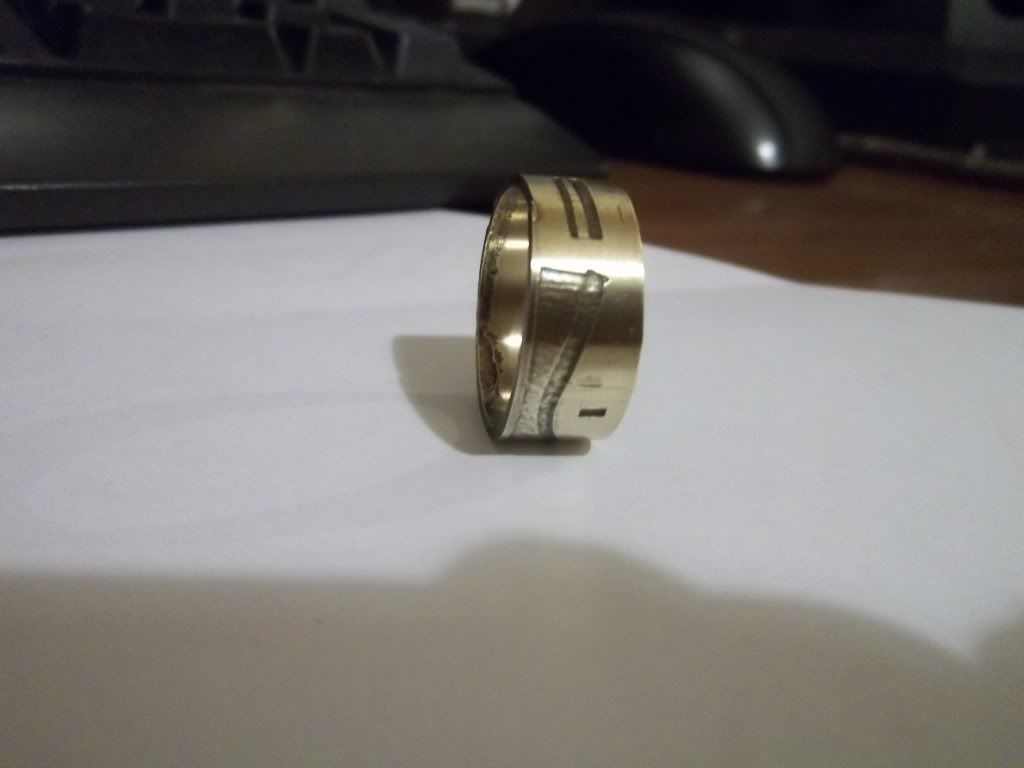
In this sample I have used sign vinyl for the patterns - stuck on first and then spray painted Wattyl Kill Rust primer. It didn't seem to take well on the surface so...I sprayed some Incralac on too. Then pealed off the vinyl......And then stuck it in for a couple of hours...

100_2160-1.jpg


The primer has bubbled and the markings have oxidised. Burnt off the resists and sanded them back. The primer does not burn off cleanly and will take some work to get the oxidation from the inside :darnkids

100_2163.jpg


The primer has bit into the metal far more than I would like. Not good if you want a smooth surface but great if you want a dimpled look.
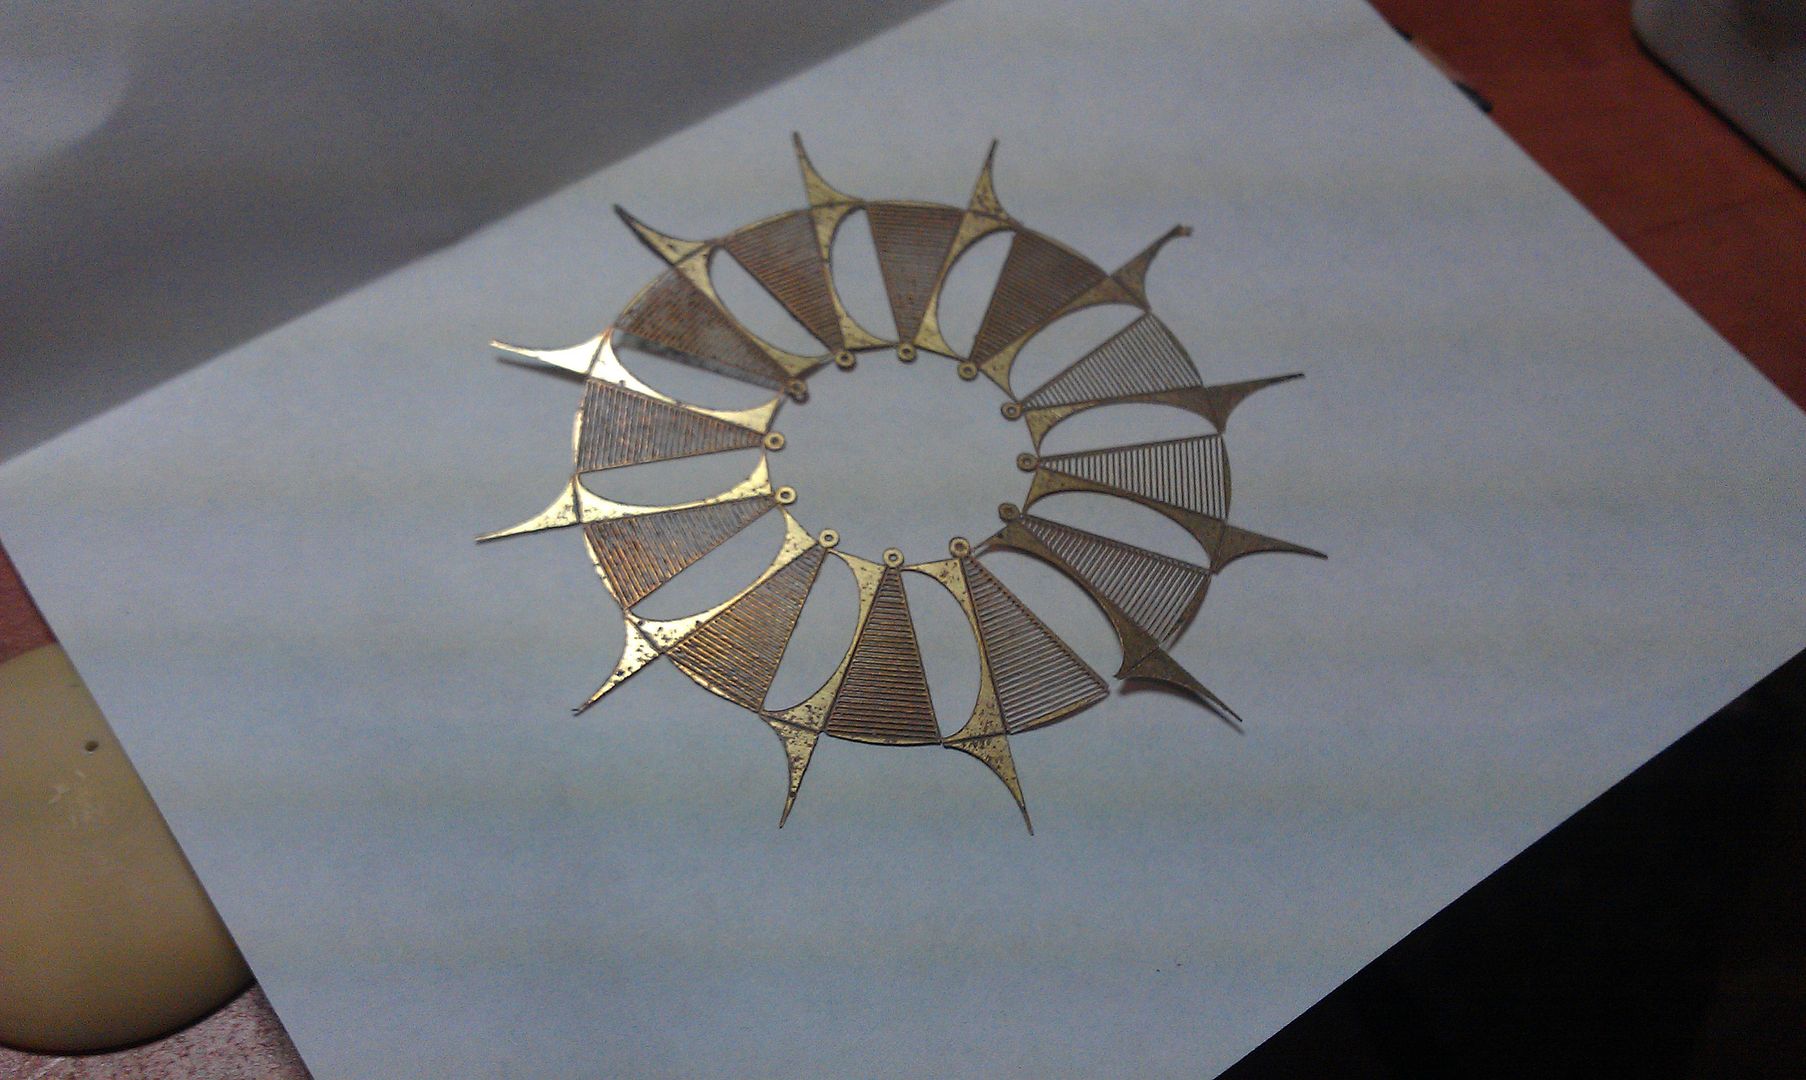
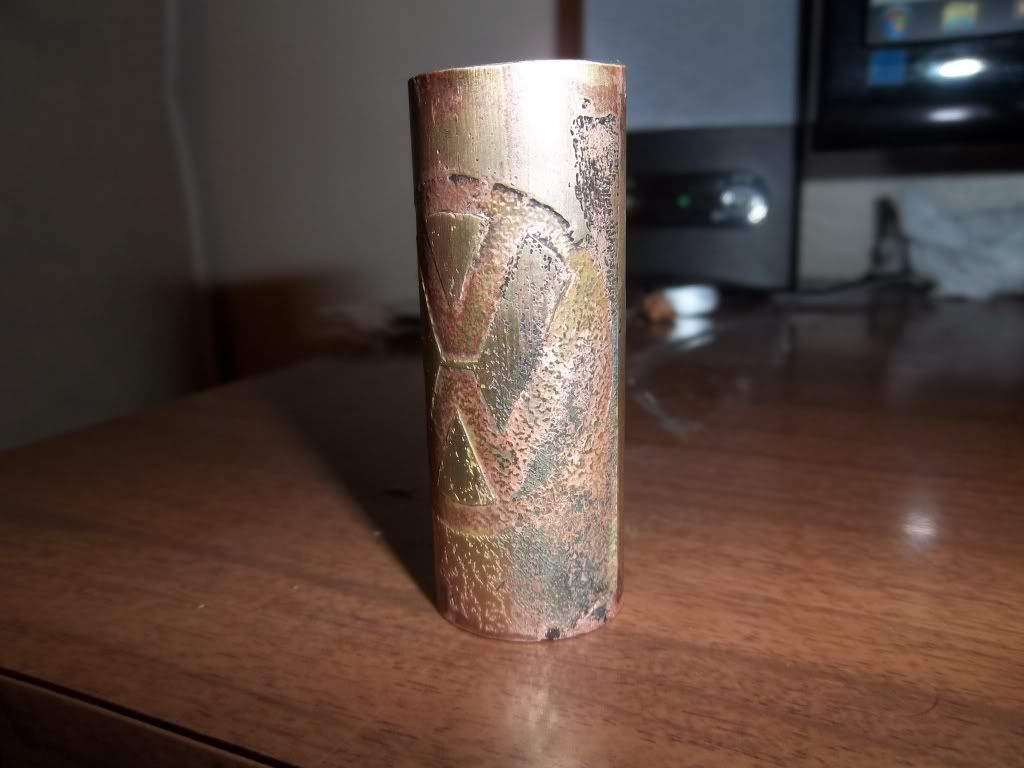
Test #3
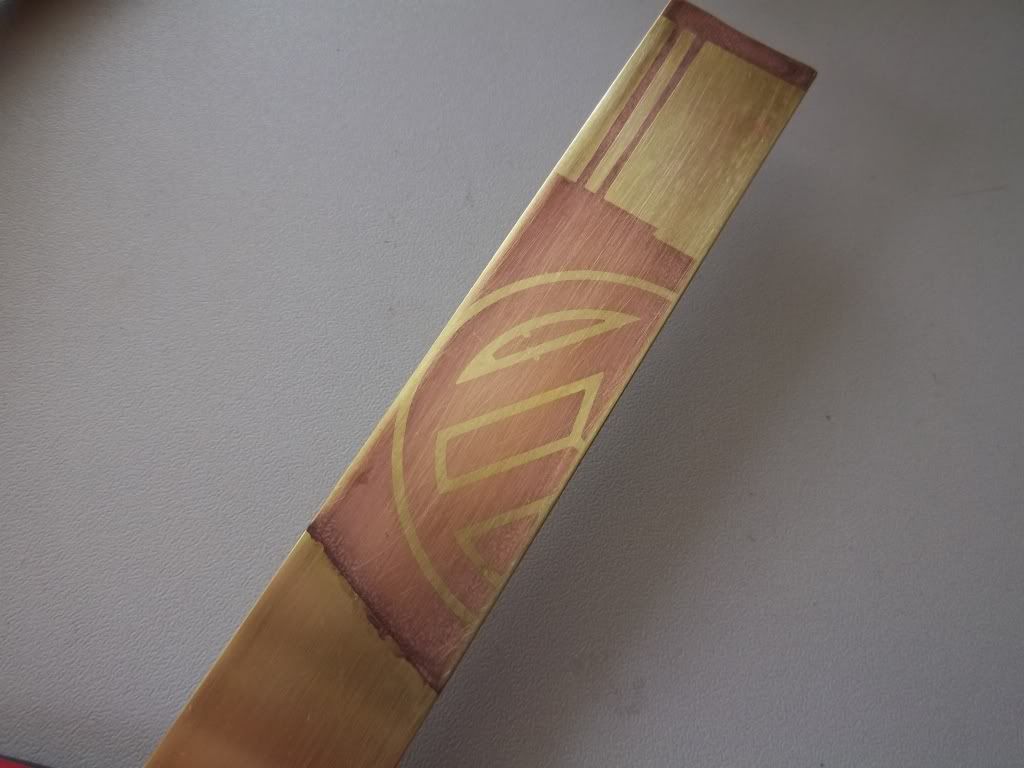
This time I just used a single coat of the Incralac and sellotape as the resist. Peeled off the vinyl for the image. The Incralac didn't work as it started to erode away. May work better with a thicker coverage. The cellotape worked brilliantly.
100_2178-1.jpg

100_2179-1.jpg


Tomorrow going to try the sign vinyl just by itself
carrots.gif


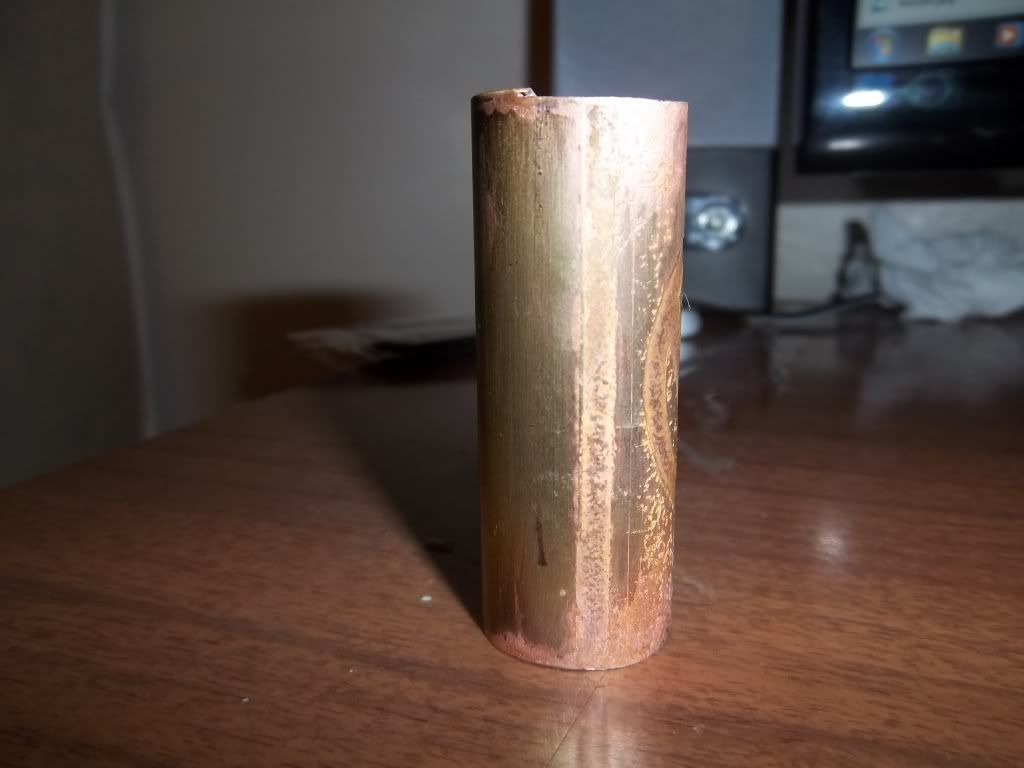
Getting tape inside the tube is a bit tricky. I have found that sticking it along a length of stiff wire and threading it through the tube, then after partially sticking it down, pull out the wire...it gets the tape in there. It seems to make the best resist and burns away cleanly.

Overall the etch effect is a good'n. A nice pattination with a crisp edge with the vinyl or sellotape resist :cool
 
It is interesting to know every step of the investigation (including errors) because they usually only see the results. Thanks for sharing.

Doctor: Brilliant staircase
 
It is interesting to know every step of the investigation (including errors) because they usually only see the results. Thanks for sharing.

Doctor: Brilliant staircase

You're welcome. It's a journey and it's with low tech supplies. A lot of the websites have materials worth a great deal more, playing with more voltage and amperage...and with variable bells and whistles (!)

It would be cool to see what others experience with the their tests. I'm hoping to perfect this so I can use it in my Custom Sonic Build. If I can get this to work, it'll make a great way to have a pattern on the sonic handle and help tie-in the elements of design I'm putting together. I'm also looking to have some precision holes drilled into the tube, so etching their placement will help that process too :cool
 
A question: What risk is there of shock or, even worse, electrocution?

Depends upon how careless a guy is. :behave

my guess is little to none (again, as long as a guy doesn't do anything dumb). I mean it is "only" a car battery. With 12 volts and 2.7 amps you will know if you touch the wrong thing but other than scaring the %&$§ out of you, it shouldn't do anything life threatening.
 
Still using 12V & 2.7 Amps and a two hour time-frame...

Using a slightly stronger solution 1/2 cup non-iodised salt per 1.5 litres bottled water. Paid special attention to getting the metal really clean. Sanded it down and with a soapy steel wool used some cloudy ammonia too. Made sure it was completely dry before putting on the sign vinyl.

The results were dramatically different

The bubble and scum effect is much slower. So much so, that I thought the unit was broken. It does pay to make sure the anode or sacrificial metal is cleaned up a little too. Too much previous corrosion acts as a resist to completing the circuit.

After about an hour, took it out for a look-see and took off some vinyl and tried a two-tiered effect. The sign vinyl looks like a winner for the tube. Clean lines and even pattination :cool

100_2195.jpg

100_2199.jpg
 
Last edited:
This thread is more than 12 years old.

Your message may be considered spam for the following reasons:

  1. This thread hasn't been active in some time. A new post in this thread might not contribute constructively to this discussion after so long.
If you wish to reply despite these issues, check the box below before replying.
Be aware that malicious compliance may result in more severe penalties.
Back
Top