tehguitarist
New Member
Man, you’re making me regret being so liberal with a file over sandpaper! Parts are looking fantastic!
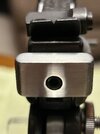
I’m still working on a sanding sequence. For some, I started with a light dremel sander. Others i started with the file. Then 220 or 300. Then to 400. I did the trigger and hammer with 800 because I’m leaving them raw. I tried this sequence with the cast steel, scope mount today. Wow. Getting that rough texture off was ridiculous. I’m about 80% done but need a break.Man, you’re making me regret being so liberal with a file over sandpaper! Parts are looking fantastic!
I hear you regarding the Denix weight. This one’s going to be a display piece.I like my Denix DL-44 blasters whose base pistols were modified / “accursed” by Bobadebt, years ago, as display pieces….
…but they are as heavy as solid bricks and probably not the best for “trooping”…especially when considering the accurate light-weight pistol bases now offered by sellers like Field Marshall.
I prefer to use resin casts of either real Mausers or MGCs as my DL-44 bases, with metal greeblies, now.
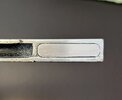
I did not hear back. I ordered all the other parts. I’m still debating the aluminum plate that will end up costing $34 with shipping or getting a vintage Mauser one for $40 and free shipping. Based on the comparison that Scottjua did, the denix is only fractionally larger in the mag area. And removing the mold circles will likely eliminate that difference.Did you end up hearing back about the mag plate at all?
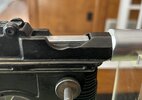
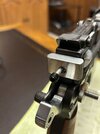
I have looked through so many denix threads here. I have learned a lot. The denix definitely has its shortcomings but I am very pleased with the way it cleans up so far. My least favorite part of the build is the scope mount. I’ve spent 6 hours on that and still not satisfied with the finish.You’re putting in some serious work
Incredible job im impressedI have looked through so many denix threads here. I have learned a lot. The denix definitely has its shortcomings but I am very pleased with the way it cleans up so far. My least favorite part of the build is the scope mount. I’ve spent 6 hours on that and still not satisfied with the finish.
Thank you. I appreciate your support.Incredible job im impressed