Destiny - "Monte Carlo" weird SMG w/bayonette

jamesmcintoshjr

Active Member
Updated! - Done (sorta) and photographed.

attachment.php
attachment.php
attachment.php
IMG_9495.jpgIMG_9485.jpgIMG_9498.jpgIMG_9492.jpgIMG_9494.jpg

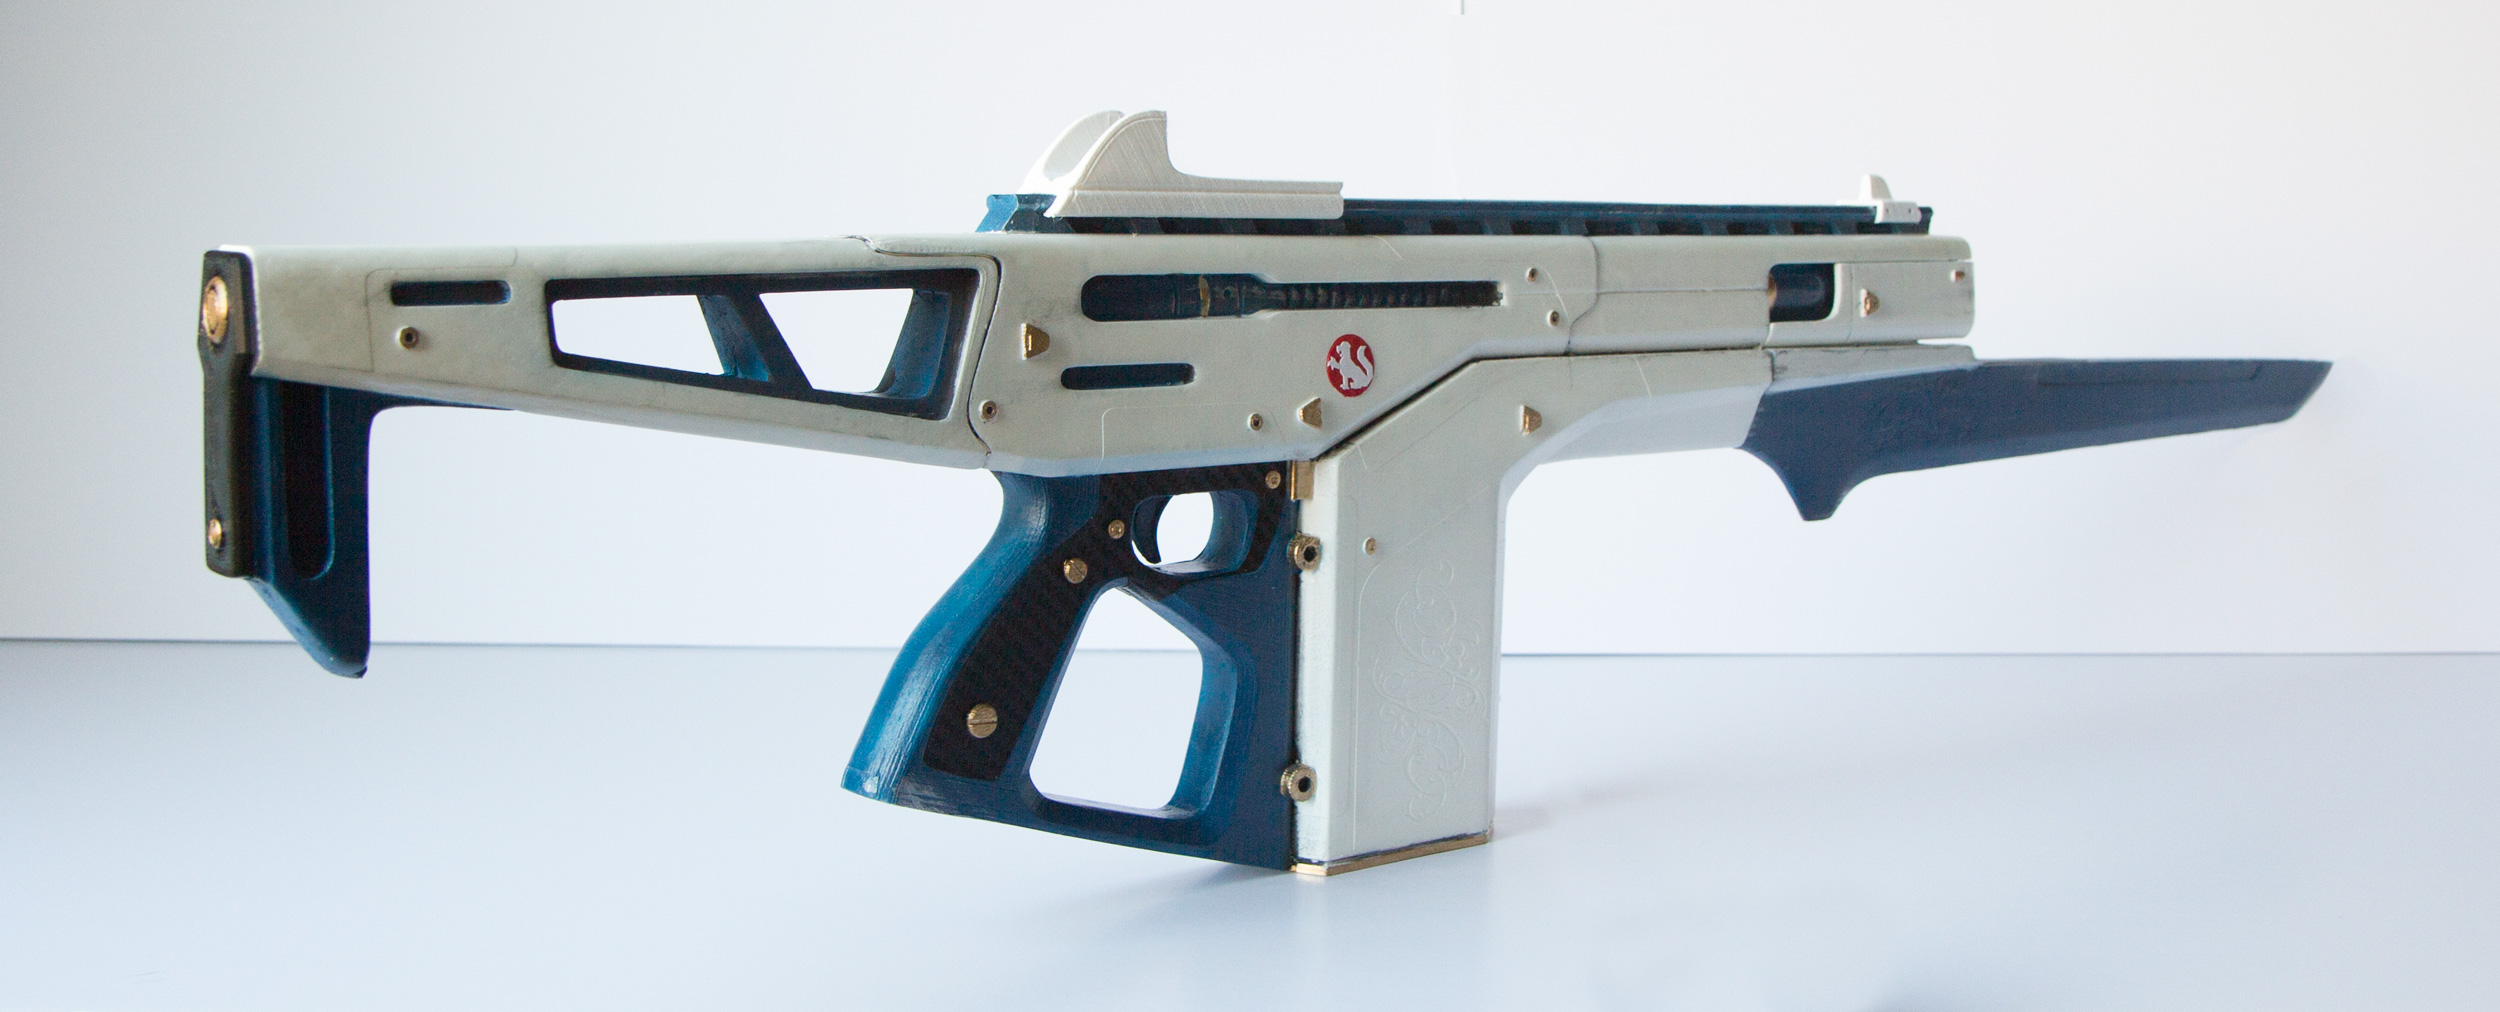
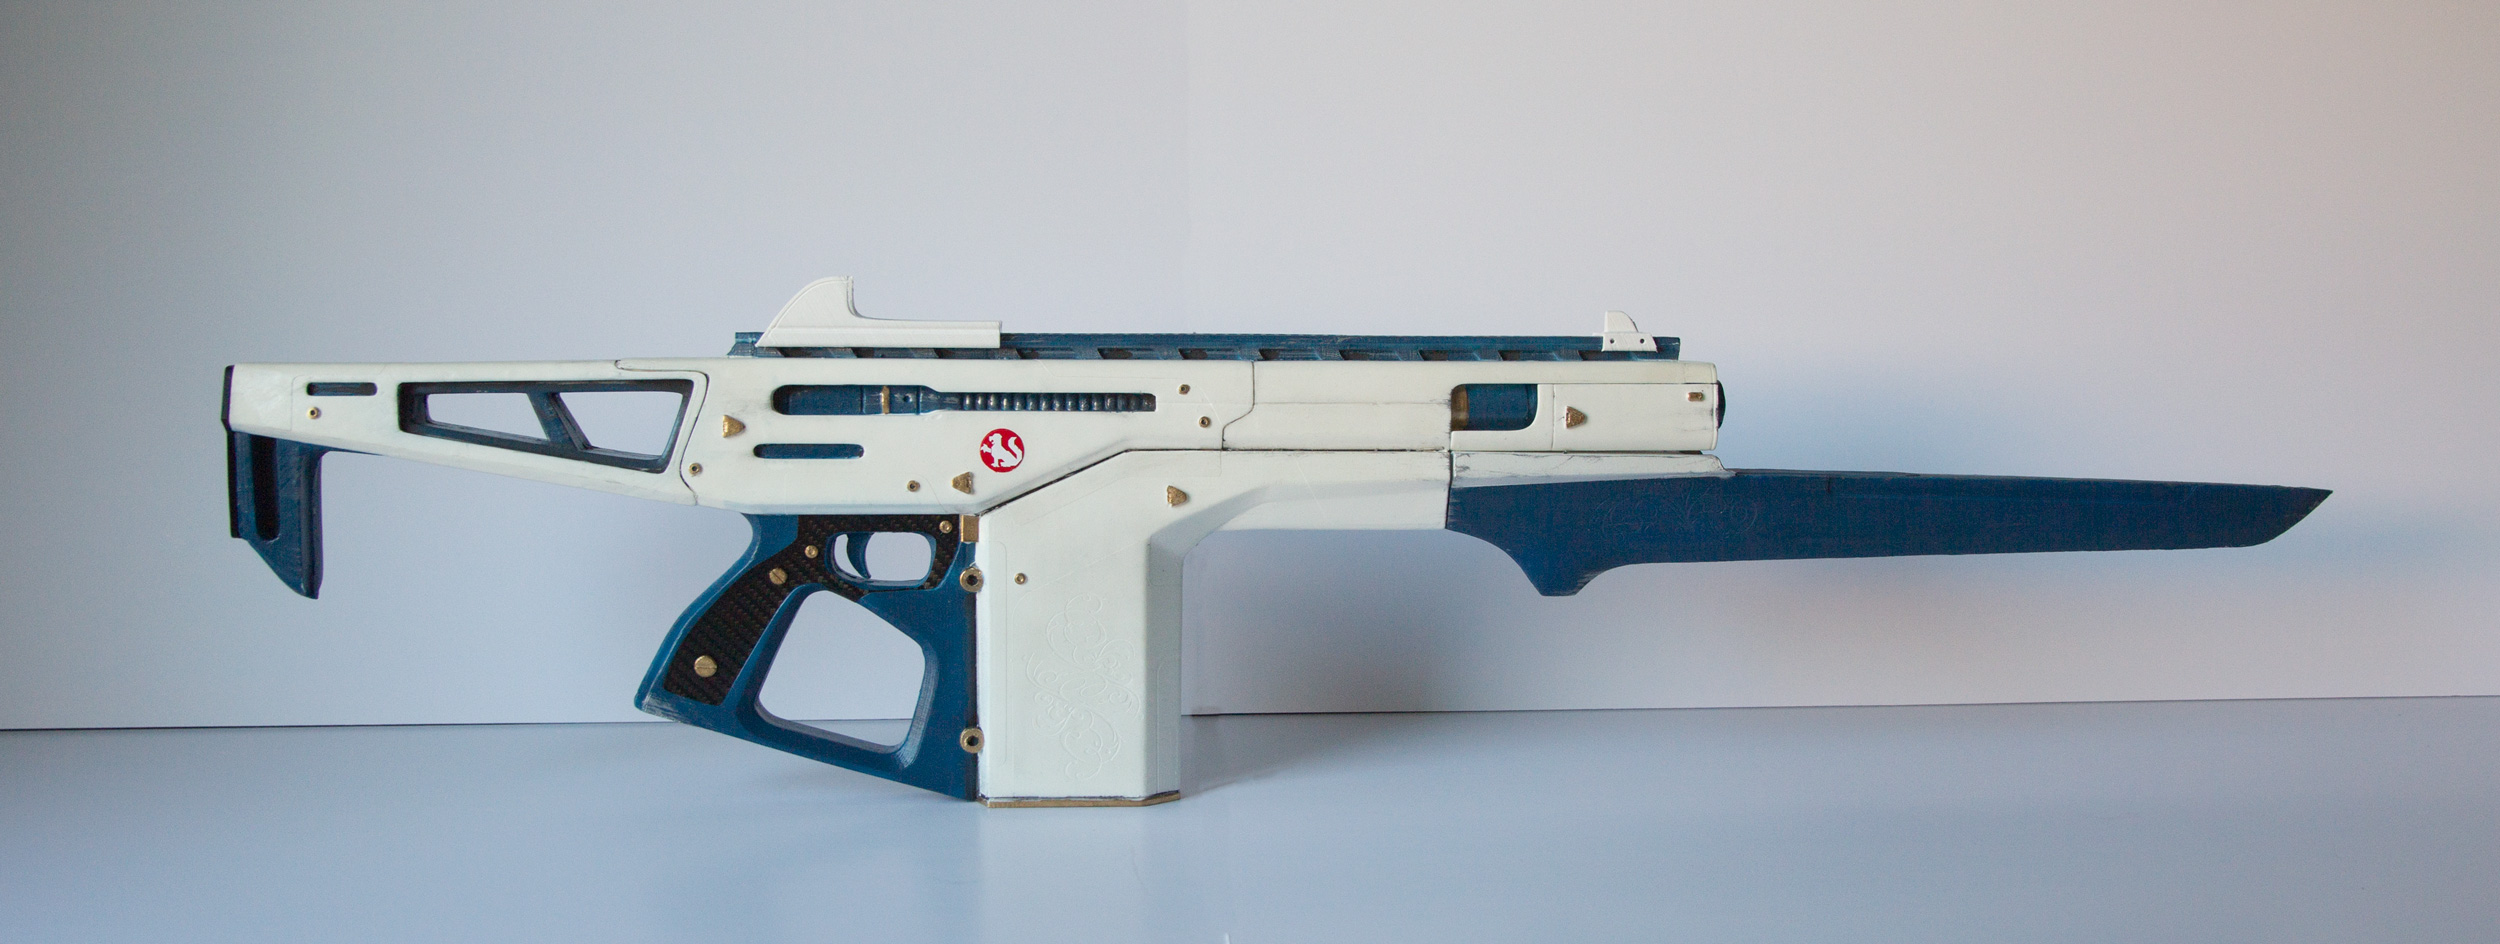
A few things like the gun sight need some attention, and maybe next time I won't do such a crappy job painting it. But I've got an invective to finish up and that's looking real good.


Hey all,

So Destiny is coming out this week, and I saw some of the PS4 only content launching with the game. One thing that stood out was this weird SMG with a bayonette attached to it called the Monte Carlo.

destiny-monte-carlo-screen-04-ps4-us-07jul14.jpeg

I actually am getting it for xbone, but I still wanted this gun :) on to the build!

using reference shots, I started modelling it up in 3ds max. The gun itself I'm making should be just around a meter in length, so obviously too big for my makerbot rep2.

01.jpg02.jpg

One thing of note is that the gun has a bunch of "character" lines along the body, I figured this would be a great opportunity to try something new and segment my model using the character lines, rather than simply straight-slicing a model into chunks to get it small enough for the build platform. This way I won't have to blend away the seams prior to molding, and I chunk it out into small enough pieces I can print it.

03.jpg

Also, I'm planning on taking the sword section and making it removable in the final build, held on with a long dowel and a magnetic lock, so at a moments notice it can be broken down to about half it's size.

Plus, sliding the blade on and getting a nice "click" will be pretty cool.

I've been back-to-backing prints all weekend, and I've got most of the gun done. Just need to finish the sights and the shoulder stock but it's fitting together rather nicely.

WP_20140907_004.jpgWP_20140907_005.jpgWP_20140907_007.jpg

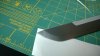
There's also the small matter of the very fine detailed patterns embossed onto the body and blade, I plan to do some vinyl-cutting to dig out the pattern once I've got some sanding out of the way. The vinyl with the pattern cut out will provide a nice shallow embossing of the decorative elements, and once cast if someone doesn't like em they can easily be filled or sanded away.
 

Attachments

  • IMG_9483.jpg
    IMG_9483.jpg
    343.3 KB · Views: 1,755
  • IMG_9478.jpg
    IMG_9478.jpg
    507.8 KB · Views: 3,488
  • IMG_9476.jpg
    IMG_9476.jpg
    446.2 KB · Views: 2,685
Last edited:
It looks fantastic dude, can't wait to see more, wish I had half your 3D sculpting skill.... sadly I have a big printer, but have to commission most of my prints.
 
great build! Did you model some "registration geometry" to align the seperate pieces while glueing them together? Or did you just glue them flat, aligning by eye? (I hope you know what I mean :confused)
 
Thanks all!

I went back and did some dowel type modifications and made new prints. I intend on making a 3 or 4 piece cast resin I so it was worth the trouble to redo some of the pieces so it wouldn't be a flat piece glued to another flat piece. So, yes to answer your question :)

Been busy with extra day job type work but getting back to this. New prints being coated in filler and getting ready to do some sanding and finishing.

WP_20140922_003.jpg

Also been working on design of the gun sight, want to basically have the red dot effect in a removable sight that will go on the top rail. Which I haven't finished yet. Figuring out how to light some etched acrylic to use as the sight with a little red led and a watch battery without light spilling out everywhere.
 
So this is further along now. Interesting thing I found out using elmer's wood filler to smooth 3D prints - it's water soluble. FOREVER. I had coated and sanded my print, and wanted to wash the dust off prior to primer and realized I wound up simply washing off all the filler that hadn't been sanded off. Since I wet sand my prints to be super smooth this isn't gonna work, so went back to bondo and scratch primer.
WP_20140928_003.jpg
WP_20140928_002.jpg

I also wanted to work on the detail on the lower. In the game reference there's a subtle embossed hoolanders/laurels/flowery patterns. My reference is too low res to really pick up all the texture detail, so I recreated it using some clip art and some of my own doing. It looks similar, but this way if some a-hole recaster decides to have a go once I make this into a kit, it'll be pretty easy to figure out if it's mine or not.

I did the old vinyl cut trick, since this is going to be cast, I just needed the light detail to be embossed, a mold will pick this up no problem. I plan on cutting a bit more vinyl to finish out the character lines that weren't actually worked into the geometry upon printing.

WP_20140928_006.jpgWP_20140928_007.jpgWP_20140928_008.jpgWP_20140928_009.jpg

Just need to finish the barrel to get the upper half moldable, and then give some love to the grip which I'm redoing with a cut in for my dowel, and haven't decided if I'm going to make the trigger move, that might come in the post-casting phase becuase I'm likely going to have to cut into the top half of the gun to get the trigger mechanism to work... trying to come up with a plug-n-play trigger mechanism that I can print and stuff into my projects so I don't have to redo it every time.
 
Last edited:
More progress, got the gun sight modelled and printed, doing another one a bit wider but it fits on the gun rail pretty nicely, same with the iron sight at the tip. I don't know if I'm going to be able to figure out how to mold this thing, seeing as I have a pass through for a 1/8" thick piece of acrylic to use in the site, so I might just print em when I need em, fortunately it's not really a big piece.

Going to try to go for 2 main pieces cast for the gun overall, the main body of the gun with the attachment dowel for the blade, and the blade itself which will be removable and slide on when needed, with some magnetic lock action.

WP_20141001_003.jpg
WP_20141001_002.jpg
WP_20141001_001.jpg
 
WOW, that looks fantastic!
I was fortunate to get the rifle after completing a Weekly Nightfall last night, it's making me want to print it!

Any chance you would share your files?
 
I'd like to ask the same question as Jonny, is there any way you would share the finished files? Or at the very least, what would you charge for a raw cast? I'm extremely interested as this is my favorite weapon in the game, and I wanted to make one for cosplay purposes. If I were able to buy a cast (or maybe even buy the files?) from you, it would make my life a lot easier. Let me know! :)
 
Hey guys, I've actually spent a good bit of time refining this, as I wasn't happy with some details (or lack thereof). This was always meant for casting because of the vinyl cut out for the laurels detailing. I'm also going to do some of the raised panel detailing with vinyl as well. Its also kind of a pain to print to avoid support material marring the surface. . Trying to finish it now that I'm on holidays as well as a bunch of projects I've gad on the go simultaneously. So stay tuned!

Ive also been playing too much destiny which is why I'm not finished :) exotics I find are really hard to get because I dont have anyone to do raids and nightfall events with. I just got super good advice yesterday after getting the exotic bounty quest, and I saved enough strange coins for the armentarium pre expansion but that's it, and I'm level 29 with a 100 hours in.
 
still desperately trying to find time to finish this bad boy, did a lot of the panel detailing with vinyl and the little accents using small prints superglued to the body, so the master for mold is done.

Got around to claying up the mold yesterday, going to do the blade separately so it can be broken down if necessary, and it will have a magnetic lock for a nice little "click" when you slip the blade back on. Claying went well, it's kind of big for a block mold but I figured I'd give it a shot even though it's a lot of silicone (1 gallon for the first half, even with chopped up silicone from old molds bulking it up)

Poured the mold max 40, let it sit, things seem fine... but upon later inspection (not pictured) I discovered that 3D prints are INCREDIBLY BUOYANT. Especially big ones, the monte broke free from it's clay surroundings and floated to the top of the rubber. Fortunately I checked up on it before it was cured and dug it out so it wasn't locked into the surface of the mold, but man is that disappointing... I'd sorta resigned myself to doing a 2 gallon mold even though it's kinda pricey to do so because I didn't want to do a brush on with a mold jacket cuz I'm lazy... but that's the last time I try and do that.

Once I clean it off I've got some rebound 25 kicking around and I will be going the brush on route.. but super disappointing regardless as this ate up a whole day.

WP_20150202_001.jpgWP_20150202_002.jpgWP_20150222_001.jpgWP_20150222_002.jpg
 
That's a lovely model :)

I got a 3D pdo file of the gun to make for my warlock cosplay but the local 3D printing place said evean at 20% fill it would take 3 weeks and be £280 to make all the pieces, and that didn't include the knife as it wasn't in the file for some reason :(

Nerf scratchbuilt Umbra pulse rifle for me then.

Looking forward to seeing your finished cast :)
 
This is a really exciting build. Destiny's RNG hasn't blessed me with this AR yet, but it's still one of my most coveted. I'm loving the idea of a magnetically mounted bayonet!

At any point did you consider modeling and casting the magazine as a separate piece? What about casting the upper and lower receivers separately so that a working trigger might be installed?

the way the magazine goes on this thing is kind of weird, because essentially the magazine is most of the lower body of the gun in front of the grip... I'm going to eventually do a fusion, scout and pulse rifle, and make those with removable mags because the positioning makes a little more sense to 2-part it, but the ARs, I'm not sure... if I do another (suros regime) then I'll try, becuase that mag looks well, removable by comparison.

As to 2 parting it so a working trigger could get installed, the part where the grip and trigger connect to the upper section is quite thin, was worried that 2 parting that would be kind of weak. I wanted a 1-piece cast of the main body for durability (not to mention ease and cost of molding and casting)

Anyways, update on this, it's slow going but I basically spent a day cleaning out clay and silicone from the failed molding operation, going to attempt another mold of this shortly but I need to pick up more silicone.

In the meantime cold weather + indoors I've been working on modelling, printing and finishing another big destiny prop, Invective.

WP_20150224_006.jpg
 
So a new 2-part mold was made last week with rebound 25 with a plasti-paste mother mold, which yielded pretty nice results. Unfortunately somehow my casting comes out of the mold slightly warped, so I clearly did something wrong in my mold making process to wind up with this.

WP_20150430_002.jpgWP_20150430_003.jpgWP_20150430_004.jpgWP_20150430_005.jpgWP_20150430_006.jpgWP_20150430_007.jpgWP_20150430_008.jpg

I also wound up with some dents in the casting from the registration keys in the mold. Likely because I went a bit too thin on the silicone. While not terrible its not really up to my standards, I want this thing to be perfect and warpage and casting aberrations and a no no. I'm great at 3D printing stuff but I guess I need a little more practice with my mold making, gonna retry a mold max 40 block mold and just bite the bullet on the pricetag.

That being said, the vinyl cut detailing worked out really nicely and I'm pleased with how that turned out. I'm gonna keep my defect cast and use it as a paint mule, but for now, back to mold making, hopefully third time's the charm.
 
Everything looks incredible, I stumbled across your forum looking for a Monte Carlo replica. Everything I found was not of the greatest quality but all done with a valiant effort. Once I saw how well you were replicating it. I continued reading in hopes to see that once you finished the model to your standards, you would be making more and selling them. I would love to buy one of these duplicates from you. The first time I saw the Monte Carlo I shared the same passion for it as everyone else. The Monte is one in its own compared the other weapons in the game. If you decide to make more with the intents to sell them please get in contact with me. I will be checking this page and my message box for rpf once or twice a month. Thank you and an amazing job man!!!
 
updated first post with pics

It's taken me kind of a while to finish this, but I basically went back and created new molds for everything. I have one for the blade, one for the main body and one for the under-barrel shroud. I think I'm going to just 3D print the iron sight.. and not quite sure what I'm going to do about the main sight but for now it's just a raw unpainted 3D print. I'll probably do the vinyl detailing on the sight and cast it but for now I'm gonna move on to a few other props that need finishing.

One thing is for sure, I need to get better at painting. My great casting was sorta ruined by my substandard paint job.

A few more pics from the build-

Brushed metal vinyl for the blade detailing. This texture was picked up by the mold for a very pleasing brushed effect even after paint.
WP_20150720_001.jpg


View attachment 532784
View attachment 532785

the new mold (the 3RD ONE!), decided not to skimp and just did a nice sturdy mold max 40 block mold. Almost 2 gallons used for the main rifle.
WP_20150520_001.jpg
View attachment 532783

Cast in smooth cast 310 and hit with the first coat of acrylic satin white (base white then top coat of satin)
View attachment 532787

A bad casting used as a paint mule, for what good that did.
View attachment 532786

I chose to grind off the rifle butt a bit and replace the casting with a soft ninjaflex cap, that took paint quite well actually.
attachment.php


I should mention this is my first time airbrushing anything... I suppose it could've been worse.
 

Attachments

  • WP_20150720_002.jpg
    WP_20150720_002.jpg
    241 KB · Views: 120
Last edited:
I have not played the game so I'm not familiar with the gun but I've got to say that the design is absolutely gorgeous. It reminds me of early plane designs. The paint scheme is also perfect.
You've done a great job bringing it to life.
 
This thread is more than 8 years old.

Your message may be considered spam for the following reasons:

  1. This thread hasn't been active in some time. A new post in this thread might not contribute constructively to this discussion after so long.
If you wish to reply despite these issues, check the box below before replying.
Be aware that malicious compliance may result in more severe penalties.
Back
Top