Custom white lettering decals

lucavigg

New Member
IMG_3044.JPG


I'm currently coming to the end of a Thunderbird 1 build, based on a set of STL files from Gadgetmind on Thingiverse. Initially, I was going to get some vinyl lettering cut out for the vertical THUNDERBIRD on the main fuselage from nose to tail. However, I'm not sure vinyl would stick correctly, given I've already painted the fuselage.

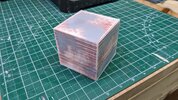
I've tried scoring and cutting some 0.25mm styrene (picture) on my Silhouette cutter but it's difficult to get super accuracy on the position of each letter.

Is there a way of printing a single custom waterslide decal in white so that each letter has a transparent gap around it?

Thanks
 
The only way I know of, is to find someone with an ALPS printer. Those are becoming increasingly rare.

If you can cut them well, you could get white decal paper.
 
IMO, vinyl should stick just fine.

I also use decal printer paper for inkjet printers, but you will have to be very accurate with your cutting. I recommend printing the letters with a light outline onto non-transparent decal paper, and then cutting just inside the lines when you are ready to apply.

Another option might be to put the decal paper through a Cricut. That might actually get the job done.

If you want to DM me, I might be able to help.
 
It looks as if you didn't sand down the layer lines enough. The glue may not have enough tooth to just stick to the tops of the ridges.

TazMan2000


IMG_5921.png


It’s good in some places, worse in others. The first image was taken with a desk light edgeways on. The light blue fuel drum is much smoother.
I have a friend that runs a printing company. He can run me a few tests to see if vinyl is still a viable option.
 
View attachment 1837161

It’s good in some places, worse in others. The first image was taken with a desk light edgeways on. The light blue fuel drum is much smoother.
I have a friend that runs a printing company. He can run me a few tests to see if vinyl is still a viable option.

It doesn’t look too bad from that lighting, but vinyl is a material that likes to return to its original shape, so you always have that stress, if ever so little. In addition, the letters are quite small so for their size there is not a lot of glue there.

Perhaps try another brand of vinyl, or another material altogether. There also could be some sort of residue on the paint. Try cleaning the area with warm water and dish soap.

Do the letters just not stick at all, or do they pull away after a few days? If they do that over a few days you might be able to coat them in a clear lacquer after you burnish them down so it seals the edges and prevents air from drying out the glue.

TazMan2000
 
Do the letters just not stick at all, or do they pull away after a few days? If they do that over a few days you might be able to coat them in a clear lacquer after you burnish them down so it seals the edges and prevents air from drying out the glue.
Haven’t attempted the smaller letters yet. Since posting I’ve just tried the larger letters on the engine with plastic weld. A minuscule dot on strategic places while the top of the letters are held down with masking tape and then lift up the letters to apply in other areas after removing the tape. Seems to have stuck quite well. I’ll see if they’ve fallen off by morning.
 
Haven’t attempted the smaller letters yet. Since posting I’ve just tried the larger letters on the engine with plastic weld. A minuscule dot on strategic places while the top of the letters are held down with masking tape and then lift up the letters to apply in other areas after removing the tape. Seems to have stuck quite well. I’ll see if they’ve fallen off by morning.

That will be the cheaper option. There some lasers that print “ghost white” but I’ve only seen favourable results on T-Shirts and I think they do a two-pass. White host toner cartridges are expensive and only a few vendors sell printers that come with that ability. Most commercial flatbeds can print white, but for a small decal it could be quite expensive, unless you know someone in a print shop. It’s the setup fee that is expensive for small jobs. Some print shops won’t even bother unless you have a large amount of square feet to print since it won’t be worth their time. They sometimes send you off to try other print shops all over town, which is a waste of time and money.

The white ink in those commercial printers have titanium particles in the ink to provide opacity.

Manufacturers can actually design an inkjet printer to print white, but it wouldn’t do it well for very long. The titanium particles tend to settle to the bottom, and clog up the nozzles so it takes daily maintenance to keep them printing. Not good for home use since nobody would want to have a daily ritual of maintaining an inkjet printer for the rare times one would need white.

I’m a bit surprised that no other company would try and replicate an ALPS for the hobby industry.

TazMan2000.
 
Recut the vinyl but weed the letters out and use it as a mask for painting, The background should adhere well enough for that and if you use the brush as a dry stipple instead of spray paint or brush strokes an added benefit is the lettering will look scale
 
Another option is Letraset dry transfer letters, that's what they probably used on the original TB model. They're getting increasingly difficult to find, but if you look, you may be able to find some in the size and font you need.
 
Recut the vinyl but weed the letters out and use it as a mask for painting, The background should adhere well enough for that and if you use the brush as a dry stipple instead of spray paint or brush strokes an added benefit is the lettering will look scale

I did think about that although I’d have problems with the D and the R.

On the strength of Tazman2000 comment, I’m reprinting the fuselage and wings at 0.05 layer height and attacking with 100 to 1000 grit paper. Carpal tunnel be damned.
 
The centers will hold, especially if you use the stipple method as each touch of the brush helps keep the vinyl in position. I have worked with vinyl (in sign making and vehicle graphics) for over 35 years and unless you use low grade intermediate performance vinyl it should work well.
I do understand wanting to print and sand the hull better- the Thunderbird craft did have panel lines but very smooth hull plates
My apologies. You were referring to vinyl. I haven’t actually attempted vinyl yet, having just sent a DXF file to my friend for the lettering I need. I’ll try it on the current fuselage while the other is printing.
 
I did think about that although I’d have problems with the D and the R.

On the strength of Tazman2000 comment, I’m reprinting the fuselage and wings at 0.05 layer height and attacking with 100 to 1000 grit paper. Carpal tunnel be damned.

PLA is REALLY HARD to sand. So much so that I simply don't do it.

Instead, take some Bondo Sculpting Glaze (the red stuff in a tube) and thin with a little acetone. Paint it over your print with a paintbrush, sand and repeat a couple times. You will need far less elbow grease! Follow up with 2-3 layers of primer-sand-repeat.

This will not take hard force. Those materials sand easily with 400-grit!

PXL_20231001_005009441.jpg
 
PLA is REALLY HARD to sand. So much so that I simply don't do it.

Instead, take some Bondo Sculpting Glaze (the red stuff in a tube) and thin with a little acetone. Paint it over your print with a paintbrush, sand and repeat a couple times. You will need far less elbow grease! Follow up with 2-3 layers of primer-sand-repeat.

This will not take hard force. Those materials sand easily with 400-grit!

View attachment 1837709
In the U.K. we have 3M Bondo 907 putty. Looking at the precautions, it looks like scary stuff. I’ll see how the higher resolution print comes out. Presumably, some sort of respirator mask is needed?
 
In the U.K. we have 3M Bondo 907 putty. Looking at the precautions, it looks like scary stuff. I’ll see how the higher resolution print comes out. Presumably, some sort of respirator mask is needed?

Yep, that's the stuff. Alternatively, you can use heavy coats of primer or filler-primer...the putty is faster.
 
Good call on reprinting the parts with ridging. Finish and decals (no matter the type) are going to be a lot easier for you if the surface is smooth and artifact-free. Your decals will want to 'tent' over any ridges or blobs, and it will become super-obvious with any kind of gloss on there.

I don't know how your availability is, but I've used Micromark's laser printer decal paper with a bit of success. Applies like typical waterslides, they should have white- and clear-backed as well.

www. micromark.com
 
I did think about that although I’d have problems with the D and the R.

On the strength of Tazman2000 comment, I’m reprinting the fuselage and wings at 0.05 layer height and attacking with 100 to 1000 grit paper. Carpal tunnel be damned.

Yes, PLA is hard to sand but I use a palm sander with a 150 grit to take down the high ridges and follow up with 3D printing photoresin brushed lightly all over, soaking up places that it pools. This fills in most scratches, and after a couple of coats of filler primer a couple of coats of paint. I like the photoresin since all you need is sunlight to cure it and you get immediate results. When you sand with mechanical means, it is easy to over-sand an area, and at that point the PLA starts melting, so allow some time cooling before going at it again.

But hand sanding works too for a small model and offers better control.

TazMan2000
Aaah, sunlight. That’s a bit of a hope in London at the moment. Ten more hours of printing before deciding which direction to go in.

Thanks everyone for all the suggestions.
 
Back
Top