Custom Hasbro Signature Series Darth Vader Black Bars Lightsaber

WyoWilliam

Active Member
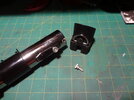
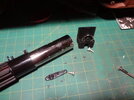
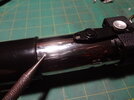
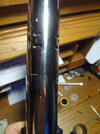
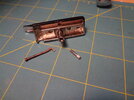
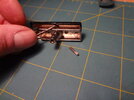
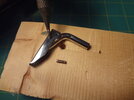
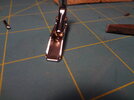
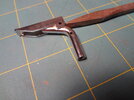
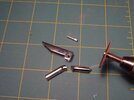
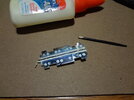
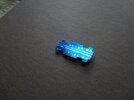
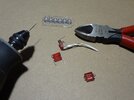
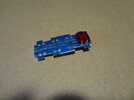
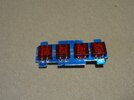
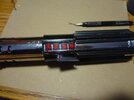
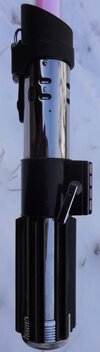
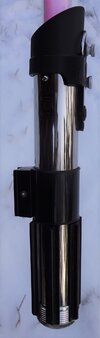
Recently I decided to make a "Black Bars" ANH lightsaber. I've never liked the "Hero" prop, with it's off-center clamp, half-way up the hilt, and with the monkeyed-with clamp lever. I like the ESB saber, but always thought the wires sticking out of it seemed... impractical. (Was Vader hot-wiring his saber?? Imagine if one of those pulled loose during the Bespin fight - maybe Luke would have never lost his hand.) The Black Bars saber is the perfect marriage of both. So, here's how I made mine, using what I had available...
 
Last edited:
First step was to take the lightsaber apart. It's pretty easy, especially the removable blade version. First, remove all the screws that you can see on the outside. There's one opposite the clamp lever. which will give you access inside the "clamp".
 

Attachments

  • DSC01869.JPG
    DSC01869.JPG
    1.4 MB · Views: 103
  • DSC01870.JPG
    DSC01870.JPG
    1.4 MB · Views: 108
Last edited:
Now the only thing to do is unsolder the switch, push the wires inside the tube, and push out this pin... (Might need a hammer and a small punch or nail.)
 

Attachments

  • DSC01871.JPG
    DSC01871.JPG
    1.4 MB · Views: 96
  • DSC01626.JPG
    DSC01626.JPG
    504.5 KB · Views: 92
Here's where it can be a little tricky. You need to drill some new holes. Strictly speaking, you would not have to remove the electronics because the new holes avoid them, but if you drill too far, you will damage the circuit board and wires, so never go too deep. The hole on the bottom and top need to be pretty precise as the top one needs to be tapped for the existing screw, and the bottom aligns and hold everything in place. The middle hole is just to grab the switch wires and pull them back through.
 

Attachments

  • DSC01873.JPG
    DSC01873.JPG
    564.3 KB · Views: 108
Last edited:
Here's where the fun begins. To "fix" the nail/ bent clamp rod you need to punch out another couple pins. These are a pain. I needed to make a small pry-tool with a nail to push the pin out the side of the bar holding it in place.
 

Attachments

  • DSC01692.JPG
    DSC01692.JPG
    1.4 MB · Views: 98
  • DSC01693.JPG
    DSC01693.JPG
    1.4 MB · Views: 107
Next, to remove the pin holding the lever to the rod - careful here, too, as it will only easily come out in one direction. It's also soldered in place, but a small chisel will pop it off fairly easily.
 

Attachments

  • DSC01694.JPG
    DSC01694.JPG
    1.3 MB · Views: 101
  • DSC01696.JPG
    DSC01696.JPG
    1.2 MB · Views: 100
  • DSC01695.JPG
    DSC01695.JPG
    1.4 MB · Views: 110
Last edited:
The rod needs to be cut (It can NOT be straightened.) but once it is, the lever can be re-attached with the pin.
 

Attachments

  • DSC01698.JPG
    DSC01698.JPG
    349.9 KB · Views: 93
I decided that the circuit board used on the prop, which is rare, hard to find, and expensive to get a replica of (No one is 100% certain of the color, even.) I could make, close enough, using what I had laying around. First, I used dots of white glue to make "solder points" and glued floss to the existing chrome switch plate to make "circuit traces". I used clear blue spray paint over the top, then soaked it in water and a light scrubbing left me with this...
 

Attachments

  • DSC01855.JPG
    DSC01855.JPG
    1.8 MB · Views: 105
  • DSC01859.JPG
    DSC01859.JPG
    1.6 MB · Views: 107
Next, I drilled holes in the plate, and in some 1x1 clear red LEGO bricks, then attached them together with twist-tie wires to simulate the calculator LEDS. (If you bend the wires front to back, they won't interfere with the switch.) Doesn't look nearly as neat as the actual LED board, but the price was right.
 

Attachments

  • DSC01856.JPG
    DSC01856.JPG
    604.1 KB · Views: 106
  • DSC01860.JPG
    DSC01860.JPG
    1.2 MB · Views: 101
  • DSC01861.JPG
    DSC01861.JPG
    439.8 KB · Views: 110
Last edited:
Next, put everything back together in reverse. I replaced the screw for the clamp lever with a shorter hex-head, and added a washer on the back side to look more like the vintage clamp/lever would have. (Of course, I also painted the "bars" black, hence the name.)
 

Attachments

  • DSC01864.JPG
    DSC01864.JPG
    1.1 MB · Views: 120
I bought the saber used and because it had a bad LED (It was soldered backwards at the factory - was able to fix that, too) I was able to make this for under $100.
 

Attachments

  • DSC01866.JPG
    DSC01866.JPG
    246 KB · Views: 140
  • DSC01865.JPG
    DSC01865.JPG
    191.6 KB · Views: 145
  • DSC01867.JPG
    DSC01867.JPG
    230.8 KB · Views: 140
Wow, you definitely went on your sabersmithing journey, and earned your badge. It all looks good to me. Please do include the Lego brick kit. Thank you.
Hey! Just saw this message. Thanks! If I didn't send it to you before, there's a great thread on here all about the film prop. I'd be curious to know how yours turns out.
 
This thread is more than 3 years old.

Your message may be considered spam for the following reasons:

  1. This thread hasn't been active in some time. A new post in this thread might not contribute constructively to this discussion after so long.
If you wish to reply despite these issues, check the box below before replying.
Be aware that malicious compliance may result in more severe penalties.
Back
Top