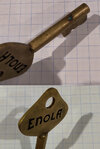
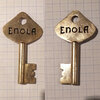
Crimson Peak "Enola Key" build

Hi all,

I am in the final leg of my months long build of the "Enola" key from Crimson Peak. I started in January 2019 by gathering information through screen captures, general key research, sketches, and 3D modelling.

I've made 3 prototype PA12-grade 3D prints to ensure size and feel were correct, and have finally pulled the trigger on a lost wax casting in brass. The next steps will be weathering and aging. I plan to use some other keys/coins to add some scratches and dents, some light heat treatment, mild acid application, and some probably enamel fill for the lettering.

My goal is to complete my first ever "screen match" scratch built prop, and I could not be more enthusiastic about it :D

Will be posting more pictures and information here over the coming days and weeks
 
Here is a montage of the screen reference I've captured.

EnolaKeyMontage.gif


My hands are pretty big, so I sized the key a bit smaller and asked other people with presumably Edith Cushing-ish sized hands to hold the first 3D print to ensure I got the size about right. I also guessed length based on both the probably key shaft diameter and key ring hole diameter, as shown below:

KeyholeBasedSizing.png


It's a bit crude and not exact, but gave me a rough idea of dimensions for the final key size. From here, I did a rough sketch to approximate the key "paddle" curvature and other bits, and did some paint-over plus print/scan on paper to recreate the letters:

KeySketch.png


The first prototype print was made at 2.3" long
 
Print #1 of v1.0 blank key turned out well, but I did not like the curve transition from the tip of the paddle to the shoulders of the paddle once I had it in my hand.

v1print.jpg


I edited the model to soften the curve transitions on the paddle of the key. Also made the sides of the paddle less "pointy":

PaddleShoulderSoftening.jpg
 
Another change was to the "weld" joint between the shaft and the paddle, to provide some more material overlap.

Next, the letters were modeled on their own against image reference.

v1Letters.jpg


Then, they were integrated (tediously) into the mesh. Here's the final "v2" model ready to print:

v3.4PrintWithLetters.jpg
 
When I got the "v2" print back, there were some fill issues with the edges, resulting in some soft shoulders which were especially visible on the letter edges. I learned that this may have been the result of print orientation, and re-printed it.

v3.4Prints.jpg


The re-print was much better, with nice crisp edges all around. The tweaks to the paddle shape and weld made the key feel much better in my hand, and more closely resembled the on screen version.
 
The next step was to prepare the model for lost wax casting in brass, which was pretty intimidating for me as I've never done this before, and it is quite expensive. I recalled Adam Savage's "Maltese Falcon" talk where he mentioned casting shrinkage and did some googling and reading on the printer's website.

There were some other areas I wanted to tweak based on reading about brass casting. These included the lettering depth and relative size compared to the paddle, as well as the end of the key shaft where there was a little indent.

The letters were made slightly deeper to preserve a crisp edge and fill space without sacrificing strength in the center of the paddle. The paddle was also thinned out a little bit:

letterDepthForBrass.jpg

(this is a top down view of paddle's top edge)

The edge around the indent of the brass version was also made slightly thicker, as the edge thickness on the "v2" print was thin enough that it might get removed through either shrinkage or polishing process when cast in brass:

shaftEndEdges.jpg


When ordering in brass, the estimate was 2.5% casting/polishing shrinkage as an overall model size reduction. So I scaled the brass version of "v3" model to be 2.36", from which losing 2.5% will result in 2.301" final estimated size (ish).
 
The resulting brass casting was just about perfect. The edge details on the revised parts were preserved as I wanted (hooray):

BrassCastSizeComparison.jpg


As you can see above, the ~2.5% shrinkage accounting was about right. The brass model is quite a bit glossier than it appears in the photo.

The end of the shaft edge thickness also turned out very well, preserving the edge as I wanted:

ShaftEndEdgeResults.jpg


You can see above that the plastic print edge was a little thin, but making the brass model thicker made the result about the same.

The next stage is weathering and aging, which I am very enthusiastic to get started on :D
 
The first step I want to achieve in weathering is to add some natural looking visible wear in the form of scratches, nicks, and dents. I want the key to look old, like it's been on a keychain for a while. The key has traveled and been used on a trunk. And it's also been on a keychain in Lucille Sharpe's possession for quite some time, with some other keys. It's also probably been exposed to blood, red clay, dirt, snow, and so on.

TumblingWithKeysCoins.jpg


But first things first, some damage from other keys. I've made a makeshift tumbler and attached it to my drill at a very low speed. In the tumbler, I have tossed in a handful of old keys and various coins. I plan to let it tumble (turning over once every few seconds) for 30 minutes or so to see what the results will be :D
 
After tumbling for about a half hour, the resulting scratches and dents were very satisfying:

FirstTumbleResult.jpg


I also slide and turned the key inside my bench vice a little bit, to approximate the wear marks one might find on such a key used for a trunk, presumably with a brass or similar key hole and cover plate.

After tumbling and wearing a bit more, I heated it with a propane torch until the factory gloss was mostly gone. The result was a bit darker than I had anticipated, but still seemed workable. Here's the resulting post-heat result:

HeatTreatResult.jpg


I also filled in the letters with enamel paint (just a rattle can sprayed onto some cardboard, then sort of roughly mushed into the letters then wiped the excess away).
 
Lastly, I decided to do some light acid treatment with white vinegar and salt in a loosely sealed plastic container. I didn't submerge it, but just sort of made sure it had some of the mixture on it at all times (shaking around every hour or so). After about 3 hours, this was the result:

AcidEtchResult.jpg


I neutralized a bit with baking soda and rinsed with filtered water, then threw it around in the dirt for a few minutes, trying to squish some grime in some of the tiny scratches and voids. The result is slightly more "new" looking than I want, but I plan to lightly weather and oxidize the key over time for the next while, hoping I get some naturally occurring darkening on most of the key.

I really want to screen match as closely as possible, with the expectation that I probably won't be able to be exact. But hopefully closer over time. I am hopeful that oil from handling as well as oxygen might make it look more naturally aged and used. I also want to take some photos in appropriately sized hands with better lighting on my real camera rather than my phone camera.

Overall happy with the process so far. Any comments or tips (especially to do with aging/oxidation) welcome and appreciated :)
 
This is amazing! The level of and attention to detail are mind-boggling. I know people always ask this question, but is there any chance you'd consider making another of these on commission? Understanding, of course, that there is a ton of work that goes into it, and lost wax casting is not cheap!
 
This is amazing! The level of and attention to detail are mind-boggling. I know people always ask this question, but is there any chance you'd consider making another of these on commission? Understanding, of course, that there is a ton of work that goes into it, and lost wax casting is not cheap!

Ah, thank you :)

I would certainly consider doing a commission, and if there was enough interest, maybe a small run of these to lower the price. They are really not cheap to do though, so I worry the price would put people off.

It seems I have not been active enough (too much lurking!) to do an official Project Run yet, but please DM me if you're interested in a one-off! :)
 
Following up with another post with regards to weathering and natural aging. I have more or less left the key alone in my office for 2 years, occasionally handling it and showing curious passers by. The result is a more oxidized, slightly darker look, with some light tarnish spots in some seams and things that I am going to leave for a bit longer before removing.

LongAge24MonthsA.jpg


LongAge24MonthsB.jpg

I am really pleased with this result! :)
 
So, I finished up a second key (for Editrix), and am pleased with the results! Here are some WIP process shots.

First up, the two keys side by side. The new one in its full, shiny, factory polished form which I think I didn't capture super well last time.

OldVsNew.jpg
 
Next up, I did a combination of a tumble with coins and keys as well as a basic heat treatment with a torch. The results were good, though I maybe over did the tumble and "key slot wear" here at first.

HeatTreatment.jpg


As you can see on the right side, bottom, the scratches appear a little more than I wanted. But the acid treatment and final weather made up for it here I think, as the contrast between the darker heat treated brass and the scratches was reduced nicely.
 
This time around, the acid treatment was reduced from 3 hours to 2, with hopes of reducing or eliminating the sort of "galvanized" look achieved with the original key. It worked! Not sure if it was just a variation in material purity or composition, or if the shorter acid time was the key factor here, but good results nevertheless.

AcidTreatment.jpg
 
And finally, the finished key (another side by side with the first key for comparison). It's worth noting that the older key has oxidized (as mentioned above) for a couple years, so it's not a direct comparison I guess.
SideBySide.jpg


The new key certainly looks more shiny, but will darken and mellow with age and handling over time.

It's worth noting here that the sizes seem slightly different between the keys but that's just due to the camera lens, and the way I photographed these on my desk. The images are merged together in photoshop, so its not a perfect 1:1 across the photos here and above.

In any event, a fun process to revisit, and great to see two outputs of approximately the same weathering process compared. :)

FinishedA.jpg
 

Your message may be considered spam for the following reasons:

If you wish to reply despite these issues, check the box below before replying.
Be aware that malicious compliance may result in more severe penalties.
Back
Top