Companion Cube Sub Woofer and Morality Core Speakers

dstilgar

Well-Known Member
Here's a mostly complete set of speakers I've built. The original worklog was posted on another forum long ago, but despite being a member here, I'm not allowed to sell anything yet, and I figure the best way to get my post count up is to actually contribute something useful.

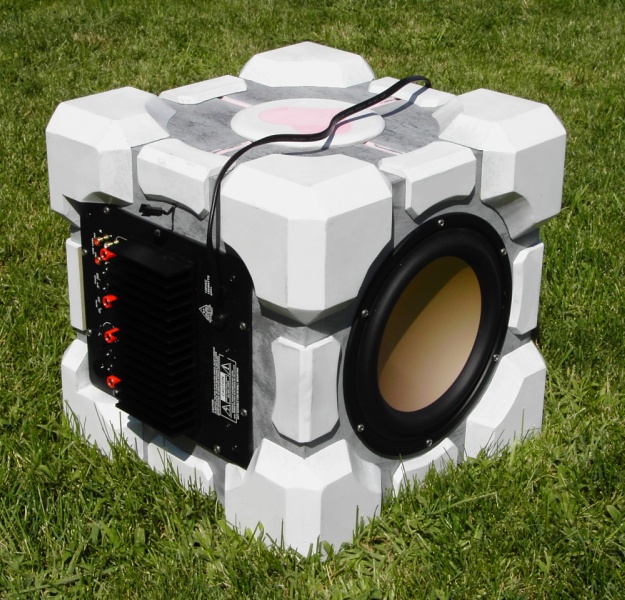
The first part of the project is a Companion Cube sub woofer. I started this is late 2008 and finally finished the speaker portion about a month ago. I'll edit the posts a little bit, but some things I'll keep the way I originally posted them as to help with some continuity. Also . . . this is pic heavy and I didn't resize some of the early pictures of the build before uploading them to my website. I'm going to upload them to my site again in a smaller size, but . . . there's an internal server error right now and I can't seem to do anything. For now, I haven't seen any rules against the having huge images, just know that I'm trying to fix it and it's either big or nothing for the moment.

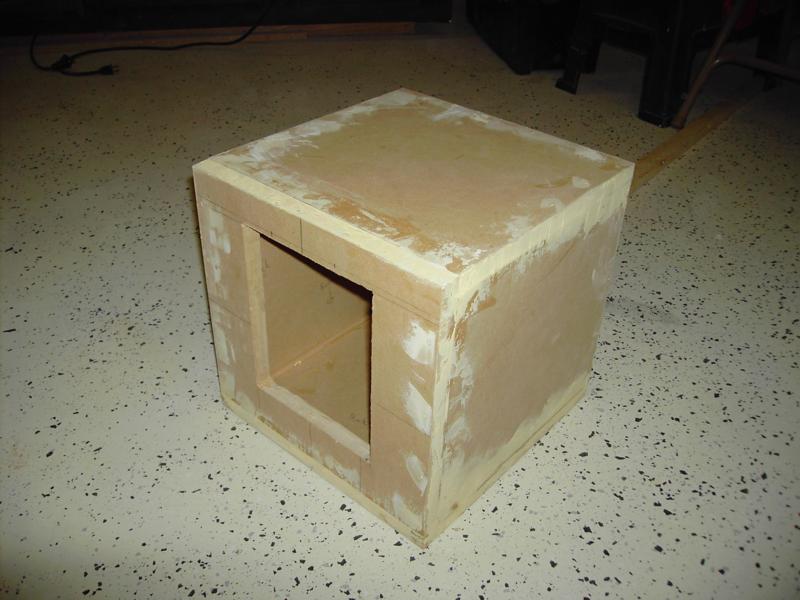
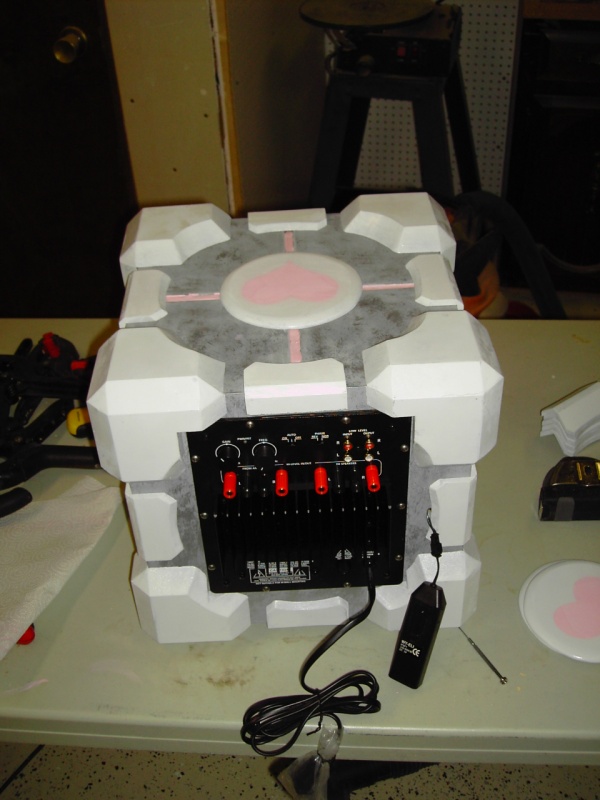
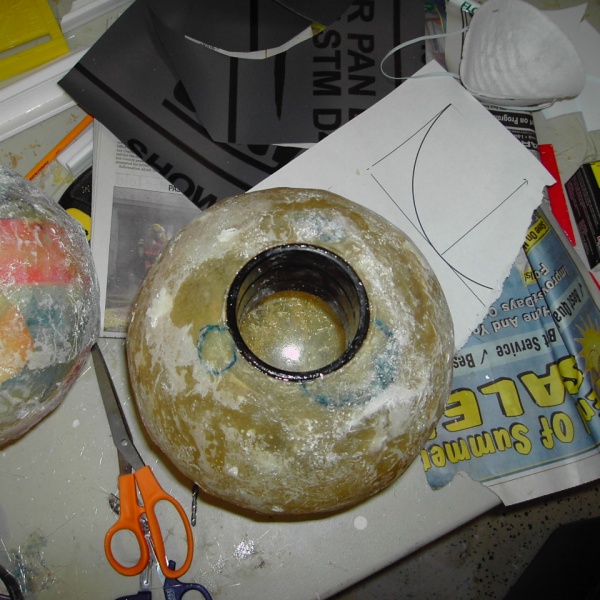
A box with a hole cut for the amp.

PICT1310.jpg


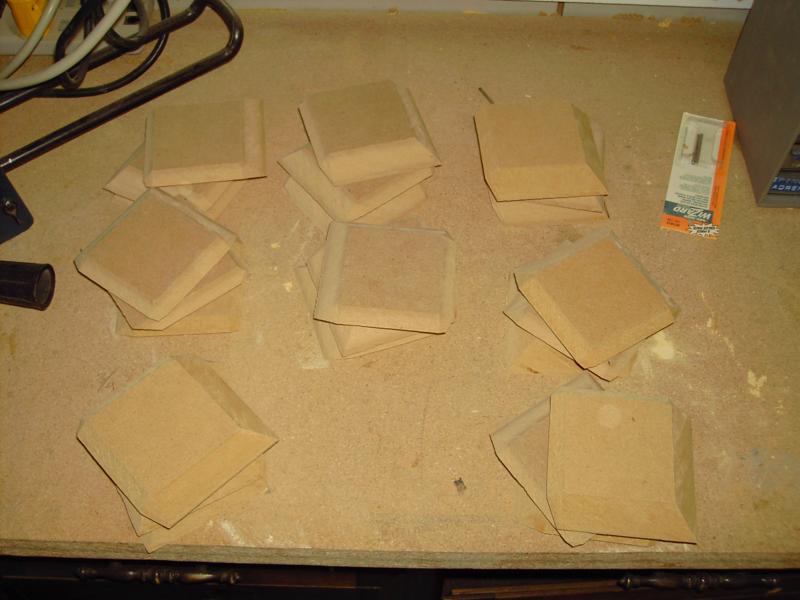
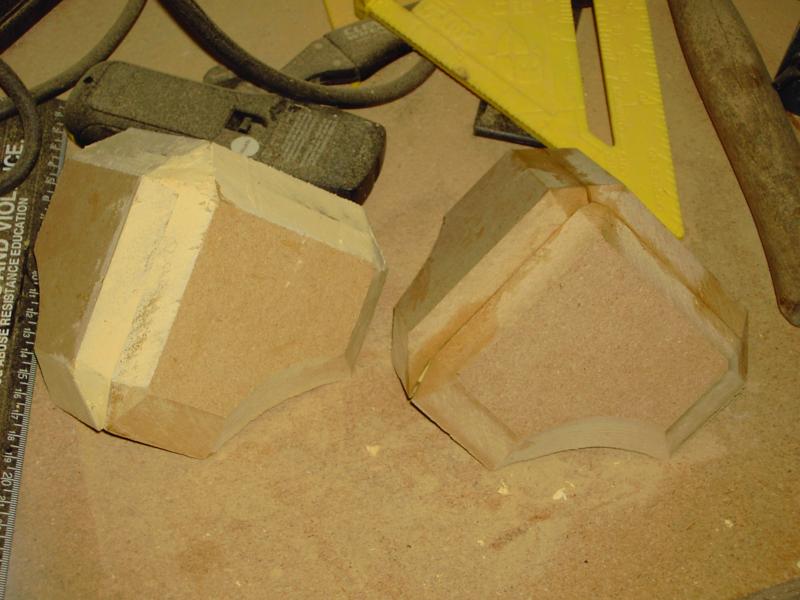
Some corner pieces. There are 24 in total.

PICT1311.jpg


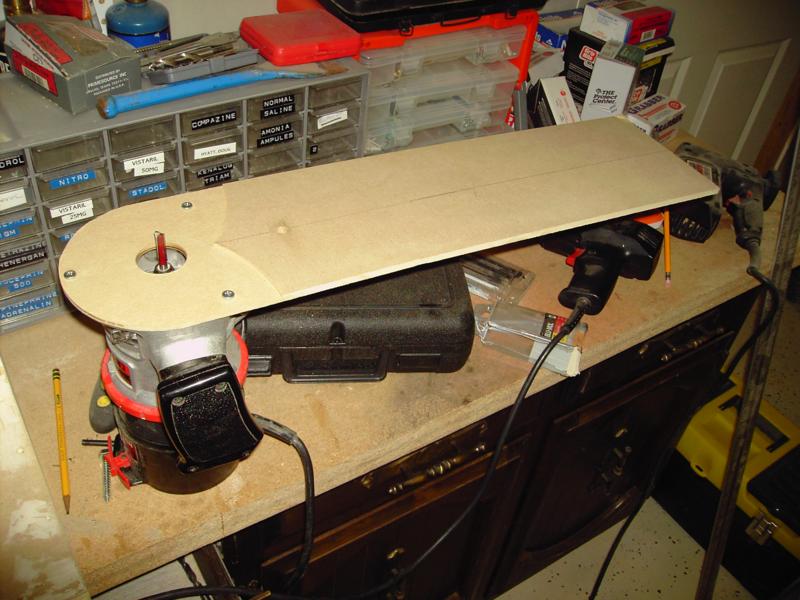
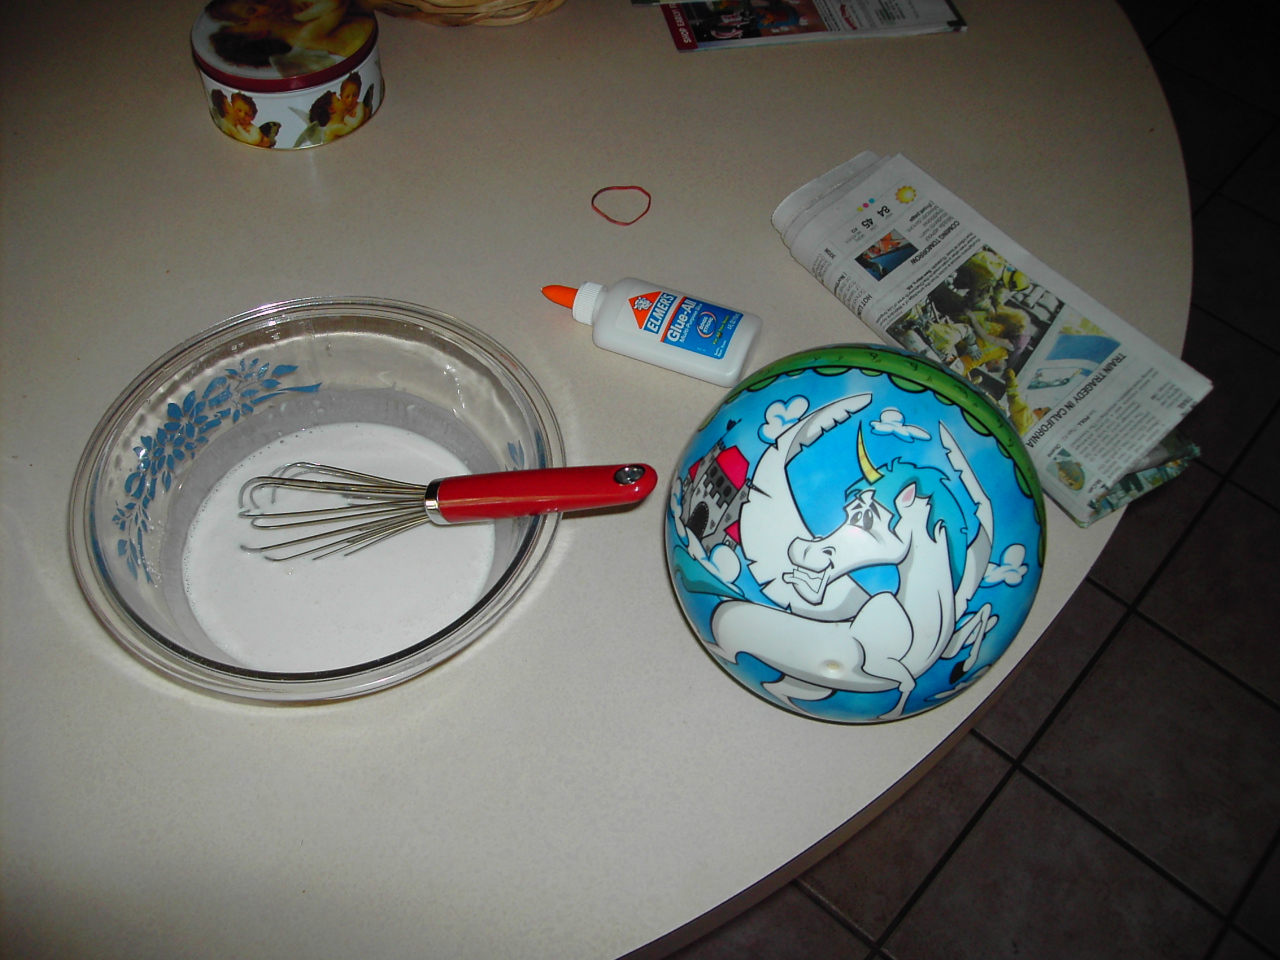
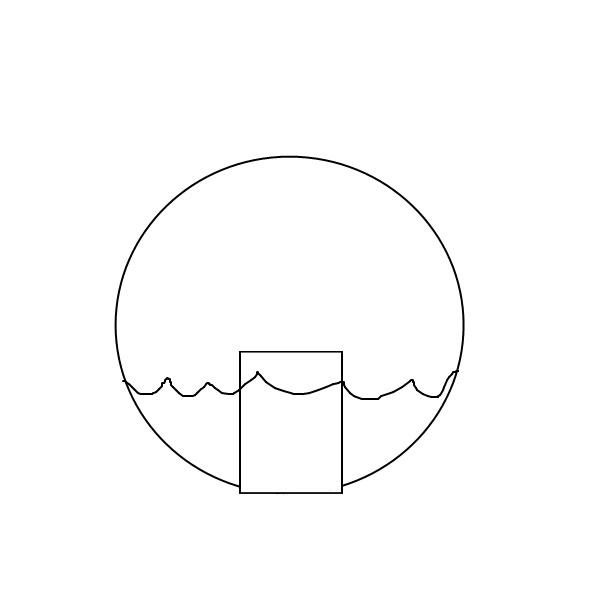
A homemade jig. Can be used for circles or straight lines.

PICT1313.jpg


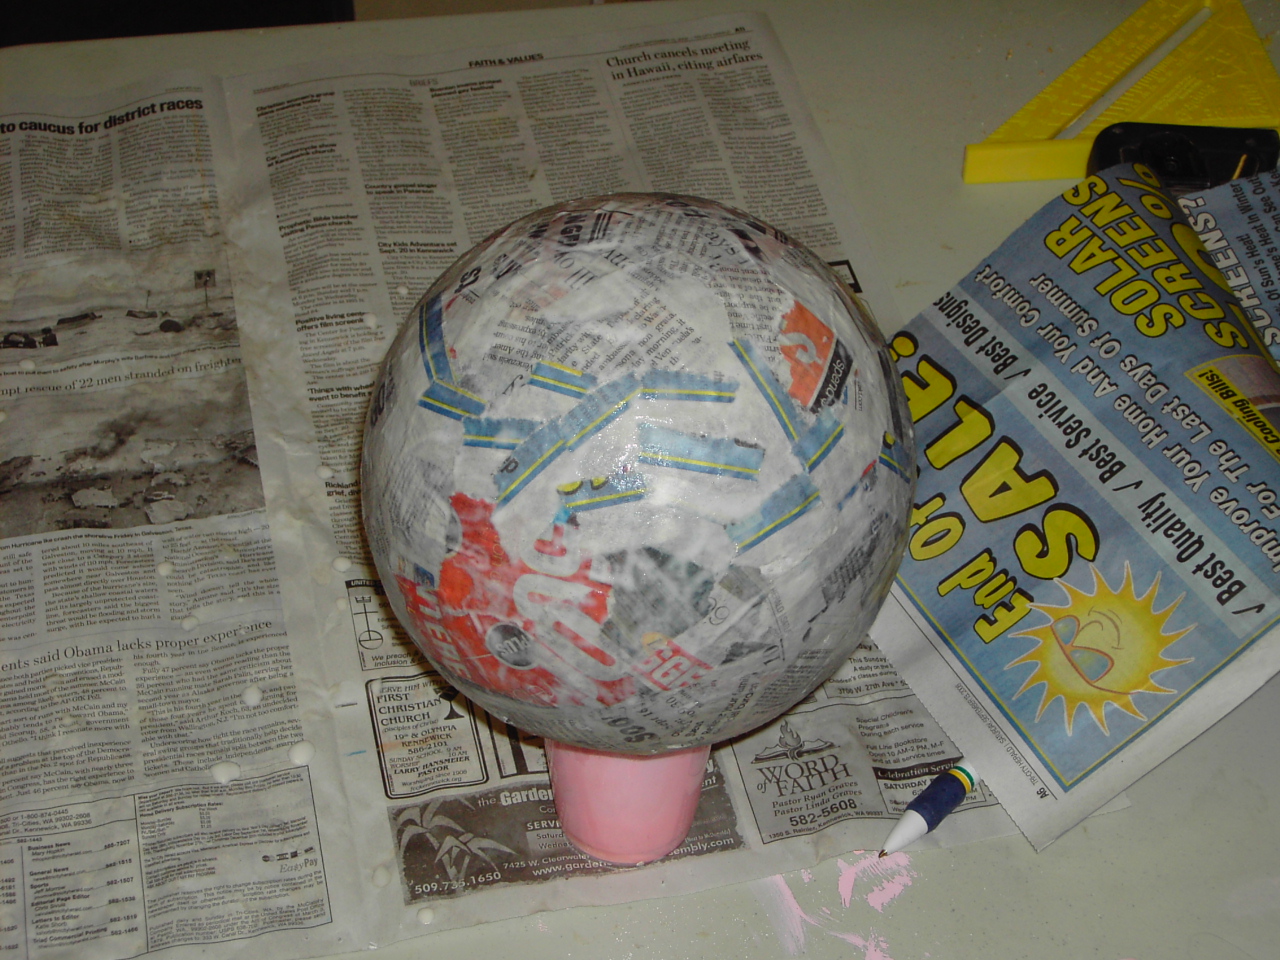
Three pieces make up each corner section. The box is used as a jig while the pieces are glued. The clamps hold them on until the glue is dry and they are one piece.

PICT1314.jpg


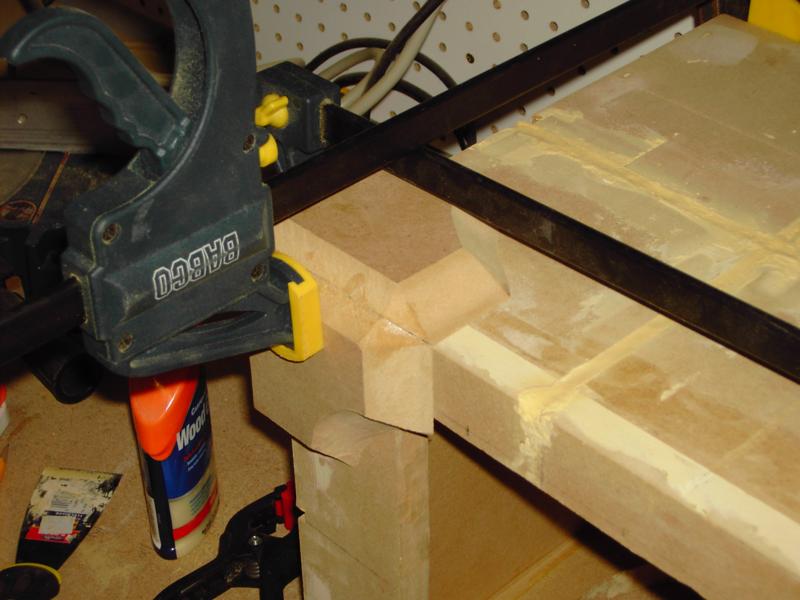
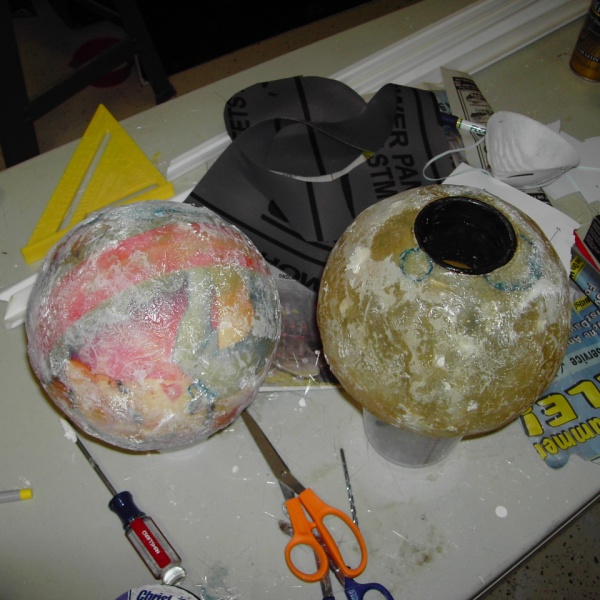
The corner pieces are then removed from the box. Glue is added to the inner seams, then wood filler is used to perfect small imperfections. They will be sanded too!

PICT1315.jpg


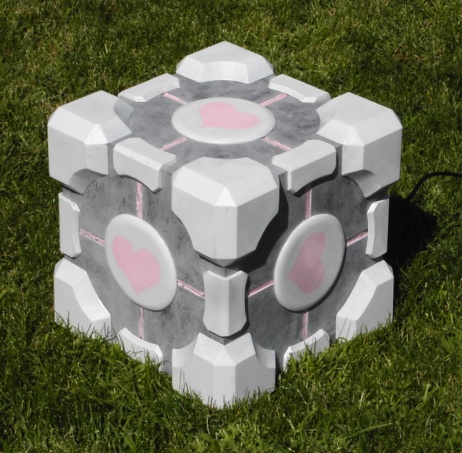
I am going to add a few details this week and by this Saturday it should be done. The speakers that will go with it haven’t even been started, and details on them is still secret. All you can do for now is just enjoy what I give you.

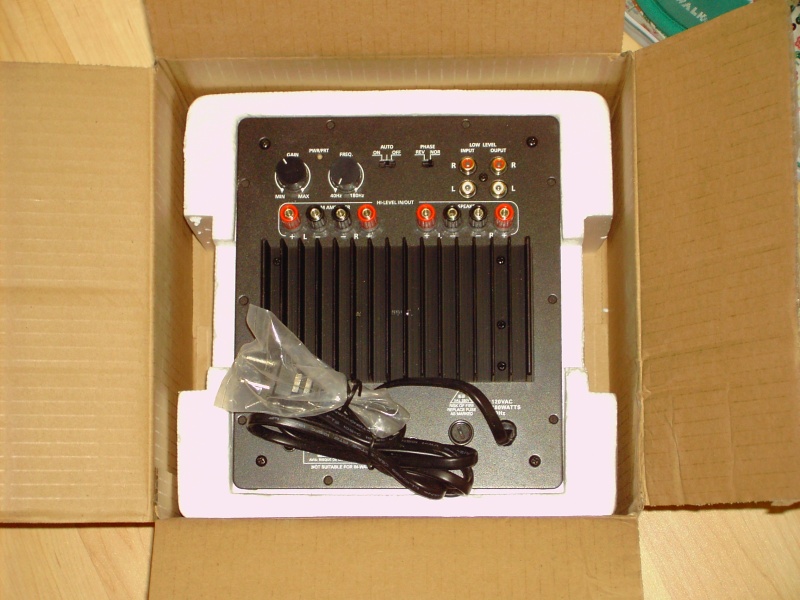
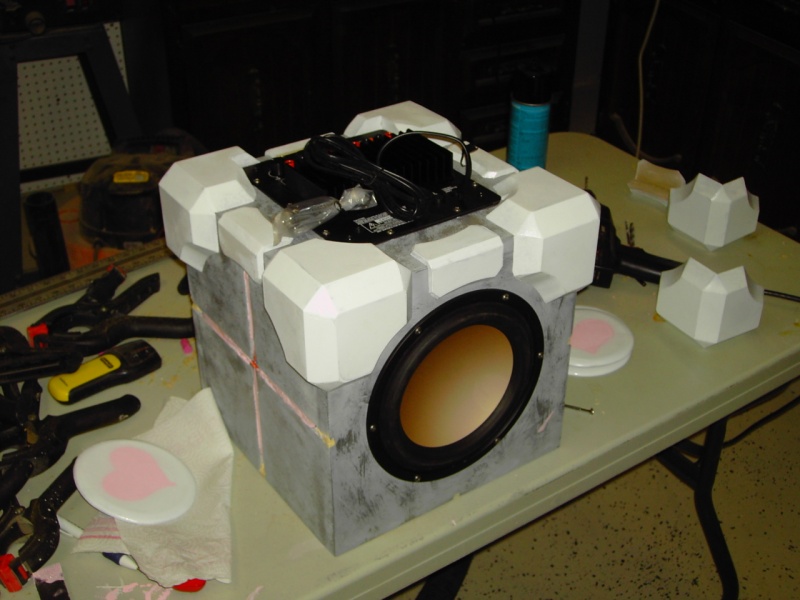
Here’s the sub amp and 8″ woofer.

sub-amp.jpg


sub.jpg


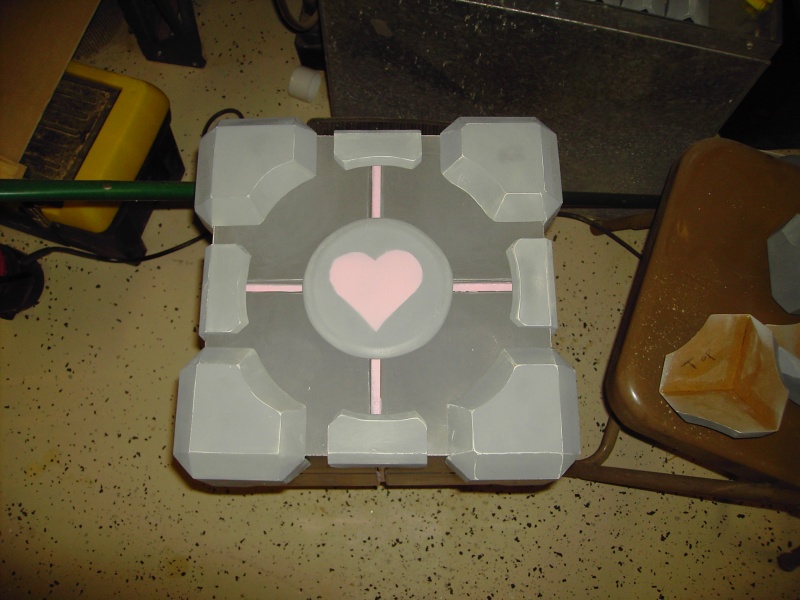
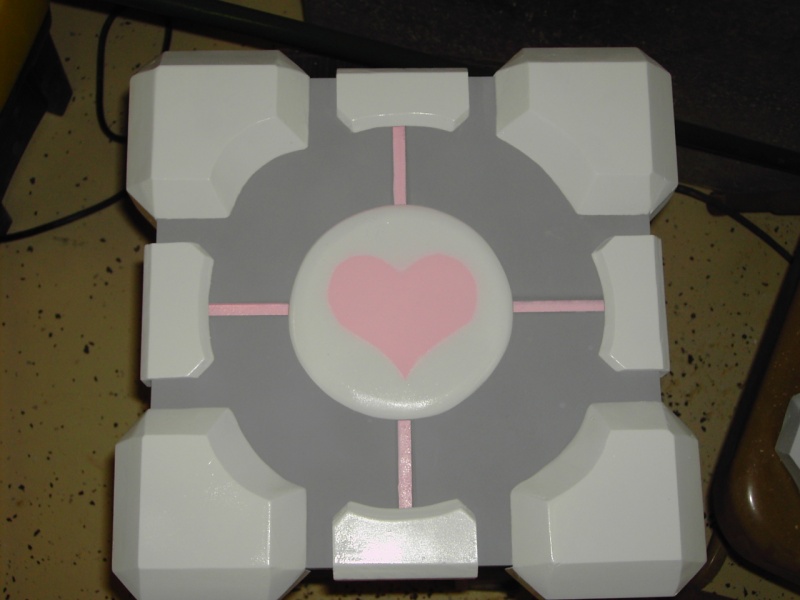
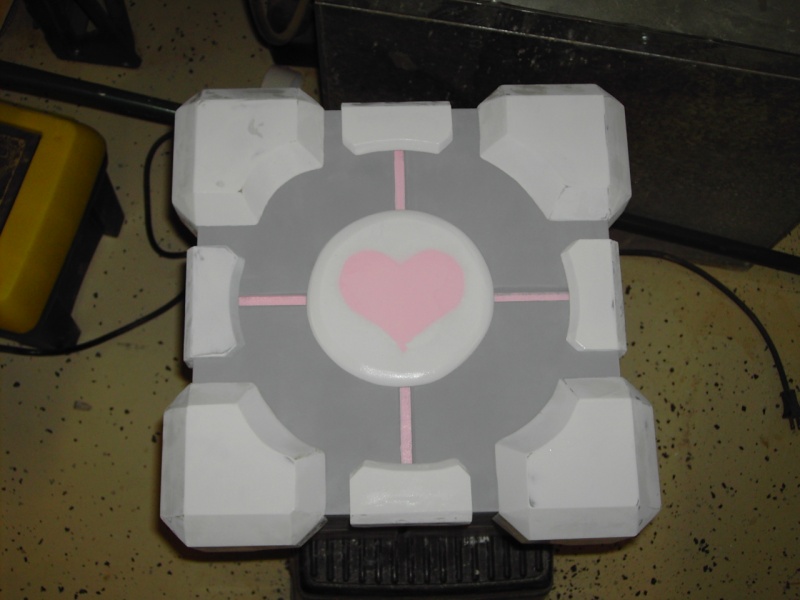
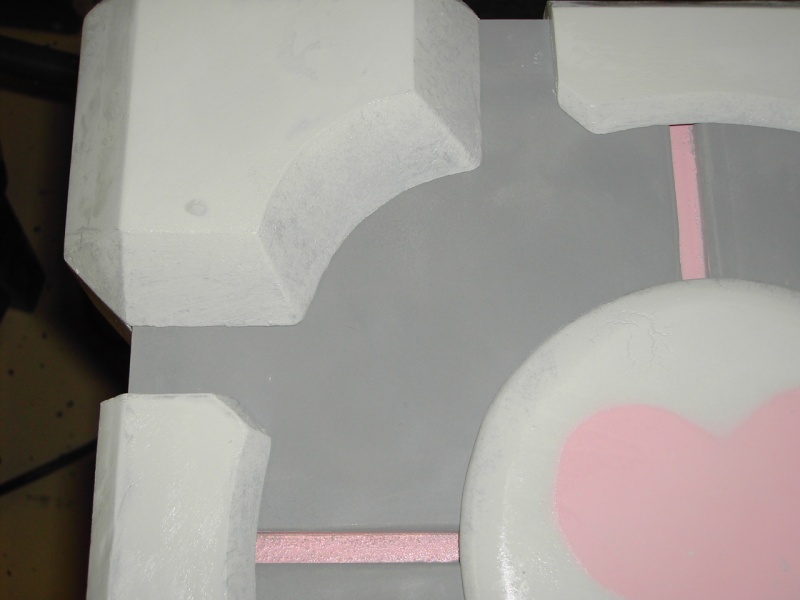
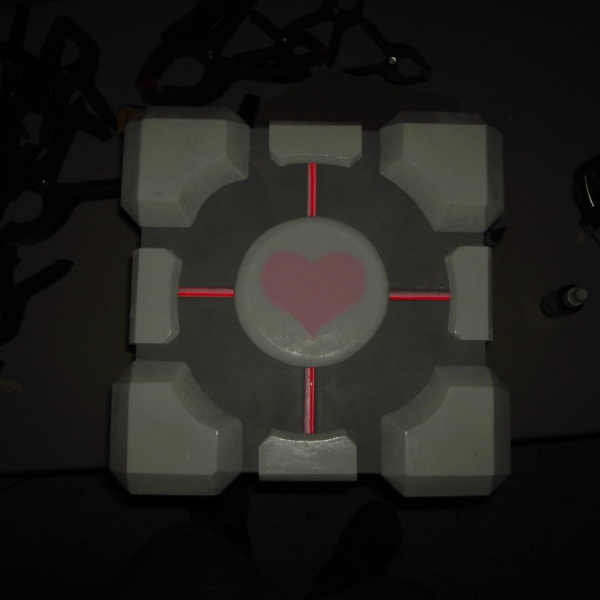
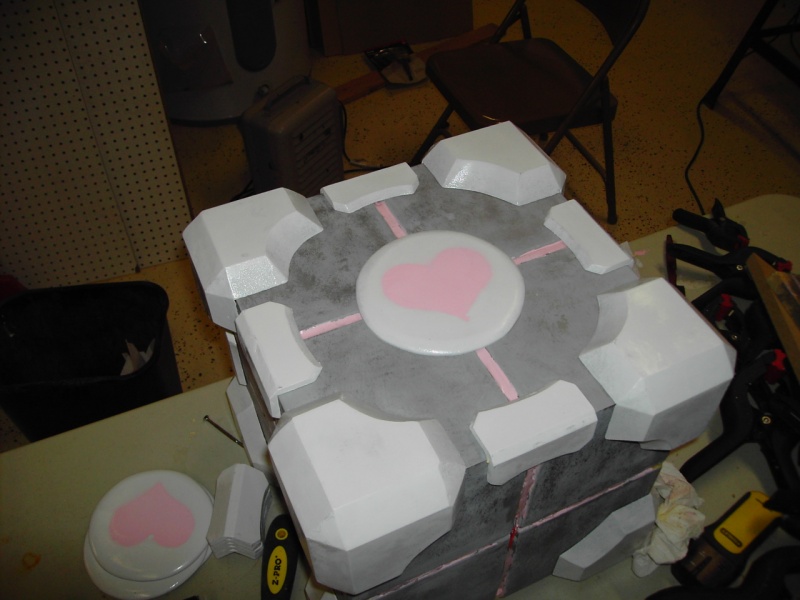
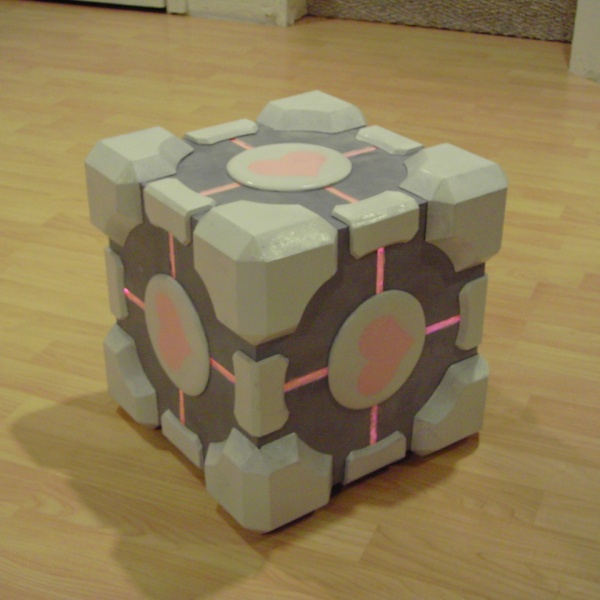
I know what you really want. You want to see the sub box with a little more detail. Here’s the box painted up. It’s a little darker than I hoped, but there’s not a lot you can do without getting it custom painted at an autobody shop. Later this week I will add the EL wire and glue on all the corners. Then there is a little wiring, and screwing in the amp and woofer. Then the sub woofer will be done!

cube-top.jpg
 
Last edited:
I was unsatisfied with the results I was getting, so I decided to repaint the cube. It was frustrating, but worth it. I like the new results a lot more and after some dry brushing and a few coats of clear, it will look perfect. I’m still waiting on the pink EL wire to ship, but it should be here before the end of the week and then I can finish the subwoofer. The speakers will come next. I have the drivers, but everything else to make them needs to be purchased.

Let’s take a moment and compare the new paint job and old to a screenshot of our favorite cube.

repainted-cube.jpg


cube-shot.jpg


cube-top.jpg


Now, knowing that the new paint job isn’t finished yet, which is closer to the screenshot?
 
Today I waited for the mail to come, but I didn’t get the EL wire I ordered. Maybe tomorrow.

Instead, I worked more on the paint. The screenshot shows that There is some grading between the gray of the cube, and the complete white of the corner pieces. I decided that I would try my hand at dry brushing to add the gray. I first added the gray, and then after it had dried a little more I added another drybrush layer of white. It turned out pretty ok. There’s some natural looking wear on the corner pieces, and grade from gray to white looks pretty good too.

Here’s the cube sanded. The white was way too shiny, and the finish wasn’t completely smooth. Sanding also added some wear to the cube that it needed. None of the pictures here show the detail very well.
gray-added-to-white.jpg


Here you can see the gray added and the super light white coat to cover up the wear that was a little overboard.
sanded.jpg


Finally, here’s a close up of the gray to white. The gray does not show up very well in the pic. Sorry, there’s nothing I can really do to fix that.
a-close-up.jpg


Later I will add a clear coat, but first I will wait for the EL wire to show up and I will get it mounted and epoxied in.
 
I got an email back the morning after I contacted the company. Apparently my card was declined for some reason, and the job of telling me about it slipped through the cracks somewhere. I canceled that order and reordered on Aug 28. The order came today (Aug 30). The owner of the site emailed me several times and was really friendly and nice. I was going to give worldaglow a bad recommendation, but I just can't now. My card was declined and they failed to tell me. It could happen to anyone. The owner of the site said that they are really busy this time of year since Burning Man is approaching. The customer service was really good and my order (re-order anyway) got here really fast. I'm impressed and would order from Worldaglow again.

Since my order came today, I worked hard on the Companion Cube sub woofer for most the day. I did a number of things. First, I drybrushed a metallic gray onto the cube to give it a sheet metal sort of look. It worked pretty well and I am very satisfied with the results. It really added some depth to the gray.

I drilled holes and ran the EL wire. This is some pretty fun stuff. The pink is just right. Here is a great blurry picture of the cube in the dark. The wire is run in the grooves and holes are drilled so the wire can from one track to another on the inside on the box.

pict1377.jpg


A quick mock-up with the corners on. The wire will have epoxy over it, and then the epoxy will be painted pink. The glow will show through when it is dark, just like in the game.

pict1380.jpg


Here is the EL wire inverter. It will just hang like it is, but it can be removed. It is on the back, next to the sub amp.

pict1375.jpg


I put epoxy in the grooves to bury the EL wire, and then painted it pink. I then added the mounted the amp and woofer. Here’s a pic of the results.

pict1385.jpg


Some glue on the corners, and this is getting very close to done.

pict1387.jpg


A pic of the back. You can see the amp and the inverter. I hate waiting for glue to dry.

pict1390.jpg


I'm off to glue a few more pieces. Tomorrow morning I will finish and give a sound test. I'm pretty excited.
 
Although there will be more to come in the form of speakers, the Companion Cube Subwoofer is finished. I glued the last pieces last night and took some glamor shots this morning. I'll let the pics do the talking. I'll continue the other half of this project in Part 2: GlaDos Speaks with Her Eyes. The sub weighs in at just under 40lbs. It's heavy.

pict1408.jpg


pict1394.jpg


pict1392.jpg


pict1414.jpg


‪Companion Cube Subwoofer‬‏ - YouTube

‪More Fun With the Weighted Companion Cube Subwoofer‬‏ - YouTube

‪Companion Cube Subwoofer Vid 2‬‏ - YouTube
 
I know you are all thinking that I should play “Still Alive.” I promise, it will come when the entire speaker project is over. For now, enjoy shelf shaking sub-brating goodness.

The speakers in the end are going to look like GlaDOS Morality Cores. I hoped in the beginning that I could just find some spheres that were the right size and mod them, but I never found anything that looked like it was going to work. I eventually stumbled across this project over at partsexpress.com, which is where I got all the parts for the sub woofer. The project explained how he made the spheres. I calculated that with my 2.75inch speaker drivers that I would want the spheres to be between six and seven inches in diameter. Sadly, I could not for the life of me find a candle mold that size. This of course meant one thing, I get to make my own mold.

I went to Fred Meyer (I hate Wal-Mart) and got a ball. I came home and mixed up some paper mache, which consisted of 1/2 cup flour, 1 cup water, and 4oz of Elmer’s Glue.

mache-and-ball.jpg


I then ripped up the day’s paper and put about five layers on. This was fun and messy.

mached-ball.jpg


After it dried I made a template for a rim that would go around the circumference of the sphere. This is made of sheet styrene.

rim-template.jpg


And cut it out and glued it around the middle.

glued-rim.jpg


To add strength as a mold, I then put fiberglass over what I had.

two-halves.jpg


Here are the two halves after the fiberglass and rims are added. They are only clamped together, they are seperate halves. Eventually I will cut a hole in one and it will be the hole through which I slush cast some Tufcal, which is a plaster which is fiber reinforced to reduce chipping. The speakers will eventually be mounted to the plaster spheres.

side-view-of-two-halves.jpg


Next up I have one of the speakers on top of the mold for a size reference. I will compare this to one of GlaDos’ eyes and perhaps you can get an idea of the eventual final product.

kinda-like-this.jpg


glados-eye.jpg
 
My TufCal arrived and I went to slush cast some speakers. Sadly, however, I could not get my homemade mold water tight. I had clamps and vaseline and a shower liner ring cut out to help, but it didn’t work. Plaster spilled everywhere. I was irritated and took a week off to think about things. After that week I knew that if I had neoprine that I could make it waterproof, but I decided that I could go another direction.

I went back to Fred Meyer’s and got two more balls, each one the same size. I then proceeded to fiberglass both balls completely. Each ball would serve as its own mold completely and would then remain part of the final speaker. The ball on the left has not been cut open yet.

glass-hole.jpg


The ball on the right was cut open with a 2.75inch hole saw. I removed the ball and glued in some PVC pipe. The plaster will be poured right into the opening. I calculated that ~5 cups of plaster will yield me ~0.75inches of plaster in the inside. That is perfect.

mounted-pipe.jpg


From this point I will be able to pour the plaster right in the opening and turn the sphere without having to seal the hole. The pipe is above the water line, so the plaster will never be able to pour out, even when the ball is upside down. Now I don’t have to worry about making the stupid thing water tight. The plaster will cure as I spin the ball, creating an even coat on the inside. This technique is called slush casting. I made a very fancy diagram showing how the ball can be upside down without spilling the plaster. Don’t laugh . . .haha.

fancy-diagram.jpg


Here is the TufCal. It’s a good plaster and resists chipping because of fibers in it. It cost about $75 shipped for a 50lb bag. I slowly sifted 2.5 cups of plaster mix into 2 cups of hot water, then stirred. About a minute later I poured the plaster into the mold and began to spin. It worked. No spills, just drips. The results were great. It set up in under 10 minutes. Hot water does the trick for a quick set.

tufcal50.jpg


Just like normal plaster.

tufcal.jpg


The next two pics show one ball with the plaster cast and set, and one without. The plaster adds a few pounds. I’ll measure later. You know what they say; if it is heavy, it must be expensive!

one-plaster-one-not.jpg


A closeup of the inside. Nice and even!

slush-cast.jpg


After completing one shere, I quickly did the other. It went equally well and I am pleased. The artsy part of this, the fun part, will be equally difficult I fear. From here on out I have to make this thing look good. Wish me luck!

both-are-done.jpg
 
After using fiberglass for the first time, and having a less than perfect time of it, I was worried about bondo. However, almost all modders talk about how easy it is to use. I hoped for the best and mixed some up. It went on well enough. It was horribly uneven, but it’s supposed to sand relatively easily, so I didn’t worry. Here’s a pic of one of the speaker enclosures with unsanded bondo, and one after being filled and sanded.

still-lumpy-not-perfect.jpg


After sanding both spheres, I decided that I needed more bondo to fill in the valleys. I hoped that I would get a more perfect sphere the second time around. Here are the sanded balls ready for more bondo.

time-for-more-bondo.jpg


I sanded the balls again. The results were nothing short of amazing. Making a sphere is hard, and these aren’t prefect yet, but I am now confidant that they are perfectable. With much work these will become two of GlaDos eyes. I’m excited, and I should be. One more month ’til completion? That’s what I’ll aim for, but it could be two.

post-sanding-almost-perfect.jpg
 
I uploaded these videos to youtube last week and, like the busy person I am, am only now posting them to the site. I still can’t find the camera I used to take progress pics. I’m sure it is at my parents house somewhere. I’ll find it when I go home again. For now, I just have some videos of the speakers and subwoofer together. I’ll do a video tour of the speakers, sub, and new apartment soon. For now, enjoy the videos.

A triumph.
‪Still Alive: GlaDos Speakers and Companion Cube Subwoofer‬‏ - YouTube

Outkast. The song is called “Intro” from the album “Speakerboxx”
‪Companion Cube and GlaDos Demo‬‏ - YouTube

I’m open to requests. Have any?
 
No idea what a companion cube is but nice work I owned a car audio biz for years and did more custom boxes than I can remember and yours came out nice :)
 
This thread is more than 12 years old.

Your message may be considered spam for the following reasons:

  1. This thread hasn't been active in some time. A new post in this thread might not contribute constructively to this discussion after so long.
If you wish to reply despite these issues, check the box below before replying.
Be aware that malicious compliance may result in more severe penalties.
Back
Top