CEREAL KILLL3R'S - Halo 3 Master Chief (WIP with Videos)

Hey! Just wanted to say that you're stuff is quite impressive! I'm amazed at how much skill you have! I was wondering how you sanded your bondo? I saw that you uses metal files, but is there anything else? I have a mouse sander and I seem to clog the paper faster than I can afford! Once again, spectacular job!
 
Last edited:
Hey! Just wanted to say that you're stuff is quite impressive! I'm amazed at how much skill you have! I was wondering how you sanded your bondo? I saw that you uses metal files, but is there anything else? I have a mouse sander and I seem to clog the paper faster than I can afford! Once again, spectacular job!
The quality of your body filler makes a huge difference when it comest to paper clogging. Evercoat's cheapest fillers are 1000 times better than standard Bondo brand body filler. In a pinch you can use the Bondo Pro Gold, which is still better than the standard Bondo.
 
Man this is an amazing work!! You are very talented!! Thanks for the videos, they are very helpfull!!
 
Thank You for taking the time to show us the detail and things you've done, how long have you been doing this type of stuff?
 
If i one day manage to have a talent a quarter of yours i would be a very happy chappy!!!!
awsome build loving it!
 
There is a comment Cereal made about nothing sticking to silicone. His comment was to do with applying the foil to the Mohawk and what a pain it is, well I found a way when doing my mould to get it to stick :). Just use a thin coat of spray mount. This makes the silicones surface tacky so the foil will stick but due to nothing actually sticking to silicone it won't glue to it when the spray mount dries.
 
Man, I hate you. Not really, but kinda.
Quit being so awesome.
Seriously, man, cut it out. :D

That is the best helmet I've seen, honestly.
Where did you get the visor? How's visibility?
 
Last edited:
This thread has given me SO much inspiration.. I love the way you posted with your progress and details. I'm actually attempting to do one quite a bit like yours, using some of your methods and details. I just wanted to thank you for such an amazing thread and work.
 
its a late comment but could you explain in a little more detail how you managed the visor detail i'm going to be attempting a Jorge helmet soon and although his has no where near as much detail it still looks amazing and id like to give it a go however id rather not go in blind so to speak on that same note i don't suppose anyone noes where i could get said visor from closest colour match I've found is blood orange/fire mirror any helps much appreciated

last but certainly not least your work and detail is phenomenal if mine turns out half as good ill be amazed
 
Ok, figured it's about time to bring this thread "back to life" as things around here have finally picked back up to Full Tilt!
My apologies for the lengthy delay all, but here we go again!

A also have a few more instructional videos up for all who are interested. These ones are geared for the beginner but they do cover some good info for all!

How to Scale your Pepakura Pieces:
https://www.youtube.com/watch?v=H_YIKeFX9P8


I'm back:
https://www.youtube.com/watch?v=kd67vETqAs4


What is Pepakura, how is it done?
https://www.youtube.com/watch?v=KAJl3ty-gVg


Understanding Fiberglass Resin: How to Harden Pepakura Pieces:
https://www.youtube.com/watch?v=eJmB0yw3sOY


Cheers,
Dave/Cereal.
 
Last edited by a moderator:
Ok, Now actually time for an update!...

It's been a busy week or so here in Pepakura land. I figured since I'm doing a video that's going to be covering resin coating, I'd better make sure that I have some things to resin coat. So here we go:


Here's a shot of some of the things I've been doing for the last 8 days.
All_Pieces-1280x850_zpsafd10179.jpg


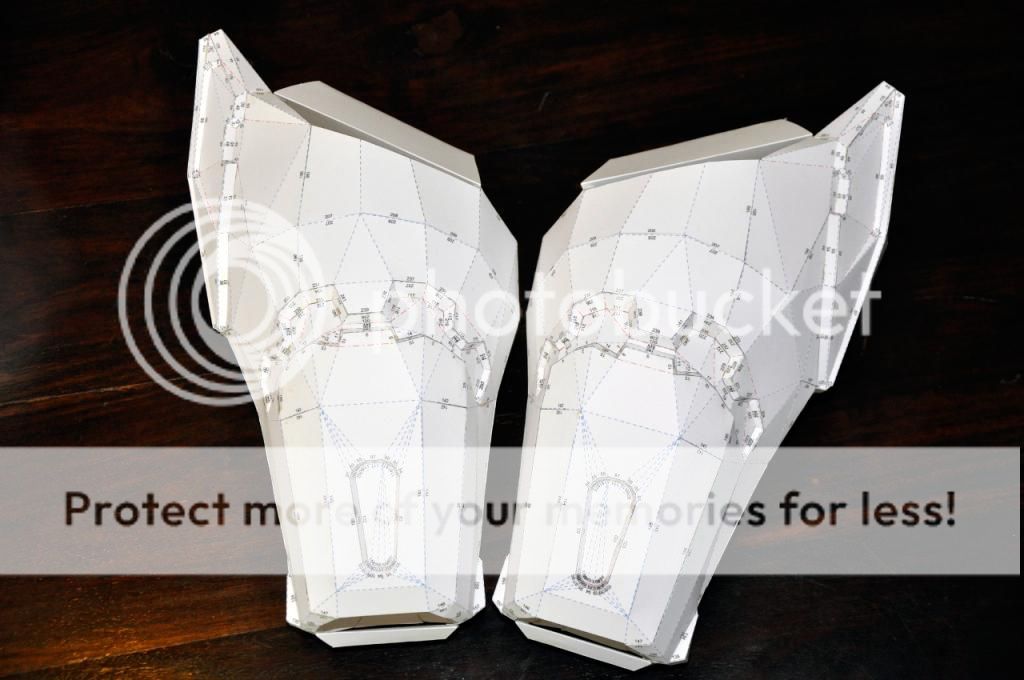
I Pepped out some new gauntlets because I wanted to adjust the sizing to be a bit bigger
Gauntlets-1280x850_zps8ad33a38.jpg


Here are the shoulders. I made a bit of a booboo which I didn't notice until too late. I accidentally printed out 2 right shoulders and did not realize until everything was cut out and the bicep was pepped. There was no flipping way i was going to re-print, re-cut everything again so I assembled the piece inside out :)
Shoulders-1280x850_zpsba6bea6c.jpg


On a personal note, I could no longer stand the unfold on the shoulder/bicep pieces. So I decided to do a Re-unfold of my own and could not be happier with the outcome!
Re-Unfold_1-1280x850_zps6e35aced.jpg

Re_Unfold_2-1280x850_zps30d425fc.jpg


Here's the hand plate, which I only did one of. This is done purposely as the left and right side are identical and I intend on molding and casting the piece which will save time.
Hand_plate-1280x850_zps15bb1a17.jpg


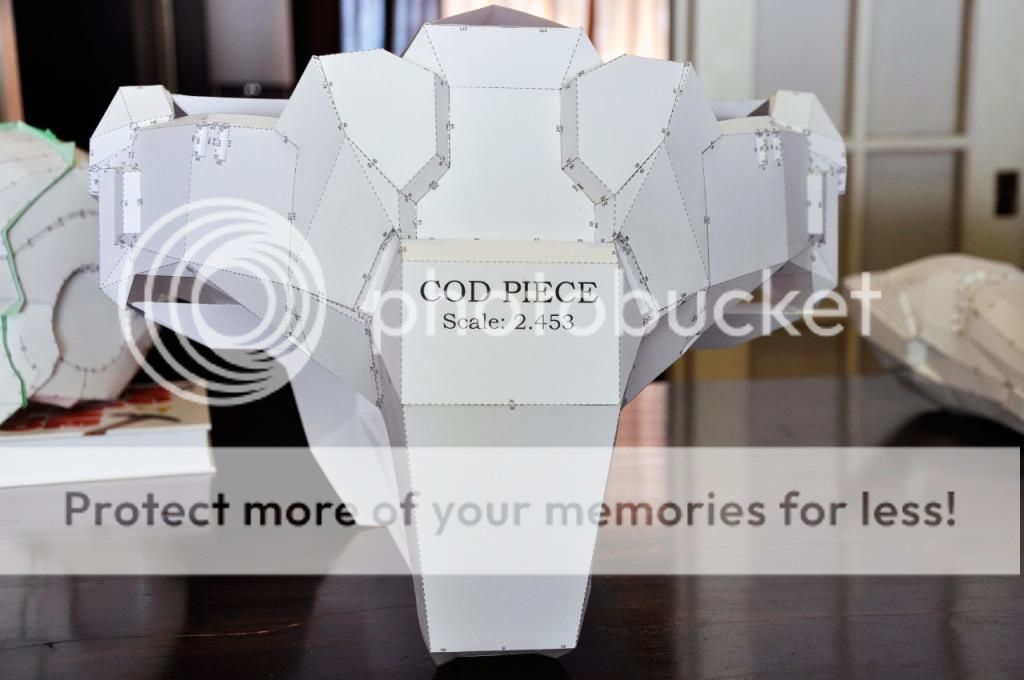
Moving right along, and down the body, we come to the cod piece. I am doing a somewhat different approach with this piece specifically. I have always found that when this piece is scaled "Correctly" it is too cumbersome and easily interferes with you're overall movement. So I have intentionally scaled this piece about 10% too small for me and will be sectioning it off in to 4 separate pieces down the road. This will allow a more compact fit allowing a far greater range of motion and comfort! :)
Cod_Piece-1280x850_zps99a4a6e0.jpg


The last piece of the armor set that I managed to get done (due to the fact that I ran out of card stock) was the right thigh. Oddly enough, the model does not come with any supports, not too much of an issue as I will be constructing my own.
Thigh_1-1280x850_zps595c1643.jpg


I'm not getting into too much detail here
but I do have another "parallel" project that I'm starting on, which will be covered separate from this thread. Before anyone asks, YES it will be a MK 7 from The Avengers (My Favorite Suite of of the Iron Man franchise :) )

Iron_Man_Pep-1280x850_zps2fb07c78.jpg

Iron_Man_Pep2-1280x850_zps6da06d36.jpg


There, now that everyone knows that I am indeed on the move there will be more to come really soon!
Torso progress coming very soon :)
Dave/Cereal.
 
It is Shark's File, yes.
I've clamped the helmet segments together with binder clips on the inside to keep the proper shape and yes the tape is so I can the the pieces apart once they've been epoxied.
 
It is Shark's File, yes.
I've clamped the helmet segments together with binder clips on the inside to keep the proper shape and yes the tape is so I can the the pieces apart once they've been epoxied.

Nice. I may just have to steal that. Keep us informed on how it works.
 
Looks great man!!! I have been following your videos on YouTube, I hadn't saw the thread update until now....... Love your updates man!!
 
Thanks,
Yeah, it has been a while since I've had the time to get back in to this build, now it's in full swing. Looking forward to getting it complete as I have several other projects that I'm itching to start!
 
Back
Top