Building The Death Star - PRODUCTION

Here's a theory of mine...

On my domes, portions along the circumference of the edges get a little wonky (see my fabulous, technical diagram below). I wonder if on the original they may have experienced this, and perhaps added styrene bands along the edge to address this, and/or add some interest and a "manufactured" look to the otherwise plain dome.

Edgescan.jpg
 
It looks like the panels may have been just that: panels. Are you sure that these aren't thin sheets of styrene? Look at this part, you can see what looks like the shadow of the panel.
DeathStarSurfacecopy.jpg


The more I look at this the more panel edges I see. Look to the right of the one I have circled. You see the shadow of the next panel (well, in my mind anyway).
 
Last edited:
Dont suppose some of thse panels would have been PVC tape by any chance would they Rob? Could be?

lee

Lee that's pretty much where my mind (imagination?) is taking me on this... Is this some sort of pre-printed pattern (think shelf paper) that was laid down on the model? Perhaps even a heat-shrink product similar to what is used on RC aircraft (to deal with the compound curve issue).

I realize I'm going way out on a limb here, and as Mike said a few posts back, I'm over-thinking this. But at this stage, my neurotic analysis hasn't yet resulted in analysis paralysis. I'm not ready to paint yet anyway, so no reason not to dive deep and explore crazy ideas!
 
Feek, good call, but that line is a tad too bold to be shadow.

The model has TONS of vertical lines drawn on it by what seems to be mechanical pencil. That is probably what this vertical line is. Interestingly, the southern half has WAY more of the vertical lines than the northern.

It looks like the panels may have been just that: panels. Are you sure that these are thin sheets of styrene? Look at this part, you can see the shadow of the panel.
DeathStarSurfacecopy.jpg
 
I see that one is bold but didn't know if it was raised slightly more then the rest. Now the shelf paper is a interesting theory. I swear I have that exact shelf paper here! How easy to cut the patterns and stick them on the surface instead of painting it. Wow, it boggles the mind! :lol


Will
 
Now the shelf paper is a interesting theory. I swear I have that exact shelf paper here! How easy to cut the patterns and stick them on the surface instead of painting it.

On the other hand, the things that make me re-think that theory are:
--I've seen the model in person; though I wasn't looking for any edges, it appeared as smooth as we all know it to be
--Age; after thirty years, would any "stuck down" elements still not be peeling up?
--The compound curve issue; even a band of masking tape, if wrapped latitudinal, will not sit right (longitudinally, a band of masking tape will sit properly though)
 
Last edited:
A paper laminate sounds a good theory...id agree there, its very possible!

Im still liking the PVC tape for some reason, like you said rob, applying that would be very thin, and with minor manipulation, wrap to the curvature, heat would also be a wise thing to make that tape (if there is indeed any on the model) mold to that shape!

Id not even go the styrene route, thats seems overkill and would be a pig to adhere neatly....its one thing ive been looking at for the cannon is all Rob, Tape for the panels, instead of styrene...if you mess one up, peel it right off and go at it again bud, as we know now, its what they used on the X wings Saturn V cans!

lee
 
I personally feel you're starting to over think it. Those shadows you have to remember, are being cast by extreme studio lighting. The slightest change in depth in the paint will cast a decent shadow. I'm almost certain that most, if not all, of those shadows are just due to raised paint layers created after masking had been removed. That thin scribed looking line was probably where some pin striping had been layed down to mark tropic line.

Granted, I've never seen the model in person, so this is all theory, but I think it's pretty sound. There may be some styrene strip on the equator for some added detail, but other than that, I say it was all masked and painted with many layers of paint, and they were left with some good raised panels after the masking had been removed.
 
Im going with tricloudwalker on this one! These are raised paint tape lines. The shadow could very well be a darker paint that was used in this spot to help accentuate a slightly darker shade at this point,as you can see there are varying shades of gray on this globe. Maybe the separation line is where this deathstar was assembled in FOUR sections,as opposed to a top,and a bottom half. In my early days of automotive painting we'd mask of a spot for blending,and it would be a bit darker on purpose(sprayed with a darker primer) as to add colour a little bit at a time to achieve a certain amount of hide without complete coverage to hide the repair,so it wouldn't be brighter that it should be. This helps it to blend in order to look as if it had the same colour intensity. If everyone remembers - the deathstar had varying shades of gray on its' surface(panels)to give it the illusion of depth,as well as definition of detail. This is most likely the same effect they were going for,and most likely the technique they used,but they probably didn't notice the exposed line! I'd copy it,as this does'nt go all the way up the side(probabaly not a shadow)in this case!
 
Well guys I think its fairly evident that I've sold myself on the concept that there was at least a styrene band around the equator.

So mine now has a styrene band around the equator!

Hopefully I'll be primering tomorrow or the next day...

012509001.jpg


012509002.jpg


012509003.jpg


I've also finished the radials around the north pole. I think they're pretty dang cool!
012509004.jpg
 
Great build up! I have to agree with nwjedidave about the "texture". I think they are done with 2 colors in rattle cans. A "dusting" with 2 colors over the light gray base color. I think a darker gray was sprayed over the light gray base color then black was sprayed over that.
Vince
 
Hey man, Lorne Peterson once told me that they spray their lighted models first with a coat of reflective silver which helps best with light leaks. We were discussing the Star Destroyer at the time, but I just thought I'd throw it out there before you prime.

I like your equatorial plating idea. It looks "right" now that I see it.

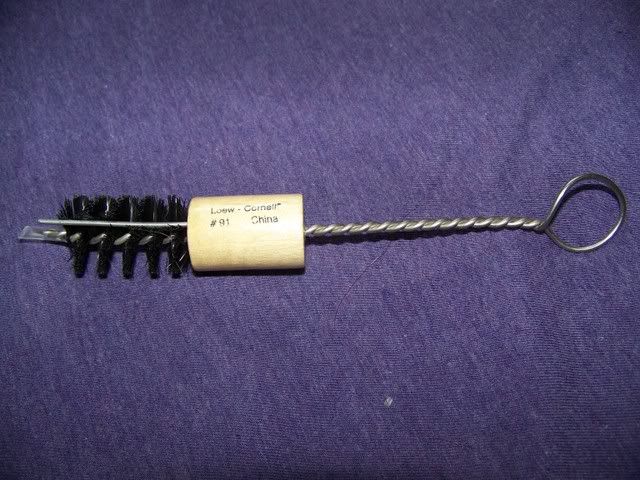
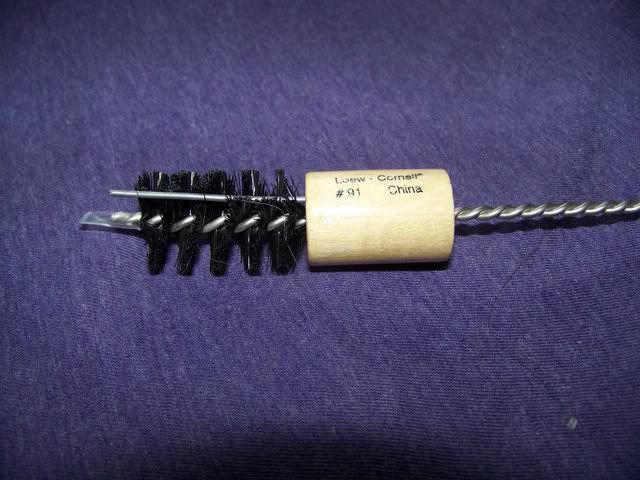
The spattering brush is an excellent tool.

Love the radial strips on the north pole too. That looks very cool!

Dave :)
 
The spattering brush is basically the same effect as a toothbrush,except that the bar is used,as opposed to a thumb. I'd use this instead of spray paint cans! This way you won't have to worry about making the spots TOO big in a couple places,and therefore having to strip this,and having to start over! :cryI know that there is alot of masking to do,even after this,as the original was painted with gray automotive primer,then masked for the latitude,and longitude lines before finally being sprayed with the spotty finish. I think Dave's(vaderdarth)right about the silver paint being sprayed for blocking out light leakage. I'd just paint it over with flat black,as I do on most of my models that need to be lighted to block out any possibility of leakage due to any type of light source. However,I believe that they used silver because of it's ability to not absorb heat from the lamps as it would from any other paint! Brighter colours don't absorb heat as darker colours do! This is also probably why they didn't paint the entire globe at ILM when they made the deathstar! I build all my models with LEDs,as they don't produce any heat what so ever! Unfortunately,this is too big to just put LEDs in it!
 
Last edited:
All right women... Hold on to your butts...

012609014.jpg


I still have a fair bit of physical work to do before painting the finish coat. The styrene banding needs work. I need to sand smooth the RCH of an edge it has in some places, and I need to "block sand" the facing surface of the styrene to flatten and smooth it out. Plus I need to fill the gaps between the pieces of styrene (which don't show well in the photo, but sort of pop in person).

Also, I need to (obviously) fill in the screw holes, sand everything again, and add another coat of primer. Oh and the detail bits surrounding the dish need a smidgen of clean up.
012609015.jpg


I've been worried that I made the trench too tall/wide (7mm), but in this shot, take a close look. Most of the trench exhibits a large gash creating an odd illusion that the trench is more narrow than it is. The black line on the bottom is the gash (cear Plexi showing), and the black line on the top is the cross-section edge of the upper dome. Look at the trench area on the right that is fully painted. How does it compare to mine?
012609017.JPG


And after all this fretting about the speckling pattern, Brad and the others suggesting a simple rattle can approach were right on task -- this was a two minute quickie test. Slam dunk.
012609018.jpg
 
Last edited:
Back
Top