BRDencklau
Well-Known Member
A short while after I started making Borderlands themed props I was approached by a huge fan of the game and regular on the forums. He expressed his love and respect for a weapon that some treat with general disdain, The Flakker. I have to admit that I did not understand the capabilities and true power of this legendary weapon at first. But after a brief tutorial and some toying around I began to cherish this beast of a shotty from the high octane mo-fo's at Torgue. Always being up for a challenge and already having ideas of a BL2 shotgun project, I agreed to the project.
Now there is a bit of conjecture as to the proper or most effective assemblage of parts on the Flakker. Including prefix which is obviously tied to assembly. For this build it was requested that I approach the build with the Casual prefix. Maintaining a Torgue-centric construction but with the option for a Hyperion stock.
I presented this rough sketch, which to my eyes appeared to be the proper arrangement of components. I was wrong. I can accept that.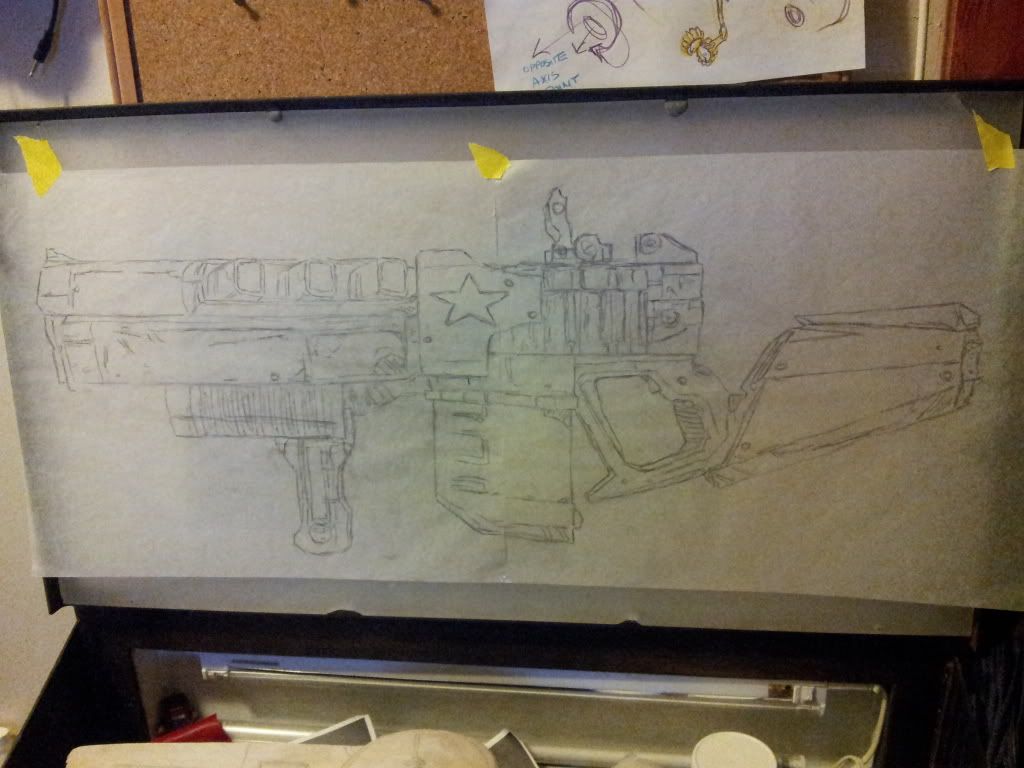
This is the reworked drawing with the appropriate pistol grip pump. As you can see, I cleaned it up a bunch. I also produced drawings from the top and bottom views, as well as from the front, but will not be showing them here.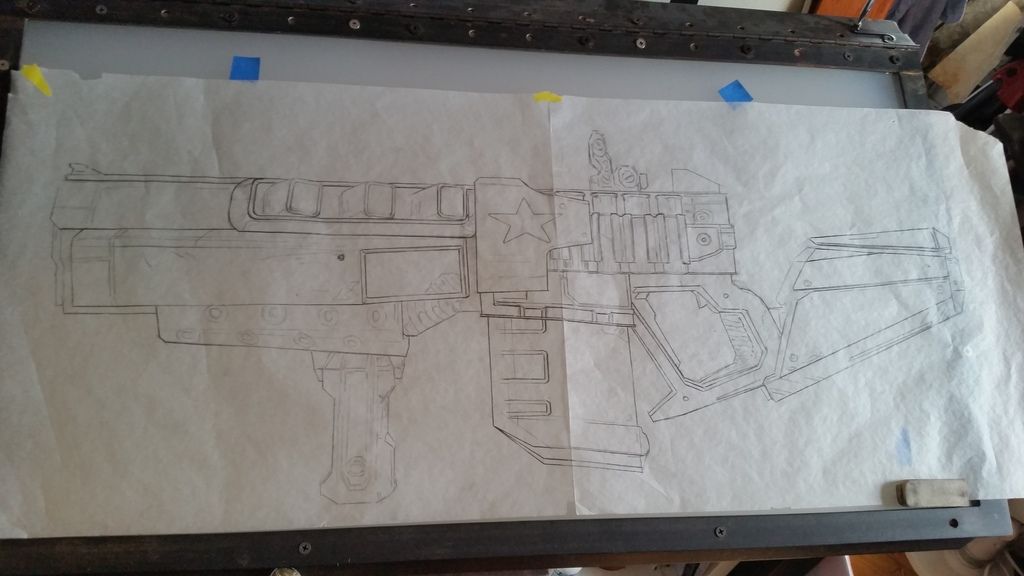
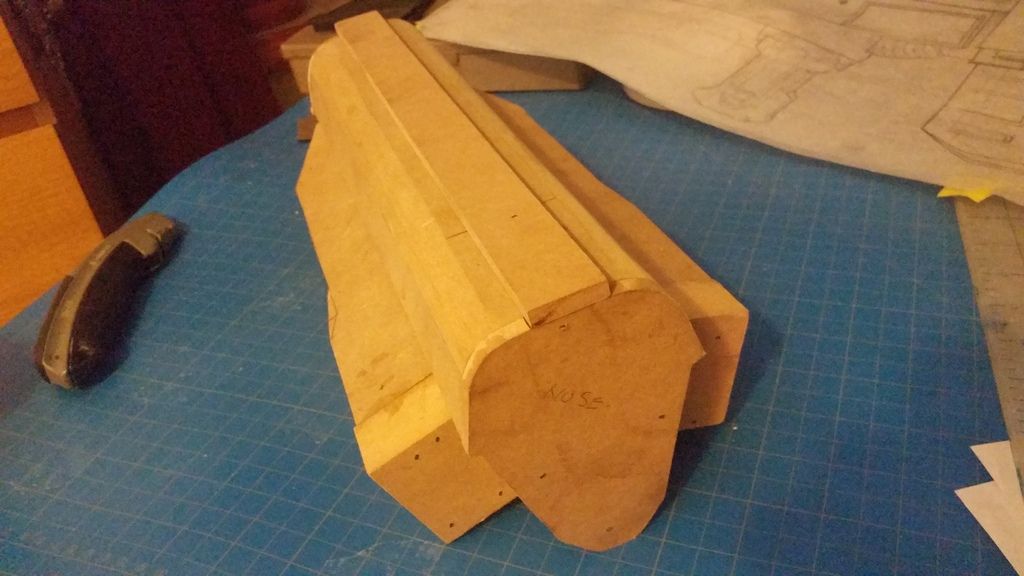
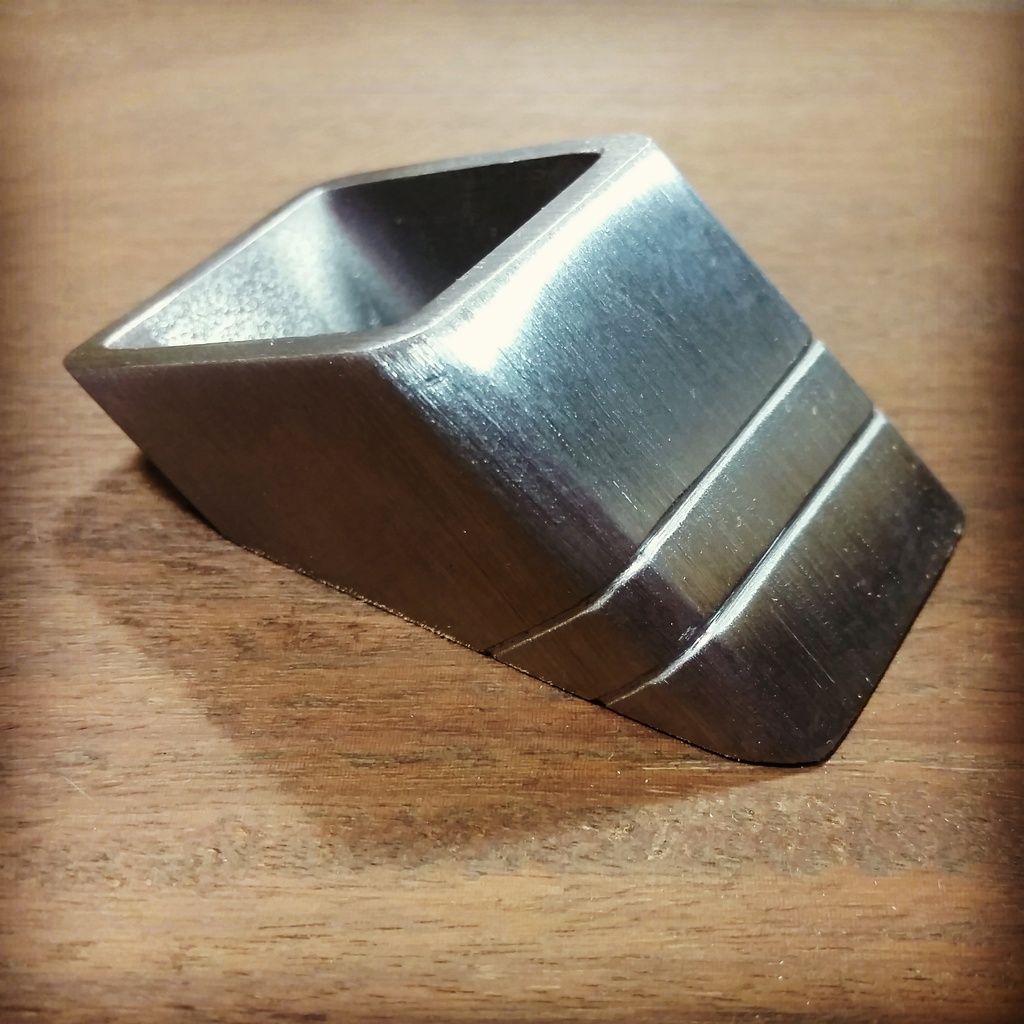
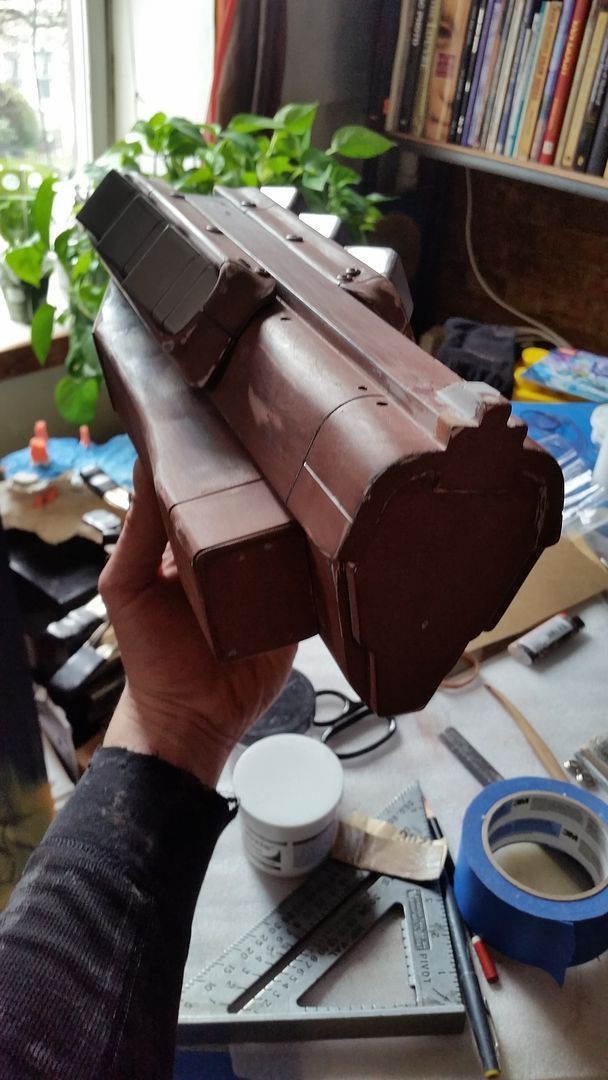
So... yeah. This thing is super duper complicated with a ton of different parts that all have weird geometry. I decided to start with the barrel assembly. After some thought I decided to break it down into 7 parts to make it "easier" on me. (And actually it breaks down into 13 parts. You'll see why in a bit.) The first of which is the main barrel. I extrapolated dimensions from my drawing set and produced a 1:1 that I broke down into multiple basic trapezoids that I could rip on my table saw. (I do all my drawing / designing by hand as of now, all 3-D modeling is in my head.) So you end up with a bunch of parts. Note: the digital bevel gauge is one of the best tools.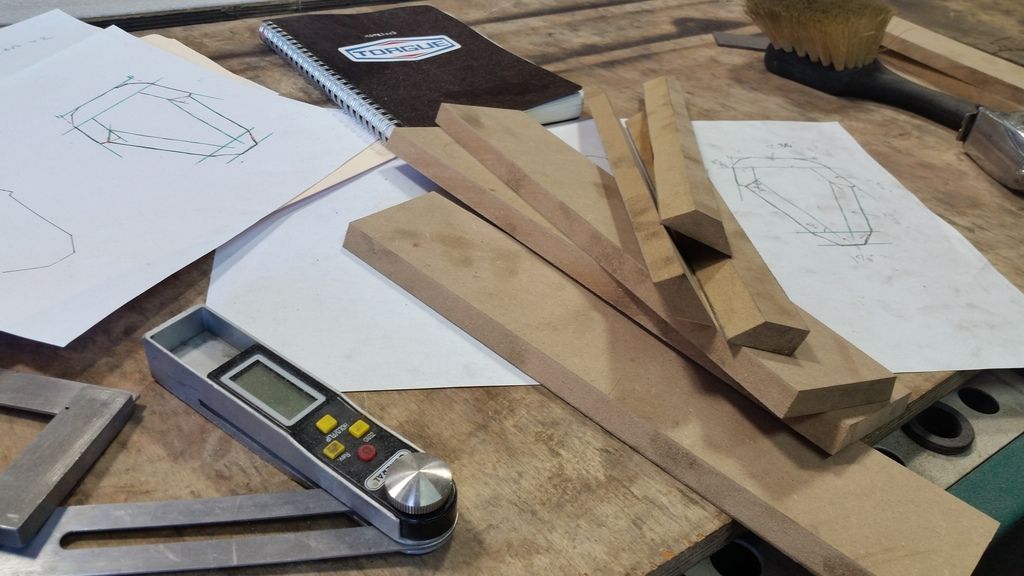
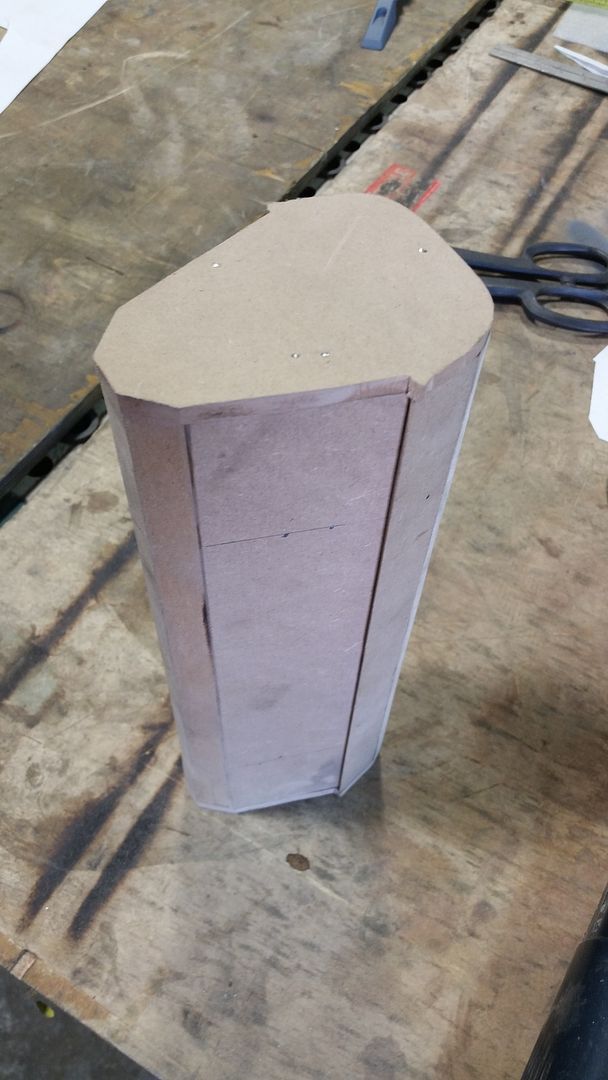
These pieces were assembled into the basic shape of the barrel. I capped it of on the top and bottom so you don't get to see how I did it.")
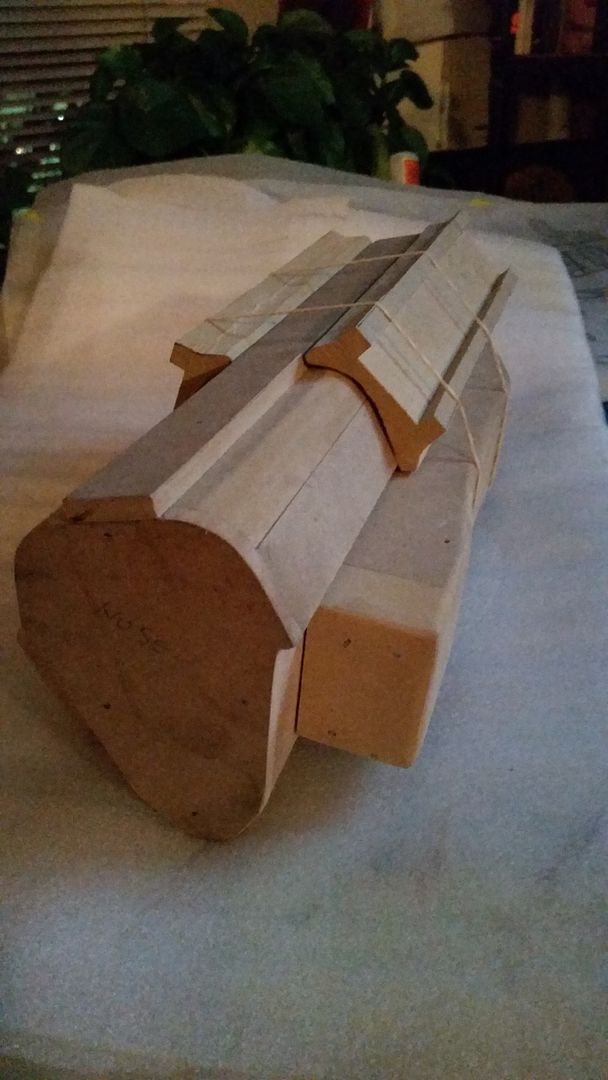
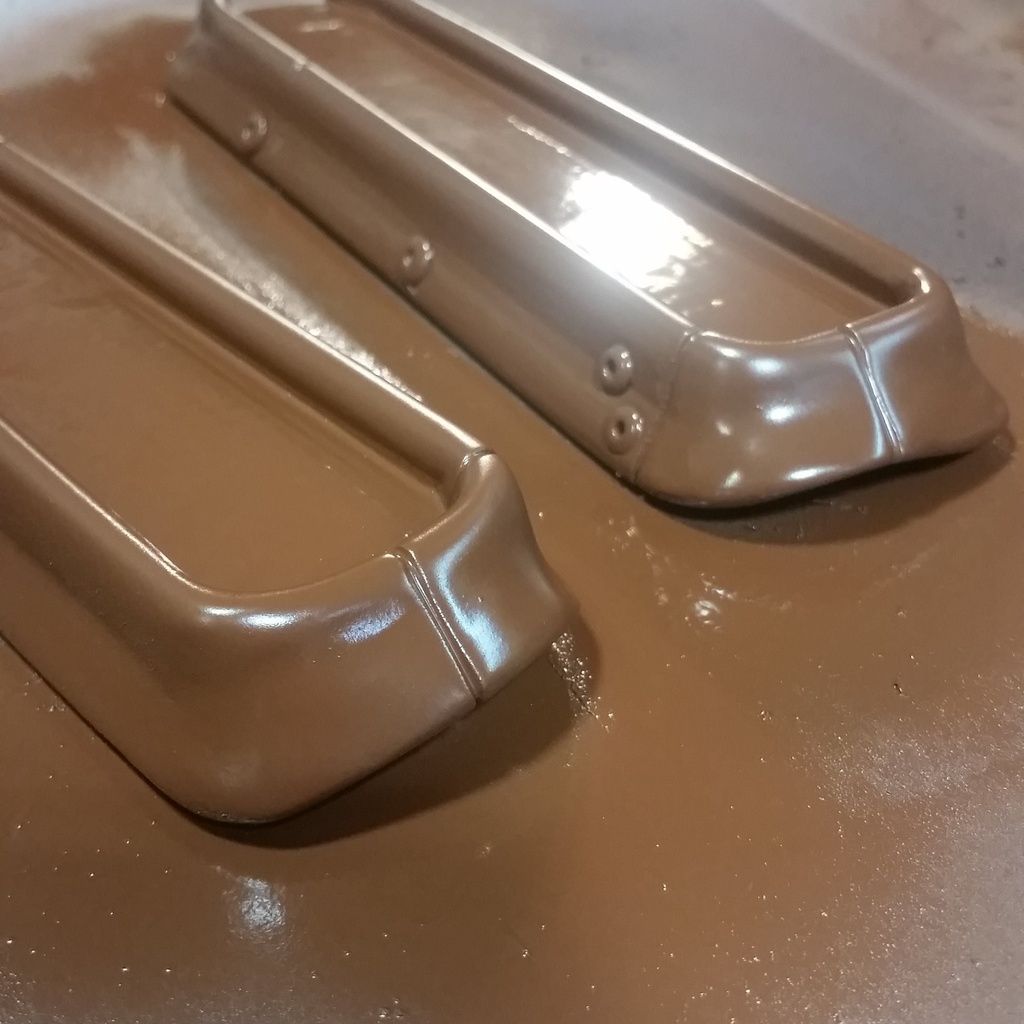
I fabricated the two side pods in a similar fashion. They attach via small blocks on the sides of the main barrel. I also added a strip to the top for the sight.
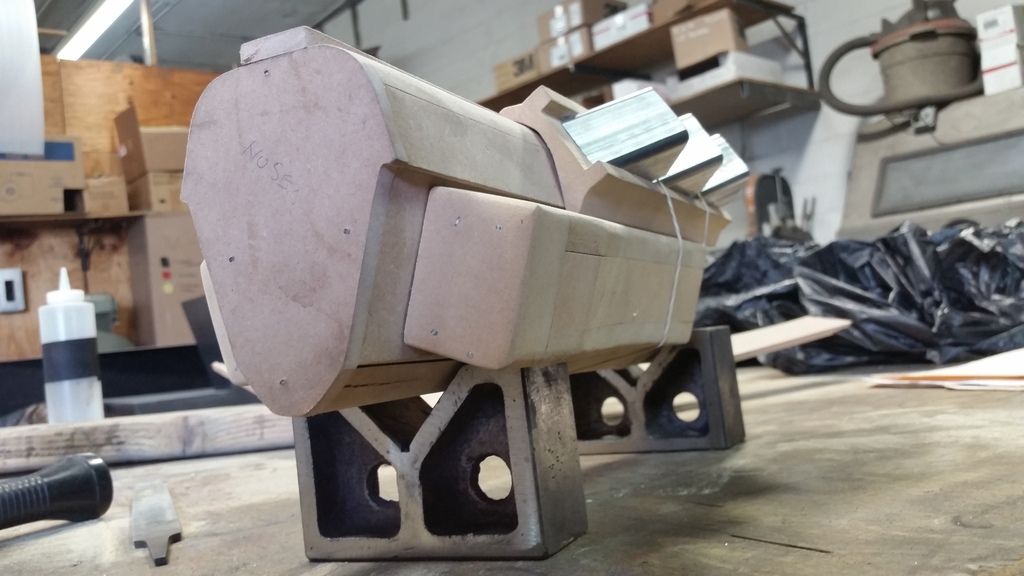
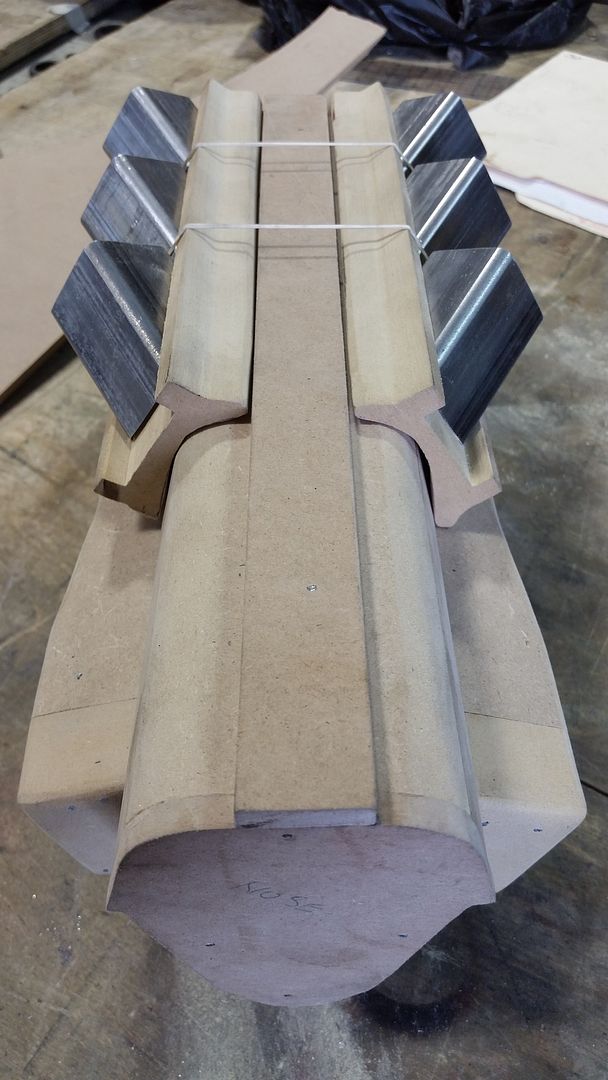
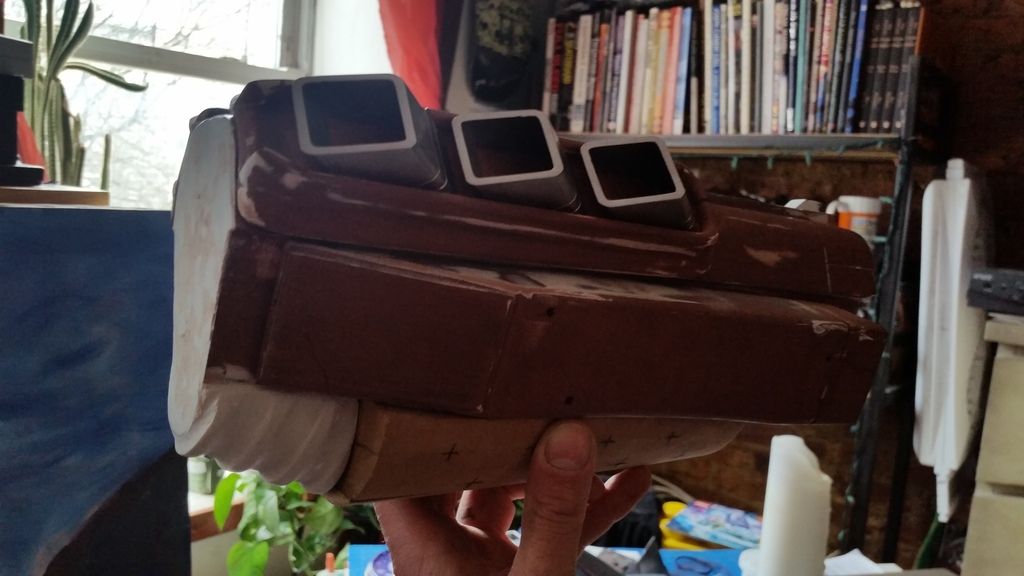
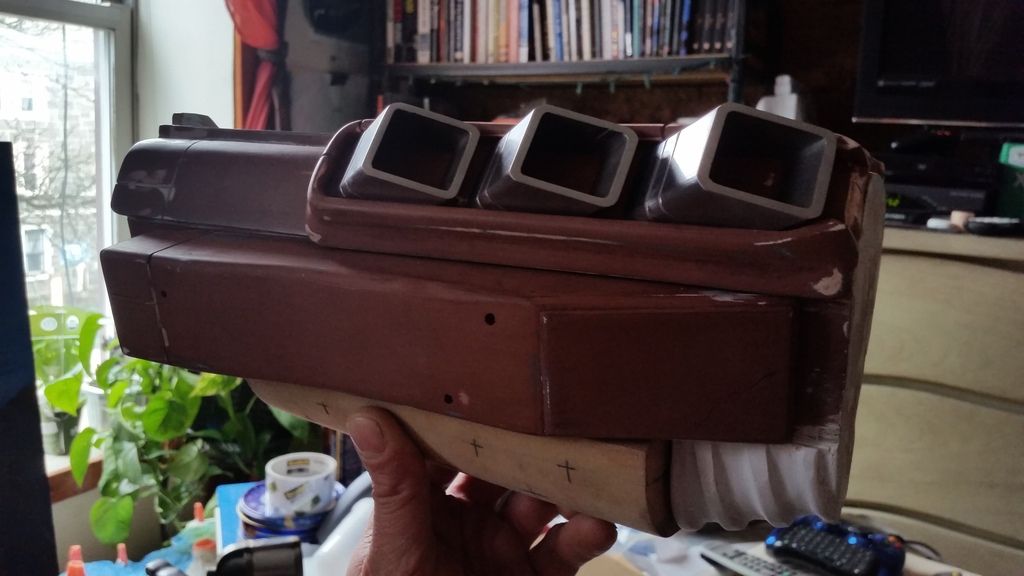
Here is where it starts to get tricky. The vents on the top of the barrel, one per side, each consisting of a main housing and three vent ports. The housing conforms to the contour of the barrel on the inside, but has a distinctive "airplane engine" shape on the outside. I originally theorized to make a stack of components all cut out with a jigsaw... that was a well wasted two hours of labor. I reverted to my woodworking roots and came up with a shape that served quite well as a base to sculpt on.
After spending ample time getting started on the housing, I turned my attention to the vents. I chose 1 1/4" 12ga steel tube and mitered six pieces to give the base pitch of the vents. I had previously datoed the housing blanks to the 1 1/4" size so the pieces would fit snugly. The prop is starting to take shape and look like something Mr. Torgue would be proud to blow $#!T up with.
I realized while marking the detail lines on the blank that the initial angle I used (normal to) for the outside of the port were wrong. So I made the appropriate adjustments, added the detail lines and finished them off with a nice brush finish.
I sculpted the nose and tail of the housings with Apoxie Sculpt and files to emulate the in-game model. I added seam lines, decorative rivets, and primed with several layers of different colored primer.
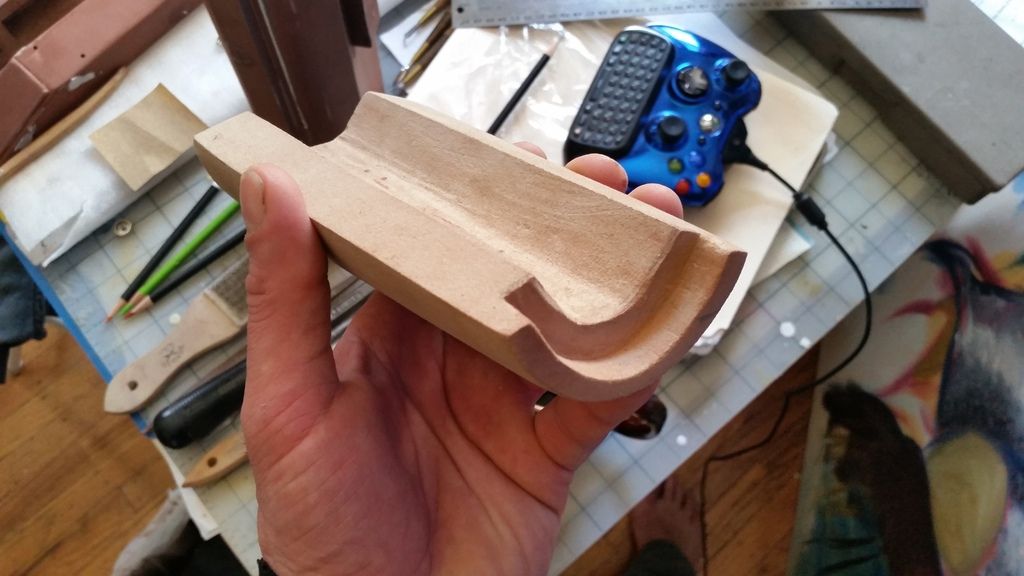
The pump was constructed from layers of MDF that I reductive sculpt to the half-round/ conical shape. I have a great idea for the details on the grip but that will come in a later post.
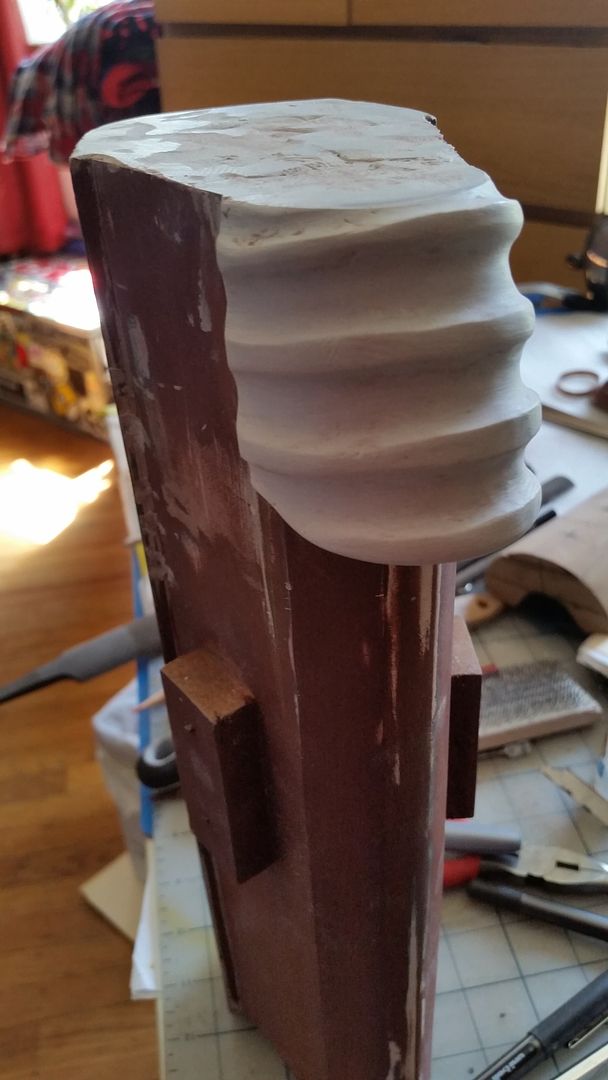
There is a detail behind the pump that I addressed with a bit of creative thinking and a staple gun. To minimize the amount of Apoxie necessary to form the tube structure, I domed out the basic shape with some spare foamcore and a bit of a small plastic cup. After minimal wet sculpting and some considerable dry carving I got something I can work with. Though I think I will need to do more as I like to set the bar high.
I took a series of photos to show the state of the prop so far. It has only been two weeks of work on my off time, but I feel quite good about the pace and direction of this prop.

I know for a fact that I did much more work than was expressed here in this post so if you have a question or comment about anything, please feel free to contribute.
Thanks!
Now there is a bit of conjecture as to the proper or most effective assemblage of parts on the Flakker. Including prefix which is obviously tied to assembly. For this build it was requested that I approach the build with the Casual prefix. Maintaining a Torgue-centric construction but with the option for a Hyperion stock.
I presented this rough sketch, which to my eyes appeared to be the proper arrangement of components. I was wrong. I can accept that.

This is the reworked drawing with the appropriate pistol grip pump. As you can see, I cleaned it up a bunch. I also produced drawings from the top and bottom views, as well as from the front, but will not be showing them here.

So... yeah. This thing is super duper complicated with a ton of different parts that all have weird geometry. I decided to start with the barrel assembly. After some thought I decided to break it down into 7 parts to make it "easier" on me. (And actually it breaks down into 13 parts. You'll see why in a bit.) The first of which is the main barrel. I extrapolated dimensions from my drawing set and produced a 1:1 that I broke down into multiple basic trapezoids that I could rip on my table saw. (I do all my drawing / designing by hand as of now, all 3-D modeling is in my head.) So you end up with a bunch of parts. Note: the digital bevel gauge is one of the best tools.

These pieces were assembled into the basic shape of the barrel. I capped it of on the top and bottom so you don't get to see how I did it.

I fabricated the two side pods in a similar fashion. They attach via small blocks on the sides of the main barrel. I also added a strip to the top for the sight.

Here is where it starts to get tricky. The vents on the top of the barrel, one per side, each consisting of a main housing and three vent ports. The housing conforms to the contour of the barrel on the inside, but has a distinctive "airplane engine" shape on the outside. I originally theorized to make a stack of components all cut out with a jigsaw... that was a well wasted two hours of labor. I reverted to my woodworking roots and came up with a shape that served quite well as a base to sculpt on.

After spending ample time getting started on the housing, I turned my attention to the vents. I chose 1 1/4" 12ga steel tube and mitered six pieces to give the base pitch of the vents. I had previously datoed the housing blanks to the 1 1/4" size so the pieces would fit snugly. The prop is starting to take shape and look like something Mr. Torgue would be proud to blow $#!T up with.


I realized while marking the detail lines on the blank that the initial angle I used (normal to) for the outside of the port were wrong. So I made the appropriate adjustments, added the detail lines and finished them off with a nice brush finish.

I sculpted the nose and tail of the housings with Apoxie Sculpt and files to emulate the in-game model. I added seam lines, decorative rivets, and primed with several layers of different colored primer.

The pump was constructed from layers of MDF that I reductive sculpt to the half-round/ conical shape. I have a great idea for the details on the grip but that will come in a later post.

There is a detail behind the pump that I addressed with a bit of creative thinking and a staple gun. To minimize the amount of Apoxie necessary to form the tube structure, I domed out the basic shape with some spare foamcore and a bit of a small plastic cup. After minimal wet sculpting and some considerable dry carving I got something I can work with. Though I think I will need to do more as I like to set the bar high.

I took a series of photos to show the state of the prop so far. It has only been two weeks of work on my off time, but I feel quite good about the pace and direction of this prop.


I know for a fact that I did much more work than was expressed here in this post so if you have a question or comment about anything, please feel free to contribute.
Thanks!


