Hi everyone, here is my wip for Boba Fetts EE-3 blaster. This is my first post on here so hope you like it. I went out and bought hasbro's Fett blaster. What could be easier than spraying it black and doing a bit of weathering, i thought. I thought WRONG!!! As you will see over the course of this build. When i went on to the web to research the blaster, i noticed the main thing wrong with the Hasbro toy, it was way too small, amongst other things. So after a lot of research, i got everything together i needed and started.
Here is everything i need.
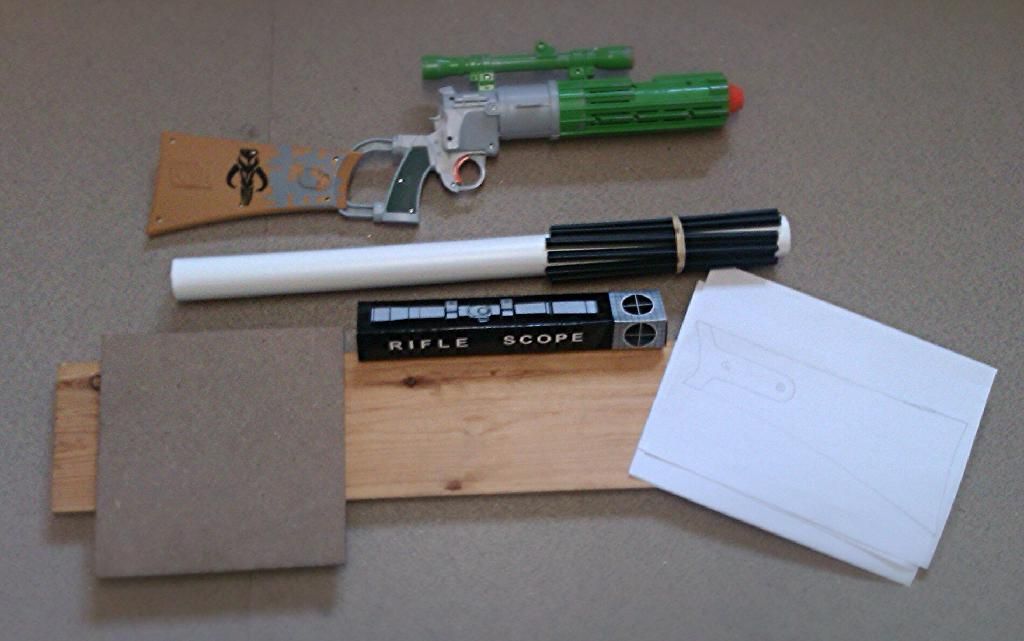
Blaster, wood for the stock, new sight, pipe for the barrel, t-track and plans.
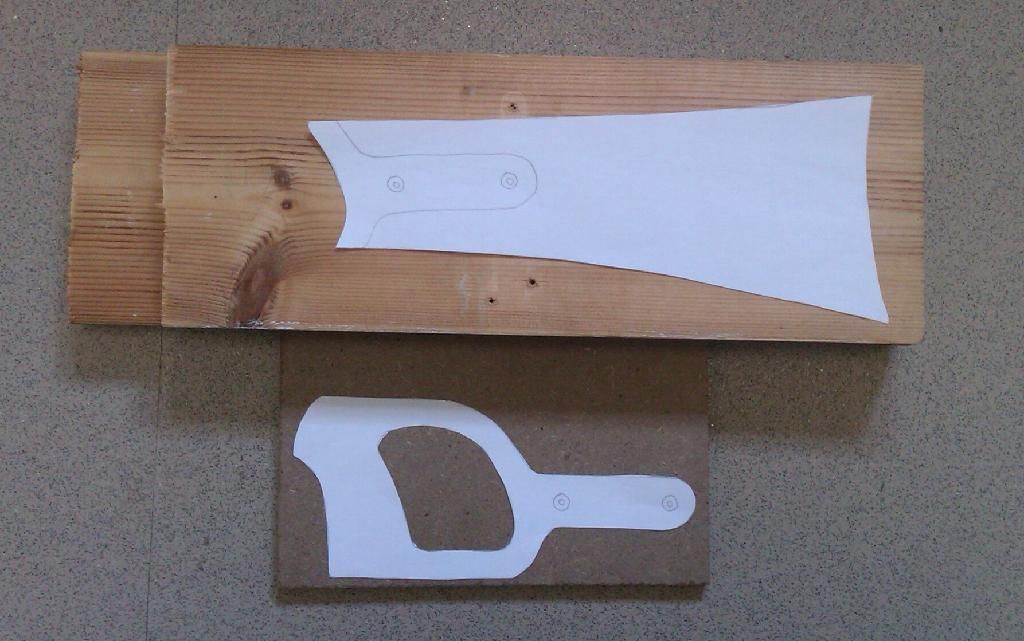
The first thing i did was to cut my plank of wood in half and glue it together to make the right thickness of the butt. I then cut out my templates and drew round them.
I then cut them out and dismanteled the Hasbro blaster. I was going to keep the lights and sound, as you can see them in the picture, but was unable to as you wil see later in the build. Here you can still see the barrel attatched, but that gets removed later.

- - - Updated - - -
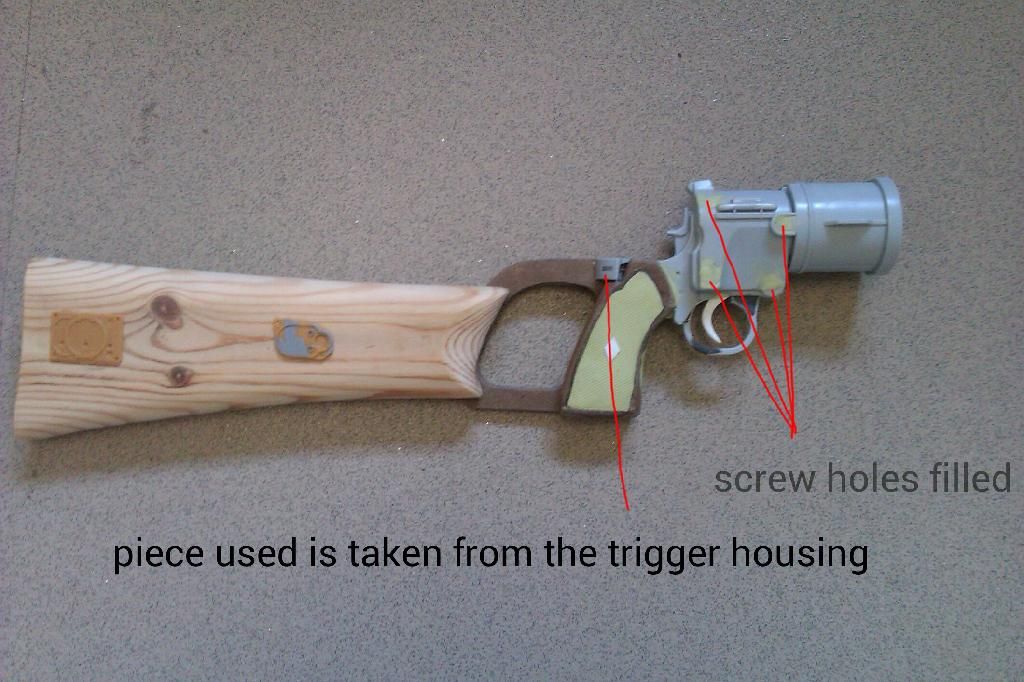
After cutting the barrel off, I went to work on the body and grip, whilst also working on the butt when the weather was good. After searching for ages for a suitible replacement for the grip, as the one attatched was too small, I decided to make one from scratch. I drew round the template I had on a piece of 9mm MDF, cut it out, then I cut out the middle, placed some card at the back and some card on the inside. As you can see in the pic, I still have to modify the trigger housing.

The next thing was to make the knurling on the grip, this was done by filling the grip with Milliput and using some car body filling wire mesh from Halfords and pushing it on to the still wet Milliput. I cut down the trigger housing and made a new trigger from plasticard. After a lot of sanding and filling i finally finished the butt and the main body. As you can see, i cut off the bits from the Hasbro's plastic stock and stuck them to mine.

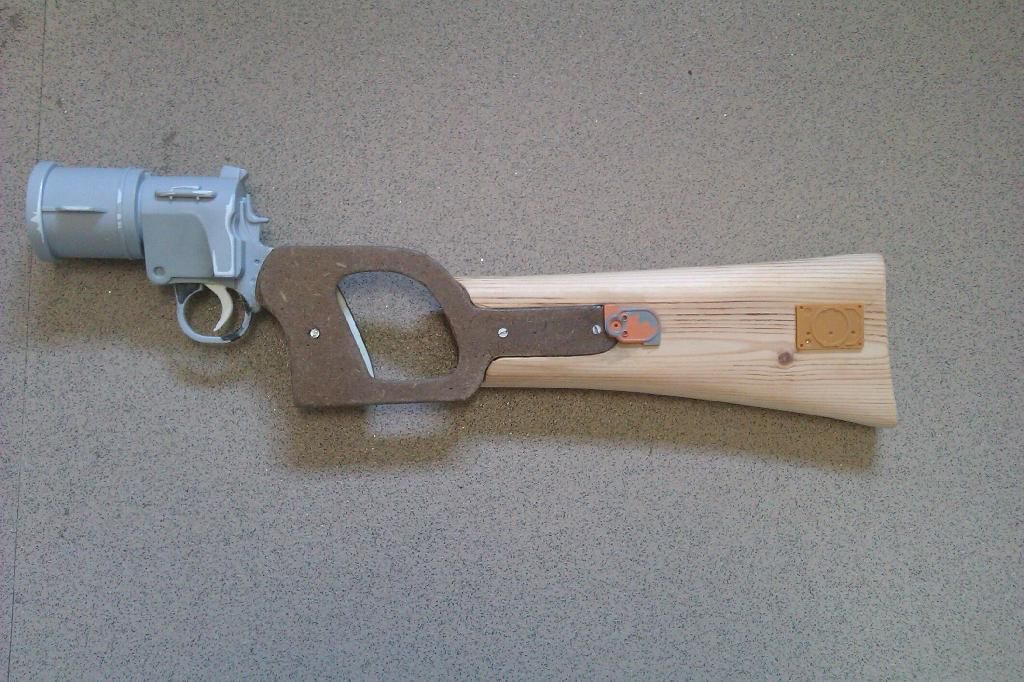
The next thing to do is to stick the grip and new butt with grip on to the main body.
Ok, grip and butt have been glue on to the main body,and screw holes filled. Lots of filling and sanding to be done now.
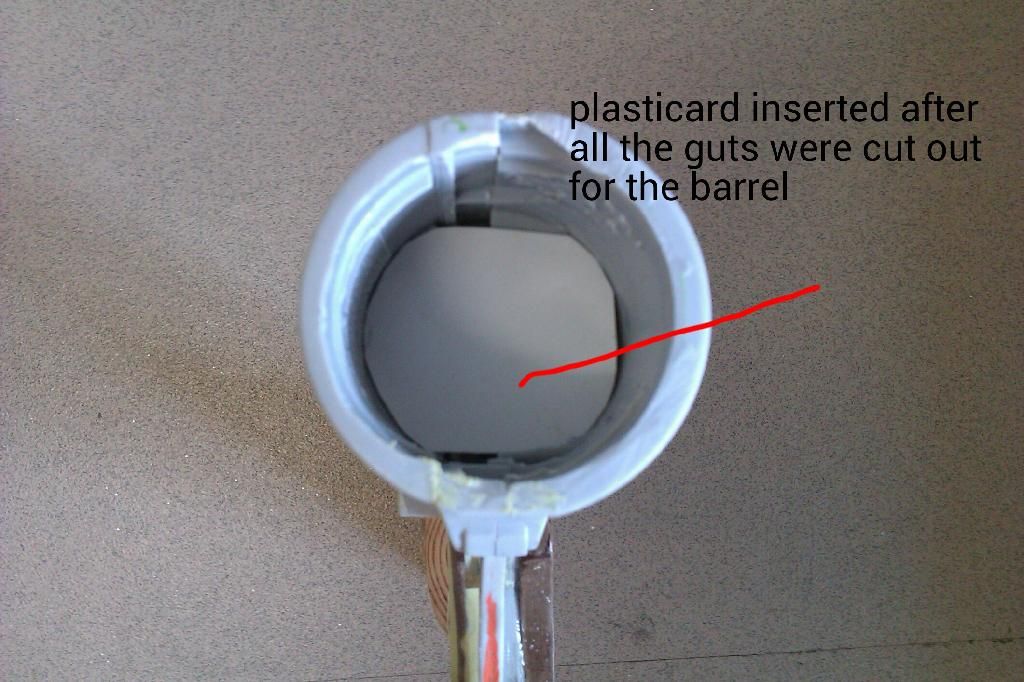
On the inside of the main body, I placed some plasticard for the barrel to glue to, I also plan to stick some more plasticard on to help secure the barrel. This is why I can't use the lights and sound.
Here is everything i need.

Blaster, wood for the stock, new sight, pipe for the barrel, t-track and plans.
The first thing i did was to cut my plank of wood in half and glue it together to make the right thickness of the butt. I then cut out my templates and drew round them.

I then cut them out and dismanteled the Hasbro blaster. I was going to keep the lights and sound, as you can see them in the picture, but was unable to as you wil see later in the build. Here you can still see the barrel attatched, but that gets removed later.

- - - Updated - - -
After cutting the barrel off, I went to work on the body and grip, whilst also working on the butt when the weather was good. After searching for ages for a suitible replacement for the grip, as the one attatched was too small, I decided to make one from scratch. I drew round the template I had on a piece of 9mm MDF, cut it out, then I cut out the middle, placed some card at the back and some card on the inside. As you can see in the pic, I still have to modify the trigger housing.

The next thing was to make the knurling on the grip, this was done by filling the grip with Milliput and using some car body filling wire mesh from Halfords and pushing it on to the still wet Milliput. I cut down the trigger housing and made a new trigger from plasticard. After a lot of sanding and filling i finally finished the butt and the main body. As you can see, i cut off the bits from the Hasbro's plastic stock and stuck them to mine.

The next thing to do is to stick the grip and new butt with grip on to the main body.
Ok, grip and butt have been glue on to the main body,and screw holes filled. Lots of filling and sanding to be done now.


On the inside of the main body, I placed some plasticard for the barrel to glue to, I also plan to stick some more plasticard on to help secure the barrel. This is why I can't use the lights and sound.


