Blast Shield X-Wing Helmet (EFX conversion)

gabe3666

Well-Known Member
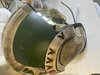
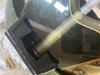
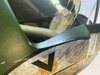
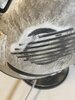
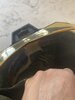
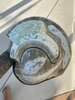
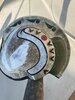
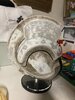
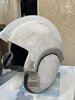
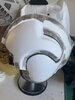
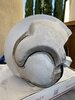
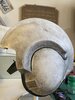
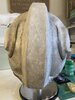
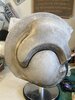
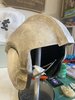
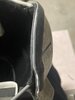
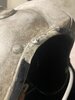
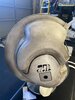
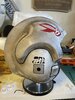
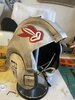
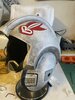
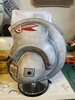
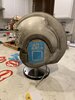
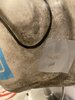
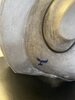
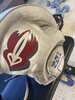
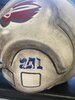
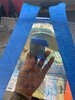
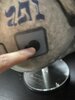
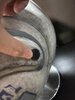
So I was rearranging my helmet display when I accidentally dropped my EFX Wedge Helmet and cracked it in several spots. :( I was going to just let it be and keep it on display since you can only see the cracks up close. Then a few weeks ago I came across a collector that was selling the EFX wedges helmet at an amazing price and couldn’t pass it up! (no box, COA, or plaque)

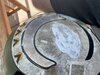
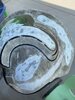
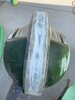
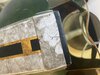
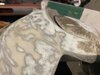
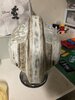
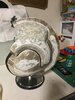
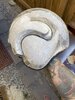
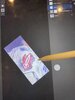
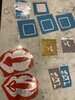
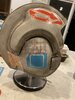
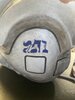
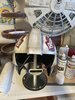
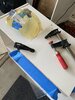
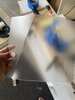
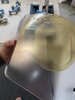
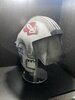
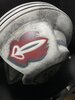
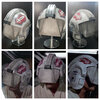
So I decided to convert the broken EFX helmet into the Blast Shield Helmet from ANH. This is my journey.
 

Attachments

  • F798CCAA-4EF7-4BC3-B451-75F2013A722A.jpeg
    F798CCAA-4EF7-4BC3-B451-75F2013A722A.jpeg
    257.1 KB · Views: 216
  • A338D979-1884-4A3D-B033-CC21D27B31F3.jpeg
    A338D979-1884-4A3D-B033-CC21D27B31F3.jpeg
    270.9 KB · Views: 214
  • 892C4396-14DD-4B8D-A1A6-F97FC813CFF3.jpeg
    892C4396-14DD-4B8D-A1A6-F97FC813CFF3.jpeg
    183.4 KB · Views: 206
  • 010C335B-F800-4B0E-AF7F-66053D27805D.jpeg
    010C335B-F800-4B0E-AF7F-66053D27805D.jpeg
    210.4 KB · Views: 222
First I removed the lenses. They were just glued to a small block. The lining was glued to them as well so I had to be careful. I also started playing with sandpaper grit to see if I could keep as much of the base white.
My plan is to color match the white and weathering rather than starting from scratch. 220 seemed to work the best for the black details.
 

Attachments

  • D7246B51-47E8-47FA-AAB4-6613F75C0726.jpeg
    D7246B51-47E8-47FA-AAB4-6613F75C0726.jpeg
    1.7 MB · Views: 158
  • 44942666-7C6D-497A-8C83-1CBA12CD7658.jpeg
    44942666-7C6D-497A-8C83-1CBA12CD7658.jpeg
    1.8 MB · Views: 181
  • 996167C1-5BF2-413A-A707-D86C15C36768.jpeg
    996167C1-5BF2-413A-A707-D86C15C36768.jpeg
    1.2 MB · Views: 163
I started sanding and luckily EFX doesn’t apply a heavy clear coat so the top layers were really easy to remove. I had to go a bit coarser for the green (160). So far so good.
 

Attachments

  • 16B4EFBE-FF45-417F-BD2F-CA564CC04D03.jpeg
    16B4EFBE-FF45-417F-BD2F-CA564CC04D03.jpeg
    3.3 MB · Views: 174
  • 94DB9EF8-8FEA-4434-ACA6-773BAFD85C2C.jpeg
    94DB9EF8-8FEA-4434-ACA6-773BAFD85C2C.jpeg
    1.8 MB · Views: 155
  • 4501A664-E4AF-4114-80C2-672C65C3D84F.jpeg
    4501A664-E4AF-4114-80C2-672C65C3D84F.jpeg
    1.2 MB · Views: 141
  • 785F5748-8149-4D85-9153-E81CF8C43C32.jpeg
    785F5748-8149-4D85-9153-E81CF8C43C32.jpeg
    1.6 MB · Views: 161
  • 5CCB3DC1-04D7-42D1-A08F-9AC78A52AF8D.jpeg
    5CCB3DC1-04D7-42D1-A08F-9AC78A52AF8D.jpeg
    1.7 MB · Views: 148
Holy cow, that must've been one hell of a drop! :eek: Sucks that it broke easily.
Buuuuut, way to turn a travesty into a win! :D(y)
Can't wait to see the final outcome.
 
Holy cow, that must've been one hell of a drop! :eek: Sucks that it broke easily.
Buuuuut, way to turn a travesty into a win! :D(y)
Can't wait to see the final outcome.

Unfortunately it was just the way it landed. It landed face down on the hardwood floor. It broke the front cap and cracked the sides since it’s all fiberglass.
 

Attachments

  • 2211F2A3-9761-45BD-8997-37889C47021A.jpeg
    2211F2A3-9761-45BD-8997-37889C47021A.jpeg
    270.9 KB · Views: 154
  • B6D73145-9436-45FD-97E7-0AEAE5ADBC86.jpeg
    B6D73145-9436-45FD-97E7-0AEAE5ADBC86.jpeg
    183.4 KB · Views: 150
  • 088CE412-0947-46A8-A88F-F609774D6366.jpeg
    088CE412-0947-46A8-A88F-F609774D6366.jpeg
    230.8 KB · Views: 142
Here is the helmet sanded down. Anyone know the color they used to paint x-wing helmets? You think it’s reefer white?
 

Attachments

  • C28AA6C9-7C71-49E4-BE57-0E3CF5A467C2.jpeg
    C28AA6C9-7C71-49E4-BE57-0E3CF5A467C2.jpeg
    1.8 MB · Views: 181
  • 577DEC00-EE2B-4ACC-A3FF-BEBC86A79B28.jpeg
    577DEC00-EE2B-4ACC-A3FF-BEBC86A79B28.jpeg
    1.7 MB · Views: 167
  • 92FF6357-0412-4BF4-888D-D86F7BE23AB3.jpeg
    92FF6357-0412-4BF4-888D-D86F7BE23AB3.jpeg
    1.8 MB · Views: 172
I am liking this a lot !
Its a real shame about you dropping the wedge but 'your loss will me our gain' I think.
The blast shield helmet is probably one of my favorites.
 
Ok so today I tested a few paints but decided that the basic Rustoleum Flat White was the closest. Although the base white on the original helmet had a bit of a bluish tint to it, after the weathering it won’t be noticeable

B9735187-6E41-4C7A-BA80-E8C6320227DB.jpeg


I then taped off as much of the white and weathering as I could and sprayed the first coat.

90C987BC-E7C6-4538-AB24-130B7B0B7266.jpeg


After removing the masking tape, I noticed a lot of noticeable high spots so I decided to paint larger portions of the helmet.

CB74F4F9-B634-4549-8AAB-97D4B25EF139.jpeg


I then started to play with the weathering. I mixed black and burnt Siena acrylic paints in water and started blotting and wiping.

AC1B7FE7-45BA-4E23-8E9B-31486B329D9A.jpeg

F2536998-5FA9-448B-85FC-FEED0EEA64F1.jpeg
 
Ok so after peeling off the tape I decided that there were too many sharp lines where it would be more time consuming to sand down than paint. So I painted most of the original weathering.
 

Attachments

  • 5B528784-DCAF-4244-9B7E-36800E591B7E.jpeg
    5B528784-DCAF-4244-9B7E-36800E591B7E.jpeg
    1.8 MB · Views: 140
  • C9BFE1B3-E683-45A7-B53E-10C220B7024F.jpeg
    C9BFE1B3-E683-45A7-B53E-10C220B7024F.jpeg
    1.4 MB · Views: 143
  • FF90B736-7CE7-4D4A-AE95-4D08A1E13E91.jpeg
    FF90B736-7CE7-4D4A-AE95-4D08A1E13E91.jpeg
    1.5 MB · Views: 151
  • 8AC50CE4-B1AD-4944-83BA-B568E301E791.jpeg
    8AC50CE4-B1AD-4944-83BA-B568E301E791.jpeg
    1.6 MB · Views: 142
  • C8F8CB8A-22AD-4112-9AB9-DD1DD8A5D490.jpeg
    C8F8CB8A-22AD-4112-9AB9-DD1DD8A5D490.jpeg
    1.5 MB · Views: 146
  • A07C7CE2-0A85-42CD-A192-E35A4F90AFD4.jpeg
    A07C7CE2-0A85-42CD-A192-E35A4F90AFD4.jpeg
    1.4 MB · Views: 161
  • 113D5480-9ED0-4A30-8CB1-915947556769.jpeg
    113D5480-9ED0-4A30-8CB1-915947556769.jpeg
    1.5 MB · Views: 184
After getting it to the right color and weathering, I realized that the original helmet doesn’t have the rubber trim on the bottom. So I’ll have to strip that off and paint the bottom. One step forward, two steps back.
 

Attachments

  • F0DDF410-6AEE-4B41-B32F-6EC04F0D07EE.jpeg
    F0DDF410-6AEE-4B41-B32F-6EC04F0D07EE.jpeg
    1.7 MB · Views: 153
  • 9743D0F4-35FE-4CEC-8D57-D3DE7159B3D3.jpeg
    9743D0F4-35FE-4CEC-8D57-D3DE7159B3D3.jpeg
    1.7 MB · Views: 160
  • E66381B2-F241-46E3-8888-DE83D1F0CA0F.jpeg
    E66381B2-F241-46E3-8888-DE83D1F0CA0F.jpeg
    1.9 MB · Views: 151
  • CE5940C2-ACC5-4D1E-8BE7-A642CF056B94.jpeg
    CE5940C2-ACC5-4D1E-8BE7-A642CF056B94.jpeg
    1.7 MB · Views: 147
  • 41FF81F3-ACCA-4F61-B94D-DB8E4F6C4E41.jpeg
    41FF81F3-ACCA-4F61-B94D-DB8E4F6C4E41.jpeg
    1.4 MB · Views: 161
  • 4E166ACB-5A4A-4675-9B97-6C8A35EEDC75.jpeg
    4E166ACB-5A4A-4675-9B97-6C8A35EEDC75.jpeg
    1.5 MB · Views: 148
Ok then I started applying the decals and the helmet was starting to look great....then I realized the decals were not screen accurate. So I’m going to use my wife’s Cricut machine to make screen accurate vinyl stencils so I can hand paint the details. Stay tuned.
 

Attachments

  • 2B57F243-5E35-44D1-AC17-D66D729DF087.jpeg
    2B57F243-5E35-44D1-AC17-D66D729DF087.jpeg
    1.7 MB · Views: 187
  • EA48AC44-9F6F-4310-8B06-3E4DD00A417C.jpeg
    EA48AC44-9F6F-4310-8B06-3E4DD00A417C.jpeg
    1.8 MB · Views: 191
  • 57CB3C86-1152-4398-A546-DEA79C0C042B.jpeg
    57CB3C86-1152-4398-A546-DEA79C0C042B.jpeg
    1.6 MB · Views: 198
  • 1FBC8B3D-43D8-445C-BFAA-DA720C66A422.jpeg
    1FBC8B3D-43D8-445C-BFAA-DA720C66A422.jpeg
    1.7 MB · Views: 200
  • 67AE91AF-4D3F-461F-9EF0-3F2FA0C08607.jpeg
    67AE91AF-4D3F-461F-9EF0-3F2FA0C08607.jpeg
    1.7 MB · Views: 198
Ok here is the update. I finished the base weathering. I also spent a few days perfecting the decals. These are pretty much as close as you can get to the screen used helmet since I took them directly from screen grabs and photos of the ROTJ helmet they reworked.

There are slight differences between the right side and left side details, which I made sure to capture in the decals. Also the gray part in the main symbol is different so I made adjustments to match them.

I applied the decals, which was actually kinda hard because I wanted to get the placement exactly like the original. Both sides are placed differently just like the screen used helmet.

I will start painting today and post what colors I used.
 

Attachments

  • A0A9E4E3-A3E6-47EE-B3B3-ACD4DCD45027.png
    A0A9E4E3-A3E6-47EE-B3B3-ACD4DCD45027.png
    9.3 MB · Views: 201
  • AACE1080-3870-4387-BF38-EB1BC67231C0.png
    AACE1080-3870-4387-BF38-EB1BC67231C0.png
    10.3 MB · Views: 196
  • 707ACF56-11A4-41EB-A3BF-37537C7B5A7F.jpeg
    707ACF56-11A4-41EB-A3BF-37537C7B5A7F.jpeg
    2 MB · Views: 177
  • BEC66DA3-CB8F-420B-BEB5-0B4DFBAC5B1C.jpeg
    BEC66DA3-CB8F-420B-BEB5-0B4DFBAC5B1C.jpeg
    1.8 MB · Views: 177
  • 77064636-4105-40B9-8B7C-3C142522609D.jpeg
    77064636-4105-40B9-8B7C-3C142522609D.jpeg
    1.6 MB · Views: 180
  • 67B03B72-5EB7-4525-B49B-9C4CF810C90E.jpeg
    67B03B72-5EB7-4525-B49B-9C4CF810C90E.jpeg
    1.6 MB · Views: 187
  • 8C6A1F04-329E-4715-B4F8-B699C1E0F1E6.jpeg
    8C6A1F04-329E-4715-B4F8-B699C1E0F1E6.jpeg
    1.7 MB · Views: 195
Last edited:
So it’s been a while but here are some pics of my progress.
 

Attachments

  • 908CAAA8-99C8-409B-89EB-18E34EAFF194.jpeg
    908CAAA8-99C8-409B-89EB-18E34EAFF194.jpeg
    2.1 MB · Views: 166
  • EC24F058-B8E3-403A-BBEB-6B1C677378BA.jpeg
    EC24F058-B8E3-403A-BBEB-6B1C677378BA.jpeg
    1.8 MB · Views: 137
  • 2D557B5A-116F-4D0A-A0AF-9AFE7B0DDEFB.jpeg
    2D557B5A-116F-4D0A-A0AF-9AFE7B0DDEFB.jpeg
    1.5 MB · Views: 139
  • B141EBBF-1D94-4F62-8BEF-A7975273D65E.jpeg
    B141EBBF-1D94-4F62-8BEF-A7975273D65E.jpeg
    1.5 MB · Views: 148
  • E89A688D-0CE1-40AD-8572-184D98214E1B.jpeg
    E89A688D-0CE1-40AD-8572-184D98214E1B.jpeg
    1.7 MB · Views: 132
  • C0603CA9-3677-463E-A835-94CBF3C99002.jpeg
    C0603CA9-3677-463E-A835-94CBF3C99002.jpeg
    1.8 MB · Views: 150
  • D48A5372-6E09-48AD-BF4E-35B06701D935.jpeg
    D48A5372-6E09-48AD-BF4E-35B06701D935.jpeg
    1.9 MB · Views: 166
Here are some pics of my visor process. I studied the lines on the regular yellow visor and seemed to match the lines on the blast shield, so I went with it. I taped the lines and used a heat gun and some scrap wood to make the bends. Came out good!
 

Attachments

  • 3300605A-E84F-47EA-88BB-559185CB3A43.jpeg
    3300605A-E84F-47EA-88BB-559185CB3A43.jpeg
    1.7 MB · Views: 171
  • E6D347B4-CD08-40CC-9E8A-7E60258680B5.jpeg
    E6D347B4-CD08-40CC-9E8A-7E60258680B5.jpeg
    1.7 MB · Views: 150
  • DD399BDC-561C-42DF-A6EC-AD89C3B5C171.jpeg
    DD399BDC-561C-42DF-A6EC-AD89C3B5C171.jpeg
    1.3 MB · Views: 149
  • 36004460-0E68-4C8C-BF15-56F61873C6EA.jpeg
    36004460-0E68-4C8C-BF15-56F61873C6EA.jpeg
    1.3 MB · Views: 144
  • 9892929F-04F5-42FD-A785-800A8CAD6D8F.jpeg
    9892929F-04F5-42FD-A785-800A8CAD6D8F.jpeg
    1.6 MB · Views: 167
  • 0B1DEF0B-EAA2-4692-9648-6085E28185F7.jpeg
    0B1DEF0B-EAA2-4692-9648-6085E28185F7.jpeg
    1.4 MB · Views: 152
  • AB40936E-DD27-49C0-A455-3EDEA5CE821F.jpeg
    AB40936E-DD27-49C0-A455-3EDEA5CE821F.jpeg
    1.3 MB · Views: 157
  • 6E9FBA65-56BC-47CF-89BF-6F0073BDA727.jpeg
    6E9FBA65-56BC-47CF-89BF-6F0073BDA727.jpeg
    1.8 MB · Views: 164
Added some final details by comparing the original helmet. And here is the final helmet 99% done, just needs the front cap replaced. Really proud of the way it came out!
 

Attachments

  • 2834E64E-4542-4260-A26F-31812564E9F6.jpeg
    2834E64E-4542-4260-A26F-31812564E9F6.jpeg
    1.9 MB · Views: 185
  • C57DD2DB-C48A-4011-9336-6957B16A81F7.jpeg
    C57DD2DB-C48A-4011-9336-6957B16A81F7.jpeg
    1.7 MB · Views: 160
  • 99BEADBD-AF0A-4F9D-80F4-7A0A9B673B2E.png
    99BEADBD-AF0A-4F9D-80F4-7A0A9B673B2E.png
    7.5 MB · Views: 180
  • AAF460C9-31D1-419C-B547-B229940EA416.jpeg
    AAF460C9-31D1-419C-B547-B229940EA416.jpeg
    3.4 MB · Views: 185
  • D459A2FB-9B51-4AB4-9519-43E41201A0E7.jpeg
    D459A2FB-9B51-4AB4-9519-43E41201A0E7.jpeg
    1.7 MB · Views: 204
  • C566F7D8-A7DA-487D-A1D5-D4EEF4D02931.jpeg
    C566F7D8-A7DA-487D-A1D5-D4EEF4D02931.jpeg
    654 KB · Views: 221

Your message may be considered spam for the following reasons:

If you wish to reply despite these issues, check the box below before replying.
Be aware that malicious compliance may result in more severe penalties.
Back
Top