Ok here’s the “how to” step by step process to achieving the “K” coat look. Let me start out and say there was a ton of research in this subject matter, and being someone who works professionally in the film and tv world, I had access to some really knowledgeable and creative minds. Even with their help, I couldn’t nail down exactly how this look was achieved. There was plenty of testing and re testing of these steps, also there was a lot of failure. To anyone who plans on attempting this, please do so at your own risk. Zlurpo provided us with a kickass jacket and I feel he deserves most of the credit here. I just fancied it up a bit.
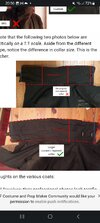
Here’s everything you need to do the job.
View attachment 796916
Painters tape
3-4 chip brushes
rubber gloves
Tim holtz distress inks- black soot, walnut, mustard seed (yellow), antique linen
a fine flat edged brush ( lettering on the back)
squirt bottle for water
an orbital sander of your choice sandpaper grit 120-150
kryolan camouflage ultra olive drab spray can
bladerunner 2049 soundtrack
25 work hours
(pay not attention to the 3 little bottles in front, they weren’t used)
Step 1.choose a color you feel is close to the what you see in the movie, we all see something different
I choose a high gloss
View attachment 796918
Step 2. Spread the jacket out on a flat surface and make sure to put down an old bed sheet or something to contain the mess,
and start laminating or painting, which ever you prefer.
Take your time, don’t over saturate the material, you have to do 2 coats anyway. This is a 3 day process
1 day for the first coat
1 day for the 2nd coat
1 day for reapplying or hitting the spots you missed 3 days total
View attachment 796919
Step 3. Once you feel you have an adequate coating over the whole jacket, and it’s been allowed to dry for at least 24 hrs
This is when you start sanding, again lay the jacket flat, work one area at a time, be VERY mindful of the seams.
View attachment 796920View attachment 796921
This is is what happens if you spend too much time in one area and there’s a seam on the underside of the coat
View attachment 796922View attachment 796923
I call this “battle damage”. Just be careful
Step 4. Reapply paint to areas that are thin or you make have burned thru, allow to dry (1 hour) and re-sand
Step 5. Hand paint around the lettering on the back if you have them, if not disregard this step
View attachment 796924
Step 6. Is optional if you are not happy with your choice of green, I did this just to finely tune the final shade of green
i took the camo spray can and lightly misted the jacket, doing a little at a time. And the final step In the paint process,
if you have the letters. Take the flat edge brush and mix some of the green you chose and some black paint, and repaint
the letters.
View attachment 796925
Now to the fur coloring,
This was surprising easy and quick, took all of maybe 1/2 hour to do.
Step 1. Tape off all areas around the fur
View attachment 796887
Step 2. Take the water squirt bottle and moisten the fur, no need to soak it just make it damp.
I then put on the rubber gloves. I test sprayed all colors on a paper towel just to get a feel on how it sprayed,
i misted just a small area of the fur with the mustard yellow to get a feel for the process. Mist the the whole
section and work it in with your hand, keep in mind you can blot the excess with a paper towel, move the fur
around, work the color. Next I misted in the walnut color,don’t be afraid, blot when necessary. Work in the brown,
View attachment 796896
View attachment 796895
Lastly, the black soot
View attachment 796897
Same thing, mist the whole area and massage it in, blot and add color as you see fit. Once you achieve
the color you’re hoping for, I misted the antique linen over the fur VERY LITTLEY. Repeat these steps
for all sections of fur. Once you feel you are complete,let it dry over night. The next day, take a paper towel
and rub the fur, more like dabbing the fur, this picks up any dye that didn’t soak in. After that, I tossed it in
the dryer on medium temperature for 20-30 mins. In hindsight, the walnut brown and black are really all you need.
View attachment 796900
Here are he results
View attachment 796903View attachment 796904View attachment 796909View attachment 796908View attachment 796907View attachment 796906View attachment 796905View attachment 796910
I took the photos outside on an overcast day. As for my thoughts on the process, it’s a little labor intensive, and there’s areas
you can’t just get right. The color I choose looks different once you see the whole jacket painted so beware of your color choice.
My color was a green olive almost black, I felt it was too dark, that’s why I misted the other spray can green over it just to bring
out the green hues. As for stiffness, it’s a little stiffer then I hoped, but it’s no stiffer then a heavy rain jacket. All in all, I give this
build a solid B. Thanks to Zlurpo and everyone for following. I would gladly answer any questions any of you might have. Also
I have no idea as to why the photos are misaligned, once you click on them, they right themselves, so please forgive me. Mike
") I do not anticipate any price change with the coating.
I do not anticipate any price change with the coating.