TheDarkPope
Well-Known Member
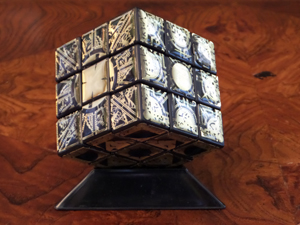
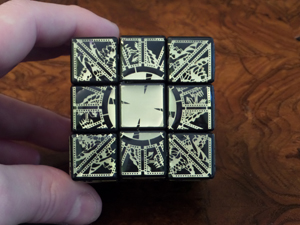
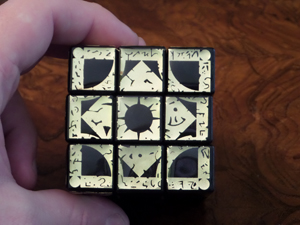
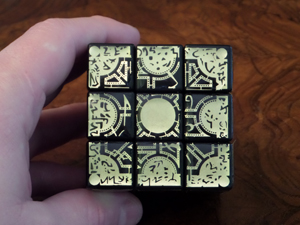
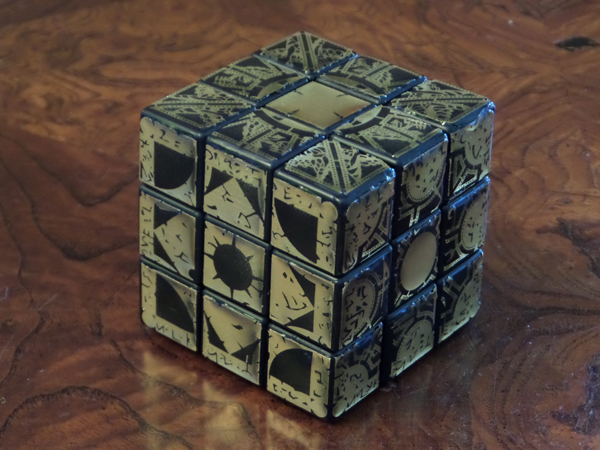
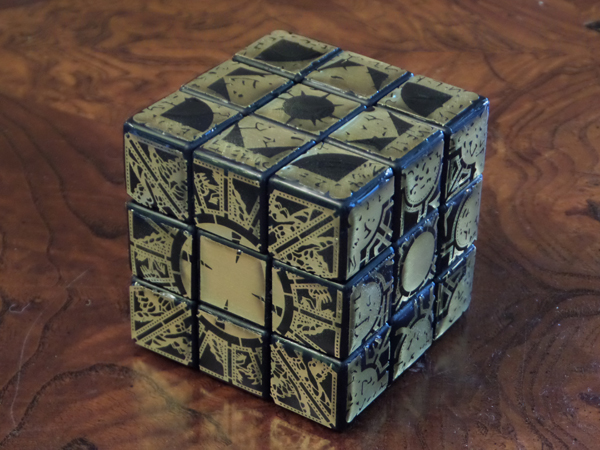
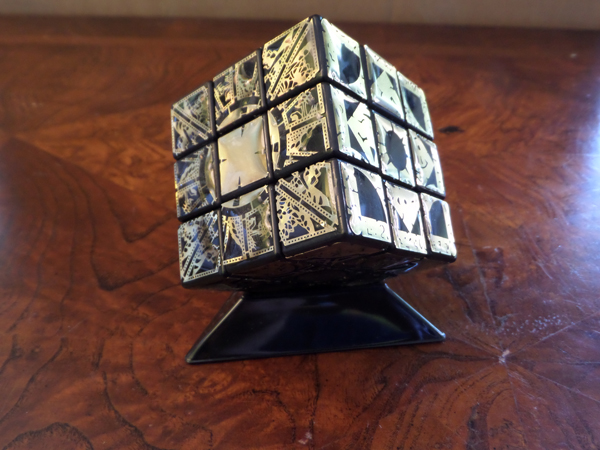
Re: Because I Hate Stickers!!! An Etched Brass Hellraiser Rubik's Cube WIP
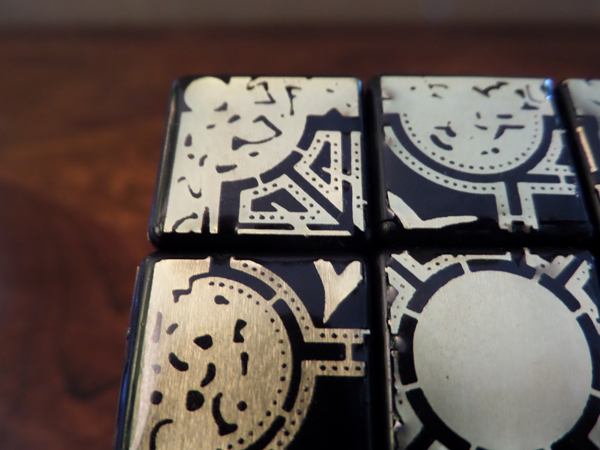
Toner transfer method will not get you detailed etchings. Nor will it ensure an unbent piece of metal especially at .005 or .010 inch thick. If you want high quality detail (single sided or through hole) etching, you need to use a photoresist film. It's the same thing a professional etching house does. I made a video and it currently resides on Youtube. It can be found here...
Photo Etching Tutorial
Thank you")
I'm kinda stuck on that one for a few reasons. Most important to me is how it looks. I don't want to slather a bunch of goo on the cube because then it looks like brass floating on a cube of goo. The cubes are new so they aren't full of scratches, and whatever I use should be able to adhere to unscuffed plastic. I would prefer a spray adhesive along the same lines of it not looking like it was floating on a moat of goo.
All that being said, unlike the Hellraiser box proper, this one has the intention of being played with, and a lot. That might mean compromising my lake of goo theory. I'm open to suggestions for sure. Is there a spray CA? I've seen spray CA accelerators, but not the adhesive proper. Maybe I just need to look harder.
As always, I'll update as they are ready. Thanks guys for your words of encouragement.
I don't think I've used the word - proper - so many times in such a short period
Well, I just wrote out a long answer, then I hit the wrong button, and it all went away. Now you get the short version.I would really appreciate if you could provide some details on how you get such great results.
Toner transfer method will not get you detailed etchings. Nor will it ensure an unbent piece of metal especially at .005 or .010 inch thick. If you want high quality detail (single sided or through hole) etching, you need to use a photoresist film. It's the same thing a professional etching house does. I made a video and it currently resides on Youtube. It can be found here...
Photo Etching Tutorial
That's a pretty damn cool project :thumbsup
Thank you
What are you using an adhesive, for the brass - cube?
I'm kinda stuck on that one for a few reasons. Most important to me is how it looks. I don't want to slather a bunch of goo on the cube because then it looks like brass floating on a cube of goo. The cubes are new so they aren't full of scratches, and whatever I use should be able to adhere to unscuffed plastic. I would prefer a spray adhesive along the same lines of it not looking like it was floating on a moat of goo.
All that being said, unlike the Hellraiser box proper, this one has the intention of being played with, and a lot. That might mean compromising my lake of goo theory. I'm open to suggestions for sure. Is there a spray CA? I've seen spray CA accelerators, but not the adhesive proper. Maybe I just need to look harder.
I would love it if Rubik would make a wooden DIY mahogany cube. I'd be all over that! I've looked other places to find hand made wooden cubes, but didn't find anything I would be happy with. The biggest problem is there needs to be insane consistency on the dimensions of the cube. That's why I went with a proper Rubik and not some Chinese knockoff.I would love to apply these templates over a cube made of mahogany. That would be sweet :cool
As always, I'll update as they are ready. Thanks guys for your words of encouragement.
I don't think I've used the word - proper - so many times in such a short period