Radford
New Member
After recently building my first costume, a Tusken Raider, I was motivated to try something else. I kept thinking about a BD droid and thought I'd have a go at doing a scratch build. This is my first attempt at something like this and I made it up as I went more than I would like to admit. I had a lot of fun with this build.
I haven't written a build blog before. But I have read heaps of them and they have been so beneficial for both my costume build and inspiration. This is not a step by step tutorial on what I did. This is just a general outline. With what I've learned, if I was to build another I would do it differently.
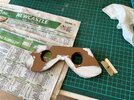
As I spent a couple of weeks thinking about the basic shapes I started collecting bits and pieces from thrift stores and second hand stores. This was what I started with. I did not use everything and I had to get a lot of other stuff.

I used the plastic container to as a basic head shape. From the rubber floor mat I cut the eye shape.
For the left eye I cut down a piece of round pvc pipe.
The right eye was a cut down plumbing fitting, a fishing bobbin that I cut in half and then removed the dome. And a bottle cap was placed on top of that.


I dismantled the Antman mask. It had a feature where you can change the view through one of the eyes to a blue or a Kaleidoscope lens. After sanding it to shape with the dremel, I added the Kaleidoscope lens to the right eye, hoping it would add a cool effect? I used the blue lens for the left eye.


I had a faulty camera lens that I pulled apart for the left eye.


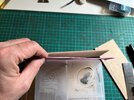
I cut the folding lid off the plastic container and sanded it to size. I wanted to make a wooden base for the head. I started by making two mock up's out of cardboard first. One made the head a bit higher, but I decided that it was too high so went with the lower option.


Now I had the cardboard template I went ahead and cut the parts out of 3mm MDF.


I was originally hoping to use the shape of the container for the top of the head as it has nice rounded edges but I decided this wasn't going to work for several reasons and surrounded it with more 3mm MDF. I needed to add some foam to straighten the side pieces.
I did all of the woodwork in my laundry. I did most of the cutting with a hand saw and used a belt/disc sander combo a lot to try and fix my mistakes. I can promise you there is not a straight cut on this whole build.


I cut out a second foam piece for the front face. I painted them in several coats of pva glue to seal them.


I painted the foam and used some general purpose filler to fill dents in the foam. I know your not really suppose to use the filler on foam but I'm hoping as this piece doesn't need to move that it will be ok.

I cut another piece out of the 3mm MDF for the detail on the top of the head.

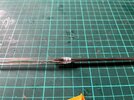
I constructed the rear panel for the head and used a fly swat for the window. For the lights I just used some RGB LEDs on a 5V circuit. I wrapped the LEDs around a piece of the MDF.


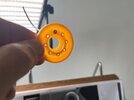
I had a couple of options of the ears. One was the ear pieces from the Antman mask and the other was wheels from a toy car. I went with the wheels and sanded them down to the right size. I used an antenna for the aerials.


It was around this time I saw an Adam Savage video where he was showing how they used fibre optics in the lighting of R2D2's head. I knew I had an old fibre optic cable that I had got with a stereo and never used. The cable was a perfect size to fit the wheel nut spots on the ears. So I drilled them out and glued in short pieces of the cable. As I had wrapped the LED lights around the rear head panel, so I had light on the inside of the head. I just directed the cable towards the light. The end result isn't amazing, but it adds a little extra something.

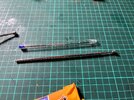
For the base of the aerials, I cut the ends from a couple of ball point pens and glued them on.


I found a video on youtube showing how you could attach a motion sensor to a mp3 soundboard and thought it might work for my droid. I thought I could place the sensor in his chest and the speaker in his head. When I received the soundboard it worked perfectly. I followed the advice in the video and upgraded the speaker with an old logitech PC speaker. It dramatically improved the sound quality. I found some BD droid beeps online and loaded it up.


It was at this stage that I started thinking about the legs. I decided to make them out of thicker MDF and add the detail using various found objects. I started by cutting them out of cardboard to check for size.


At this point I had no idea what I would do for feet. But I was happy with the size of the legs.
I cut them out of two pieces of MDF to get the right width and then cut and sanded to shape. I actually did the process twice. As I had near completed legs but decided they were too thick and made them over.
I picked up a few items for the details. I cut a toy hammer in pieces. (I used parts of their handle as dowel joints later.) I cut the hose fitting in half.


I cut down an aluminium can and added it.


For the lower legs, I made the details from MDF.

I was really excited about doing the inside of the legs. This is the first time I have kitbashed. I had been collecting some cheap model planes and tanks from thrift stores and had a lot of fun doing this part.

For the section between the legs and the body I removed some rubber tyres from a toy car and painted them.

I haven't written a build blog before. But I have read heaps of them and they have been so beneficial for both my costume build and inspiration. This is not a step by step tutorial on what I did. This is just a general outline. With what I've learned, if I was to build another I would do it differently.
As I spent a couple of weeks thinking about the basic shapes I started collecting bits and pieces from thrift stores and second hand stores. This was what I started with. I did not use everything and I had to get a lot of other stuff.
I used the plastic container to as a basic head shape. From the rubber floor mat I cut the eye shape.
For the left eye I cut down a piece of round pvc pipe.
The right eye was a cut down plumbing fitting, a fishing bobbin that I cut in half and then removed the dome. And a bottle cap was placed on top of that.
I dismantled the Antman mask. It had a feature where you can change the view through one of the eyes to a blue or a Kaleidoscope lens. After sanding it to shape with the dremel, I added the Kaleidoscope lens to the right eye, hoping it would add a cool effect? I used the blue lens for the left eye.
I had a faulty camera lens that I pulled apart for the left eye.
I cut the folding lid off the plastic container and sanded it to size. I wanted to make a wooden base for the head. I started by making two mock up's out of cardboard first. One made the head a bit higher, but I decided that it was too high so went with the lower option.
Now I had the cardboard template I went ahead and cut the parts out of 3mm MDF.
I was originally hoping to use the shape of the container for the top of the head as it has nice rounded edges but I decided this wasn't going to work for several reasons and surrounded it with more 3mm MDF. I needed to add some foam to straighten the side pieces.
I did all of the woodwork in my laundry. I did most of the cutting with a hand saw and used a belt/disc sander combo a lot to try and fix my mistakes. I can promise you there is not a straight cut on this whole build.
I cut out a second foam piece for the front face. I painted them in several coats of pva glue to seal them.
I painted the foam and used some general purpose filler to fill dents in the foam. I know your not really suppose to use the filler on foam but I'm hoping as this piece doesn't need to move that it will be ok.
I cut another piece out of the 3mm MDF for the detail on the top of the head.
I constructed the rear panel for the head and used a fly swat for the window. For the lights I just used some RGB LEDs on a 5V circuit. I wrapped the LEDs around a piece of the MDF.
I had a couple of options of the ears. One was the ear pieces from the Antman mask and the other was wheels from a toy car. I went with the wheels and sanded them down to the right size. I used an antenna for the aerials.
It was around this time I saw an Adam Savage video where he was showing how they used fibre optics in the lighting of R2D2's head. I knew I had an old fibre optic cable that I had got with a stereo and never used. The cable was a perfect size to fit the wheel nut spots on the ears. So I drilled them out and glued in short pieces of the cable. As I had wrapped the LED lights around the rear head panel, so I had light on the inside of the head. I just directed the cable towards the light. The end result isn't amazing, but it adds a little extra something.
For the base of the aerials, I cut the ends from a couple of ball point pens and glued them on.
I found a video on youtube showing how you could attach a motion sensor to a mp3 soundboard and thought it might work for my droid. I thought I could place the sensor in his chest and the speaker in his head. When I received the soundboard it worked perfectly. I followed the advice in the video and upgraded the speaker with an old logitech PC speaker. It dramatically improved the sound quality. I found some BD droid beeps online and loaded it up.
It was at this stage that I started thinking about the legs. I decided to make them out of thicker MDF and add the detail using various found objects. I started by cutting them out of cardboard to check for size.
At this point I had no idea what I would do for feet. But I was happy with the size of the legs.
I cut them out of two pieces of MDF to get the right width and then cut and sanded to shape. I actually did the process twice. As I had near completed legs but decided they were too thick and made them over.
I picked up a few items for the details. I cut a toy hammer in pieces. (I used parts of their handle as dowel joints later.) I cut the hose fitting in half.
I cut down an aluminium can and added it.
For the lower legs, I made the details from MDF.
I was really excited about doing the inside of the legs. This is the first time I have kitbashed. I had been collecting some cheap model planes and tanks from thrift stores and had a lot of fun doing this part.
For the section between the legs and the body I removed some rubber tyres from a toy car and painted them.