Bandai 1/72 X-Wing build and comparison

Bauble

Well-Known Member
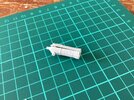
Hi, everyone. X-wing is one of my top favorite ships, so it is always great to get back to build one of the Bandai 1/72. I thought I would use this thread to compare some of the differences between the two most recent Bandai x-wing kits. Bandai kits are fantastic, but even they have some seams and ejector pins defectors that need attention. I want to walk through those, so that future modelers don't miss them. Here is a picture of my final build.
7B054720-6C2F-400B-8FFE-F21750D87A60.jpeg
 
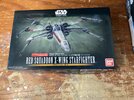
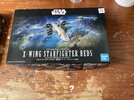
At this time (Dec 2021), there are two Bandai 1/72 x-wing kits that are broadly available. Both costs around US$25 presently. One is the "Red Squadron X-Wing Starfighter (Special Set)" (Kit A) and the other is the "X-Wing Starfighter Red 5 (Star Wars: The Rise of Skywalker)" (Kit B).
Both kits contain waterslide and sticker decals.
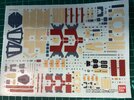
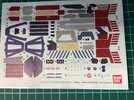
Kit A contains an extra x-wing at 1/144 scale. The decal sheet is also fuller with lots of markings, but I found it better to simply mask and paint most of the required markings instead of using the decals. The only exceptions are the decals for the pilot and the astrodroid - those are useful.
Kit B contains an extra pilot (Rey) and an extra stand (transparent green in color). The decals sheet is sparser but it contains enough extra decals to decorate 4 pilot helmets. It also has the blue decals needed for decorating R2-D2 - enough for 2 R2-D2.
I prefer kit B because of the extra pilot helmet decals and R2-D2 decals. It is easy to mess up the decals when building, so having extra is nice.

B7DA3409-3C47-496C-B70F-28AFBB36C781.jpeg64949429-036D-40F0-BEE6-2CB9EEA478D5.jpeg3F82ADAC-2155-4445-8AEC-CAF3178BF083.jpeg032DA1E7-1D00-448F-868A-2027DFF3A7D2.jpeg
 
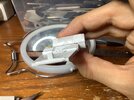
There are 5 major groups of 'attention areas' to watch out for.
1. Each of the engines has a seam.
2. Each of the guns has a seam.
3. The gun tips should be drilled out so that they don't look like solid rods. I drilled in approximately 1 mm for each tip.
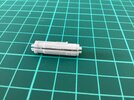
4. Each of the engine intake cowls has a seam when assembled. They are easily corrected with putty.
Item 1 and 2 are difficult to correct because the parts are small and there are tiny features in the way. I ended up putting on multiple coat of Tamiya extra thin cement to 'anneal' the seams. Then using an exacto to scrap the seams flat. Finally I used some fine sandpapers held in tweezers to sand the areas flush.
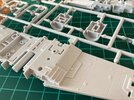
5. The wings have ejector pin marks. They are somewhat hard to see, so look for them carefully. I simply filed them down.

There is a 6th area that is optionally worth correcting. The canopy comes in 2 pieces. I found that no matter what I do, the gap between them is big enough to let through light. I solved this by gluing the two pieces together with canopy glue and carefully filling the gap on the inside with canopy glue. Once dried, I carefully painted in an opaque layer of paint (on the inside seam) to stop the light leakage. This is a delicate operation because there isn't much room for a big glop of canopy glue.
B840DA25-D281-4A73-AE1A-C7CBA7F605B5.jpeg14BF748C-01B8-49DA-B6BF-12913B4F7690.jpeg35867B58-13AC-4735-B5A1-00EE230645DF.jpegEFE47A88-884A-4533-96AF-D453BB5B9919.jpeg
 
Though the kit came with decals for the astrodroid, I found that the decals are opaque and they look 'pasted on' when placed on a chromed astrodroid. I instead printed my own droid decals on a waterslide decal film ( Sunnyscopa Waterslide Decal Paper for Laser Printer). I sprayed Alclad chrome on the droid and put on the decals. The chrome finish showed through the decals well. I was much happier with the result.

F0AD6EF7-56F1-41C5-8BAE-1AC842238F62.jpeg
 
Last edited:
I painted the wings before assembly because it would be impossible to airbrush certain areas once the plane has been assembled. I used Tamiya grey green (XF76) for primer layer. The white is made of 85% flat white (XF2) and 15% deck tan (XF78). Some of the panels were painted with flat white. Flat white should be used carefully. A thin layer so that the primer can peep through works well. Too thick a layer will ruin the look. The pale yellow was made of flat white with 5% flat yellow (XF3). The weathering were created by using a bunch of different yellow, brown and grey mixes. I just eyeballed and mixed them in the airbrush pot as I went along. The darkest shade I used was 50% flat black and 50% JN Gray (XF75). I did not go any darker than that. The red was 10% flat red and 90% Hull Red. I think mixing in some flat white would have helped push the color back better. I sprayed on chipping fluid before putting on the red.
896A2CAB-D176-4B58-8B4F-A50EBA1895CA.jpeg
 
Last edited:
The engine exhaust and interior and the canopy were painted with Alclad 50% jet exhaust and 50% dull aluminum. Some weathering with Tamiya acrylic were airbrushed on them. I then used windex on a fine tipped cotton swab to pick off some of the weathering. I had bad experience removing acrylic on Alclad with acrylic solvent. Windex is fantastic! It dissolves acrylic paint well but is inert to Alclad.
86CE7505-B9FF-4F65-BD94-DEC3BD7049B7.jpeg
 
Windex is awesome for stripping Tamiya acrylics. I've let (mis)painted parts soak in a small container of the stuff for a couple of hours and they always came out clean, right down to the primer (or bare plastic in some cases).
 

Your message may be considered spam for the following reasons:

If you wish to reply despite these issues, check the box below before replying.
Be aware that malicious compliance may result in more severe penalties.
Back
Top