ARKM
Sr Member
Hi all.
First off, a disclaimer... I am not the type of person who requires my props or costumes (not that I have any costumes) to be uber screen accurate or made from authentic parts. I am more than content with "close enough". I'm not saying that there is anything wrong with wanting your props or costumes to be as authentic or as screen accurate as possible. I'm just saying, that I personally do not need them to be. That said, on with the show...
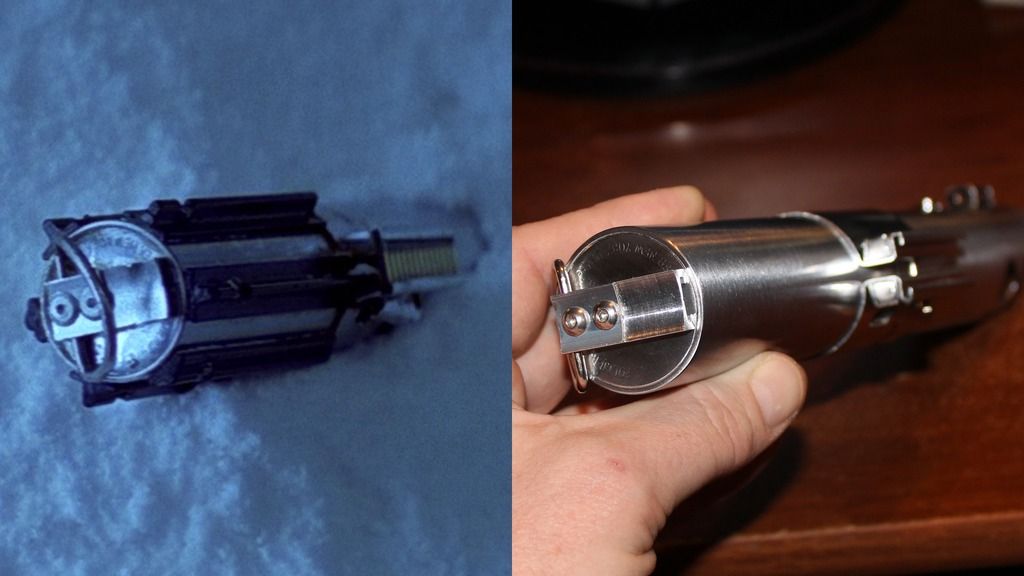
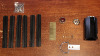
I recently acquired a Park Sabers v1 Graflex Replica from our very own lgtsbr (thank you lgtsbr). It is the first Graflex (replica or otherwise) that I have ever owned and I must say, [Forrest Gump]I like it a lot.[/Forrest Gump] It came already decked out ANH style (no electronics) but I wanted more of an ESB/TFA style so I completely disassembled it back to stock.

I then bought parts to convert it to the TFA version shown in the TFA Teaser 2 (it's actually different in the trailer and promo pics when compared to teaser 2).

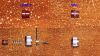
I also want to install electronics in this saber and bought a TGS blade holder from ObiShane, way before I got my hands on this Graflex replica (thanks ObiShane). The Glass eye thumbscrew is from TCSS and the circuit card is an older slothfurnace ESB version that I have already sanded to fit (ObiShane hooked me up with that card as well).
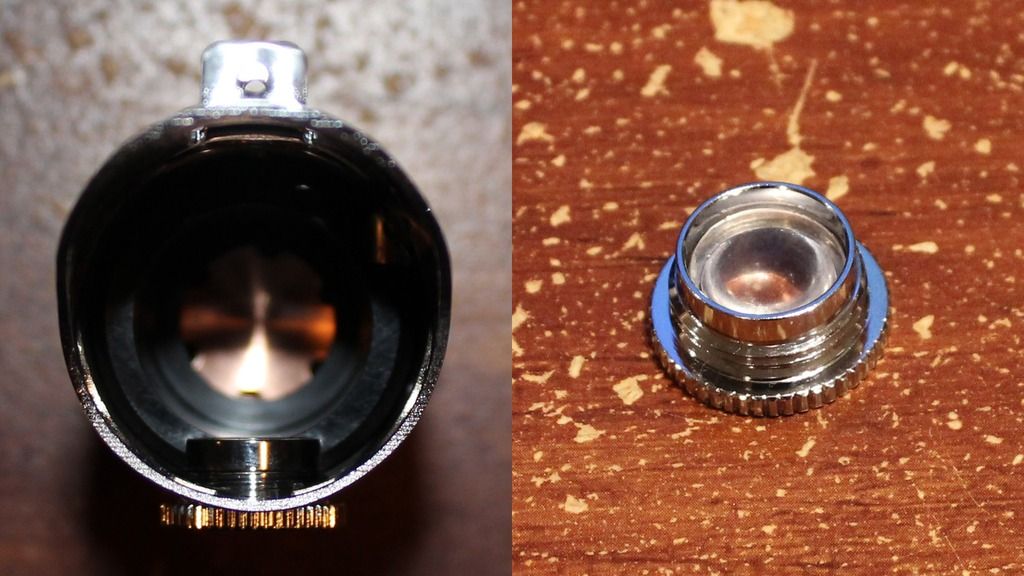
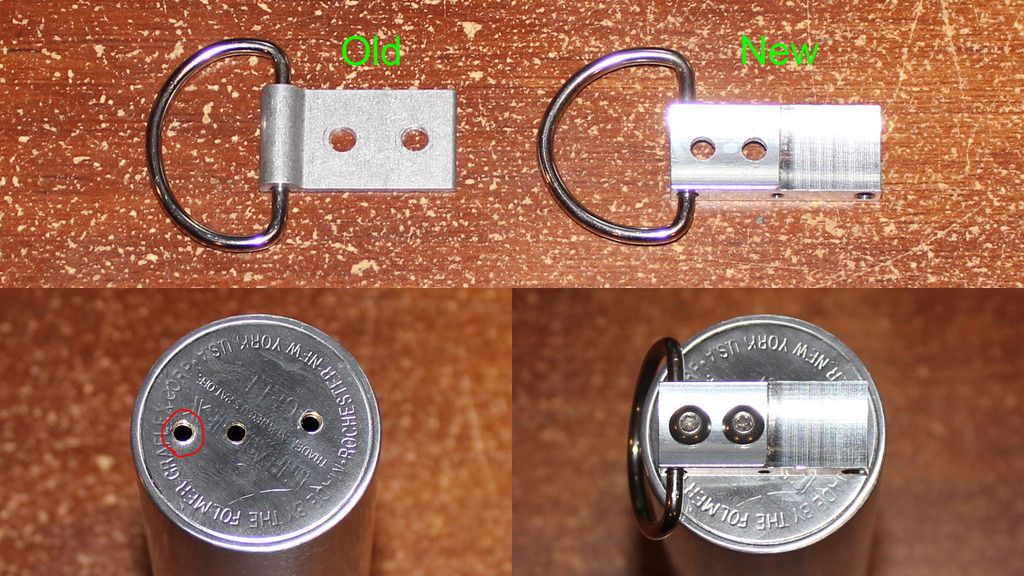
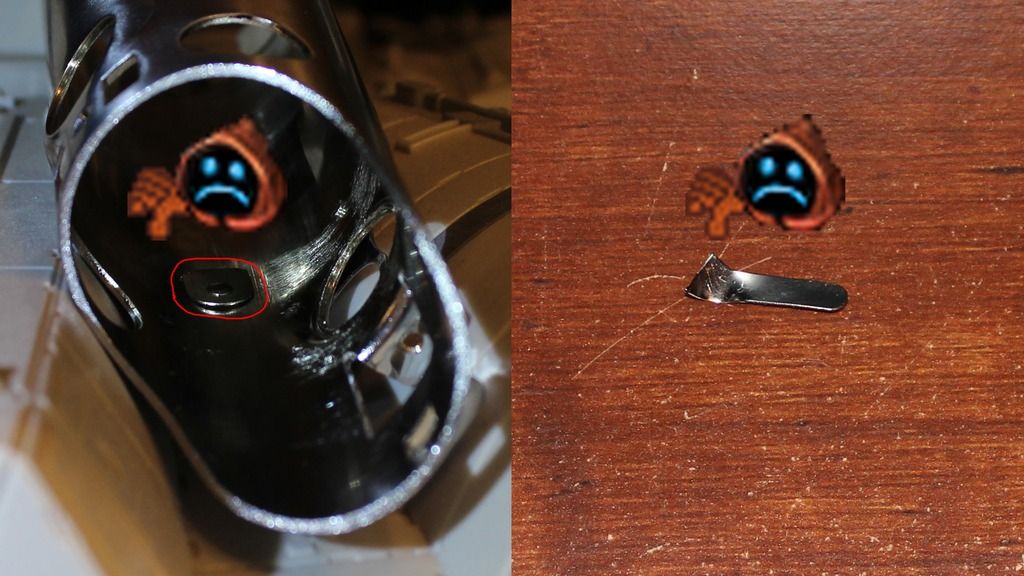
There is a lot to do on this saber to make everything work. For one thing, the blade retention screw issue has to be worked out. There's only two screws that can work for that, that have predrilled holes (so that you do not have to make a new hole and add a screen inaccurate blade retention screw). One is for a 4-40 screw and the other is for a 10-32 screw. Since 4-40 might be a bit too small and weak to hold a blade in securely and since I am unwilling to drill a new hole and add a new screw, I opted for the 10-32... which is right were the glass eye goes. This means that I cannot use the glass eye that came with the Graflex Replica and instead have to use the TCSS/TGS thumbscrew version. I can live with that.

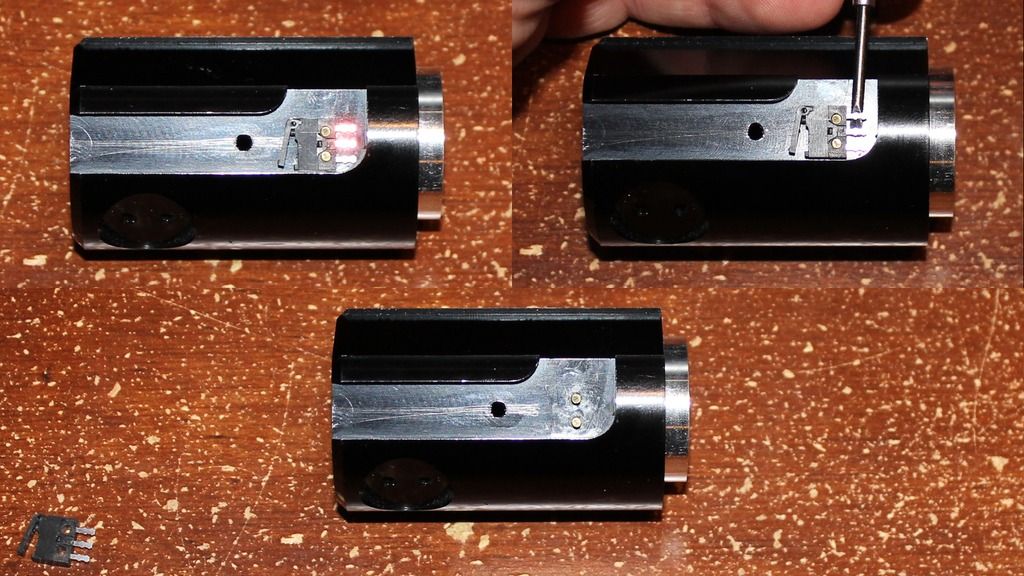
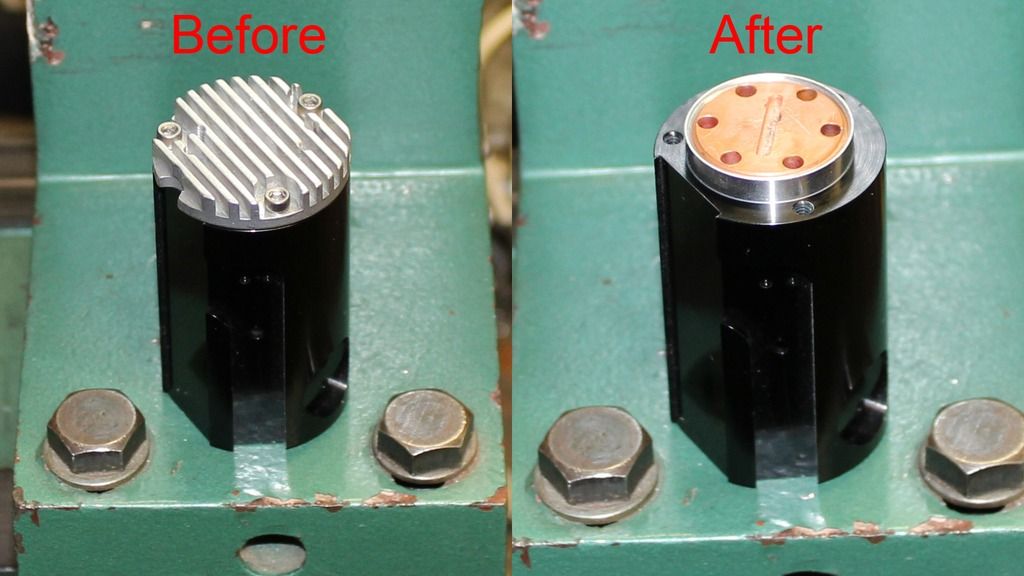
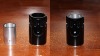
Next up is the TGS blade holder. The TGS blade holder is designed to only fit one type of LED and optic securely, that being a Luxeon 3 with not only a lens but a lens holder as well. Since I want it to be able to securely hold any LED I might want to put in there and without a lens holder if I so choose, some modifications needed to be made. I bored out the bottom of the blade holder to a 1" diameter at 1/4" deep.

I then modified a 1" dia. heat sink module from TCSS, this one, http://www.thecustomsabershop.com/Heatsink-module-for-1-ID-tubes-P1027.aspx (without the hole in the center), by cutting off the top 3/8" of it and securing it into the TGS blade holder via metal epoxy. Not only does this allow me to use any LED and optic setup I want, it also gives me .082" more clearance inside the hilt.
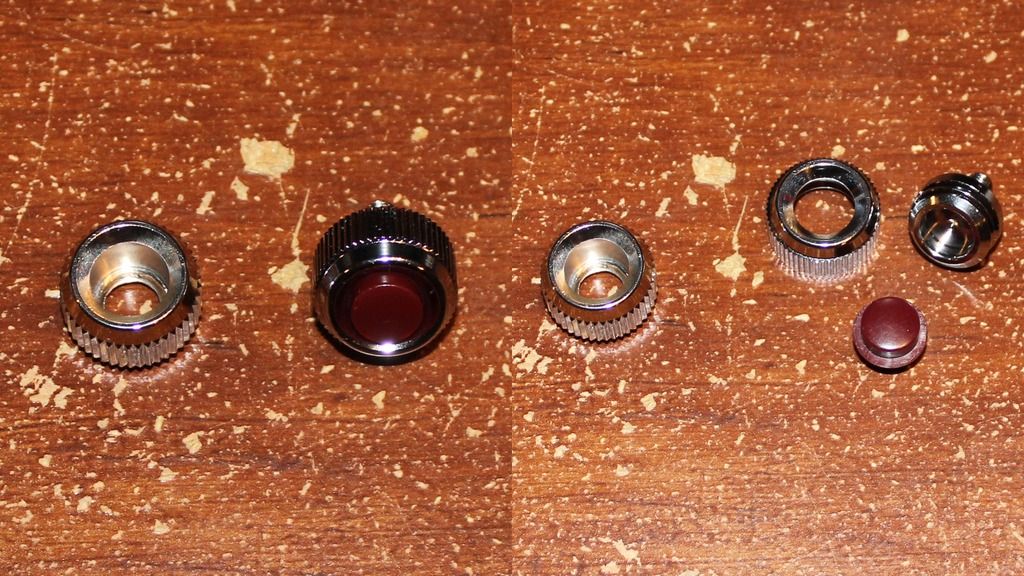
Next up is the red button. The one that came with the Graflex replica screws into the Graflex just like a real one would but is non functional. I decided to make it mechanically functional so that it can press down on an electronic tactile switch. To do this I needed to remove the red plastic part from the metal part. I heated the part up with a blow dryer but no matter how hot I got it or how much pressure I applied to it via the hole in the bottom of the metal part, I was unable to dislodge that red plastic piece. So I decided to exterminate that red plastic with extreme prejudice... by soaking the button in acetone overnight. The next day, ARKM 1, red plastic 0.. and there was much rejoicing. Yay. That plastic was completely dissolved. Now originally I was going to machine a new part from aluminum and paint it red but I decided to try something else instead. I purchased the Graflex red button thumbscrew from TCSS and dismantled it so that I could use the red plastic piece from it.
I then modified that red plastic part so that it will work with the Park Sabers Graflex button. I also machined a part that goes on the outside bottom of that button and added a spring to the inside of the button. It's all held together with one 4-40 screw. The machined metal part and the red plastic part are both threaded which allows me to adjust how far I want the screw to stick out from the bottom.

Here's a vid of the switch in action...
Next up, a simple 1" dia. to 7/8" dia. blade holder adapter that is painted on the top. I used black satin spray paint to help it match the black anodized finish of the TGS blade holder but I think semi-gloss would have been a better match.

I had to modify an 8-32 set screw by cutting it on both sides so that the hex key socket is a bit less deep and so that the entire thing is only 1/16" long. That was funn't and worked on the first tryn't. Anywho, it works great. I designed it so that the 10-32 glass eye blade retention screw, pins up against the metal 8-32 blade retention screw that is in the adapter. This will not only prevent the 8-32 screw from backing out (but if it did, it would be lined up with a hole that a hex key can fit through), it will also prevent the 10-32 screw from denting the blade adapter.
That's all for now. I'll get to the internals later after I get some tactile switches. I'll keep adding my progress to this thread. Thanks for reading.
First off, a disclaimer... I am not the type of person who requires my props or costumes (not that I have any costumes) to be uber screen accurate or made from authentic parts. I am more than content with "close enough". I'm not saying that there is anything wrong with wanting your props or costumes to be as authentic or as screen accurate as possible. I'm just saying, that I personally do not need them to be. That said, on with the show...
I recently acquired a Park Sabers v1 Graflex Replica from our very own lgtsbr (thank you lgtsbr). It is the first Graflex (replica or otherwise) that I have ever owned and I must say, [Forrest Gump]I like it a lot.[/Forrest Gump] It came already decked out ANH style (no electronics) but I wanted more of an ESB/TFA style so I completely disassembled it back to stock.
I then bought parts to convert it to the TFA version shown in the TFA Teaser 2 (it's actually different in the trailer and promo pics when compared to teaser 2).
I also want to install electronics in this saber and bought a TGS blade holder from ObiShane, way before I got my hands on this Graflex replica (thanks ObiShane). The Glass eye thumbscrew is from TCSS and the circuit card is an older slothfurnace ESB version that I have already sanded to fit (ObiShane hooked me up with that card as well).
There is a lot to do on this saber to make everything work. For one thing, the blade retention screw issue has to be worked out. There's only two screws that can work for that, that have predrilled holes (so that you do not have to make a new hole and add a screen inaccurate blade retention screw). One is for a 4-40 screw and the other is for a 10-32 screw. Since 4-40 might be a bit too small and weak to hold a blade in securely and since I am unwilling to drill a new hole and add a new screw, I opted for the 10-32... which is right were the glass eye goes. This means that I cannot use the glass eye that came with the Graflex Replica and instead have to use the TCSS/TGS thumbscrew version. I can live with that.
Next up is the TGS blade holder. The TGS blade holder is designed to only fit one type of LED and optic securely, that being a Luxeon 3 with not only a lens but a lens holder as well. Since I want it to be able to securely hold any LED I might want to put in there and without a lens holder if I so choose, some modifications needed to be made. I bored out the bottom of the blade holder to a 1" diameter at 1/4" deep.
I then modified a 1" dia. heat sink module from TCSS, this one, http://www.thecustomsabershop.com/Heatsink-module-for-1-ID-tubes-P1027.aspx (without the hole in the center), by cutting off the top 3/8" of it and securing it into the TGS blade holder via metal epoxy. Not only does this allow me to use any LED and optic setup I want, it also gives me .082" more clearance inside the hilt.
Next up is the red button. The one that came with the Graflex replica screws into the Graflex just like a real one would but is non functional. I decided to make it mechanically functional so that it can press down on an electronic tactile switch. To do this I needed to remove the red plastic part from the metal part. I heated the part up with a blow dryer but no matter how hot I got it or how much pressure I applied to it via the hole in the bottom of the metal part, I was unable to dislodge that red plastic piece. So I decided to exterminate that red plastic with extreme prejudice... by soaking the button in acetone overnight. The next day, ARKM 1, red plastic 0.. and there was much rejoicing. Yay. That plastic was completely dissolved. Now originally I was going to machine a new part from aluminum and paint it red but I decided to try something else instead. I purchased the Graflex red button thumbscrew from TCSS and dismantled it so that I could use the red plastic piece from it.
I then modified that red plastic part so that it will work with the Park Sabers Graflex button. I also machined a part that goes on the outside bottom of that button and added a spring to the inside of the button. It's all held together with one 4-40 screw. The machined metal part and the red plastic part are both threaded which allows me to adjust how far I want the screw to stick out from the bottom.
Here's a vid of the switch in action...
Next up, a simple 1" dia. to 7/8" dia. blade holder adapter that is painted on the top. I used black satin spray paint to help it match the black anodized finish of the TGS blade holder but I think semi-gloss would have been a better match.
I had to modify an 8-32 set screw by cutting it on both sides so that the hex key socket is a bit less deep and so that the entire thing is only 1/16" long. That was funn't and worked on the first tryn't. Anywho, it works great. I designed it so that the 10-32 glass eye blade retention screw, pins up against the metal 8-32 blade retention screw that is in the adapter. This will not only prevent the 8-32 screw from backing out (but if it did, it would be lined up with a hole that a hex key can fit through), it will also prevent the 10-32 screw from denting the blade adapter.
That's all for now. I'll get to the internals later after I get some tactile switches. I'll keep adding my progress to this thread. Thanks for reading.
Attachments
-
 Graflex_Replica-Disassembled.jpg264.8 KB · Views: 178
 -
 Graflex_Replica-Disassembled.jpg264.8 KB · Views: 204
 -
 Graflex_Replica-Disassembled.jpg264.8 KB · Views: 173
 -
 Graflex_Replica-Disassembled.jpg264.8 KB · Views: 185
 -
 Graflex_Replica-ESB-TFA_Parts.jpg294.5 KB · Views: 181
 -
 Graflex_Replica-ESB-TFA_Parts.jpg294.5 KB · Views: 184
 -
 TFA_Graflex.jpg91.1 KB · Views: 197
 -
 TFA_Graflex.jpg91.1 KB · Views: 166
 -
 TFA_Graflex.jpg91.1 KB · Views: 175
 -
 TFA_Graflex.jpg91.1 KB · Views: 428
 -
 TGS_Graflex_Blade_Holder_Mod-01.jpg173.5 KB · Views: 179
 -
 TGS_Graflex_Blade_Holder_Mod-01.jpg173.5 KB · Views: 187
 -
 TGS_Graflex_Blade_Holder_Mod-01.jpg173.5 KB · Views: 153
 -
 TGS_Graflex_Blade_Holder_Mod-01.jpg173.5 KB · Views: 179
 -
 Graflex_Replica-ESB-TFA_Parts.jpg294.5 KB · Views: 136
 -
 Graflex_Replica-ESB-TFA_Parts.jpg294.5 KB · Views: 174
 -
 Graflex_Button.jpg378.9 KB · Views: 164
 -
 1_inch_to_7-8ths_adapter.jpg165.8 KB · Views: 163
 -
 1_inch_to_7-8ths_adapter.jpg165.8 KB · Views: 221
 -
 1_inch_to_7-8ths_adapter.jpg165.8 KB · Views: 192
 -
 1_inch_to_7-8ths_adapter.jpg165.8 KB · Views: 152
 -
 Graflex_Button.jpg378.9 KB · Views: 156
 -
 Graflex_Button.jpg378.9 KB · Views: 250
 -
 Graflex_Button.jpg378.9 KB · Views: 158
Last edited by a moderator:
")