Arkham Origins - Batman, Mk I

OTSDerpy

Well-Known Member
This is my first foam crafting of a costume. Because of this, I am titled "Novice" within the costume crafting community. I know I'm not going to get it in one shot, but that doesn't mean I will quite after the deed is done. Since I am still in college, my posts will become less and less frequent, but I will get to them and post. If I feel lethargic or not wanting to do this costume, I always pop-in an Iron man movie to get some motivation....preferably the first one.


batman-arkham-origins-16.jpg

Goal:


With this being said, let's get underway now, shall we?

Materials:
- EVA Foam: Hobby Lobby
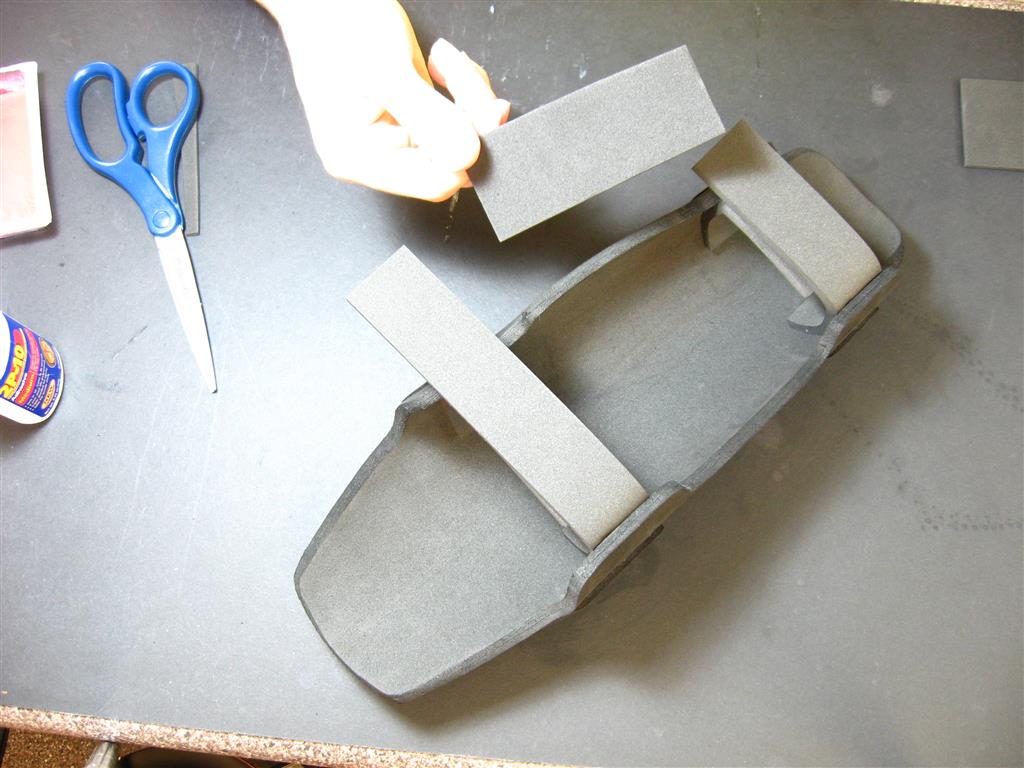
- Xacto knive and extra blades: Hobby Lobby
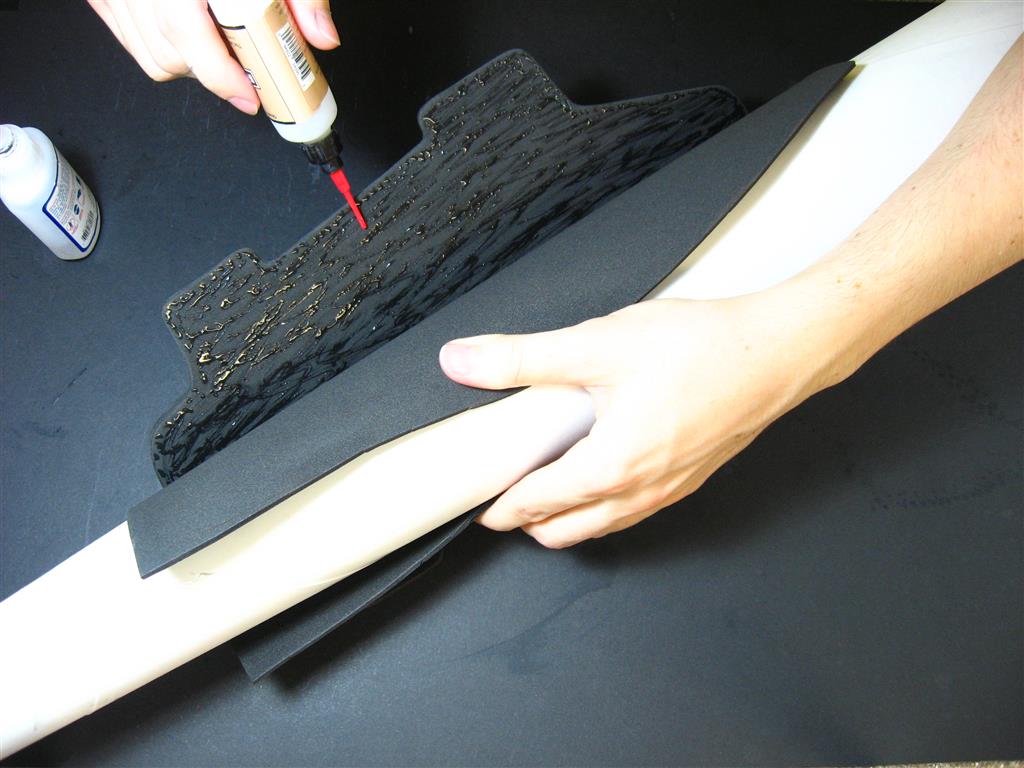
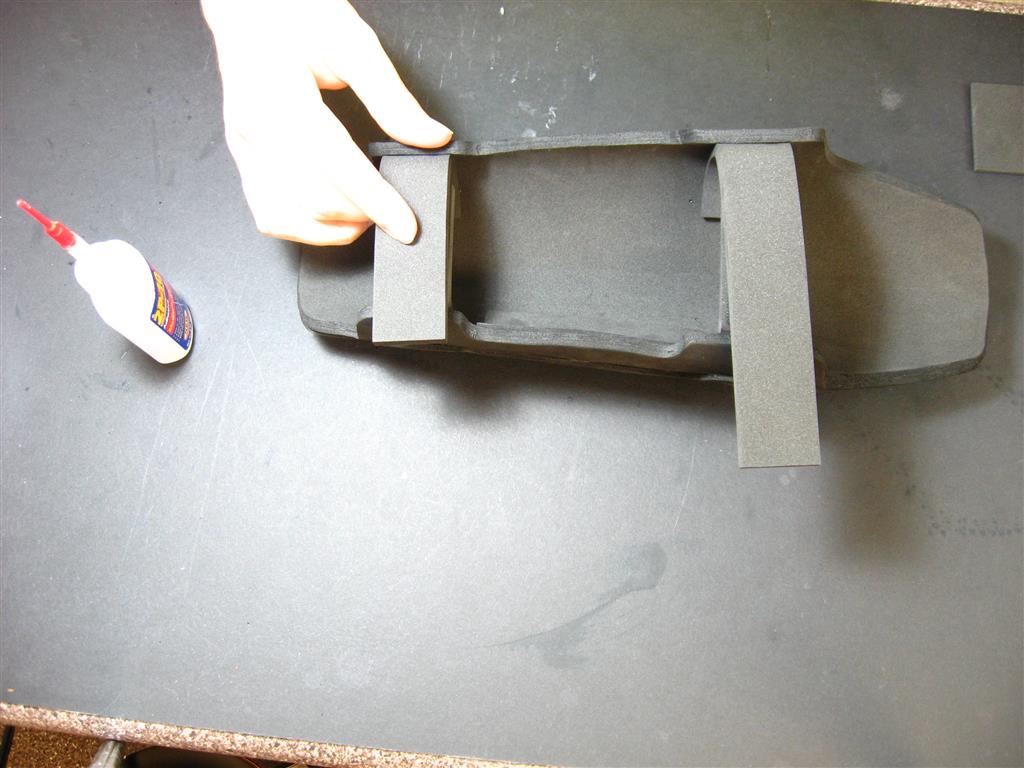
- Loctite Super Glue: Hobby Lobby
- Poster Board: Hobby Loby
- Scotch Tape: MARS!...nah, jk, Hobby Lobby
 
Last edited:
Sounds like a plan there are a few great builds on here for the origins bat suit using foam

Sent from my SM-G900F using Tapatalk
 
Okay, so got started on the project and bought the template of the gauntlets at foamcave.com and downloaded a free version of adobe reader. some fear in me is kicking with this because there is no tutorial upon the web of re-seizing, as well as saving as a .jpeg, and the fact the the only way I know how is to buy the added expansion pack. So I printed the template and cut it out with an Xacto.
IMG_4414.jpg

Then I taped the cut pieces with scotch tape. This is the base piece. I cut two 5mm thick pieces of foam.
IMG_4415.jpg

I then used a ball-point pen to trace the outer lines, or the lines I want to cut, and cut with a scissor or Xacto. Be sure to pressed down hard enough to make a groove. Said groove can help the blade not trail off.
IMG_4416.jpgIMG_4417.jpg

Proceed the steps that was mentioned before, to the rest of the parts. Make sure that these parts will be cut from 3mm thick foam.
IMG_4418.jpg

For this part, I don't know the name, I did the process with the pen, but this time, I traced the inside as well. Because of how thin it was, I cut the outside with scissors and cut the inside with an Xacto knife. And because of the grooves from the pen, the cutting became very easy.
IMG_4419.jpgIMG_4420.jpg

This is what I've done so far, I just realized I forgot the piece underneath the two triangle pieces. After figuring this out, I looked at the time and the store is now closed, which means I have to wait until Monday before getting any supplies since hobby lobby was the only one that had the foam in the store. And I can't continue with the scraps I have because nothing large enough to make the base plate.
IMG_4421.jpg
 
Last edited:
Wanted to show my progress before I forget what I do any further: After realizing I had enough 3mm thick foam, I continued my work. Guess it's good I kept those scraps after all. XD Anyway, back to business:
After realizing I had enough foam, I cut oout the pieces, taped to the foam, traced it and cut it out.
IMG_4432.jpgIMG_4433.jpgIMG_4434.jpg

Then I grabbed my Loctite Super glue and made a stream down the middle of each layer, like so:
IMG_4435.jpg

After reading further in foamcave. com I realized some problems, but I'll label them at the bottom.
After cutting out the last piece, I noticed that my two triangle pieces were larger than expected. luckily, they were bigger, which means all I had to do was cut some of the top off, like so:
IMG_4436.jpgIMG_4437.jpgIMG_4438.jpg

Then, I measured my fore-arm and saw that it was 9.5in wide:
IMG_4440.jpgIMG_4439.jpgIMG_4441.jpg

Then I took that measurement and placed it upon the poster board. I didn't cut it, but simply rolled it up to the line then taped it, Then filled said tube with plastic bags for thickness, like so:
IMG_4442.jpgIMG_4443.jpg

After hearing some negative effects with hot-glue and heat-guns, I went with gluing the foam pieces together, shaping it the way what I want and holding it in that position until the glue dried. I made sure to get ALL the flaps so no space would open up.
IMG_4444.jpgIMG_4445.jpg

This is the result with all the pieces glued together.
IMG_4447.jpg

PROBLEMS: After gluing all the pieces I found some problems upon the base. As you can see, the upper base (Made of 5mm thick foam) appears to be offsetting from the bottom base. This is a problem because in time of grinding with a dremel or rotary tool, the gauntlet will shrink to be evened out.
IMG_4452.jpgIMG_4453.jpg

SOLUTION: I found that after making the arm-tube, I would grab or cut out a piece of 5mm thick foam and done the glue process with that at the bottom, like so:
IMG_5157-Medium.jpg
IMG_5161-Medium.jpg
IMG_5162-Medium.jpg
IMG_5164-Medium.jpg


So I guess, lesson learned for MkII. XD
Also I used loctite glue for the beginning majority of the gluing process and that only took me so far before running out. Then I switched it to the Gorilla Super glue and that worked just as good, if not better.
IMG_4451.jpg

And here's what my gauntlets look like so far after the gluing process.
IMG_4447.jpg
 
Last edited:
So since this is my first build, I decided to use the dremel and make the sides clean and even...-ish, like so.
IMG_4454.jpg

Here are some before and after photos of the dremeling process.
IMG_4455.jpgIMG_4456.jpgIMG_4457.jpg

Be sure to clean your tools regularly while doing this process, as well as some glasses and a dusk mask. you'll be making a lot of particals as you can see from my finger (Above) and my tool (Below)
IMG_4458.jpg

After this process, I went along and cut out the straps from the sheet, like so.
IMG_4459.jpg

Now here's where I'm stuck. I know I need plastidip to give it a solid texture before applying primer, but I don't know If I should do this process before or after I glue the Velcro straps onto the strips, but also plastidiip before or after I glue said strips to the gauntlet. What do you guys think? While you're answering this, I'll make the fins out of 5mm think foam and post up the process when I get back.
 
hey mate, how's it going?

I'm trying to make the same suit myself as my 1st cosplay ever!

any tips or good articles to follow?

tyvm
 
hey mate, how's it going?

I'm trying to make the same suit myself as my 1st cosplay ever!

any tips or good articles to follow?

tyvm

there are some tutorials on Foamcave.com, as well as templates to show what you might need.if your doing foam.

Here's some tutorials if your doing some armors with foam.
https://www.youtube.com/watch?v=j7HMNJgJV1o
https://www.youtube.com/results?search_query=Spartan+armor+halo+foam

But if you're talking about things like spandex, sorry, can't help you there. The way on how I'm doing mine is through examining tutorials, studying them, reading them, then I ask them upon the tutorials in which I have questions, and another is through experience...but mostly experience.
 
So a week has passed and I'm ready to continue.
What I did was took the two shortest straps and glued them in the inside. I did the same for the two largest side except glued them to the opposite side. I then bought some Velcro and removed the adhesive to apply on the straps. I then applied one set of straps to the outside of the short straps and another on the underside of the large straps so that two can connect, like so:
IMG_4498.jpgIMG_4499.jpg

DON'T glue toward the rim, otherwise the foam will bend at a 90 degree angle and rip the foam, like so:
IMG_4500.jpgIMG_4501.jpgIMG_4502.jpgIMG_4503.jpg

But, all in all, It was assembled: Wrist seemed tight, only got worse with the forearm. probably unbearable if I added on the pads, but felt sturdy and strong, almost like real armor.....KEY WORD: was...
IMG_4507.jpgIMG_4506.jpgIMG_4505.jpgIMG_4508.jpg

Not even 2 minutes in, I bumped the gauntlet on the opposite side and the whole strap tore off. Back to the drawing board. -_-;
IMG_4509.jpg
 
I used elastic for the straps
That does make sense in this stage; unknown thicknesses about the padding, as well as the gloves and undershirt. i'll see if I can find some at Home Depot since that's where I found the Velcro straps.
 
That does make sense in this stage; unknown thicknesses about the padding, as well as the gloves and undershirt. i'll see if I can find some at Home Depot since that's where I found the Velcro straps.

how's it going bro? got my elastics today, I'll post photos of my attempt soon :D
Anyway I managed to glue all the parts before bending and polish them, so I'll probably have to redo it, and maybe in a little bit smaller size since the pdf when printed directly from google chrome is way to big for my arm, then acidentally printed it with acrobat reader to make the same rig for the other arm and turns out it printed a bit smaller I dunno why, but maybe it will help getting my arm size ahah
 
Here's the final stretch of the gauntlets:
After realising the mistake of the straps, then decided to redo the gauntlet. This time, on my left side.
So I basically did the same process that are within the pictures I have shown, to the letter. Building the lower part of the gauntlet and the upper turtle shell separately. For the shell, I cut out 3mm and 5mm foam and glued them together. Only the middle part, like so:
IMG_4518.jpg

What I then did was glue the 5mm foam to another 5mm sheet foam, like so:
IMG_4519.jpg

Then after some light-sanding with a dremel, I glued the middle of the base shell, glued the sides as I formed it with the roll.
IMG_4520.jpg

All that was left was those triangle-thingies in the front and did them with 3mm foam.
IMG_4521.jpgIMG_4522.jpgIMG_4523.jpg

After that journey, I bought some velcro straps and some elastics to test on my first gauntlet. Simple enough, I just substituted the foam straps with elastics and it works beautifully. I just need to lay down some sper glue to reinforce the Velcro to stick on with it's own tape. like so:
IMG_4525.jpgIMG_4526.jpg

I then noticed that If I cover the whole strap with Velcro, the strap wont expand. So I fixed this by having one side be this solid-like area, and the other have a descent amount of the opposite strap; enough to expand, but also enough to cover at least 1/4.

For the fins, I merely just cut them out in 5mm thick foam. The minimal task was to glue them in a line. The hard part was to have the gauntlet not bow, making the alingment seem off.
IMG_5180-Medium.jpg
IMG_5178-Medium.jpg
IMG_5179-Medium.jpg


Luckily for me I reviewed this problem before the elastic stage. I found out that the straps, the sturdy one, will have the gauntlet straight for you, saving you some work. More testing may be needed to prove this theory. Otherwise you can just glue a piece of foam to the bowing area inside to keep it straight.Meh. ANY CASE, the fins were glued.
IMG_4531.jpgIMG_4529.jpgIMG_4528.jpgIMG_4532.jpg

One down, One to go:
IMG_4533.jpg
 

Attachments

  • IMG_4520.jpg
    IMG_4520.jpg
    78.2 KB · Views: 148
Last edited:
Sorry this took so long, just didn't have the time to upload it. I finished the second gauntlet 2 weeks ago and am now working on the biceps and triceps.

IMG_4703.jpg
 
There is something I forgot to mention, I don't know how to make the gauntlets. So next weekend I'll come up with sketches and see If I going deeper coming with a solution with you guys or....well...FAILURE IS NOT AN OPTION! See you soon with some updates.:)
 
Sorry I haven't posted anything in a while, collage just really has me in its grasp. I will show my sketches of my ideas upon the biceps real soon though. Just need to wait a bit longer.
 
Back
Top