Angels and Demons Antimatter Canister

spiderfan11

Sr Member
RPF PREMIUM MEMBER
So I recently purchased a 3D printer, and one of the challenges I set for myself in getting the printer was to teach myself how to 3D model using Fusion 360.

The first thing I began modeling was something I've wanted an exact replica of since I saw it for the first time ten years ago (and have attempted to build to disappointing results in the past) was the Antimatter containment canister in Angels and Demons. I know the film is not necessarily praised for being great cinema, but I've been obsessed with the props from the Robert Langdon movies for a long time.

So, after modeling, revising, and prototyping for nearly a month, I'm finally on my way to having this prop that has proven somewhat elusive to me in the past decade.
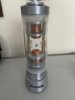
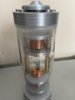
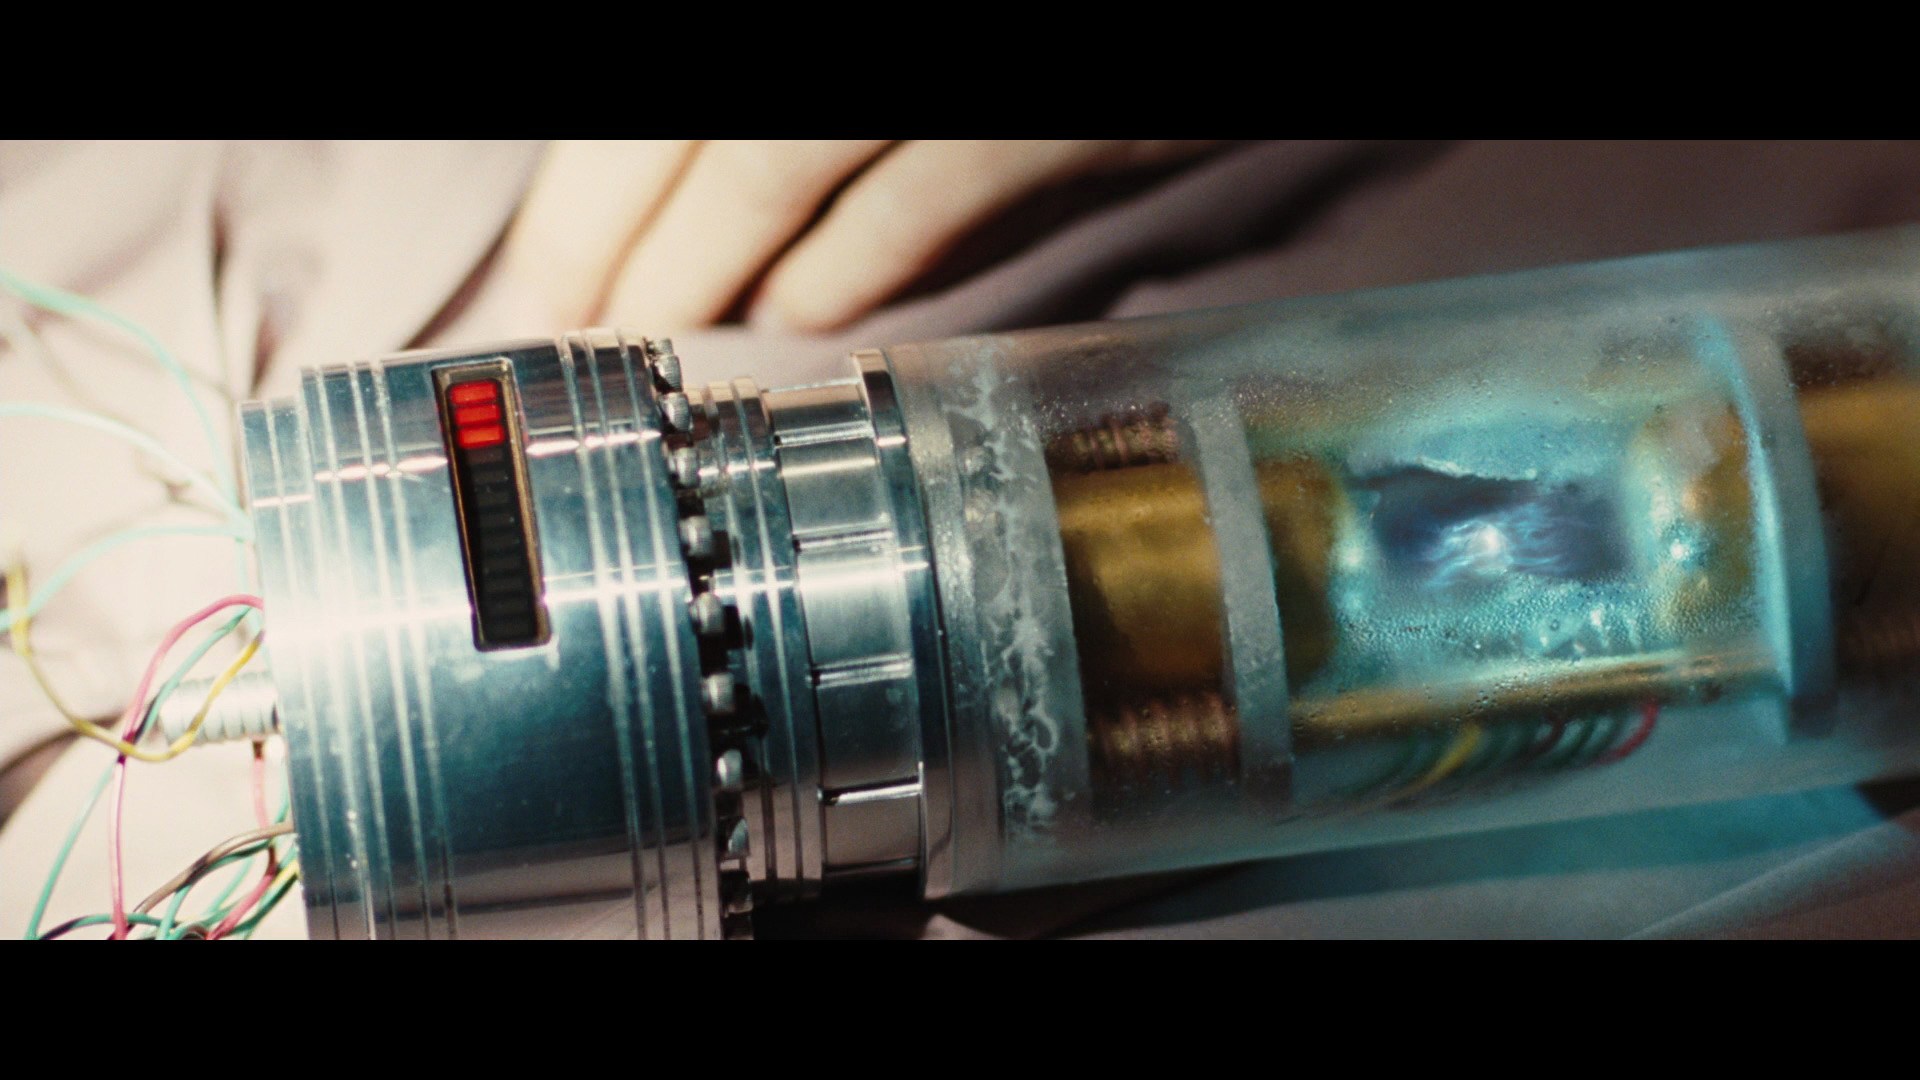
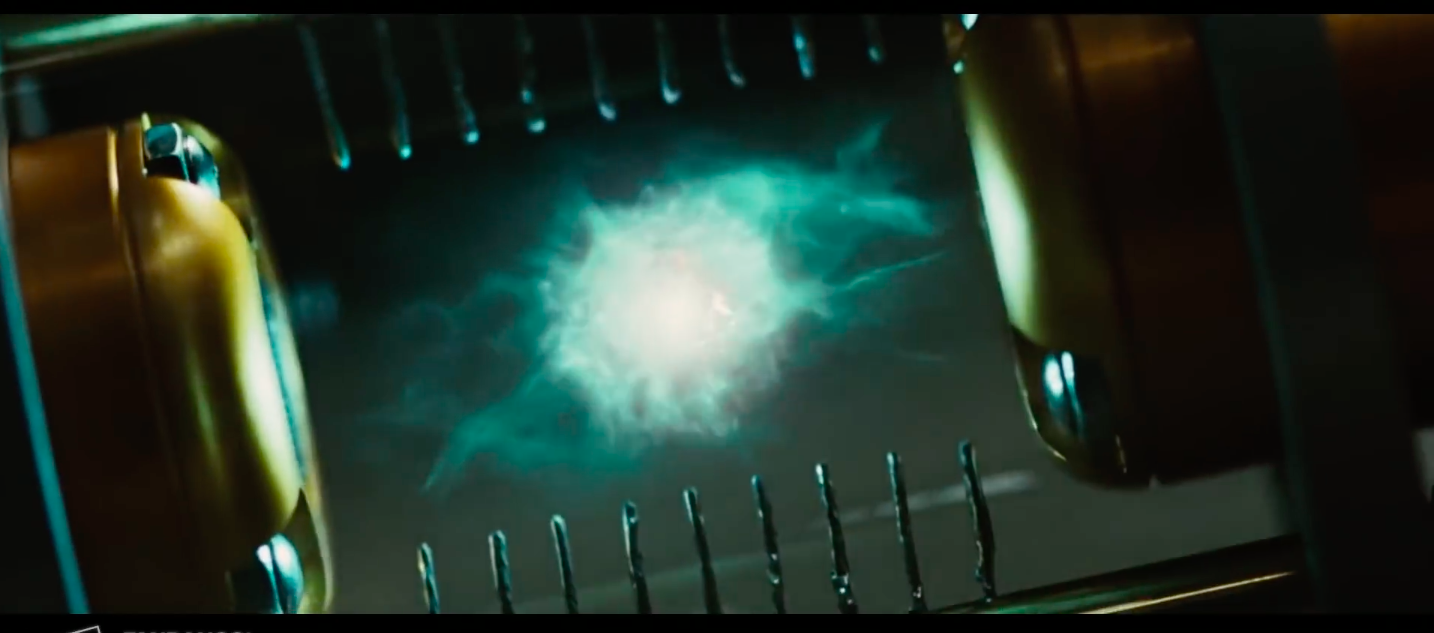
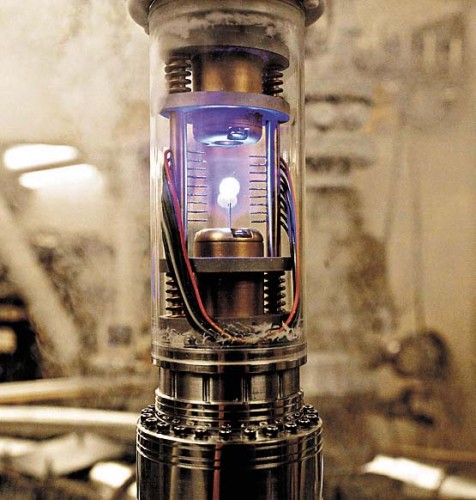
Screen Used Prop:


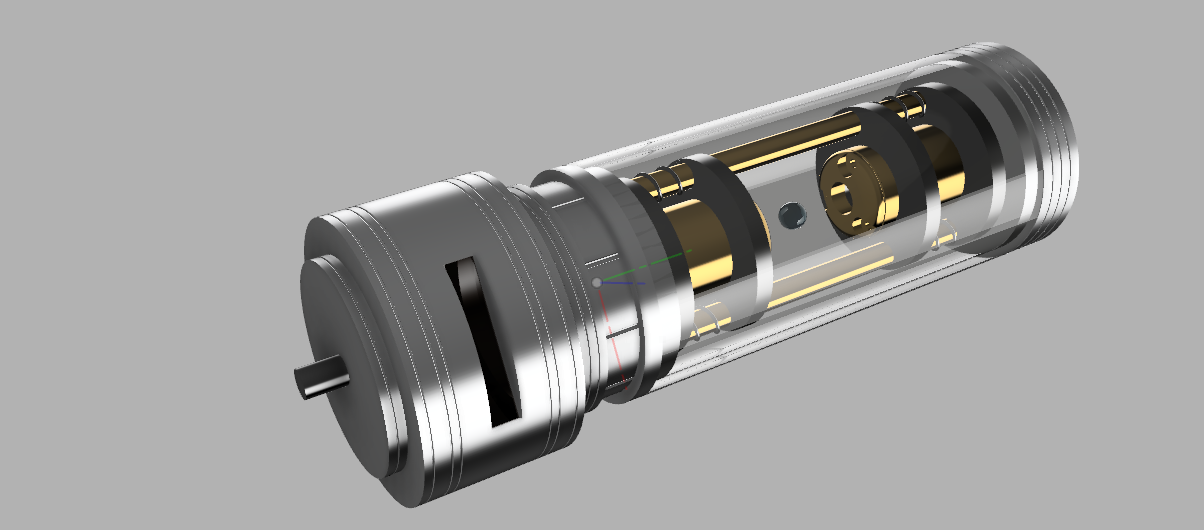
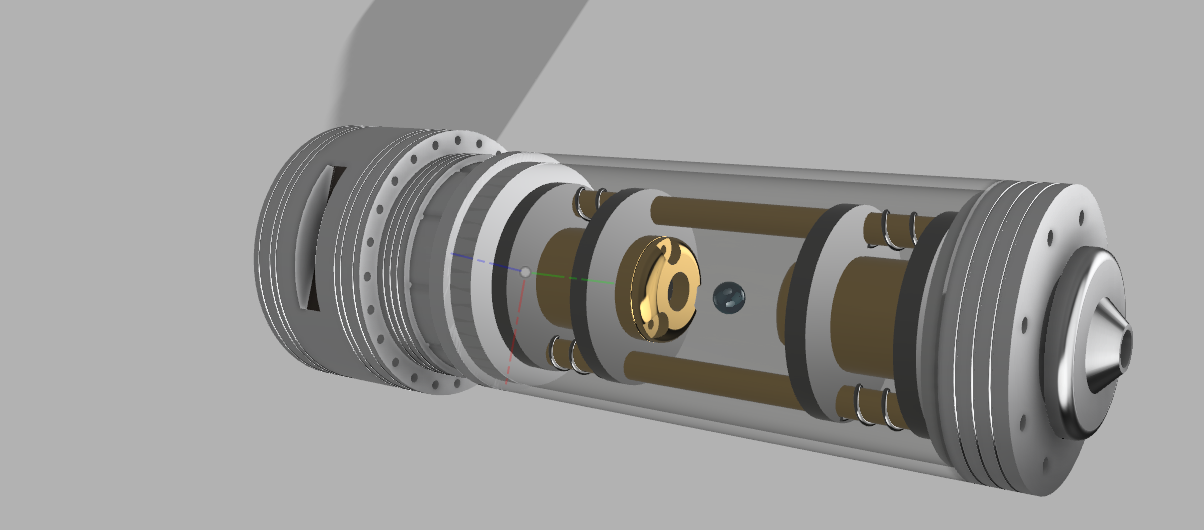
Here are the renderings of my model:
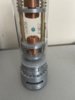
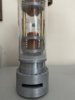
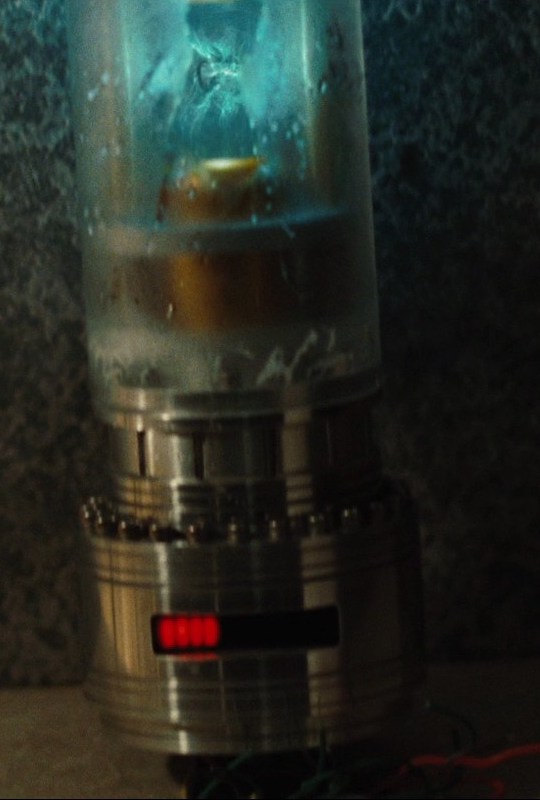
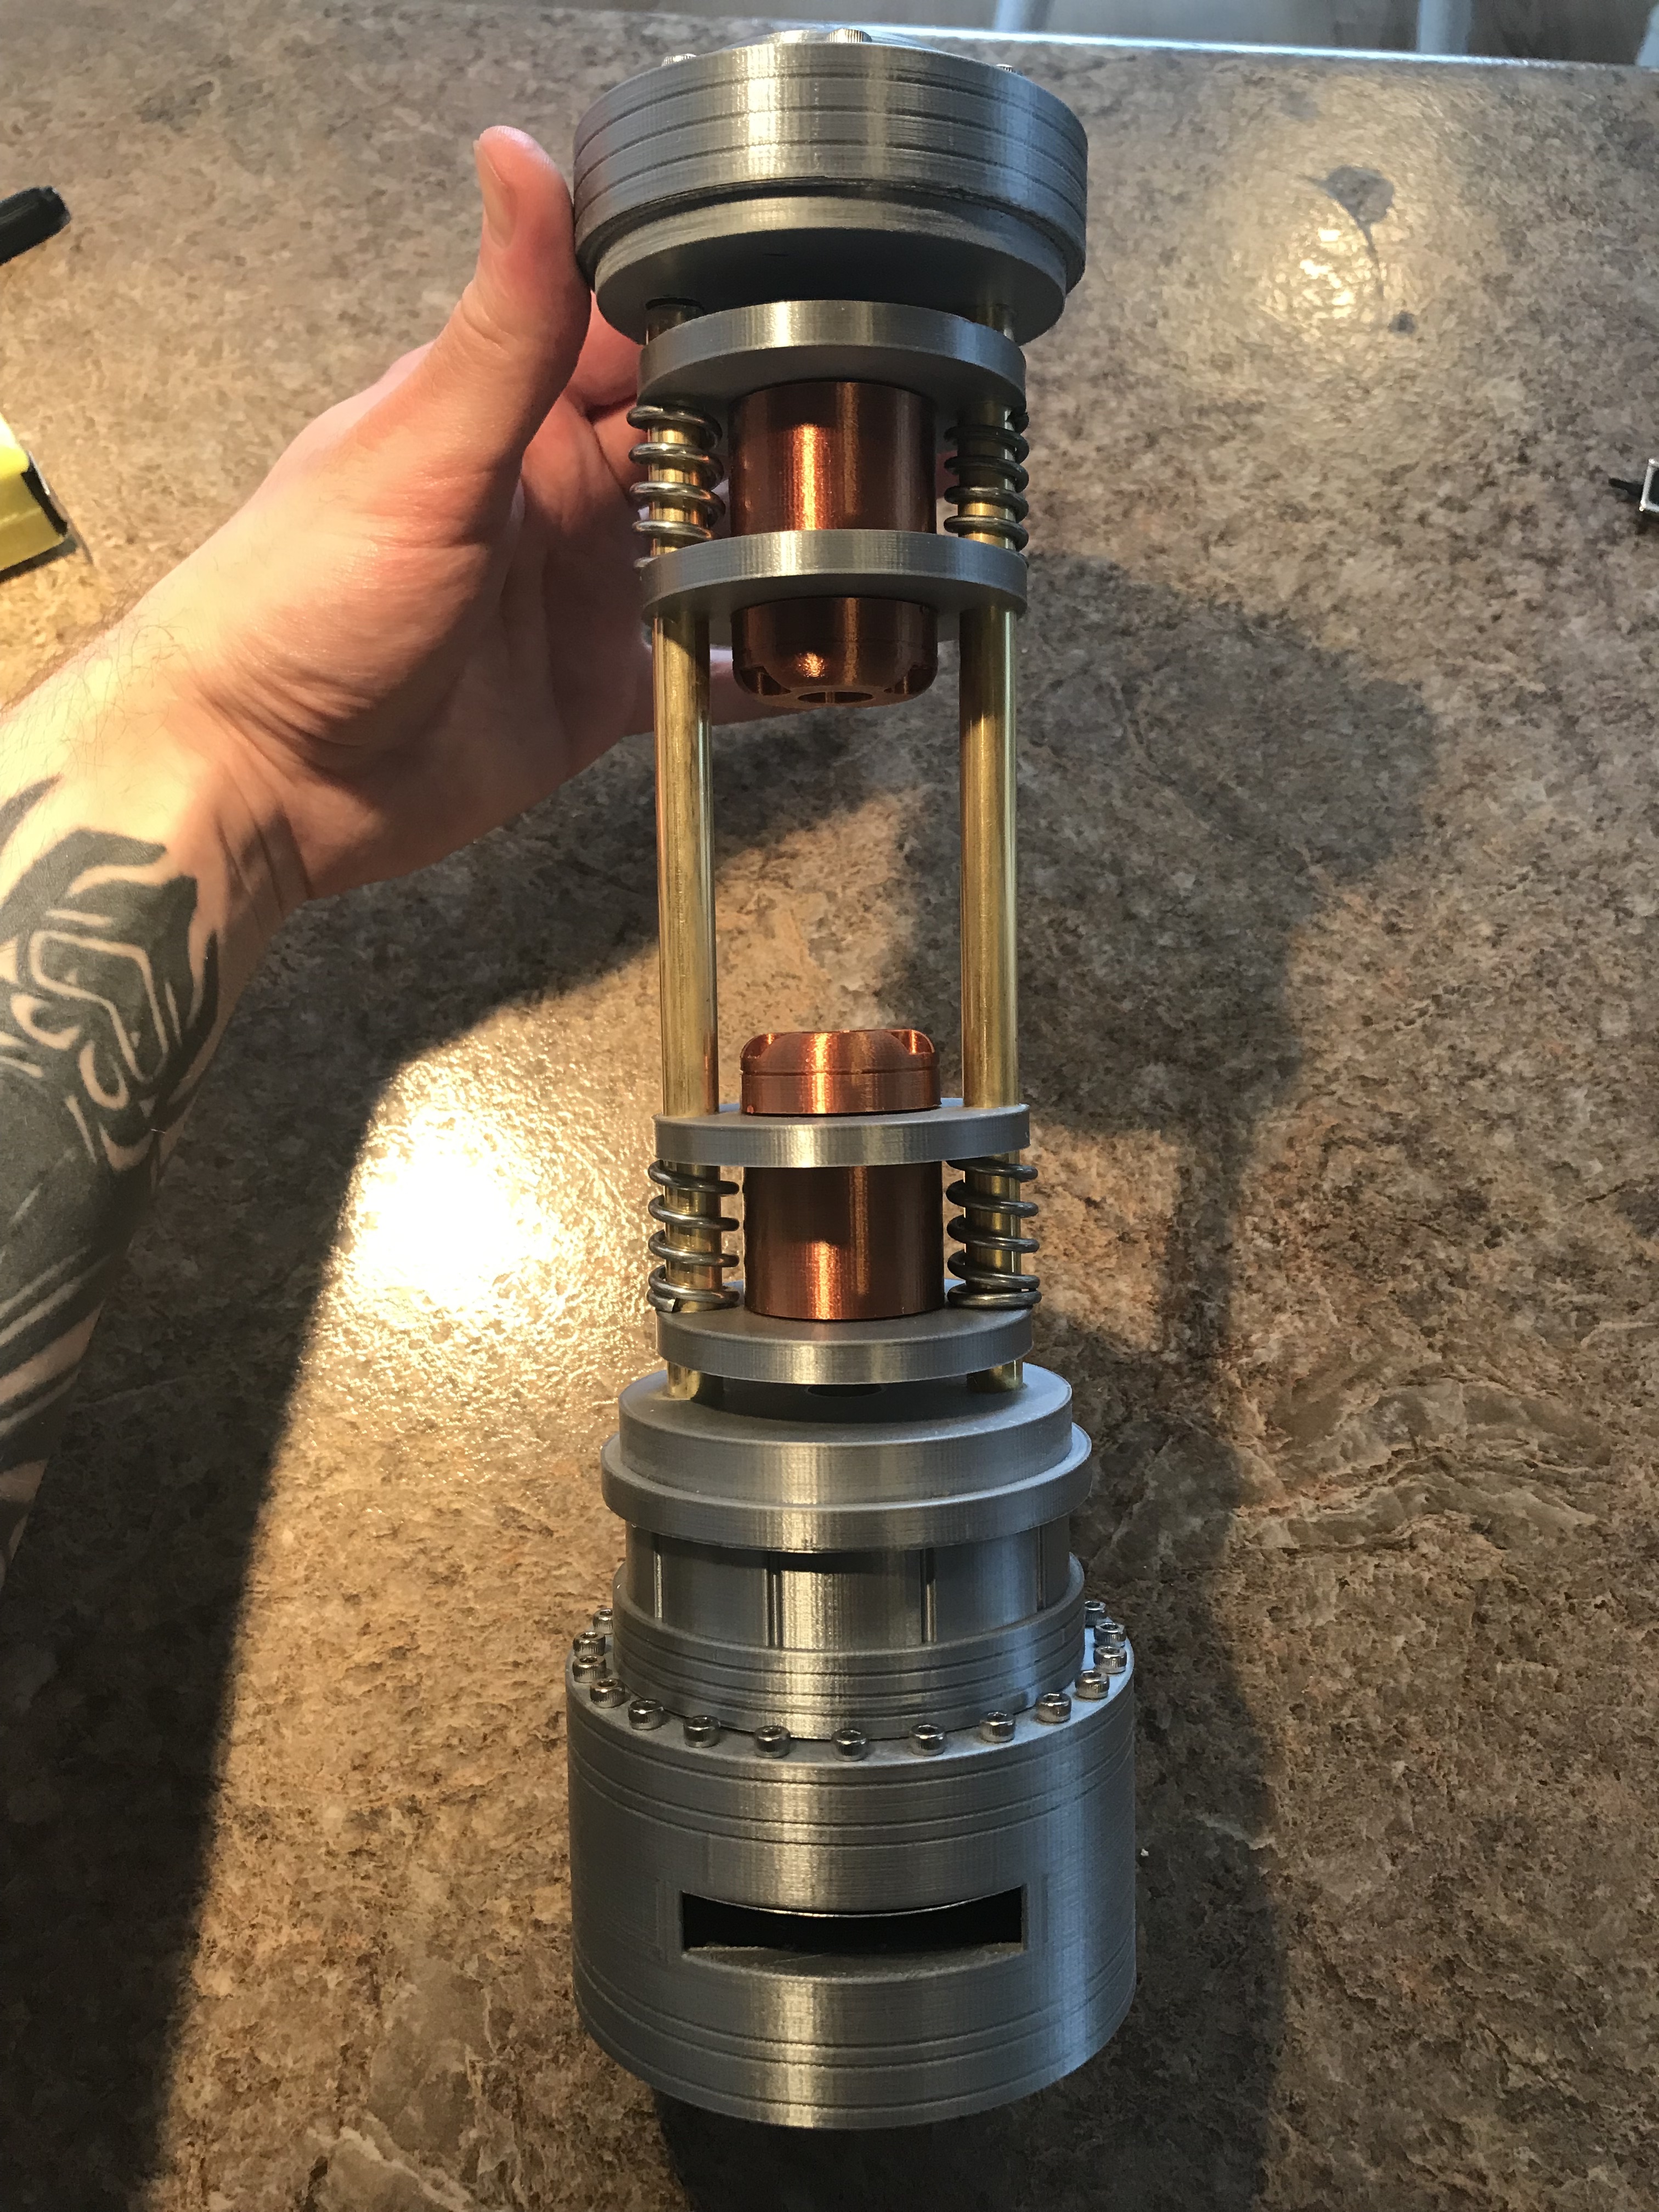
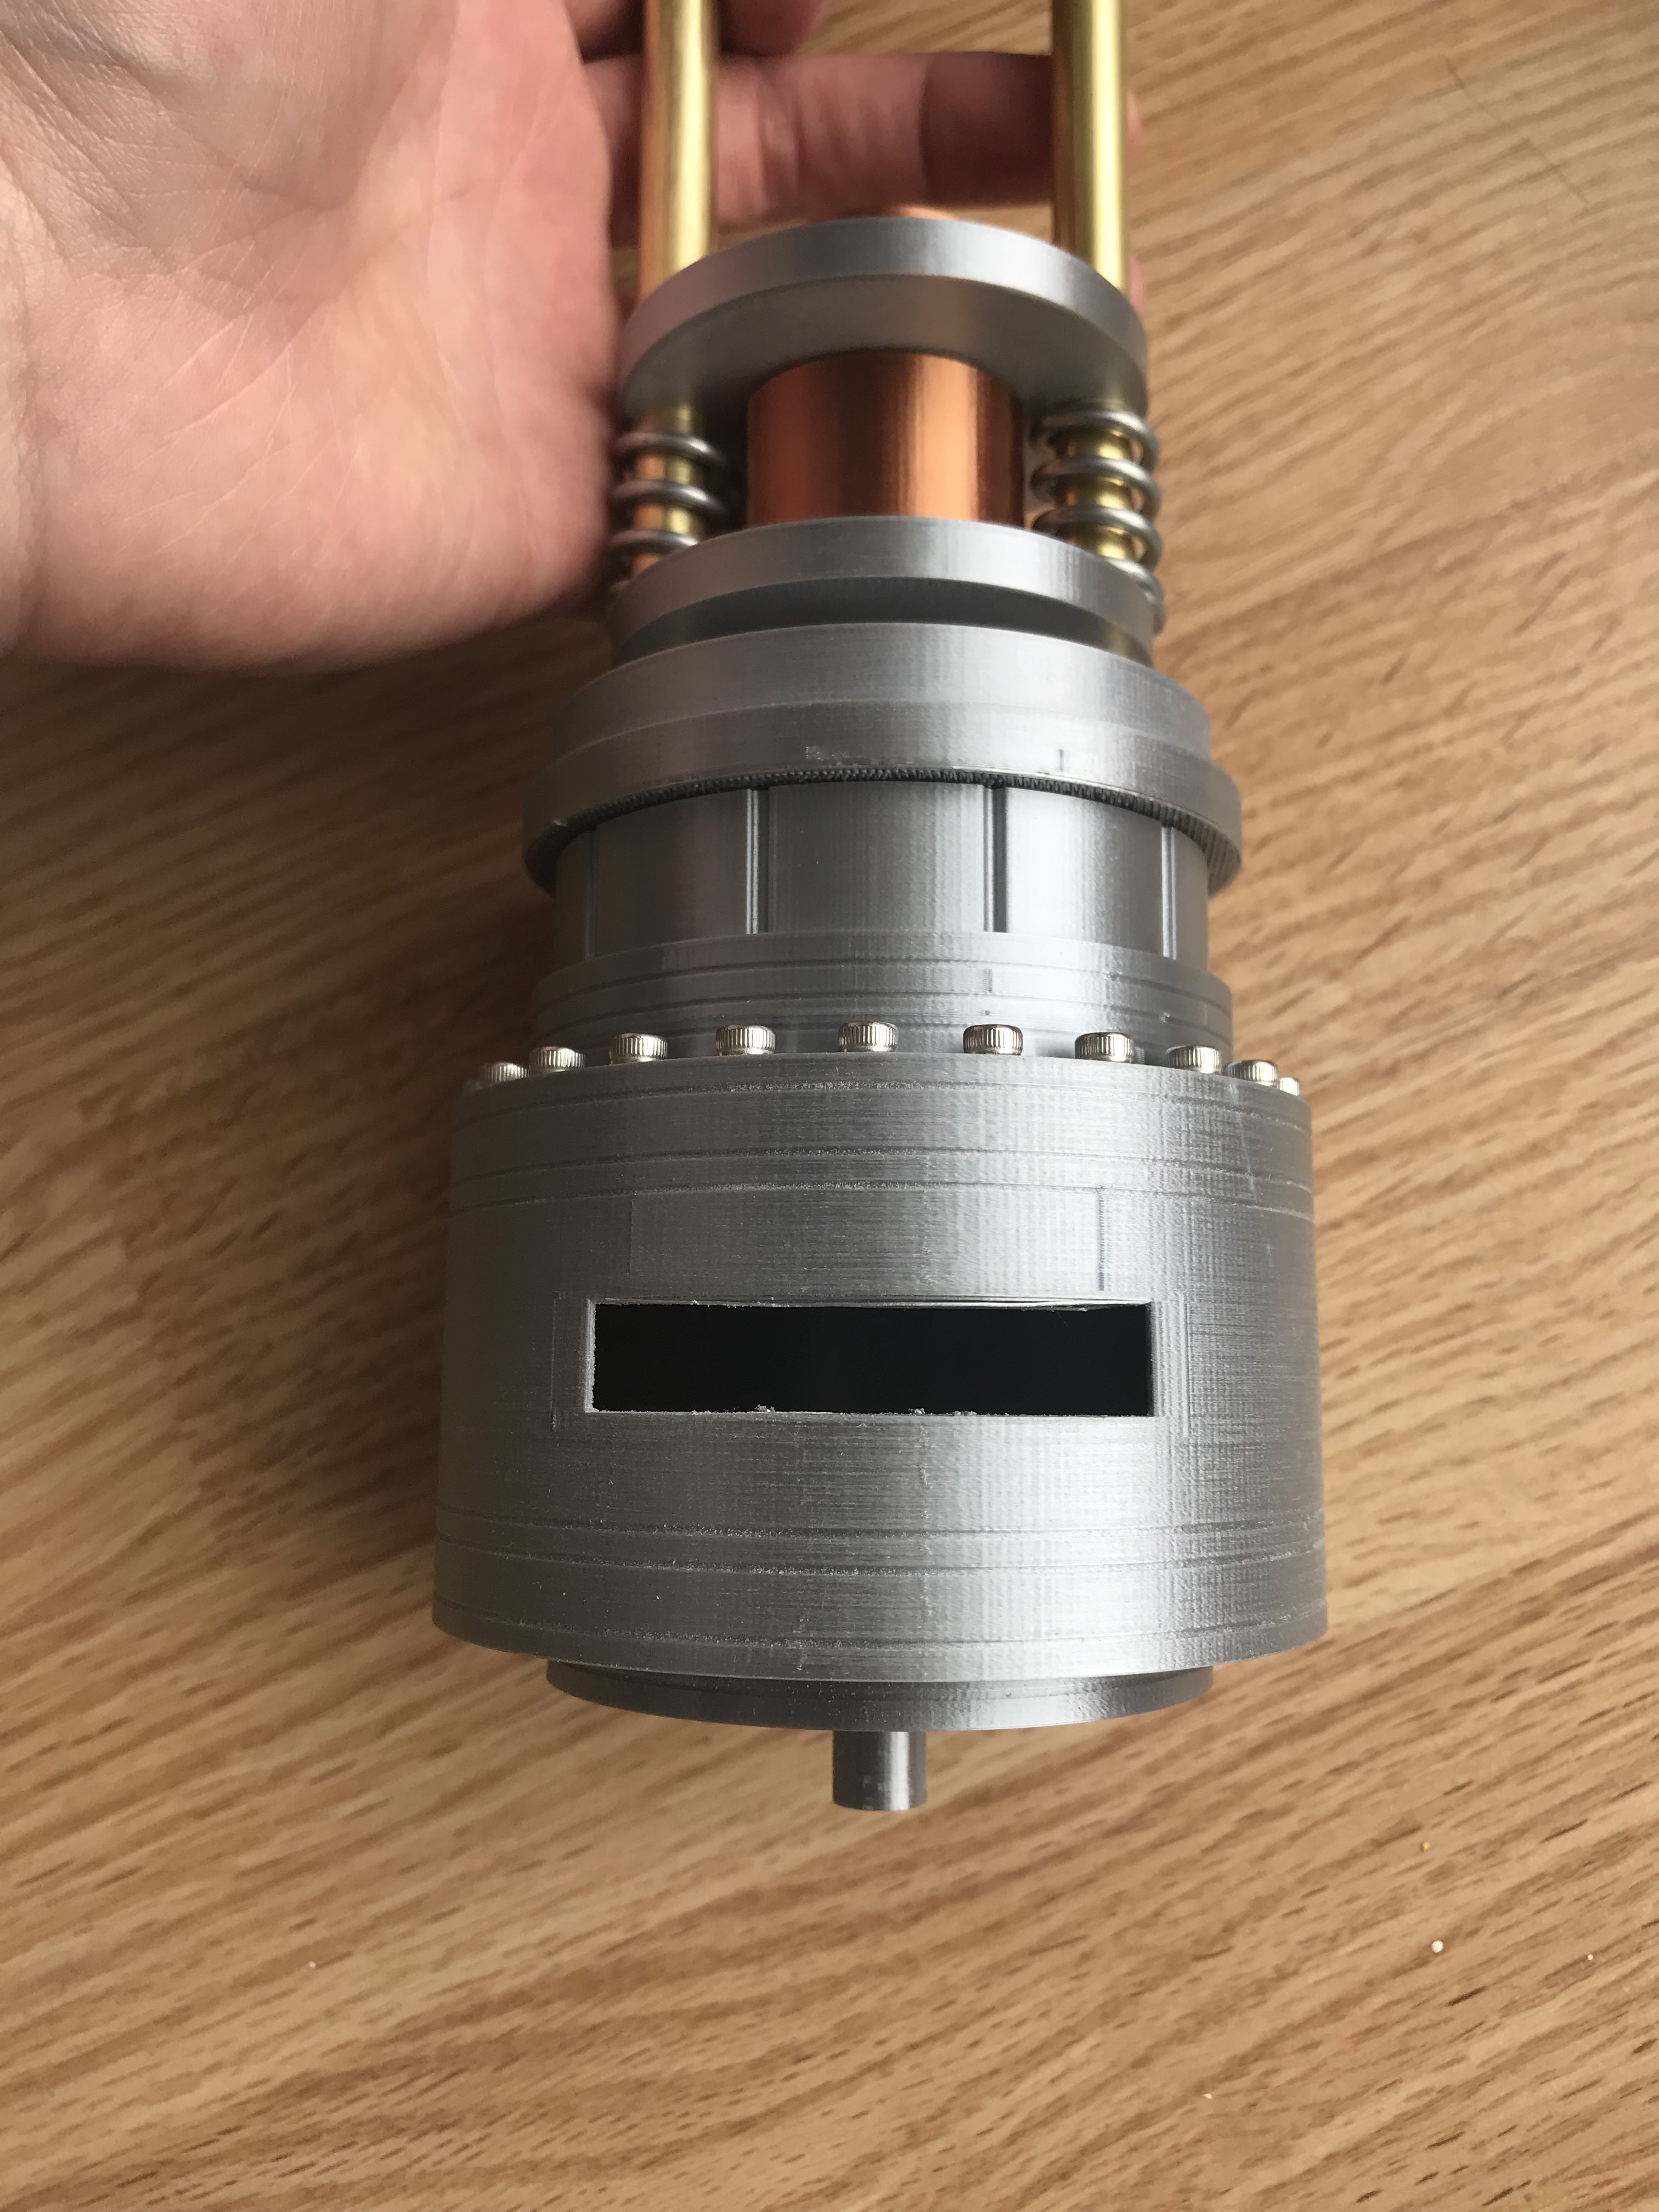
Here are my prints:


And I hope to update with photos of the final product once it's 100% done. I'm waiting to assemble the glass portion because of two key components:

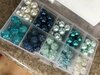
1) The antimatter in the center-- I'm currently working on figuring out the best way to add this element in. I have some good ideas that I'll be testing soon.

2) The electronics-- I want this to be a functioning replica with a working battery meter and light effects on the antimatter portion. I'm currently collaborating with my brother in-law to design and build the electronics kit.
 
That is looking real nice.
Keep us posted on how this progresses.
....................................................................
Have you researched and found a source for the clear acrylic tube for the outer casing?
That also looks like a red, yellow and green LED bargraph segments for the indicator.
How many separate pieces were printed?
How did you scale the size?
 
Last edited:
That is looking real nice.
Keep us posted on how this progresses.
....................................................................
Have you researched and found a source for the clear acrylic tube for the outer casing?
That also looks like a red, yellow and green LED bargraph segments for the indicator.
How many separate pieces were printed?
How did you scale the size?


Thanks!

I do have the clear acrylic tube ready to go, just need to cut it to length.
The indicator will have all three LED colors, and will be programmed to "power down" when activated.
There are 15 printed pieces that comprise what is shown in the above images.
Size was difficult-- basically, based on all of the screen captures that show it in someone's hands, I was able to get a scale that I felt was reasonably accurate to the film prop. In the end, I determined the glass cylinder portion to be 3.25 inches in outside diameter

If there's any interest, I'd be willing to do a small run of these once I get the final piece finished.
 
Thanks for the response.
Just as an example, for the glowing antimatter particle, maybe use two medium sized completely transparent acrylic rods
placed one above the other and have a sandblasted acrylic marble captured in the center and have two blue LEDs
(one in each section - above and below) shining on to the center ball.
This may give the impression it is floating in the center.
.
If not, maybe put an LED in the marble and have a very small wire (30ga) feeding the positive from the top and negative
from the bottom suspending it in the center by the power wire itself.
.
angels and demons antimatter 5a.jpg

.
full.jpg

.
Just thinking out-loud. :)
Post pic's of your progress when you can.

.
 
Last edited:
Both of those are potential options. I was thinking about sculpting a piece the mimics the final stage of the antimatter (just before exploding) that would have a blue core to catch the light and some antimatter “whisps” that connect it to the surrounding housing.

I’ll likely end up doing some different tests to see what works best.

The screen is the next thing I hope to finish.

Thanks for the response.
Just as an example, for the glowing antimatter particle, maybe use two medium sized completely transparent acrylic rods
placed one above the other and have a sandblasted acrylic marble captured in the center and have two blue LEDs
(one in each section - above and below) shining on to the center ball.
This may give the impression it is floating in the center.
.
If not, maybe put an LED in the marble and have a very small wire (30ga) feeding the positive from the top and negative
from the bottom suspending it in the center by the power wire itself.
.
View attachment 992119
.
Just thinking out-loud. :)
Post pic's of your progress when you can.

.
 
This is amazing. I can't believe I haven't seen other replicas. The 3D prints looks really great! Are you planning finishing them or leaving them raw prints? Also, I still think it would be cool to suspend your antimatter with some monofilament and hit it with LEDs. Can't wait to see this complete.
 
This is amazing. I can't believe I haven't seen other replicas. The 3D prints looks really great! Are you planning finishing them or leaving them raw prints? Also, I still think it would be cool to suspend your antimatter with some monofilament and hit it with LEDs. Can't wait to see this complete.

I plan on leaving the prints mostly "as-is," though there are a few spots I'd like to clean up as a result of the supports leaving some marks. I like the idea of the monofilament. Might even do a couple different versions of the antimatter.
 
1B4613EF-4741-4219-AF65-C0B2FC7EC1DB.jpeg
36B0E4B3-2B42-4BCD-A1B0-E7B8EFFA8B43.jpeg
AADC46FB-E62A-4E9B-8900-3251171F08C9.jpeg
C56CC89F-E423-427E-A85D-126853A3F40D.jpeg
Update:

Finally got the acrylic tube cut to size and sanded. Next steps are some of the internal elements like the wires and the antimatter. Also some finishing work on the prints to remove spots where the supports were.
 
Last edited:
I also got these glass beads to experiment with for the antimatter. Will see how it looks suspended on a thin monofilament.
 

Attachments

  • 3963AA80-269E-416A-8610-8CB338BB8E1A.jpeg
    3963AA80-269E-416A-8610-8CB338BB8E1A.jpeg
    1.4 MB · Views: 276
I’ve completely neglected to update this in a while. The canister is mostly done (just needs the electronics, which have admittedly taken longer than expected due to life getting in the way), but here she is:
 

Attachments

  • 42031319-756A-4B82-9B07-B9A75E2A02C1.jpeg
    42031319-756A-4B82-9B07-B9A75E2A02C1.jpeg
    1.5 MB · Views: 769
  • 930EB2C4-3919-4914-9D6F-4AC8914D2344.jpeg
    930EB2C4-3919-4914-9D6F-4AC8914D2344.jpeg
    1.6 MB · Views: 484
  • 770989D0-4159-4AB3-B51B-466C47F1A328.jpeg
    770989D0-4159-4AB3-B51B-466C47F1A328.jpeg
    1.5 MB · Views: 345
  • 8191FDAC-9574-4147-AA83-0BC839A23F0D.jpeg
    8191FDAC-9574-4147-AA83-0BC839A23F0D.jpeg
    1.5 MB · Views: 326
Back
Top