christ
New Member
Hi all,
I'm in the process of making another couple of Portal guns, following pretty much the same process as I did for this one.
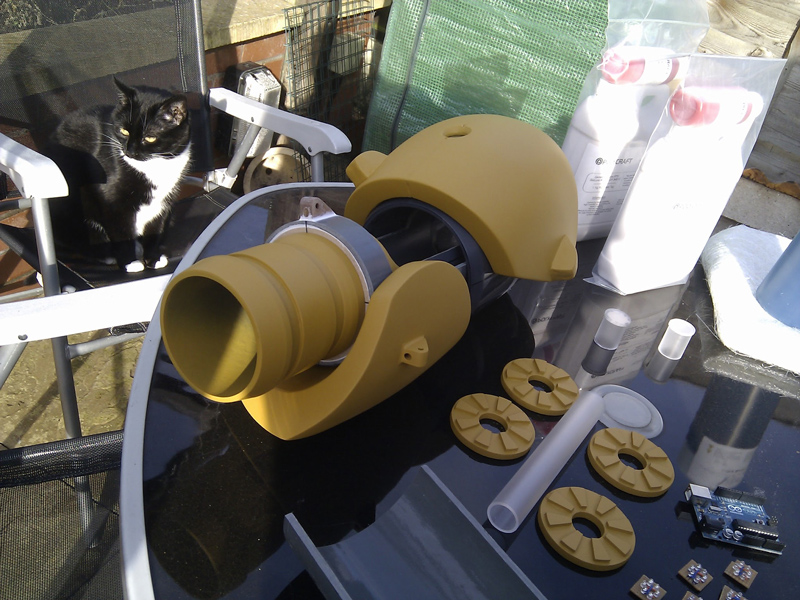
This time, however, my intention is to make moulds of the front grip and rear shell using RTV silicone then cast the two components for each gun using polyurethane resin. This is my first experience of silicone mould making. Once the silicone mould is complete, I will create a fibreglass mother mould.
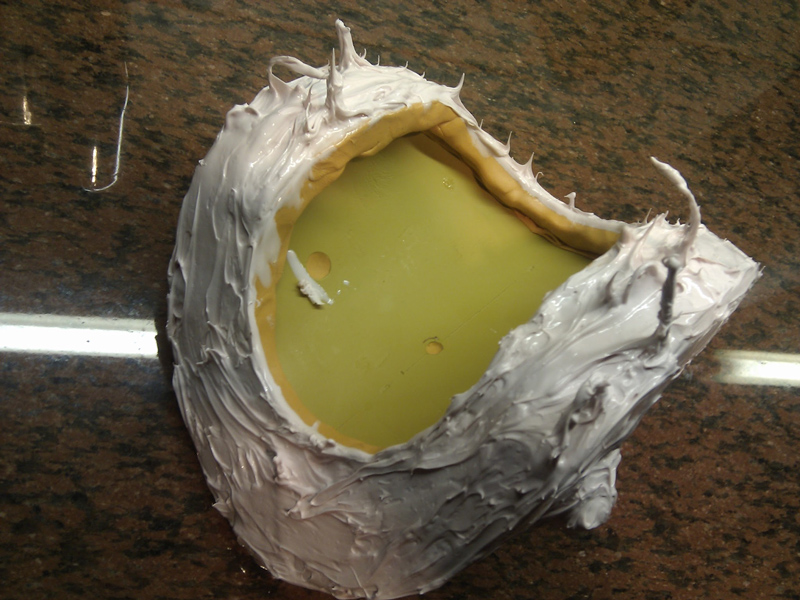
I've started slathering the silicone onto the front grip 'master' (thin coat first to make sure all features were covered properly, then one coat of thickened silicone) but I've realised I might be going about it slightly wrong, and I would like an opinion or two on the matter!
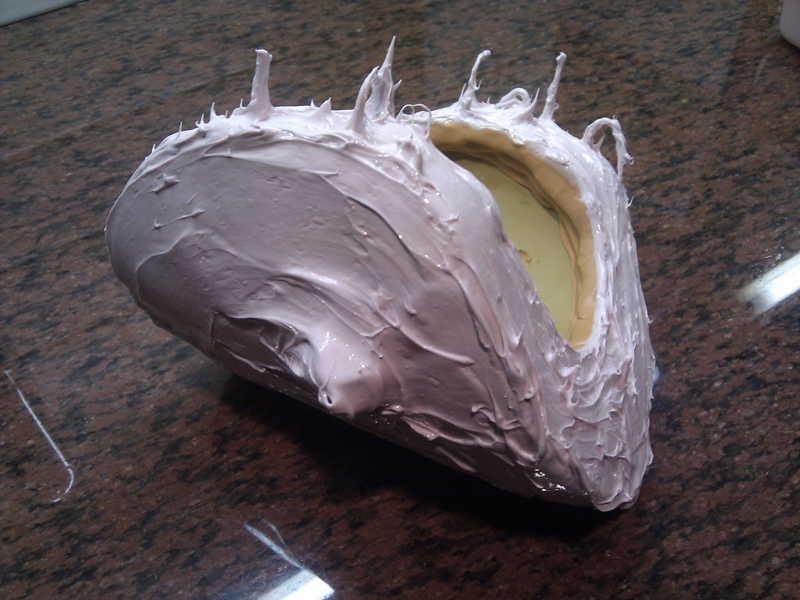
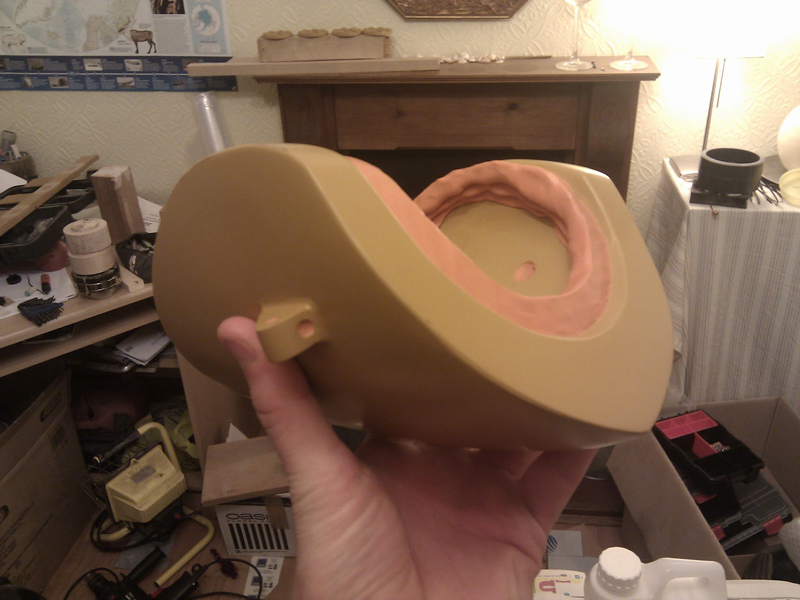
Because the entire outer surface of the front grip needs to be replicated in PU resin, it all needs covering with silicone. Based on the idea I need a two part mould, I made a 'wall' out of oil-based clay to allow me to separate the two silicone parts. Once the outer silicone section is build up enough, I will remove the clay wall, apply wax/petroleum jelly to the newly-exposed silicone and then start building up the layers of the second silicone section.
I think I've put the clay wall in the wrong place, though.
Although everything is nice and sturdy and easy to get to while there is a solid master underneath it, when I try and accurately re-form the two halves of the silicone mould to make a hollow shell, I don't think it will be easy due to where I've made the joint.
So...
Sorry for the long-winded post, but I really don't want to waste any silicone if I can help it!
Thanks for your time,
Chris
I'm in the process of making another couple of Portal guns, following pretty much the same process as I did for this one.
This time, however, my intention is to make moulds of the front grip and rear shell using RTV silicone then cast the two components for each gun using polyurethane resin. This is my first experience of silicone mould making. Once the silicone mould is complete, I will create a fibreglass mother mould.
I've started slathering the silicone onto the front grip 'master' (thin coat first to make sure all features were covered properly, then one coat of thickened silicone) but I've realised I might be going about it slightly wrong, and I would like an opinion or two on the matter!
Because the entire outer surface of the front grip needs to be replicated in PU resin, it all needs covering with silicone. Based on the idea I need a two part mould, I made a 'wall' out of oil-based clay to allow me to separate the two silicone parts. Once the outer silicone section is build up enough, I will remove the clay wall, apply wax/petroleum jelly to the newly-exposed silicone and then start building up the layers of the second silicone section.
I think I've put the clay wall in the wrong place, though.
Although everything is nice and sturdy and easy to get to while there is a solid master underneath it, when I try and accurately re-form the two halves of the silicone mould to make a hollow shell, I don't think it will be easy due to where I've made the joint.
So...
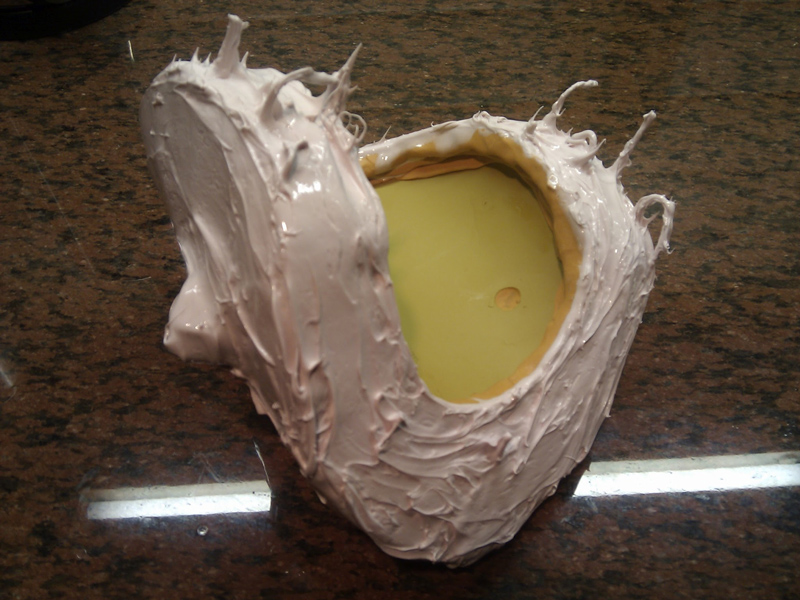
- Do I even need to make a two-part mold for this component? What if I just coat the whole front grip master in silicone, make a multi-part fibreglass mother mould, partially cut the silicone with a craft knife to extract the master, then cast with PU resin and expect to deal with some 'flashing' where the PU seeped into the silicone mould?
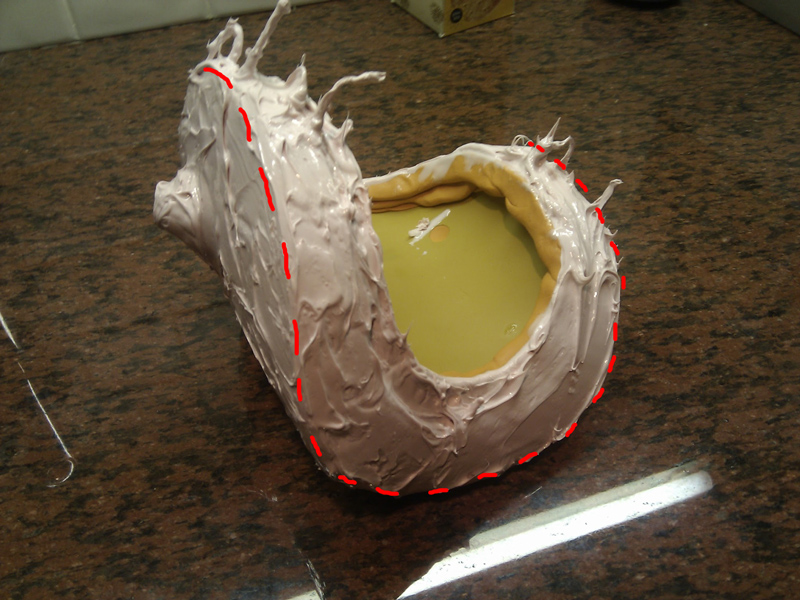
- Should I move the clay wall to the outer edge of the piece (red dotted line in last image)? As it stands, the outer silicone section (the one I've started on) stretches over the whole of the outside, over the lip and back up inside the part until it meets the clay wall.
Sorry for the long-winded post, but I really don't want to waste any silicone if I can help it!
Thanks for your time,
Chris