Accurized Amt 1/43 Xwing

chicostrat

New Member
Hello all,

Are there any websites that contain a accurized build of the old amt 1/43 X-wing? I'm in the process of building one, redoing the lower body, new engine intakes,guns etc. Just wanting to compare notes and get other ideas.

thanks
Greg
 
I did that years ago, long before forums (at least that I'm aware of), and really before the Internet was viable as a research tool for the kind of pics and info that would help. I was limited to the box art and that corny "Star Wars Technical Journal." I did correct (or at least change) the bottom of the fuselage by removing the area between the two bends, if that makes sense. I used sheet styrene in that area. I used a mixture of brass rods and plastic tubing to redo the lasers, and mixture was because the right diameters were not available in one medium. The semi-circle at the end was cut out of a brass rod, too (the same brass rod I used for main body of the lasers, I think). The only part of the lasers from the kit was the part at the very end of it, I think. I scratch-built the cockpit to match the full-size X-wing using that picture of Luke sitting in it just after "landing" on Dagobah. The rear portion of the engines (not just the nozzle, but the whole, smaller cylinder section), which I did not care for, were replaced with engines from some 72nd scale jet kit--one of those kits that comes with a whole engine to display removed). As I posed mine on the ground, I left out the R2 unit and scratchbuilt the area where he would be with all kinds of crazy details. There is no pilot figure either, and the canopy is raised. Some of the detail behind the the seat is totally bogus, as I just threw in a bunch of resin and photo-etch stuff I had laying around. I wasn't so much going for accuracy as I was just fixing the parts of that model that just look bad or stupid to me. The fuselage looks stupid. The laser cannons look soft on detail. The rear engine nacelles look stupid to me, and it was gonna be hard to hide the seam and not destroy detail. By the way, my first idea for the engines was to scratch build them from brass rod (both for the body and for the smaller details) and other materials, but that just wasn't working out. I was going to cast the best attempt in resin, but that also wasn't working out. I did not do any lighting. The gear were all replaced with totally fabricated parts. The gear wells were detailed, and as with other things, I totally gave up on trying to find good pics and do it accurately--I just made it look good to me. The rear windows are individual pieces of clear plastic. I was cheap and used the packaging from some other product--you know that somewhat rigid clear plastic that is used in a lot of packaging. The whole project took a year or so.

Here's a link that I hope works--to my album of this kit--so I don't have to post a bunch of links separately. Let me know if it doesn't work. And it looks like there's two pages.

x-wing MPC pictures by dedalus5550 - Photobucket

The funniest thing is that this X-wing sat on various shelves and so forth through the years, and then I decided to pull it out dust it off, and enter it in a regional event (OrangeCon) a couple of years ago and it took 2nd or 3rd place in Sci-Fi. At first, I was only going to put it on the display table, too.
 
I think since the Fine Molds X-wings came out people dont bother with the Amt Kits, I have the 1/72 FM but the 1/48 costs a little $$$ but i'm sure i'll get one, but i have 4 of these amt kits that i've picked up over the years and figured what the heck, i'm not gonna dump alot of money into them but i figured it would be good practice since i've been away from modeling for a few years.. I started the kit serveral years ago then shelved it..

The fun part is trying to replace the intakes of the engines (the saturn V rocket parts on the studio scale) cutting tubing to a half round is damn near impossible to get right.lol I'm thinking there may be a smaller scale rocket kit that could be used instead of cutting tubing..lol
 
Last edited:
I've got a half done 1/43 X-Wing in my stash. I am sort of doing it as a side by side with the FM 1/48 kit as an "old school, new school" build, although I am working on some other stuff at the moment. I pull it out and work on it every once in awhile until I get tired and move onto something else.

Most of the accurizing tips I've seen come from an FSM article that I believe came out about 12 years ago. It featured Luke's X-Wing crashed on Dagobah and while the model in the display was only half a model (partly sunk) it did have some accurization work to the wing gun mounts to make them look better. I used a bit of the advice in that article to accurize an MPC Snap X-wing for a dogfight diorama I did about three years before the 1/72 FineMolds kit came out. I don't have any images of it online currently, but I could probably shoot some new pictures as I still have the model in my stash.

As for helping to fix the engine intakes, the biggest problem as I see it is with the outer intakes being staggered in a little from the inside ones on each engine pod, when they should end at the same level. Only fix I could think of for that short of a full rebuild was the cut the outer intake bits off a set of parts from a second X-Wing and add them as shims to get the level right. I still have to putty up the seams and make the intakes look better, but it has potential. Then some thin grooved styrene sheet will be added to the outside fronts of the engine pods to represent that Saturn S-IVB rocket stage detailing.
 
Here is my AMT WIP with extensive mods. I remade the wings, guns and rescribbed all the panel lines to match Red3. No mods to the body shape though. It is sitting next to me dying to be finshed. It is on my list of projects to finished this year. There isn't much left.

WIP AMT X-wing Red 3 - Resin Illuminati

DSC01600.jpg


DSC02933.jpg
 
Are there any close up pictures of these amt kits that were used in ROTJ? Just wondering if they accurized them.
 
There is the pic from the Japanese mag but you can only see it front on. Or the covershot of Lucas surrounded by models. Both pix look unmodded but it's quite hard to tell.
 
I saved these pics a while back whilst looking for ref. material. I'm not entirely sure which tour they were taken at.
 
Here's a bunch of pictures of the one that I did a few years back, which included my little cockpit correction kit (long out of production and the molds are gone).
ERTL X-Wing Fighter - a set on Flickr

I did a LOT of individual corrections including:
- Rebuilt the bottom of the hull
- Detailed the insides of the wings
- Added trench detail on the tailing ends of the wings
- Rebuilt the lasers with nested brass rods (very heavy)
- Modified R2-D2
- Completely rebuilt cockpit, with modified pilot (from an older release), flightstick and targetting computer
- Improved detail on the intakes

There may be more, but I don't remember.

All of the red details were painted on
 
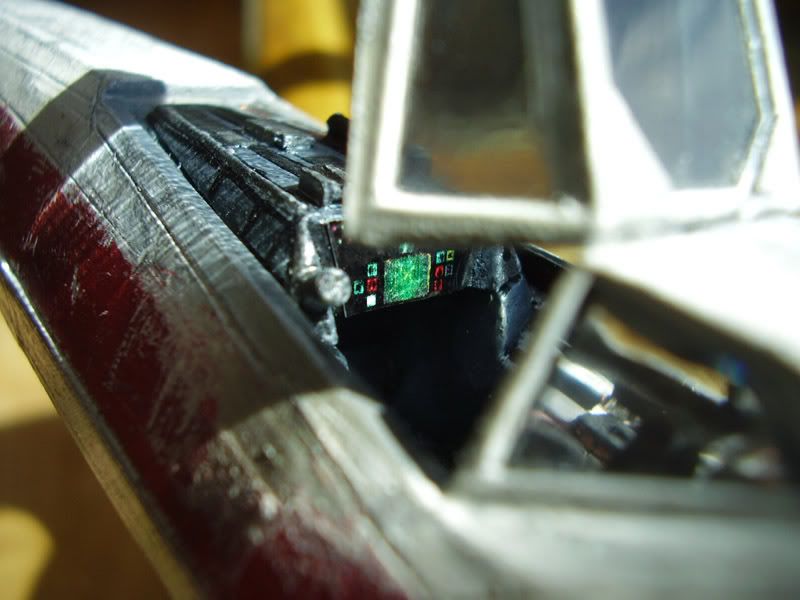
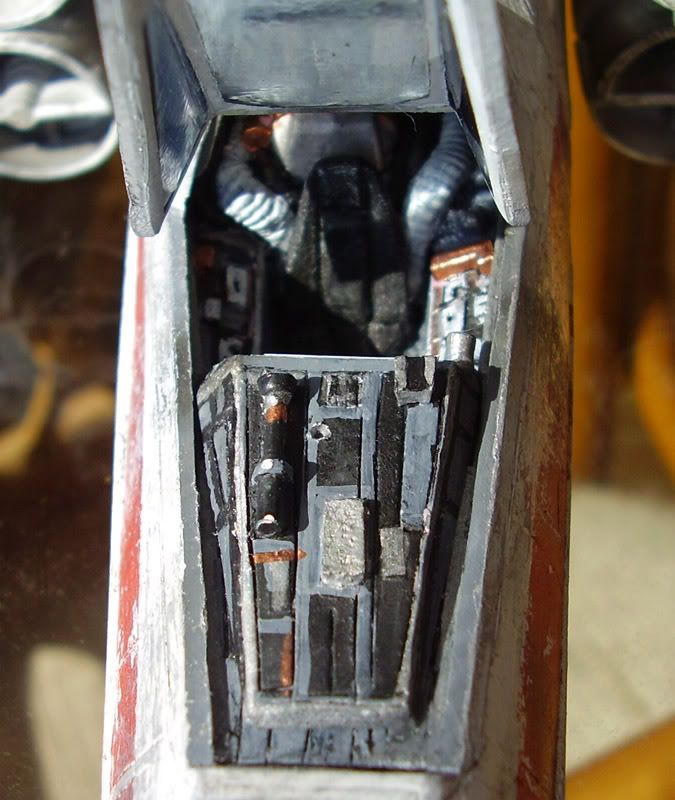
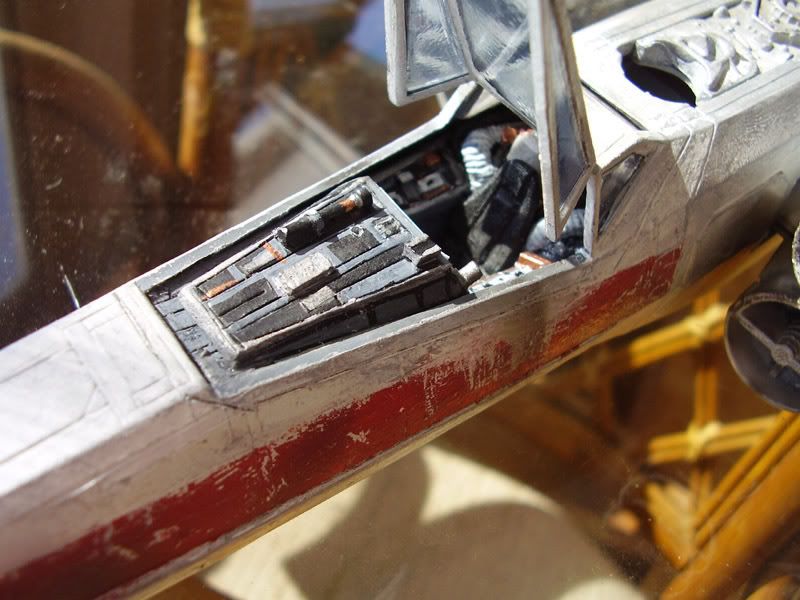
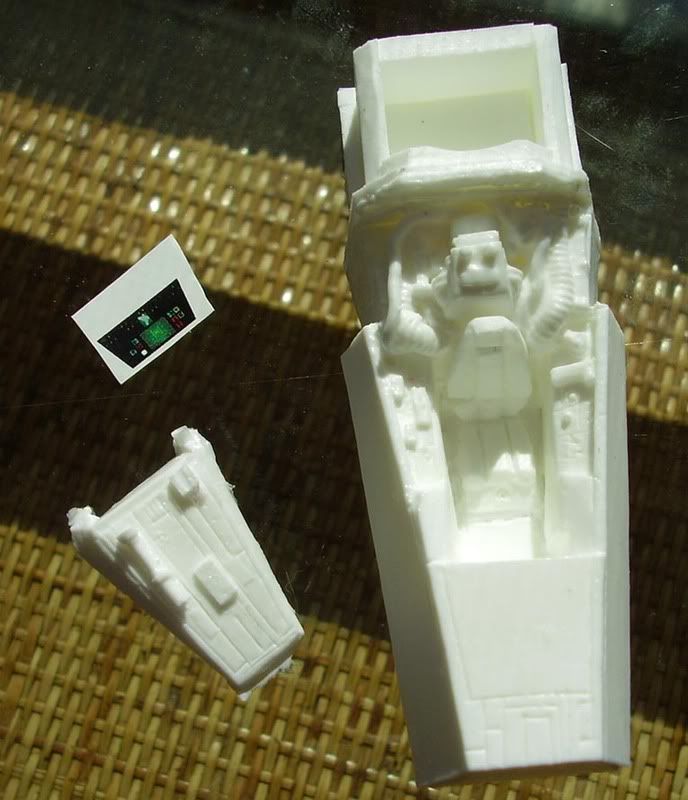
I have started a few "more" accurate AMT x-wings. I made new cockpit details and modified a few panel lines. Nothing too crazy. Here are a few pics of the cockpit.


computerdecal.jpg


above2.jpg


above.jpg


fullkit.jpg
 
How is the build going Greg? Here are some pictures of the AMT Xwing I built a few months back. This is the first build I've done in about 18 years and I wish I would have known about this forum then. I've learned a lot from all the artists here and at the time I built this, I didn't know too much about accurizing. I did add some strips of styrene on the intake engines because I noticed that was missing right off the bat. Other than that and a couple of tiny bits here and there, it's pretty much a straight kit build.
 
Back
Top