A Man and his MPC Falcon: A New Modeler's Journey

Just in case you still want to try to use stryene piping, I've had good luck soaking the section with cement and letting it sit a minute. You can then bend a pretty tight curve in it. But copper or or some metal rod is definitely the way to go. Just a little tidbit for the future.

Nice work. I've got to get my Falcon going again.
 
Cool stuff, Lee! I see your wife loves you when she said "I better let you get back to it. You have a lot of work to do." :) In my case it's "That's all you do!"
 
Thanks, guys.

Just in case you still want to try to use stryene piping, I've had good luck soaking the section with cement and letting it sit a minute. You can then bend a pretty tight curve in it. But copper or or some metal rod is definitely the way to go. Just a little tidbit for the future.

Nice work. I've got to get my Falcon going again.

I didn't think of softening it up with glue, that's a good idea. I think I will use some of it for my rear grill for sure. Do you guys think I should glue the styrene to the clear plastic that came with the kit to form the grill and frost the inside of the glass with a blue and white opaque film or look into buying a prefab for the grill? I hope to try and light it eventually (assuming I am pleased enough with the finished product).

Cool stuff, Lee! I see your wife loves you when she said "I better let you get back to it. You have a lot of work to do." :) In my case it's "That's all you do!"

I suppose that IS a silver lining I hadn't thought about , CJ =P
 
The back of the Flcon is pure evil. I am having no luck coming up with anything to simulate those "arms" at the rear above the exhaust area. Also getting my butt kicked trying to come up with a grill for the same area. Round styrene just doesn't look right . I thought about going with 20 gauge wire or 22 gauge...any thoughts on these issues guys?
 
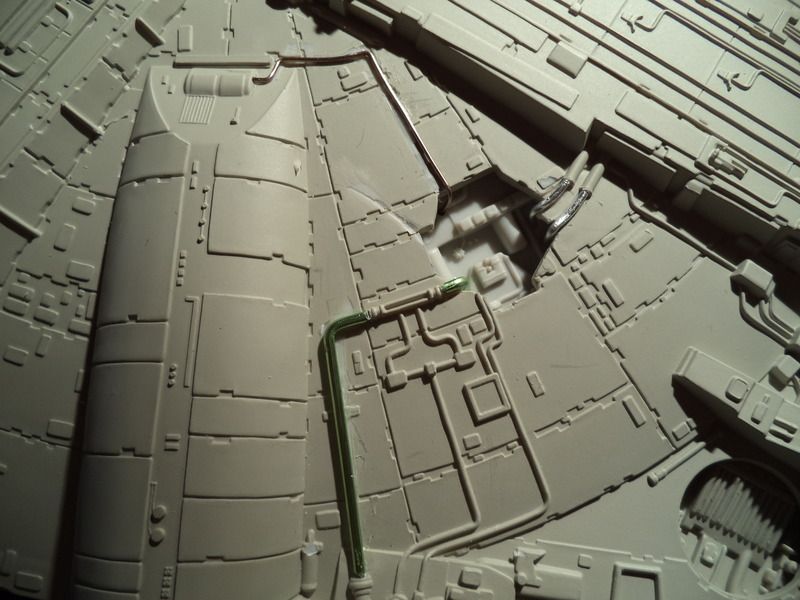
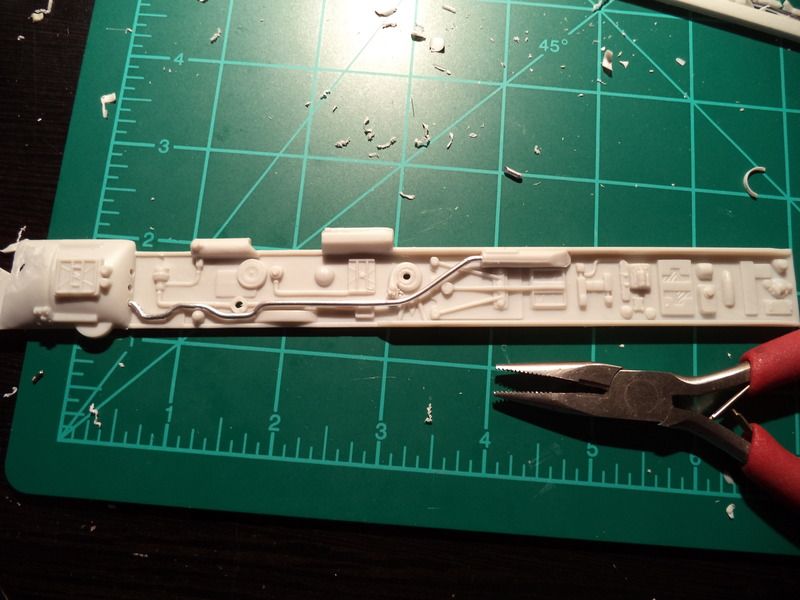
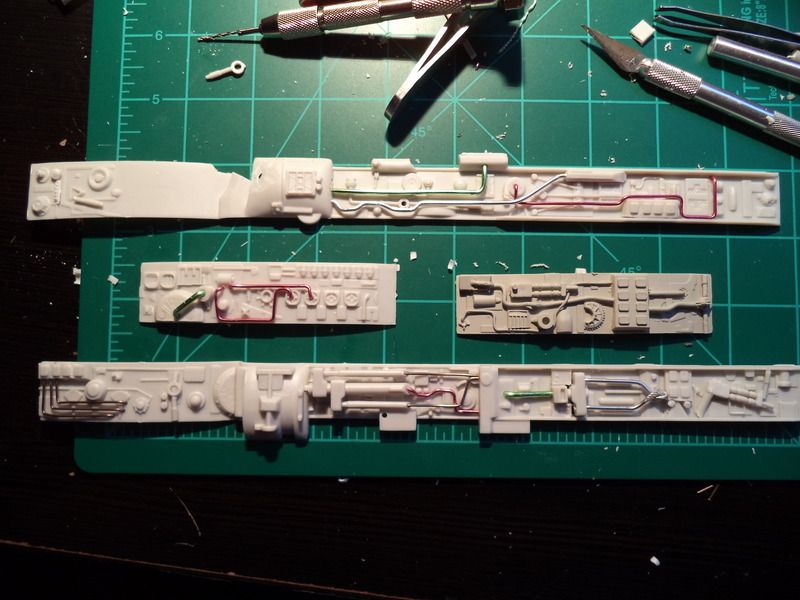
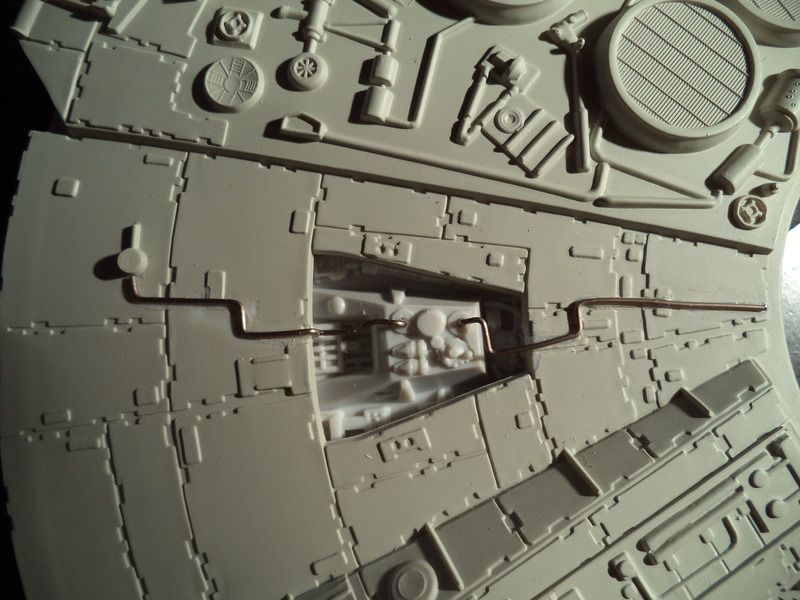
I took a couple days off to recover from crazy holiday schedule. I decided I would play some PS4, sleep, work on my book and Falcon1. Well, Falcon1 took over. I have become obsessed with adding dimension to the ship as well as bolstering the sidewalls with GREEBLY! But first...wait for it...MORE PIPING!


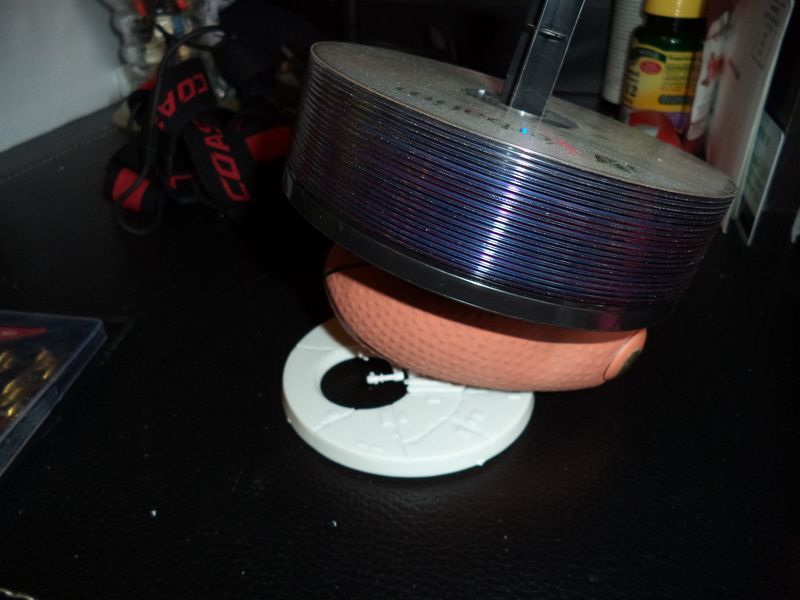
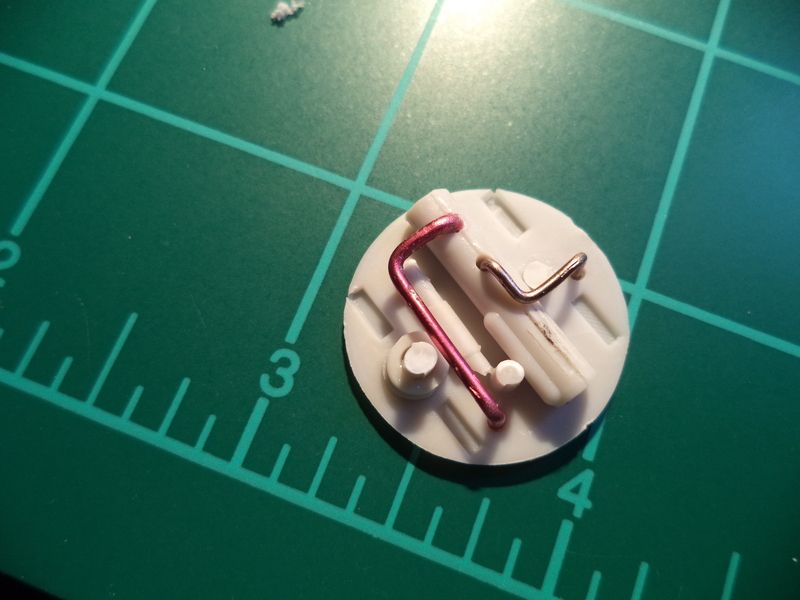
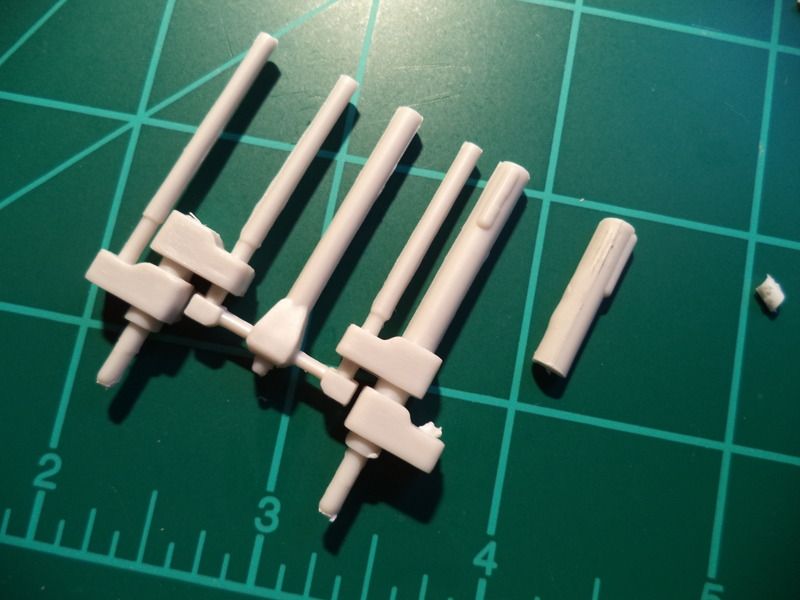
Next, the comedy relief. A man in desperate need of tiny clamps!


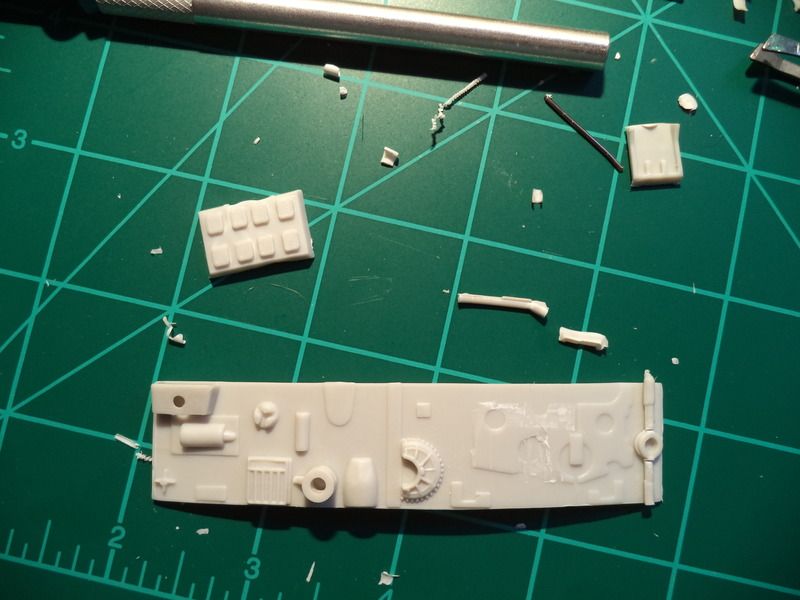
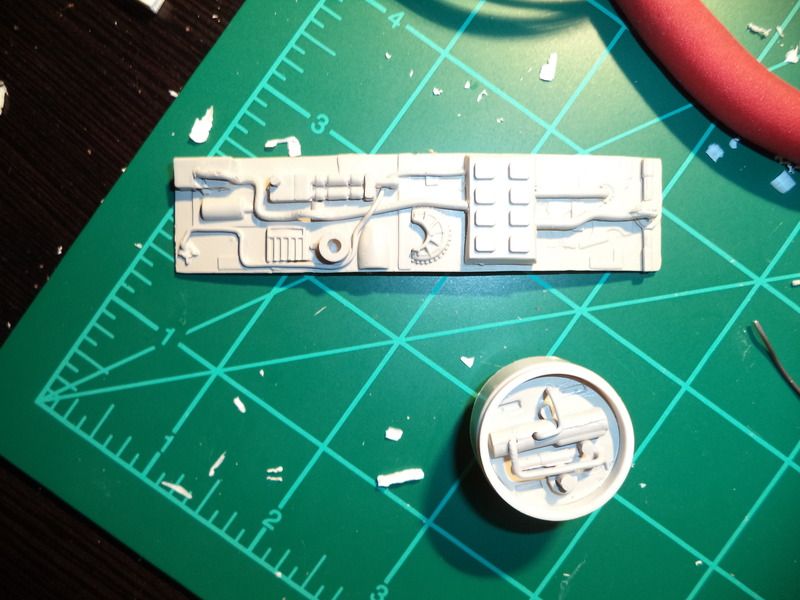
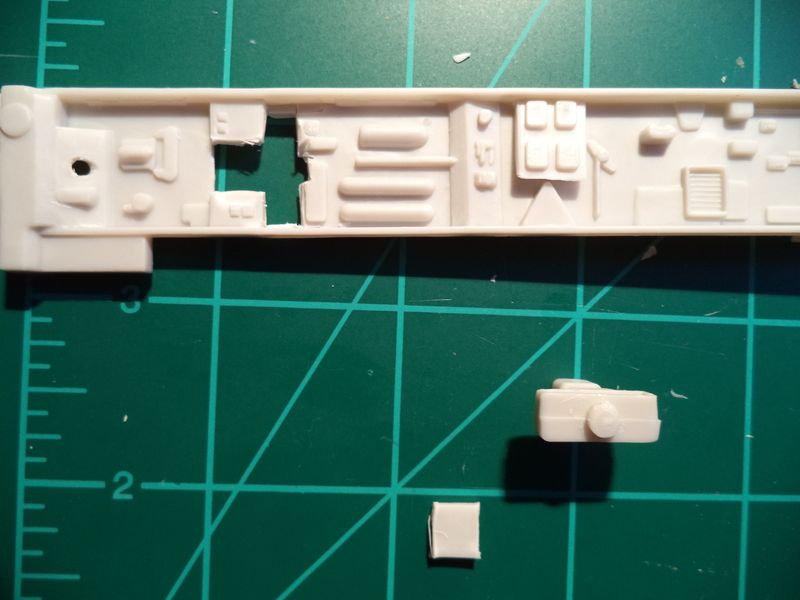
Disclaimer: I know this looks nowhere near what this section of sidewall is supposed to look like BUT the kit offered a nearly bare wall as you can see below. It was driving me crazy, the idea of leaving this stock!

I had already added the three pieces you see with the "holes" before I thought to take a pic.


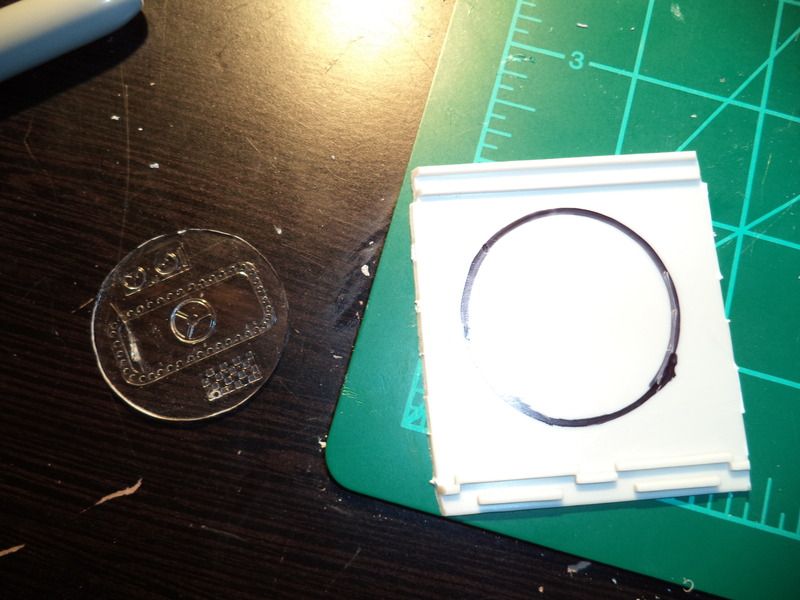
This next piece I forgot to take a pic of before I added the greebly. It was just a plain round disc with the slots to mount the radar dish.


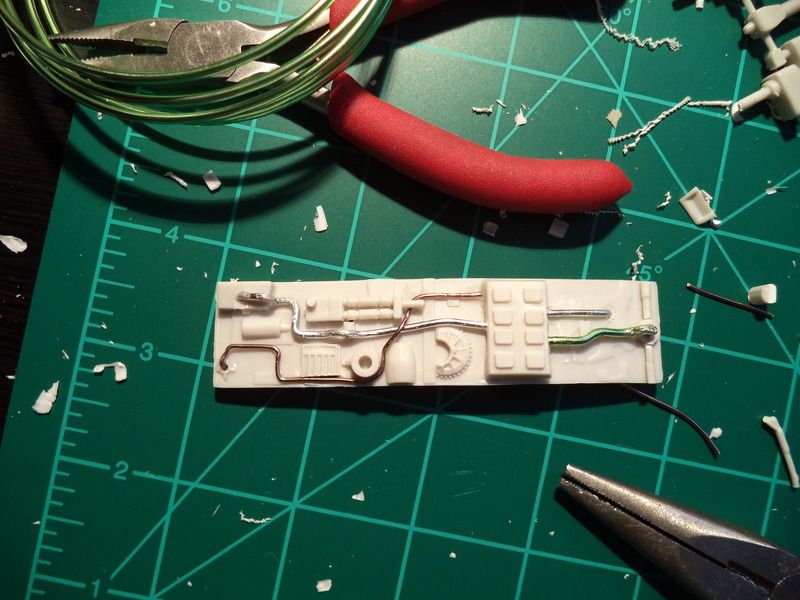
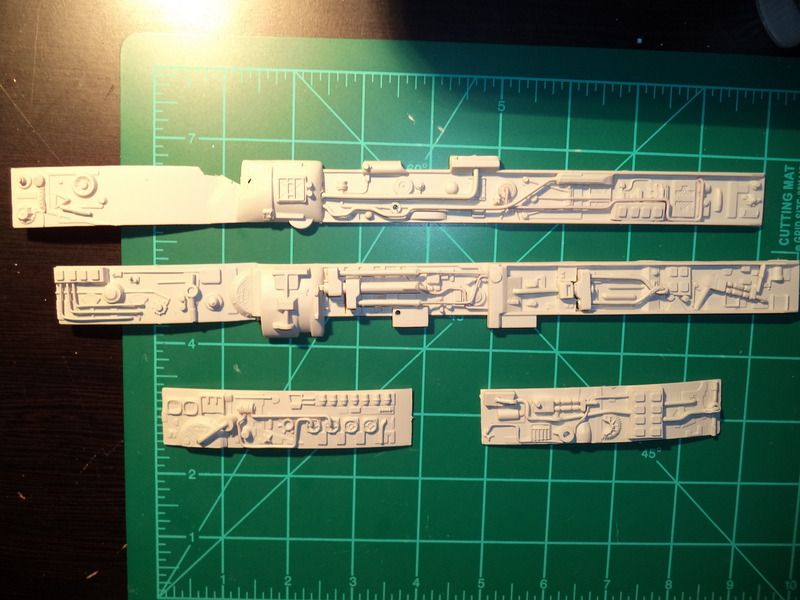
Sadly, all of the above is about 6 hours of planning and cutting and gluing and such. I decided to display Falcon1 in flight upon completion so I cannablized the landing gear and anything related to it for greebly's sake!


I am hunting for odds and ends to spruce up more sidewall. Wish me luck.

In other news this model rarely fits any one iece to another. I almost fainted today when the landing gear bay doors fit nearly perfectly!
 
Greablies.

Buy 2 1/72 scale WWII German Panzer I or II Mark 1 or 2 model kits. Hulll plating with rivets, wheel gears, tread pieces,...

All the grebes you need. Don't spend more than 20 bucks.

Your Falcon looks good!
 
@ retireddadguy NOOOOOW you tell me! =P j/k I am hunting some on ebay, but they keep going high so I have been looking for alternative sources. Thanks for the compliment. I feel like it looks a bit crazy but the stock kit is so bare and I am so new =D

More greebling up today...


A question for you seasoned builders. I plan to light Falcon1 - having said that should I paint the interior of the hull black to "dampen" the brightness of the light to help it scale?
 
Too funny! Say, Spam Daddy, from where do you hail? Reason I ask, I have found the best place for cheap plastic kits is at a local model show (contest, swap meet, etc.) where you can find old kits, started kits and so on. Often for a bit of haggle, the prices can get even better. Another option is 'garage sales' though that is pretty random whether you'll find someone getting rid of kits... but sometimes there is a jackpot. Comes down to persistence and of course, luck!

This is my experience, but I live on the east coast of the US, so your mileage may (will probably) vary.

Keep up the good work - cobbling from bits is a great skill to have in your toolkit! (Fun too!)

Regards, Robert

PS: Did you find the answer re: painting to prevent light 'leakage'? If not, that seems to be the recommended thing to do, using a spray of silver or black (I've used Al foil before, myself since NO light gets through that...)
 
he's thinking the paint on the inside is going to lower the brightness of his light source. painting the inside is for light leakage. to lower the brightness, get the correct brightness bulb in the first place or adjust with power supply.
either way, yes on the paint on the inside.
i forsee a gluing and fit problem if you are painting all the parts first....
 
Oh boy, he's started modding. It's sooooo addicting. Good work, looks like it was there all along.

Thanks for the compliment, nm! =D It took me about 15 minutes to whittle down a sprue and fit it...I dropped the first two pieces I made and I have not seen them since...stupid carpet. And you are 100% correct, I just spent the last two hours replacing 3inches of molded "wiring" with 24 gauge hobby wire.

Too funny! Say, Spam Daddy, from where do you hail? Reason I ask, I have found the best place for cheap plastic kits is at a local model show (contest, swap meet, etc.) where you can find old kits, started kits and so on. Often for a bit of haggle, the prices can get even better. Another option is 'garage sales' though that is pretty random whether you'll find someone getting rid of kits... but sometimes there is a jackpot. Comes down to persistence and of course, luck!

This is my experience, but I live on the east coast of the US, so your mileage may (will probably) vary.

Keep up the good work - cobbling from bits is a great skill to have in your toolkit! (Fun too!)

Regards, Robert

PS: Did you find the answer re: painting to prevent light 'leakage'? If not, that seems to be the recommended thing to do, using a spray of silver or black (I've used Al foil before, myself since NO light gets through that...)

I never would have thought of foil. Thanks, Robert! I am in Wetumpka, Alabama just outside of Montgomery and acouple hours from Birmingham. I haven't found any local resources and I haven't checked B'ham yet. I would LOVE to go to a model swap meet or show. That would be amazing. Yard sales is a great idea!

he's thinking the paint on the inside is going to lower the brightness of his light source. painting the inside is for light leakage. to lower the brightness, get the correct brightness bulb in the first place or adjust with power supply.
either way, yes on the paint on the inside.
i forsee a gluing and fit problem if you are painting all the parts first....

Yeah, MC, I was concerned with the light from the engine LEDs permeating the rest of the build. My thought was to either paint the interior or shield the rear LEDs with a custom carved "wall" behind those lights. I am saving my painting for completion. I remember when I was 13 and working on a really nice 1/350 scale aircraft carrier and "melting" the planes and helicopters with glue after I painted them
 
good call. i remember much swearing, high blood pressure and knashing of teeth concerning the fit of the sidewalls and two halves. superglue sticking to the paint and coming apart would compound the headache and if using solvent plastic glue, the resulting non-bond mess would aggravate.
you can simply scrape paint from the surfaces to be bonded but the tricky fit would be trying.

I am using Krazy Glue specifically for crafts I do have testors red label model glue just haven't used it yet. So far so good. I agree the sticky paint mess was horrible...just a complete disaster.

lol, great job, Lee! Similarly, you can drop by Home Depot and get some aluminum tape -- it's thin and has adhesive already.

Thanks, cj! =D

I bought 7 kits to "bash" this week and abox of junk parts from a seller on ebay. As I look at them (they don't ship till tomorrow) online I am deciding what I will bash and what I will actually put together. I will post photos of what I bought tomorrow but now I need sleep!!
 
Well, I am sad to report that ALL progress has stopped on Falcon1 due to the stupid cockpit piece not fitting in any way, shape, or form with the molded cockpit area of the top half of the falcon. I do not have the skill to solve this problem so I am afraid I will screw up my Falcon >=o/

Stupid MPC molders.

Plus I am completely stumped about the interior of the cockpit. The only thing I have come up with is placing colored film over drilled holes and placing a white light behind the cockpit wall to give the illusion of multiple colored lights. My brother in law and I have no experience with LEDs and he says that think material may melt due to the heat of the light.

Any ideas gang?

Thanks,
Lee

P.s. I also need a rear engine grill or the material to make one if anyone knows where I can get it..whatever it is.

P.s.s. I found an awesome lighting kit for the 1/72 Falcon that I am happy with and will perfectly fit my beginner's need. If you need one it was about $40 (US) and you can find it here if you are interested. By the way, the guy is super nice and easy to deal with, a gentleman named Chris from the UK whos EBAY name is bloater079.

http://www.ebay.com/itm/221997874794?_trksid=p2057872.m2749.l2648&ssPageName=STRK:MEBIDX:IT

I'll just put this right here for you. http://www.shapeways.com/shops/308bits?section=Falcon+MPC&s=0
 
Don't lose heart. This is just your first Falcon; it doesn't need to be the best one, although I'm aware of all the effort you've put in so far. In cases like these, pause and think things through (might take a while but that's ok-- normally ideas will just pop into your head especially when you wake up the morning). The idea about the film is good. I'm even thinking one printed on paper will do as long as you diffuse the LED light with some thin packing foam. Try printing one and holding it against the light to see how it would look when lit. Don't worry about the LED, it doesn't give off any heat that would be enough to melt anything.


You know, I would even be so bold as to suggest not to light up your first Falcon. Make it an easy build. If the cockpit innards turn out impossible to figure out -- maybe you can build one without cockpit detailing - it's perfectly ok. Or if you're willing to spend a bit more, newmagrathea's suggestion about printed parts is a good route. Don't lose sight of your main goal, though -- to be able to practice painting one, which I think is the hardest of all areas of Falcon modeling. All the greeblies and detailing simply become unnoticed when the paintjob is off. I nearly tossed a FM 1/144 because of this; it remains half-painted until I could sort out my Falcon painting skills.


For the rear grill, it's really a bit tricky because of the sidewall height. But then the original Falcons just had milk glass in the rear which is a translucent material, with no detailing whatsoever. It can be replicated by sanding clear styrene on both sides.
 
Thanks for that, NM. I got in touch with Tony just a few days ago but I still didn't have a link to all of his designs. That will make life considerably easier.

Slow going on Falcon1 as I wait for my LED lighting kit to arrive from the UK. In the meanwhile I have painted the inner shell of Falcon1 and all the sidewalls and such. I wil let the paint cure for a few days then sand the "to be glued" areas. I will post some pics of the lighting kit and me trying to install it without a catastrophe once it arrives.
 
Very cool to see this kit being put together and I particularly love the tubing that you're adding on your own...very cool. I'll keep an eye on this for sure!
 
This thread is more than 8 years old.

Your message may be considered spam for the following reasons:

  1. This thread hasn't been active in some time. A new post in this thread might not contribute constructively to this discussion after so long.
If you wish to reply despite these issues, check the box below before replying.
Be aware that malicious compliance may result in more severe penalties.
Back
Top