You are using an out of date browser. It may not display this or other websites correctly.
You should upgrade or use an alternative browser.
You should upgrade or use an alternative browser.
3D Printed Stormbreaker - FINISHED
- Thread starter Magnavis
- Start date
Magnavis
Sr Member
Hammer and Axe Head have been assembled. Metal rods were used to connect both pieces to the central block. Gorilla Glue for the rods, and standard Super Glue for the flat surfaces.


Rod was also inserted into the handle, which will be the connection point for the head.

I've done a test fit, and although tight, it does fit! It won't be attached permanently until painted. Then i'll add the top bit, fix the seam, and paint the handle!

Rod was also inserted into the handle, which will be the connection point for the head.
I've done a test fit, and although tight, it does fit! It won't be attached permanently until painted. Then i'll add the top bit, fix the seam, and paint the handle!
Magnavis
Sr Member
So...we had a little mishap whilst painting. Still not 100% sure what's happening, but the Alclad Gloss Black didn't go down well at-all. Very grainy finish, more matt/satin than gloss. Not something Ive experienced with it before. I have a 'real' airbrush now with a compressor, so I'm sure there is some learning curve there. When using Alclad gloss black before, I was using a crappy single action airbrush that hooked up to a can of compressed air. It actually liked that paint, just not the metal ones so much.
We can see here the finish. Once dried, I tried polishing it, wire wooling it, but nothing worked, so I've removed it all using some Humbrol enamel paint thinner, which I'm pretty sure is just turps.


If we compare this with when I used it for my Kylo Ren helmet:

Both pieces prepared in the exact same way...
I did notice that whilst painting, it never once looked overly wet when going down, so I'm gonna experiment a little, adjust the psi. As a back up, I've got a couple cans of gloss black coming from Amazon, if I can't get this to work with my airbrush properly. I dunno if I need a bigger nozzle? Its a standard .4 nozzle on the airbrush. Hammer and Steinbeck Ultra X - suction feed
Anyway....I've stripped the old layer off now. I'll wet sand it again back from around 1000-3000, and get it all cleaned up. Hopefully I can work out what I did wrong.

We can see here the finish. Once dried, I tried polishing it, wire wooling it, but nothing worked, so I've removed it all using some Humbrol enamel paint thinner, which I'm pretty sure is just turps.
If we compare this with when I used it for my Kylo Ren helmet:
Both pieces prepared in the exact same way...
I did notice that whilst painting, it never once looked overly wet when going down, so I'm gonna experiment a little, adjust the psi. As a back up, I've got a couple cans of gloss black coming from Amazon, if I can't get this to work with my airbrush properly. I dunno if I need a bigger nozzle? Its a standard .4 nozzle on the airbrush. Hammer and Steinbeck Ultra X - suction feed
Anyway....I've stripped the old layer off now. I'll wet sand it again back from around 1000-3000, and get it all cleaned up. Hopefully I can work out what I did wrong.
Magnavis
Sr Member
No need to panic!
So I got all of the paint off, and then wet sanded from 1000 through to 3000 just to clean it up again.
I then tried again with the gloss black, on a test piece of plastic...and got this

Huh...perfect. I upped the psi a little and sprayed closer, that's all I did different really. So I just went ahead and went for it.
Turned out great. I gave it a couple of coats.


I then pushed straight ahead with the Alclad Stainless Steel. Again, it turned out pretty great honestly. Hard to get some decent pictures atm. I'll get some better ones once it's had a good amount of time to completely cure. In person, it looks very metalic. Very happy with it!


Good progress for now. Just need to put some Aqua Gloss on to seal it all in, and we're ready for the next step.
So I got all of the paint off, and then wet sanded from 1000 through to 3000 just to clean it up again.
I then tried again with the gloss black, on a test piece of plastic...and got this
Huh...perfect. I upped the psi a little and sprayed closer, that's all I did different really. So I just went ahead and went for it.
Turned out great. I gave it a couple of coats.
I then pushed straight ahead with the Alclad Stainless Steel. Again, it turned out pretty great honestly. Hard to get some decent pictures atm. I'll get some better ones once it's had a good amount of time to completely cure. In person, it looks very metalic. Very happy with it!
Good progress for now. Just need to put some Aqua Gloss on to seal it all in, and we're ready for the next step.
Mad Monkey
Well-Known Member
Looks great!!
Magnavis
Sr Member
It's the next day, the paint has had a good amount of time to cure/dry, and the suns come out aswell...hooray!
Very happy with the finish. I'm just going to weather as it is, and avoid the gunmetal. Once the Aqua Gloss has been applied, and cured, I can attach it to the handle!


Very happy with the finish. I'm just going to weather as it is, and avoid the gunmetal. Once the Aqua Gloss has been applied, and cured, I can attach it to the handle!
Magnavis
Sr Member
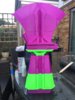
Decided against the Aqua Gloss, it dulled the shine a little too much for my liking. I've wrapped the head for protection, and have now attached it to the handle, and added the top piece. All glued, and once dry, I can add some filler where the seems are. I'll probably add some XTC around the seam aswell, which should help blend it in, and provide a little bit more strength to the joint.


Magnavis
Sr Member
So good man, so good!!
Are you going to weather axe portion at all?
Thanks! Yeah, I'll do some weathering across the whole piece. Picked up some water mixable black oil paint, which should be good for something like this!
Magnavis
Sr Member
We're done!
I'll bring the post up to date before posting finished images.
First, I wrapped the hammer/axe in plastic, and then attached it to the handle, along with the final handle piece. After glueing it all together, I applied some filler in the seams, sanded back, and then added a little XTC-3D to the seam, to help blend it back in. I then sanded it back a little more, and applied a little primer to the joint. It was now ready for painting.


Painting the handle wasn't too complicated, but involved a little trial and error.
I started with a base color, and then worked a mixture of washes and dry brushing, to get a good variation in color. I also used some lightly diluted paint, and rubbed it into certain areas, achieving a sort of stained effect. This helped to bring some of the highlight areas back up in color a little, to give yet more variation.


Once I was happy with the handle, I gave it a matt clear coat. Once dried, I could remove the plastic, and then do a few final touch ups on parts of the handle which were obstructed by the plastic.
After that, I done some light weathering on the Axe and Hammer, and that was it. Stormbreaker was finished!
Final Piece


You can read my project write up here: Build: 3D Printed Stormbreaker – Avengers Infinity War – Magna Props
I'll bring the post up to date before posting finished images.
First, I wrapped the hammer/axe in plastic, and then attached it to the handle, along with the final handle piece. After glueing it all together, I applied some filler in the seams, sanded back, and then added a little XTC-3D to the seam, to help blend it back in. I then sanded it back a little more, and applied a little primer to the joint. It was now ready for painting.
Painting the handle wasn't too complicated, but involved a little trial and error.
I started with a base color, and then worked a mixture of washes and dry brushing, to get a good variation in color. I also used some lightly diluted paint, and rubbed it into certain areas, achieving a sort of stained effect. This helped to bring some of the highlight areas back up in color a little, to give yet more variation.
Once I was happy with the handle, I gave it a matt clear coat. Once dried, I could remove the plastic, and then do a few final touch ups on parts of the handle which were obstructed by the plastic.
After that, I done some light weathering on the Axe and Hammer, and that was it. Stormbreaker was finished!
Final Piece
You can read my project write up here: Build: 3D Printed Stormbreaker – Avengers Infinity War – Magna Props
Last edited:
daddysmooth
Active Member
Awesome job, looks great!!
josiahjrex
New Member
Gorgeous!! I just bought a 3D printer and this just jumped up my list to do! How much did you spend on PLA and Paint for this?
Magnavis
Sr Member
Gorgeous!! I just bought a 3D printer and this just jumped up my list to do! How much did you spend on PLA and Paint for this?
I went through a couple of rolls of PLA on this, which I grabbed during the last black Friday sale...So not sure on exact price, but probably £20-30. As for paint, I'd say ~£30 or so.
Magnavis
Sr Member
Thank you!Unreal! That looks fantastic!
")
Pilot
Sr Member
I just ran across your files on Thingiverse last night, and then found the thread this morning. Thank you for making the files available! You've obviously put an incredible amount of work into everything, and I wanted to make sure you knew that I appreciate it very, very much. Printing this all will be a project for the future, but I will get around to it eventually.
Magnavis
Sr Member
Thank you!Absolutely outstanding!!
Wicksydude
New Member
What settings did you use i started with 0.2 then was like the only bit that needs to be 0.2 is the engraved txt so i started printing 0.2 just for the layers with the txt then back to 0.3 for the remainder but it took 20hours still AMAZING file thank you.
still AMAZING file thank you.Attachments
Similar threads
- Replies
- 3
- Views
- 642
- Replies
- 3
- Views
- 1,149
- Replies
- 2
- Views
- 1,773
- Replies
- 4
- Views
- 1,011