Hagoth
Sr Member
Figured I'd share an experiment with designing and printing a custom model kit. In this case the Aetherium 3 design is not mine. I have simply started with it and turned it into a simple two piece model kit. The Aetherium 3 was designed by Edwin Pangman. You can find more of Ed's prolific work on Shapeways at the following link including the original versions of this design. Future Imports by ancientsoul - Shapeways Shops
Ed has very graciously given me permission to upload my kit conversion of his creation to Thingiverse for all to enjoy.
So, for anyone who wants to join in building one you can find the files here:
 www.thingiverse.com
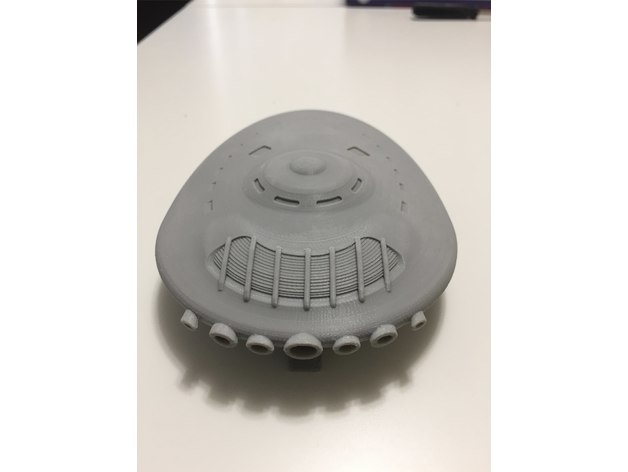
This project came about during the process of printing a 3" version for the Ed. After completion I scaled it up to 6" long and turned it into a 2 piece model kit.
Here is the progress I've made so far.


This is the original model created by Ed.

I added supports under critical corner overhangs around the landing gear to eliminate the need for slicer generated supports.

I opened up the engine exhaust nozzles for cleaner printing.

Then I split the model in half and added in alignment pin holes. The alignment pin holes are sized to accept 4.4mm long pieces of 1.75mm filament.
With the design work finished the next step is printing.
Thanks for stopping by and stay tuned for updates.
Jeff
Ed has very graciously given me permission to upload my kit conversion of his creation to Thingiverse for all to enjoy.
So, for anyone who wants to join in building one you can find the files here:
Aetherium 3 Starship by JP1
This is a 6" long, two piece model kit, of Edwin Pangman's Aetherium 3 Starship. Ed has very graciously given me permission to upload my kit conversion of his creation here for all of you to enjoy.You can find more of Ed's prolific work on Shapeways at the link below including the original...
www.thingiverse.com
This project came about during the process of printing a 3" version for the Ed. After completion I scaled it up to 6" long and turned it into a 2 piece model kit.
Here is the progress I've made so far.
This is the original model created by Ed.
I added supports under critical corner overhangs around the landing gear to eliminate the need for slicer generated supports.
I opened up the engine exhaust nozzles for cleaner printing.
Then I split the model in half and added in alignment pin holes. The alignment pin holes are sized to accept 4.4mm long pieces of 1.75mm filament.
With the design work finished the next step is printing.
Thanks for stopping by and stay tuned for updates.
Jeff


