Haven't had a chance to start a thread here on this build--feel free to catch up at Hobbytalk for the full story.
Here's the concise version:
I've decided to do a test run before beginning my 1/350 Refit. The repop of the Reliant is the logical choice, since it's a similar design. I've been working on it for a few weeks, now.
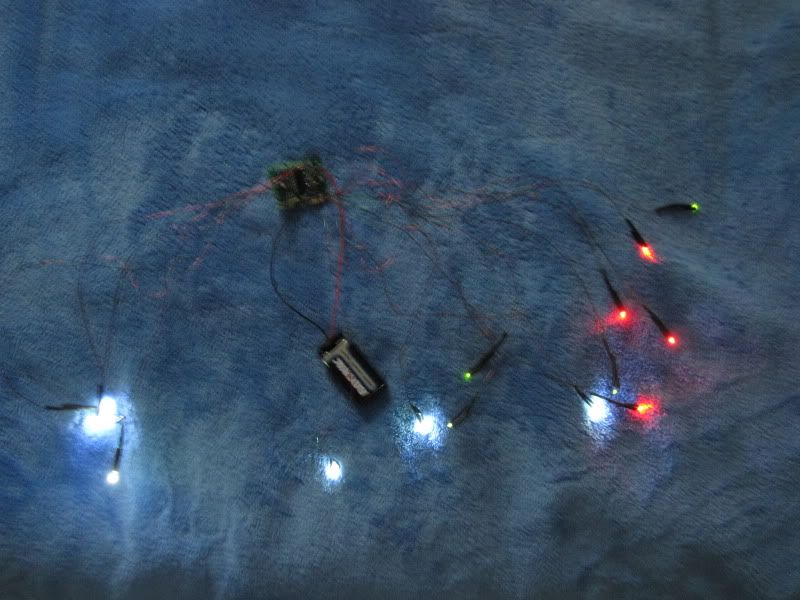
This will be my first lit model--I purchased the kit from Evans Lighting, although I could use some help in putting it all together. I've also accumulated a bunch of aftermarket decals and parts, including Paragrafix's excellent PE set.
I've been doing a lot of research, and I think I've pinned down many of the AMT kit's problems. Anyone care to name the problems they've found?
For starters, I've rescribed (or just plain scribed) the various missing/inaccurate hatches and panel lines on the lower saucer.
The upper saucer has a bigger problem. After careful study, I've determined that the upper deck's gridlines, the two hangar greeblie trenches, and the two deflector/sensor bits on either side of the B/C deck all need to be moved inward about 1/8". We're talking major plastic surgery.
I've been cutting and reassembling the parts, and it's a subtle-but-noticable improvement. Just having the deflector/sensor pieces properly aligned with the concentric gridlines adds a great deal to the overall look of the saucer.

The list of inaccuracies and mods goes on and on...
There's no lower impuse crystal on the real model--just a running light at the center of the spoked "hub" (which appears to have a flat surface on the real model, rather than the sloping surface of the kit).
The AMT kit's rollbar also sits too high, from bow-on, it should look more level, rather than arch-like.
I also noticed that the middle sections of the engine pylons (in-between the pennants and the phaser cannon mounts) are too wide, and slant forward at the wrong angle. So, I corrected this with files and putty. Also rescribed the panel lines on the pylons where the saucer meets the bases of the phaser cannons (on the R2 repop, these lines sit below the top edge of the saucer's upper deck--I think this is because they beefed up the thickness of the saucer).
I've determined that the nacelle pylons need to be moved forward about 1/4", and have been working on that.
This has entailed removing and completely rebuilding the wedge-shaped pylon spacer pieces on either side of the secondary hull, and also correcting their angles so that the pylons splay out at the proper angle. Oy!
Been sanding down the outer saucer rim--it's too flat and vertical, compared to the slant of the real model (no doubt due to Round 2's having to increase the thickness of the saucer for the repop). The top level of the DLM B/C deck is also way too tall, and I've been sanding it down, too.
I've been modifying the nacelles to house the Federation Models 1/537 intake grills, as well as narrowing the grill openings with strip styrene and putty. The black grills are much thinner on the real model. Still need to rebuild the red warp crystal housing areas behind the grills.
(Accuracy note: The red nacelle crystals glowed on the real model, even though we only ever saw Reliant in impulse mode. Unlike the Refit Enterprise, where the crystals only glowed when the warp engines--and inboard flux chiller grills--were active. I'll probably replicate this "error" in my build, which will also feature flux grills that can be turned on or off).
Straightened out the underside trapezoid with sheet styrene and Apoxie Sculpt so that it no longer matches the curvature of the lower saucer. I'll have to replace the raised detailing.
Re-angled the upper-deck "steps" on the saucer.
The five indentations on the "spine" of the upper deck (just forward of the impulse crystal) are too wide and too thin on the kit. I'm cutting out the whole area and rebuilding it with the proper proportions.
Made a bunch of custom decals:
* The "NCC-1864" that's on the rollbar pylon is too big. I shrunk it down, respaced the letters/numbers more accurately, and lengthened the hyphen (which is too short on all of the stock sheet's NCC numbers--except for the nacelles).
* "United Federation of Planets" is supposed to sit above the starboard rollbar's pylon's "NCC-1864". The stock sheet has "Starship U.S.S. Reliant". I replaced the wording, and made sure to get the spacing correct.
* On the other rollbar pylon, the wording is almost correct ("Starship U.S.S. Reliant), but is missing the small "NCC-1864" next to the name, and has incorrect spacing between the wording. I fixed this. Also note that this text is supposed to be readable from bow-on, whereas the registry and wording on the other pylon is readable from aft-on. Much like the "NCC-1701"s on the underside of the TOS Enterprise saucer.
* Created the blue "vents" for leading edges of the rollbar pylons (front/rear) and the fronts of the nacelle pylons. These were painted on the real model, and I therefore won't make them into actual recessed areas when I thicken the pylons.
* Reduced in size (and respaced the letters/numbers--and extended the hyphen) of the "Reliant NCC-1864" at the rear of the B/C deck.
* Created some phaser bank markings for the underside of the impulse housing.
* Made some sensor ring decals for the upper and lower saucer domes. Also printed a design for the little EVA hatches dotting the perimeter of the upper saucer, since they'd be a pain to scribe.
* Also used the 1/350 Refit decal sheet as the basis for a scaled-down decal sheet containing all of the red circles that surround the running lights, as well as those dozens of teeny red and black technical markings and squares.
* And, due to my continued tinkering with the aftermarket impulse engine housings, I modified the shape of impulse grill art that Paragrafix sent me, and reprinted those decals at the proper size.

Acquired a TWOK-style belt buckle to replicate Khan's pendant for the model's display base.


Here's the concise version:
I've decided to do a test run before beginning my 1/350 Refit. The repop of the Reliant is the logical choice, since it's a similar design. I've been working on it for a few weeks, now.
This will be my first lit model--I purchased the kit from Evans Lighting, although I could use some help in putting it all together. I've also accumulated a bunch of aftermarket decals and parts, including Paragrafix's excellent PE set.
I've been doing a lot of research, and I think I've pinned down many of the AMT kit's problems. Anyone care to name the problems they've found?
For starters, I've rescribed (or just plain scribed) the various missing/inaccurate hatches and panel lines on the lower saucer.
The upper saucer has a bigger problem. After careful study, I've determined that the upper deck's gridlines, the two hangar greeblie trenches, and the two deflector/sensor bits on either side of the B/C deck all need to be moved inward about 1/8". We're talking major plastic surgery.
I've been cutting and reassembling the parts, and it's a subtle-but-noticable improvement. Just having the deflector/sensor pieces properly aligned with the concentric gridlines adds a great deal to the overall look of the saucer.
The list of inaccuracies and mods goes on and on...
There's no lower impuse crystal on the real model--just a running light at the center of the spoked "hub" (which appears to have a flat surface on the real model, rather than the sloping surface of the kit).
The AMT kit's rollbar also sits too high, from bow-on, it should look more level, rather than arch-like.
I also noticed that the middle sections of the engine pylons (in-between the pennants and the phaser cannon mounts) are too wide, and slant forward at the wrong angle. So, I corrected this with files and putty. Also rescribed the panel lines on the pylons where the saucer meets the bases of the phaser cannons (on the R2 repop, these lines sit below the top edge of the saucer's upper deck--I think this is because they beefed up the thickness of the saucer).
I've determined that the nacelle pylons need to be moved forward about 1/4", and have been working on that.
This has entailed removing and completely rebuilding the wedge-shaped pylon spacer pieces on either side of the secondary hull, and also correcting their angles so that the pylons splay out at the proper angle. Oy!
Been sanding down the outer saucer rim--it's too flat and vertical, compared to the slant of the real model (no doubt due to Round 2's having to increase the thickness of the saucer for the repop). The top level of the DLM B/C deck is also way too tall, and I've been sanding it down, too.
I've been modifying the nacelles to house the Federation Models 1/537 intake grills, as well as narrowing the grill openings with strip styrene and putty. The black grills are much thinner on the real model. Still need to rebuild the red warp crystal housing areas behind the grills.
(Accuracy note: The red nacelle crystals glowed on the real model, even though we only ever saw Reliant in impulse mode. Unlike the Refit Enterprise, where the crystals only glowed when the warp engines--and inboard flux chiller grills--were active. I'll probably replicate this "error" in my build, which will also feature flux grills that can be turned on or off).
Straightened out the underside trapezoid with sheet styrene and Apoxie Sculpt so that it no longer matches the curvature of the lower saucer. I'll have to replace the raised detailing.
Re-angled the upper-deck "steps" on the saucer.
The five indentations on the "spine" of the upper deck (just forward of the impulse crystal) are too wide and too thin on the kit. I'm cutting out the whole area and rebuilding it with the proper proportions.
Made a bunch of custom decals:
* The "NCC-1864" that's on the rollbar pylon is too big. I shrunk it down, respaced the letters/numbers more accurately, and lengthened the hyphen (which is too short on all of the stock sheet's NCC numbers--except for the nacelles).
* "United Federation of Planets" is supposed to sit above the starboard rollbar's pylon's "NCC-1864". The stock sheet has "Starship U.S.S. Reliant". I replaced the wording, and made sure to get the spacing correct.
* On the other rollbar pylon, the wording is almost correct ("Starship U.S.S. Reliant), but is missing the small "NCC-1864" next to the name, and has incorrect spacing between the wording. I fixed this. Also note that this text is supposed to be readable from bow-on, whereas the registry and wording on the other pylon is readable from aft-on. Much like the "NCC-1701"s on the underside of the TOS Enterprise saucer.
* Created the blue "vents" for leading edges of the rollbar pylons (front/rear) and the fronts of the nacelle pylons. These were painted on the real model, and I therefore won't make them into actual recessed areas when I thicken the pylons.
* Reduced in size (and respaced the letters/numbers--and extended the hyphen) of the "Reliant NCC-1864" at the rear of the B/C deck.
* Created some phaser bank markings for the underside of the impulse housing.
* Made some sensor ring decals for the upper and lower saucer domes. Also printed a design for the little EVA hatches dotting the perimeter of the upper saucer, since they'd be a pain to scribe.
* Also used the 1/350 Refit decal sheet as the basis for a scaled-down decal sheet containing all of the red circles that surround the running lights, as well as those dozens of teeny red and black technical markings and squares.
* And, due to my continued tinkering with the aftermarket impulse engine housings, I modified the shape of impulse grill art that Paragrafix sent me, and reprinted those decals at the proper size.
Acquired a TWOK-style belt buckle to replicate Khan's pendant for the model's display base.
Last edited:
") It's going to be the companion piece to my 1/537 Refit (smoothie).
It's going to be the companion piece to my 1/537 Refit (smoothie).