1/350 Polar Lights Enterprise Refit - Build log

JNordgren42

Sr Member
I'm planning a build of the 1/350 Polar Lights Refit Enterprise and I'd love to hear any direct experience you have with the various upgrade options. I want to build it with the TMP iridescent aztec paint scheme. There are a few that I'm pretty set on, first the Green Strawberry bridge and officer's lounge resin upgrade sets. I want to have a go at my own lighting rig based on an Arduino board for control, so I don't really need lighting kit options. What I would like to hear about are the following:

Aztec mask sets: Orbital Drydock vs. Aztec Dummy. And are there any other good options for the full 5 color aztec pattern?
Main PE upgrade sets: Paragrafix vs. Green Strawberry?
Is the Green Strawberry resin impulse engine set worth it?

I also have a resin 3D printer, so I'm open to any STL files that anyone has had good experience with.

Finally, the consensus seems to be that an internal armature isn't needed for the refit, but I'd like to hear how models are fairing years down the line.

I appreciate any input anyone has to offer. This is a big kit and a major project and I want to do it right.
 
Orbital Drydock's site is currently a single page, with no links.

You may want to checkout this alternative, he has a lot of videos showing off how to use his mask sets:

Thanks! All this stuff is a moving target, so I appreciate the alternative.

I made the odyssey to my local(ish) hobby shop and have acquired the beast of a kit. All the videos and images I've seen did not adequately prepare me for how big this kit is (I've been mostly doing 1/72 and 1/144 scale since I got back into modeling in 2020). I did a test fit of the secondary hull, pylons and connecting dorsal and the fit isn't too bad. It will definitely need attention at the area where the strong back, secondary hull sides, and pylons meet, but I don't think it will be too difficult.

I'm going to take my time and I should hopefully come out at the end with a truly impressive version of my absolute favorite starship ever to grace the screen.
PXL_20230802_194024738.jpg
 
I've been watching endless build videos, sifting through dozens of build threads, and delving deep into a myriad of online stores and I'm starting to narrow things down. I'm probably going to go with the main Greenstrawberry PE set, and the HDA Modelworx bridge and planetary sensor replacements (and maybe their impulse engine as well). I'm leaning towards the full Mask Design aztec set and supplementary masks for the windows and hangar deck lines (I want to paint as many of the markings as possible).

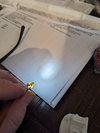
I have a plan evolving for the lighting rig and I want to do everything except for the phaser emitters. I found these interesting 2mm diameter LEDs and I was thinking of using them for some of the spot lights, especially the nacelle and pylon spots. Had anyone used them before? I'm hoping they throw a main beam that's slightly more compact. There cheap enough that I can order some and see how they work.

uxcell 20Pcs 2mm Pre Wired LED, White DC6-12V Clear Lens, Light Emitting Diodes https://a.co/d/13DilDT

Screenshot_20230804-013429.png


Screenshot_20230804-013435.png

I'm hoping they throw a more focused beam than this with everything but the end light blocked.
Screenshot_20230804-013440.png
 
Ugh. I'm so very, very annoyed. After a careful review of the parts that are included in the main Greenstrawberry and Paragrafix PE upgrade sets, I may have to get BOTH. The Greenstrawberry set omits the officer's lounge and arboretum window frames, but has some additional shuttle bay walls, and has a more detailed rec deck insert. The Paragrafix set has the weird simplified forced perspective rec deck insert, has complete arboretum walls, and incudes the critical (to me) o-lounge and arboretum window frames (as well as rec deck window frames, but I think I'm going to fabricate my own since those parts look sub-par). Greenstrawberry also makes arboretum and o-lounge upgrades, but again made the inexplicable decision to omit the arboretum window frames (they include a frame for the o-lounge upgrade).

The window frames are more critical to me, so do I just make do with the simpler rec deck and shuttle bay, or do I bite the bullet and get both? (I realize I've got to ultimately make the decision, but I'd like to hear any perspective anyone has. Especially about the Paragrafix rec deck.)
 
My 2mm round post LED showed up today and with some quick and dirty experimentation, I think they'll work very nicely for the nacelle, pylon, and dorsal spots. I had some 1.7mm I.D. aluminum tube laying around so I sanded the diameter down on one of the LEDs and made a couple of makeshift snoots of varying length. They work really well to control the throw of the spot effect, although I think I'll need to push the drive voltage to the limit to get decent brightness. I ordered some 2mm ID tube so I don't have to sand down the diameter on the LEDs, and with a little flat black inside the tubes to control secondary reflections, I think it will be fantastic.

Long to short test of the width of the spots.
PXL_20230807_182415986.jpg
PXL_20230807_182440474.jpg
PXL_20230807_182520508.jpg


Long to short test on the pylons. I think this will be fantastic with some tuning.
PXL_20230807_183003397.MP.jpg
PXL_20230807_182910338.MP.jpg
PXL_20230807_183042932.MP.jpg
 

Attachments

  • 1691433663952.png
    1691433663952.png
    12.9 MB · Views: 82
OK. I had a potentially insane idea. While browsing the Adafruit site for controllers, I came across their DotStar individually addressable RGB LEDs:

DotStar Addressable 5050 RGB LED w/ Integrated Driver - 10 Pack

I'm thinking of using one for each window group so that I can fine tune brightness and color temp for each grouping. And I could possibly subtly animate the brightness and turn them off and on at random for a more dynamic display. The light blocking between groups would be challenging, but I think it might be worth it. Regardless of if I go that way, I think I'll use them for the deflector dish and impulse crystals so I can really perfect the transitions between states.
 
I say color changing disco lights on the Rec Deck. :D
I posted this idea on the Starship Modeler group on FB and someone said they would like to do a Galaxy class this way and have a disco party in Ten Forward. It could be taken even further with a whole-ship techno rave mode and holiday blinkenlights mode. :lol:
 
OK, I think my lighting rig is starting to come into focus.

1. All windows and interior lights will be DotStar LED strip. Each "room" will have it's own LED. The rooms are somewhat arbitrary, since there is no official source for the actual deck layout. I decided to go with the strip because it is far easier to solder than raw SMD components, and for some reason also cheaper when using the 144 LED/m strips. The strips can be cut every LED, so there's no drawback there. The backing strip is larger in footprint than the components, but worst case, I can desolder a few of the LEDs from the strip if it's absolutely necessary.

2. Most of the effects lighting (e.g. deflector dish, impulse engines, etc.) will also be DotStars. This will allow me to more easily fine tune everything. The exception to this will be the warp deflection crystals, which will be regular blue LEDs, since they never need to change color, and the warp engine grilles which will be white COB LED strip with a blue gel filter between the strip and the clear grille part. Both the warp crystals and grilles will each be on their own PWM channels.

3. Anti collision strobes, navigation lights, and RCS will all be prewired SMD LEDs. Each type on its own channel and colored appropriately.

4 Spot lights will be a combination of the 2mm round post LEDs (for the pylons, dorsal, and warp engine spots) and rectangular lens LEDs for the saucer spots.

The DotStars will be split into four strings each on its own IO channel to cut down on wire heating issues, so I can use the smallest gauge wire that's safely possible. They're power hungry little buggers, consuming up to 60 mA each. I don't think I'll have to drive them that hard, but I don't want any problems down the road with melting wires, so better safe than sorry.

Everything will be controlled by an Adafruit Grand Central M4 Arduino board with a wave shield add-on for sound, and a 12 channel capacitive touch sensor breakout for input. The wave shield takes up 8 I/O pins all on it's own, and each DotStar string needs two I/O pins. The touch sensor breakout works on I2C so it only needs two I/O pins for all 12 inputs. That's a lot of I/O needs and I'm guessing the programs will also take some decent horsepower, thus the choice of the Grand Central, it has 70 GPIO pins, 256kb of RAM, 8Kb of flash, and a built in SD card reader, so I should have plenty of room even if I decide to do future upgrades (WiFi connectivity and a graphical web app for control would be amazing!).

I'm in the process of making a rudimentary digital model in Fusion 360 so I can create all of the light pipes and other supporting hardware to be 3D printed. I'm getting ready to order the Grand Central and the rest of the LEDs and I'm excited to start experimenting!
 
Arduino board and DotStar strip has been ordered and I'm digging deep into tutorials and guides for when they should show up later in the week. One bonus in going further into the docs is that I found out I won't need an MP3 shield to play audio. The Grand Central has enough horsepower and outputs to play the audio on its own. So instead of a $30 MP3 shield, I just need a $4 amp breakout board to boost the output signal. Stay tuned for some tests.
 

Your message may be considered spam for the following reasons:

If you wish to reply despite these issues, check the box below before replying.
Be aware that malicious compliance may result in more severe penalties.
Back
Top