1:1 R2D2 building from scratch - Just about done!

Re: 1:1 R2D2 homemade scratch build

Thanks! :)

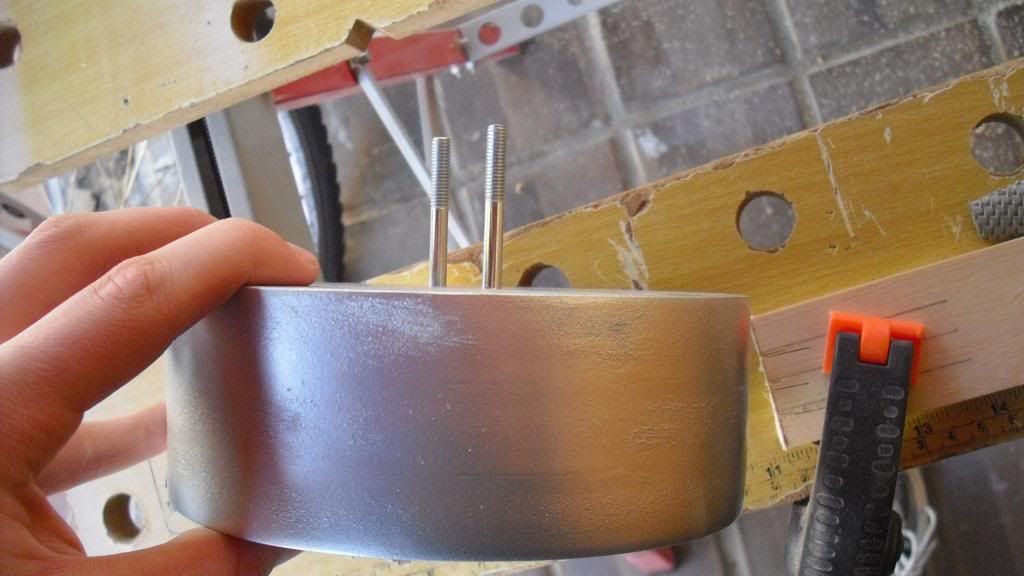
The tailor measurement ruler is here, and the HIPS is on it's way.
Haven't updated in a while, and the pictures are from a couple of different days.

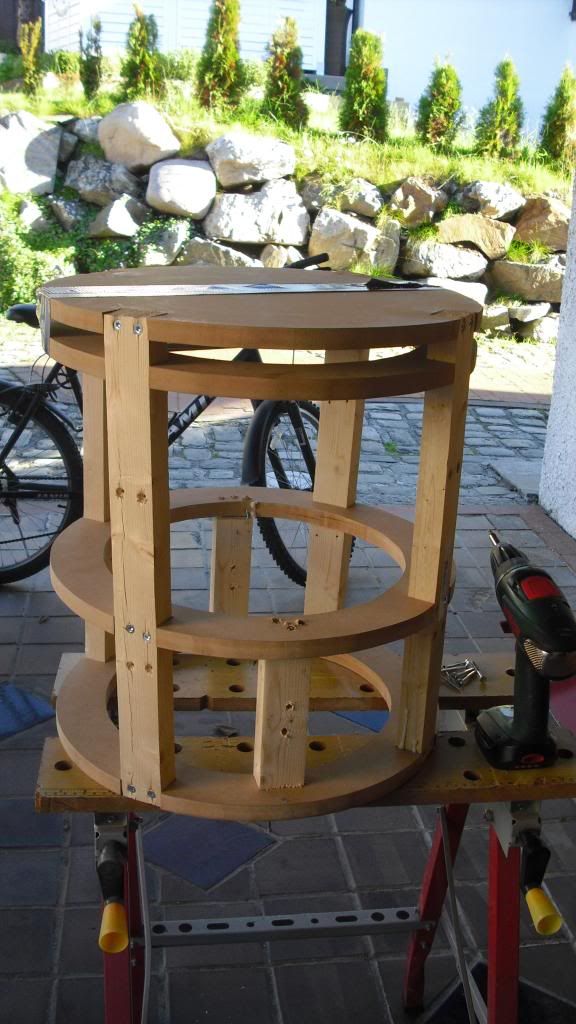
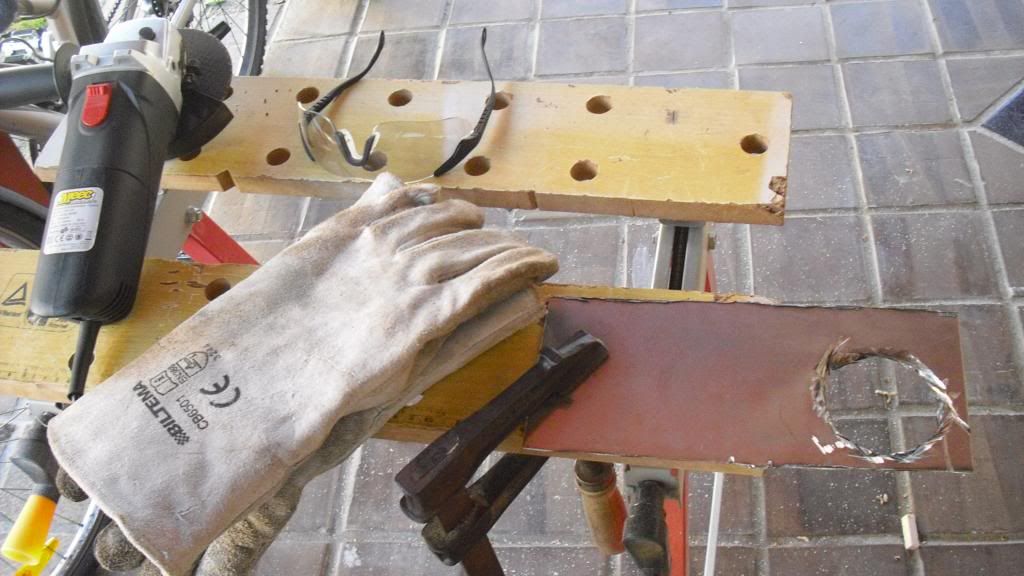
Screwed the small beams for the legs from the bottom.
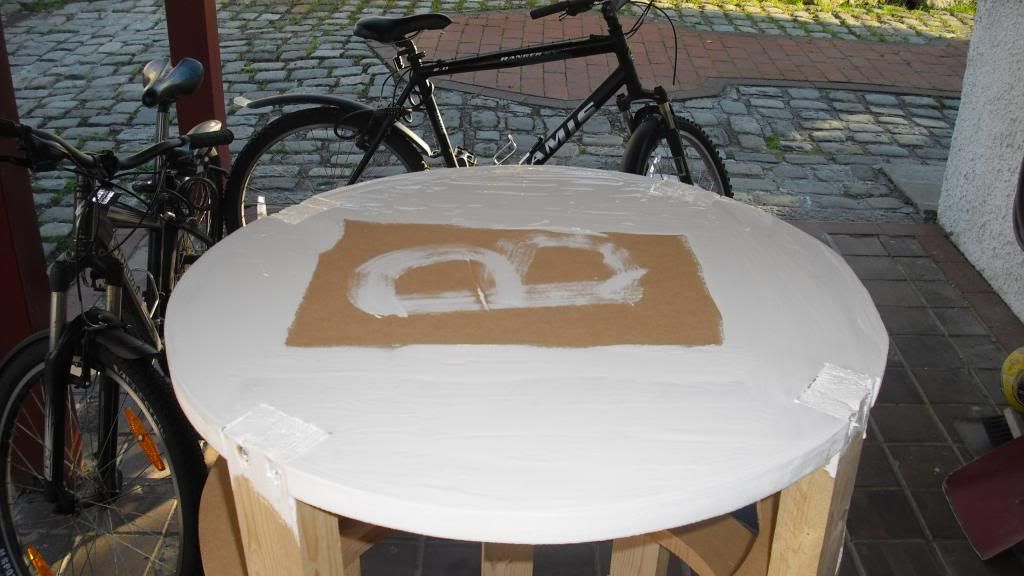

Painted the bottom.


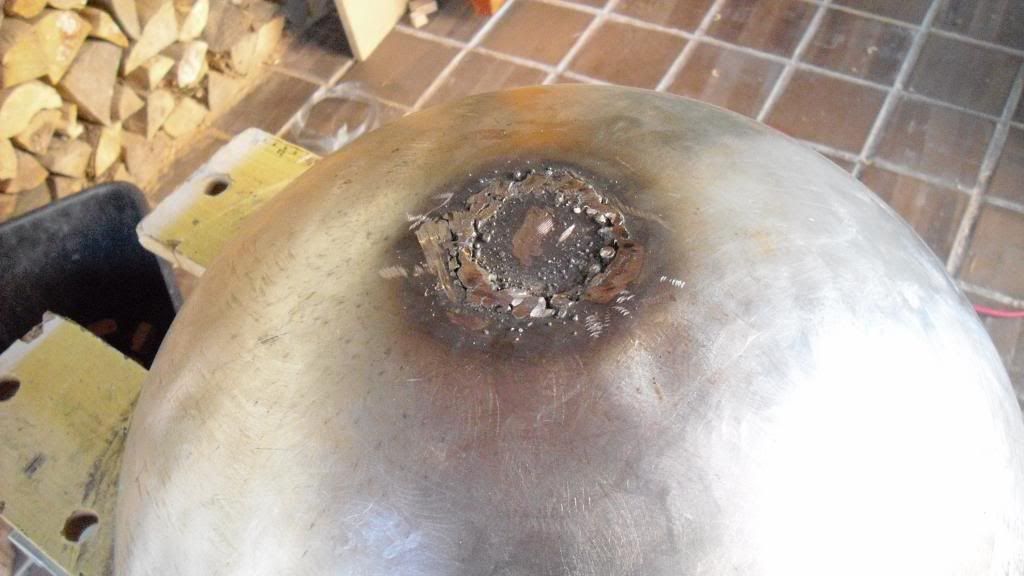
Now, I don't claim to be a good or even normal welder. I have grown accustomed to the... well, very bad weld.
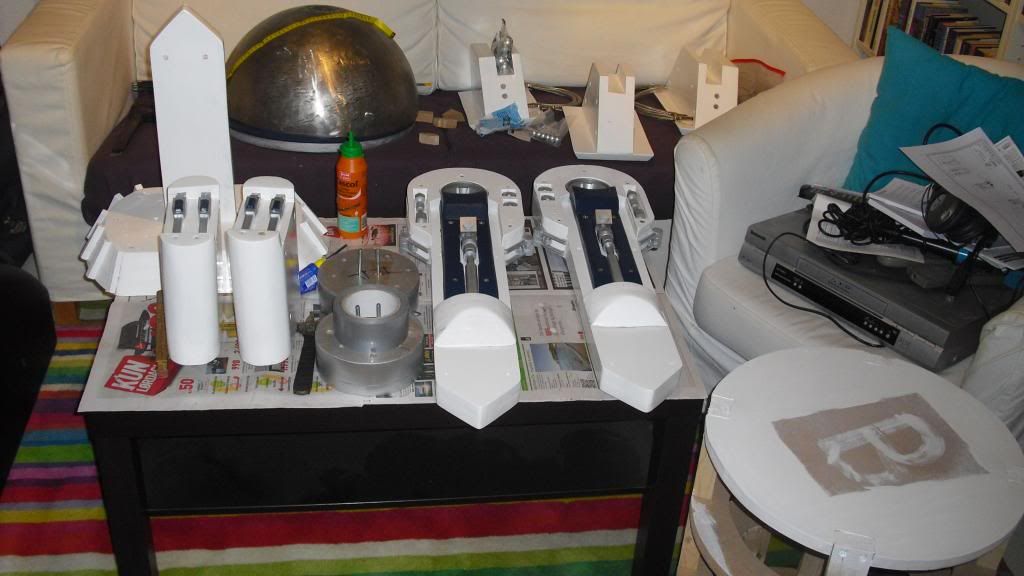


New pictures:
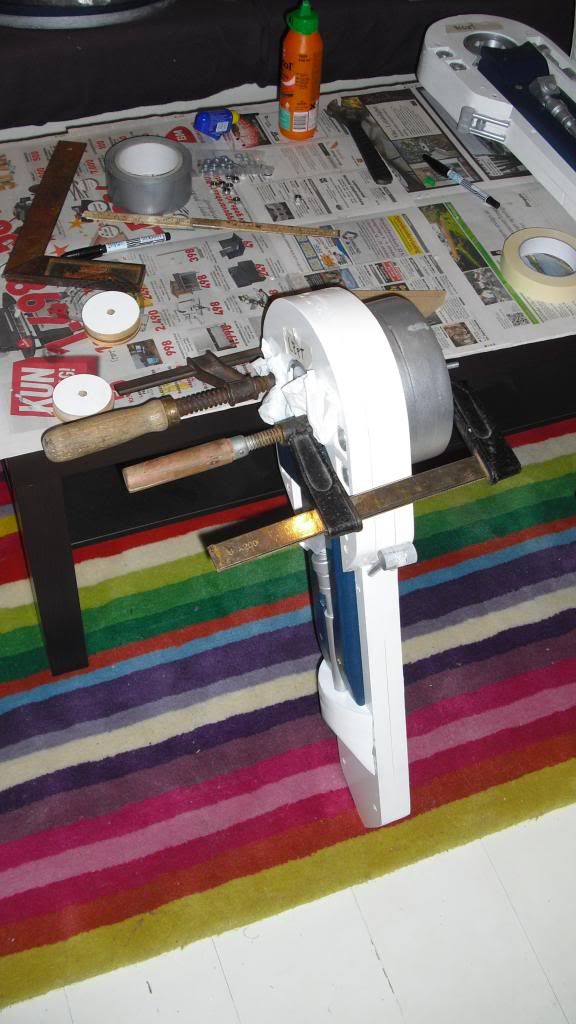
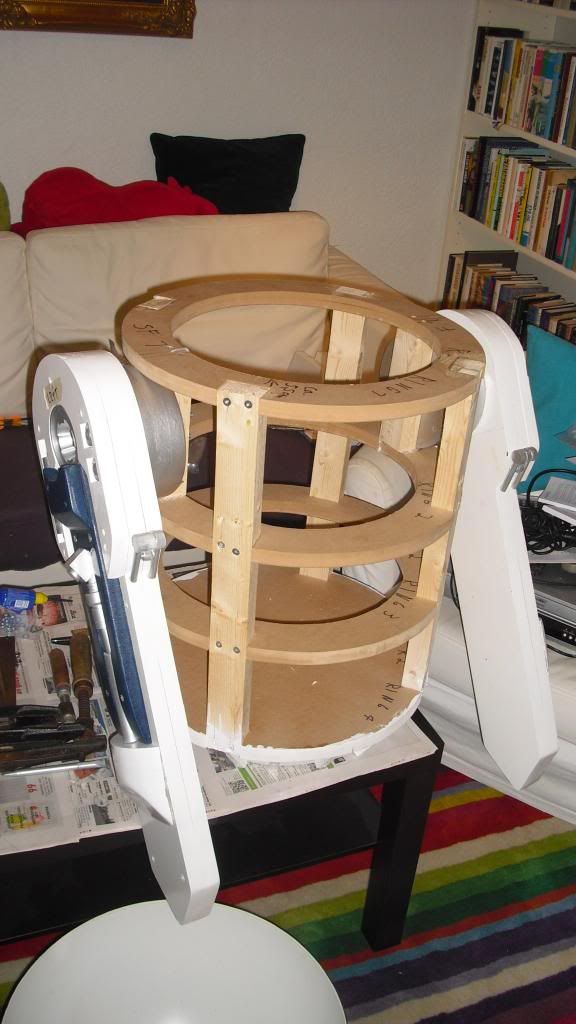
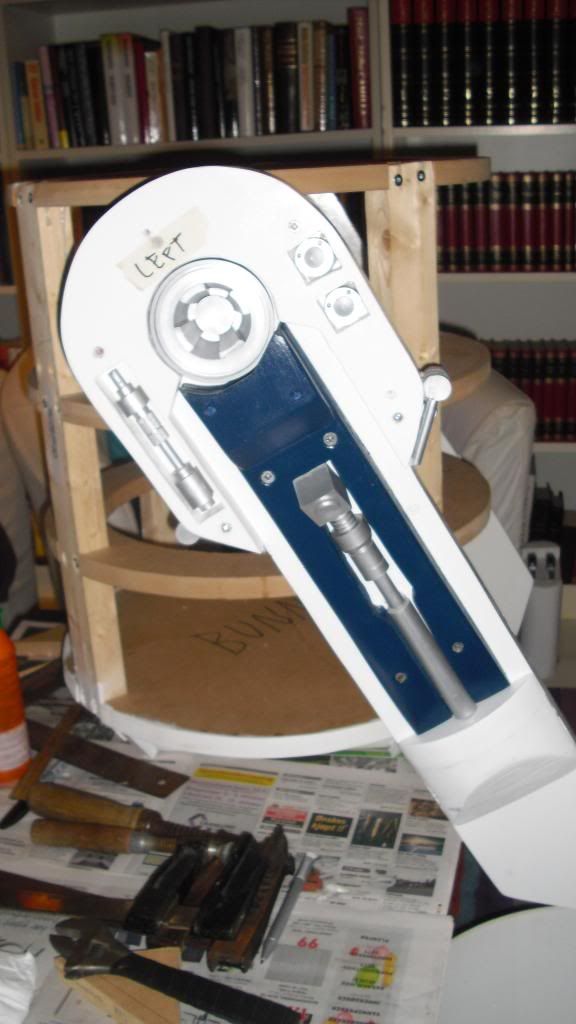
Shoulder flanges has been glued onto the legs in about a 40 degree angle and bolted onto the body.


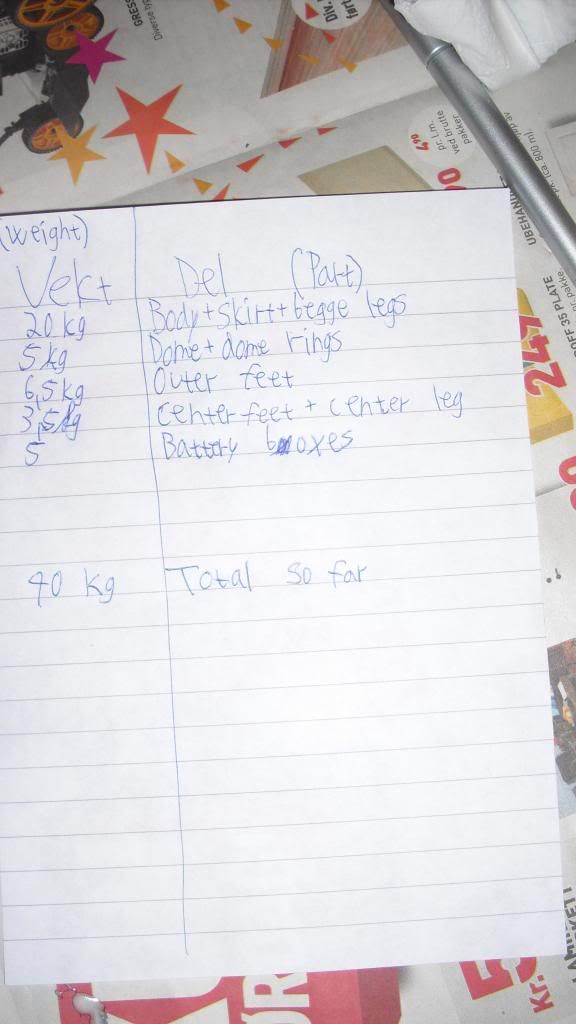
When mounting the legs to the body I found it quite heavy, so i weighted all the R2D2 parts. Note: the legs/feet haven't been bolted together just yet, and the bolts themselves weigh at least nearly half a kilo.

Just two pictures of the parts on the scale, but every part was weighted of course.


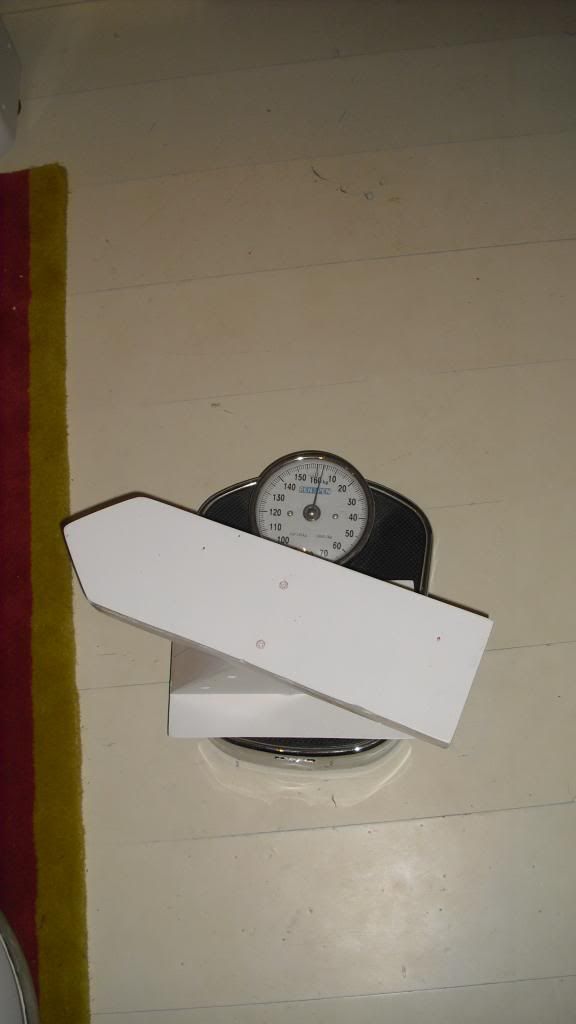
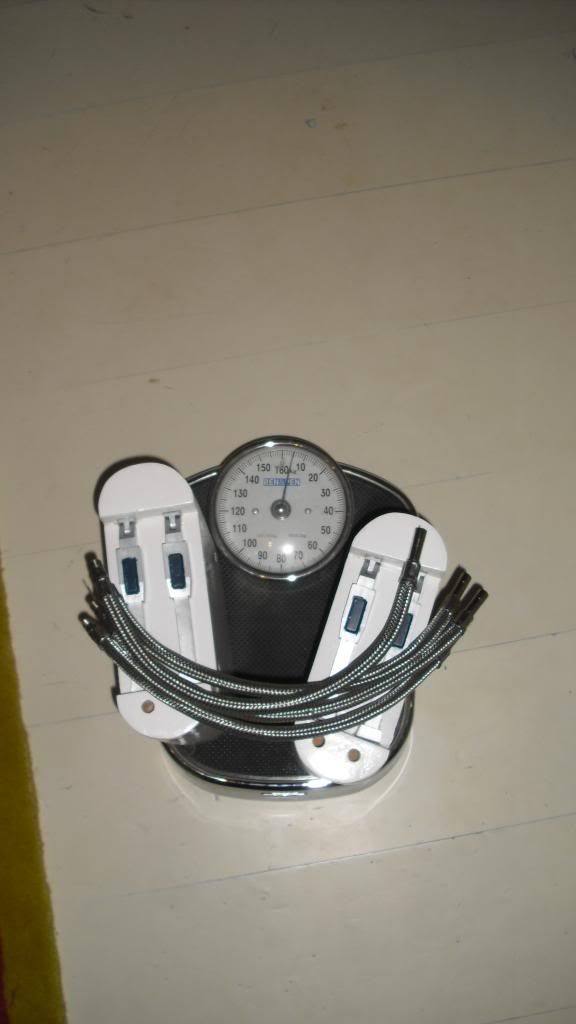
The body and legs alone is 20 kilos (44 pounds) and all the parts (without the unmounted bolts) is so far 40 kilos, or 88 pounds!


Now I see why people who build an R2 that is functional have to use wheels and motors from a automatic wheelchair. Because of the massive weigh.
 
Re: 1:1 R2D2 homemade scratch build

Grind the weld back, and use some bond to fill it. With a little sanding, you wont know the difference.
Next time, try welding it from the inside, then you wont have to clean it up!

Great job so far! :)

-Skyler101
 
Re: 1:1 R2D2 homemade scratch build

I tried to weld from the inside, but it was... challenging because of the second pole that I need to attach when welding. A minus with mig-welding. some day I will take a machine almost like a dremel and grind it better down :)


He is alive!


Glued on the center leg. Actually glued it on after the pictures above.


Notice the floor's color difference on the two pictures:


Today I cut down the center leg to the correct size, almost half the length. And bolted the outer feet to the legs. The head of the bolt is completely inside the wood to make room for the battery box on the side. The inside of the feet also had to be a bit sanded down before I could manage to push the legs down into the feet.
The center leg is now as said cut down and mounted to the center foot which has been glued to the skirt.

The angles wasn't that easy to fix, especially for the center leg.


The HIPS (plastic sheets) will get here the upcoming week, and I will also pick up a PP-pipe for the ankles the same week.
 
Re: 1:1 R2D2 homemade scratch build

Thanks! :)


The dome rings are now bolted to the body!

It doesn't show very well, but the R2 is actually HUGE in real life now when all the big parts are assembled. Even though I have seen the R2 on pictures with people by it's side, and in Star Wars also of course, but I have never realized how big it is - until now.


Last edited:
Re: 1:1 R2D2 homemade scratch build

Thanks! :)


The dome rings are now bolted to the body!

It doesn't show very well, but the R2 is actually HUGE in real life now when all the big parts are assembled. Even though I have seen the R2 on pictures with people by it's side, and in Star Wars also of course, but I have never realized how big it is - until now.

Every time I see an astromech droid in person, this always surprises me as well. They're hefty!
 
Re: 1:1 R2D2 homemade scratch build

Every time I see an astromech droid in person, this always surprises me as well. They're hefty!

Hey M,

I saw my VERY first R2 at the Makers Faire. It was awesome. Fortunately for me, I saw 5!

Kev,

R2 is looking good! Keep going!
 
Re: 1:1 R2D2 homemade scratch build

Admirable! I want to see an R2 who can run and stuff in real life, unfortunately There are very few R2 or droids at all here in Norway. On the astromech site there are 9 droid builders in Norway (on the map), spread all over the country. So a meeting like the one you participated in, SofaKing01 is sadly highly unlikely here..

The sheets of polyester came yesterday. The weight of the polyester is about 10 kilos (22 pounds) and a lot harder to work with than I though. Just like everything else :D

I though I could just use a knife to cut it, but it quickly proved to not be that easy.


And, bought the pipe this week. I wonder if 1 meter (about 1 yard) is enough...


It took quite a lot of trying to get the half-circles right as the shoulder-hubs aren't 100% round. Trust me, it's very hard to make a two half-circles, at least harder than expected.


On this forum there are a lot of people who builds with foam and make templates out of paper before cutting the foam.
I copied that and made the section at the top today in paper. This will make it so much easier to get it right. But I have to grind down the welds more first tomorrow.
The next days the objective is to finish the dome.

I felt like a freaking architect drawing the templates for the top of the dome! Even though it may look a bit like a pokeball...


I'm going on with the dome first because it has been in the "waiting-line" for a long time. And although I am this close to the finish the R2 I probably have to wait at least a couple of months to get it done. "Why that long?" Because I have to save up enough money to buy the second load of parts. Second load = the resin parts for the dome and body basically. :)
 
Re: 1:1 R2D2 homemade scratch build

Took me around two hours to get the top-section of the dome done, but it was worth it.

First I cut out a part of the drawing and taped it onto the dome and drew the pie-sections, followed by the two rings at the top. Did it a bit clumsy at first, but I got it done.


Smoothed down the top first too, although it look like a mess on the pictures, look kinda nice in real life! :)


Painted.


First time I have worked until 8 pm on a Friday evening on the R2, but I just had to get it done. I'm really looking forward to tear the tape off first thing tomorrow! :)


This part of the R2 is probably the one which includes the most hand-skills, and I won't claim to have this kind of skillset. I have never been good at drawing and I'm not very steady at the hand, but I have to get it done as good as possible anyways. The possibility for human error on this part of the build is huge as it has to be handmade.
As said in the famous proverb: "nothing is as good as a dome made as it should", it does go like that, right?


For those of you people who wants to make just the dome: you should be prepared for at least a few hours of small and detailed work ;)
 
Re: 1:1 R2D2 homemade scratch build

The top turned out fine:

A small circle is now added to the top as it is in the movies.


Painted half of the bottom of the dome today.


In the pdf-file for the dome the measurements was in degrees only, and it only said how much 1 degree is. Took me a while to get it right.


Last edited:
Re: 1:1 R2D2 homemade scratch build

It look good enough to me, although it could have been done a bit better. But believe me - this part of the dome-panting is hard to do, especially because it's on the side. And I thought the top was hard to paint... Well, the painting part isn't the hard part, to draw the lines on and tape it right is. ;)
Well, it has to be done and there ain't no shortcuts.


The paint look a bit white in some areas on the pictures, isn't as visible irl. You have to look for it to notice it ;) Maybe I will take som more paint on tomorrow at that area.

Thanks for coming out today! :)
 
Last edited:
Re: 1:1 R2D2 homemade scratch build

It has been a bit slow lately, but thanks! :)

Today I cleaned up the permanent marker I used to mark off where to paint. Removed it (and a bit paint) with some kind of alcohol. Looks a bit cleaner.
And I put a clear coat of paint on the dome to prevent rust on the surface in the future and to make it shiny.


I made the dome shiny to fit the other shiny/reflecting parts even though it's not 100% screen accurate it looks cool.


The blue shade have also been converted to the dark side.. Get it, it became darker = dark side..?


This is pretty much the only thing I have done so far this week, mainly because I have been busy with other tasks, such as school.
BUT! This weekend I will at least get the feet done and the tube at both ankles done and hopefully mount the battery boxes for a start.

I can't promise you or myself too much as the tasks always takes a lot more time than I though.
 
Re: 1:1 R2D2 homemade scratch build

Movie number 4 from 1977


Movie number 5 from 1980


Movie number 6 from 1983


Why are the position in movie number 4 different from number 5 and 6? Please tell me if anyone knows :)
 
Re: 1:1 R2D2 homemade scratch build

Center foot will the done tomorrow. (The half-moons (side details) will be bought later)


And we got yellow welds! Made out of glue. Will also be sanded down by hand tomorrow, to fragile for a machine.

I think I might have used the heat gun a bit too much.. Was surprisingly hard to get the plastic to not get bent at the top. And that's probably why I failed to do so..


The backside - so easily accessible! I'm not really looking forward to glue the backs onto there, will be hard.


I think I made the front and back body skin fit today. Will be nailed in place at a later time as I can't to it alone. Most likely after all the feet are done.


To get the feet, ankles and battery boxes done by this week was a bit ambitious..


To see the front of the center foot done isn't a lot, but it gives the R2 more depth and a kinda a psychological mood-boost for me. :)
 
Re: 1:1 R2D2 homemade scratch build

For future reference, if you take the tape off right after you paint, you'll get a much cleaner line.
 
Re: 1:1 R2D2 homemade scratch build

Thanks for the tip, I will be sure to remember!

Thanks! :)
I'm taking my time though, I don't see a reason to rush it as I can't afford the remaining resin-parts for at least a couple of months.


Tried to sand it, but it really didn't do any good. I later on used a grinder-tool with the machine like a dremel, but the glue ended up melting to the grinder-tool thanks to friction instead. Worth a shot.
I cut away what I could of the glue, and painted it with a brush.


Close up it looks sort of like bad welds, but from a meter away or more it looks good, enough.


This week I will try to do something every day to make some more progress on the feet instead of packing it all on the weekends. :) Even though I spent more time on the PC than actually working with the center foot today...
 
Back
Top