You are using an out of date browser. It may not display this or other websites correctly.
You should upgrade or use an alternative browser.
You should upgrade or use an alternative browser.
1:1 Millennium Falcon Cockpit Replica - Group Build
- Thread starter SteveStarkiller
- Start date
Fuzzual
Sr Member
Fuzz told me that he and his father cast all the individual parts - nothing short of excellent!
More to Follow so Stay Tuned!
Thanks for the nod SK, much appreciated. Really glad you like them.
Killer job on the door too man, WOW!!!!!!
I'm not going to take anything away from the Falcon group's thread here talking R2, but quickly the kit is 2/3rd scale with roughly 85% of everything you need to build this little guy. Feel free to PM me and I will be happy to talk shop on it, or if you would like one let me know.
And now back to the Falcon Build . . .
Hi Gang,
Early Morning Update!
Rain kept me from working on the door so I headed over to the makers to use the laser cutter. The first few cuts were a hit or miss! Luckily - HIT 3/4" acrylic!

After seeing a few new images of the cockpit this greeblie had some considerable depth to it


Look familiar?

I'll join these two pieces, lightly sand and mount

One of two pieces that fit atop the "ejection" tube on the ejection seats

All the work I've done on the ejection seat frame has been for not... The seat panels and all the greeblies are based on Maruska's 3D model. The original frame doesn't match up so I have to recut 4 new "hockey stick" frame pieces from 3/4" ply. But this time I'm going to get them finished and not let them sit for a year...

The second set of cuts - the new radar housing
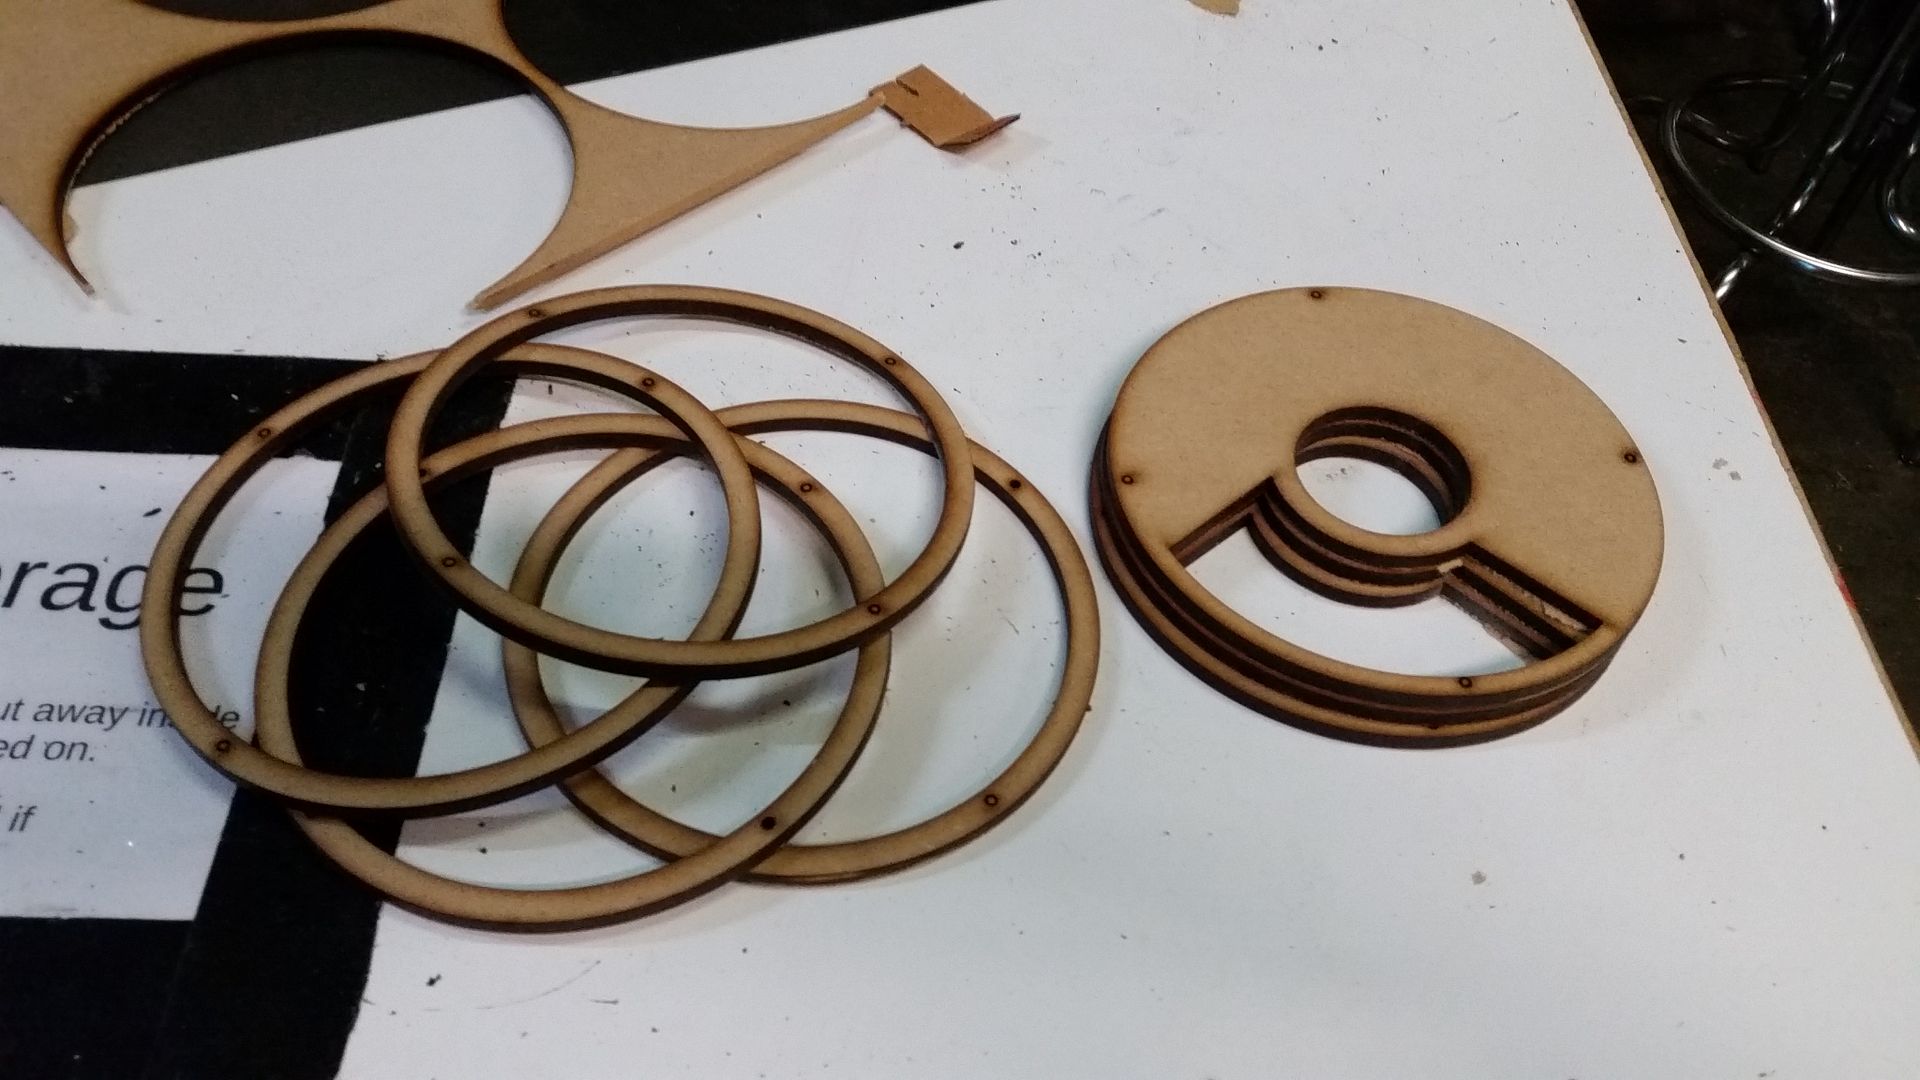
Backside - all together
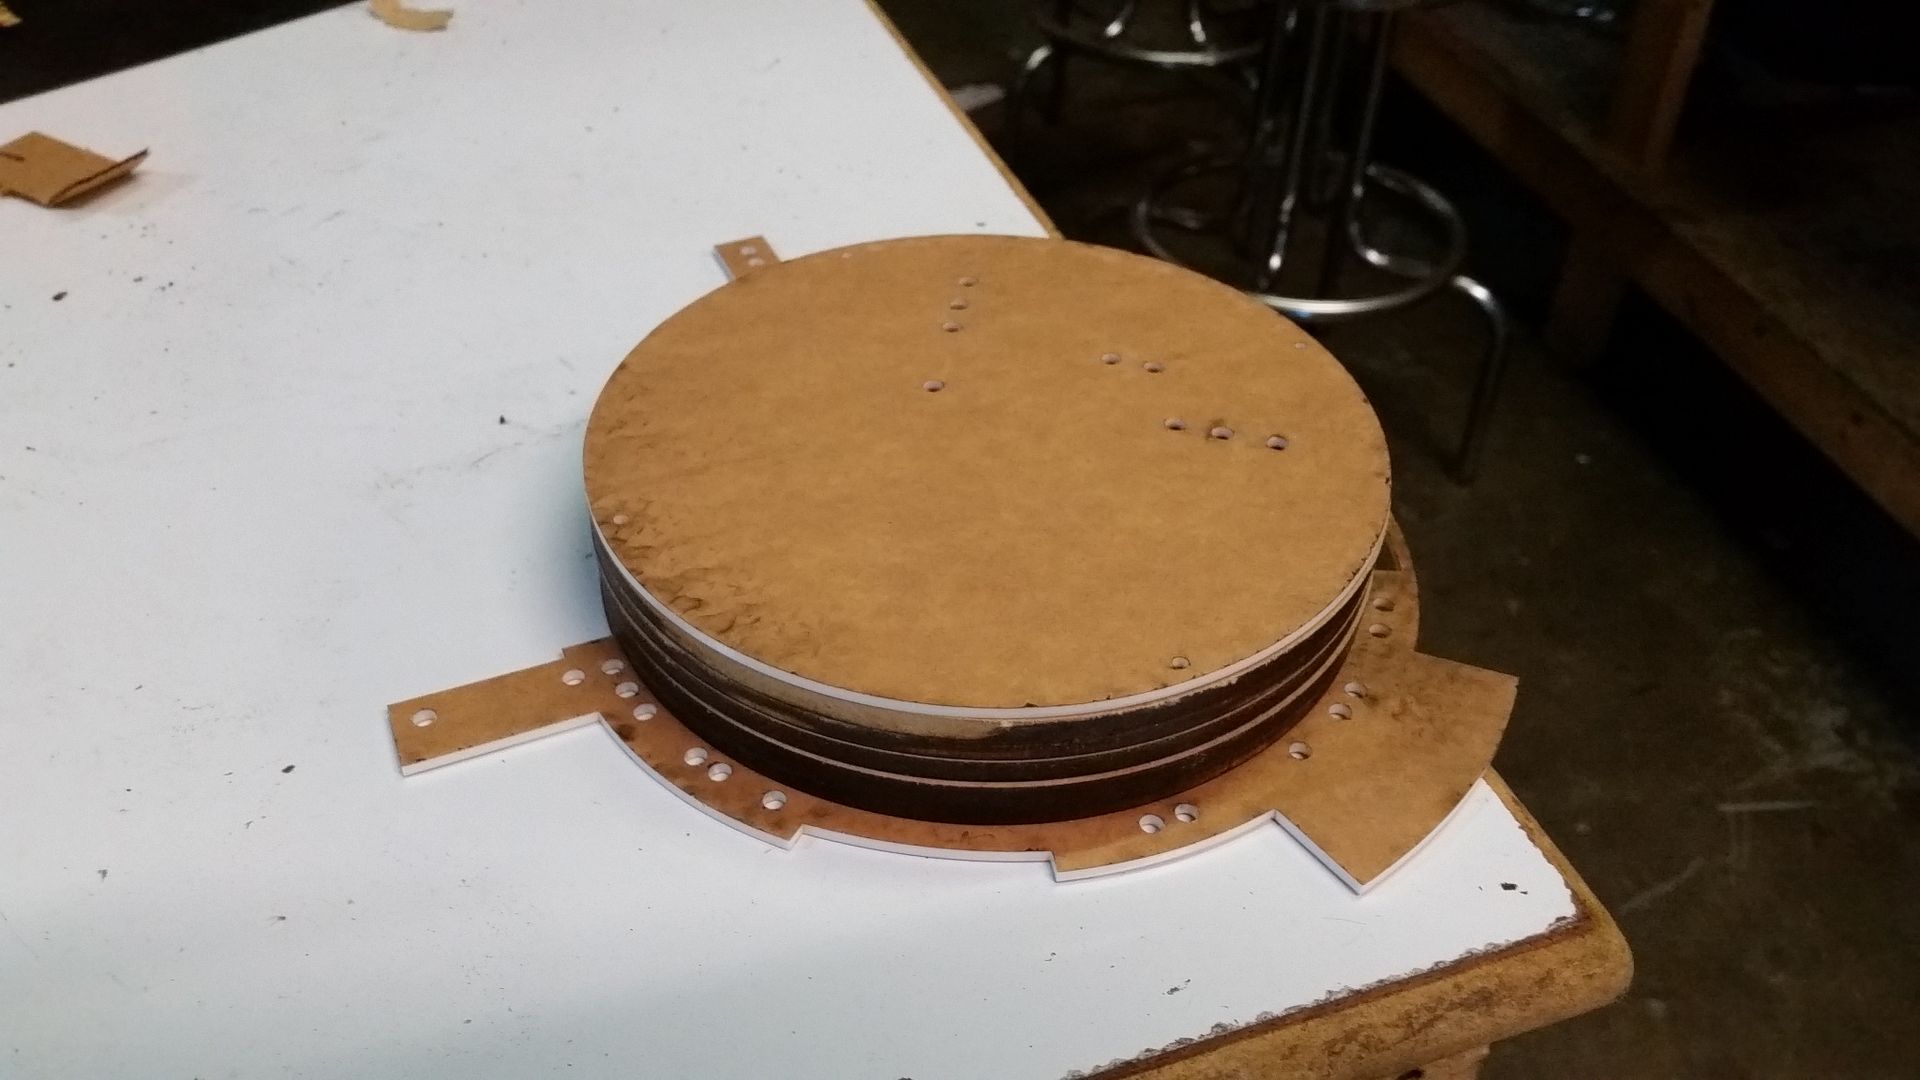
Front - DEF needs paint!
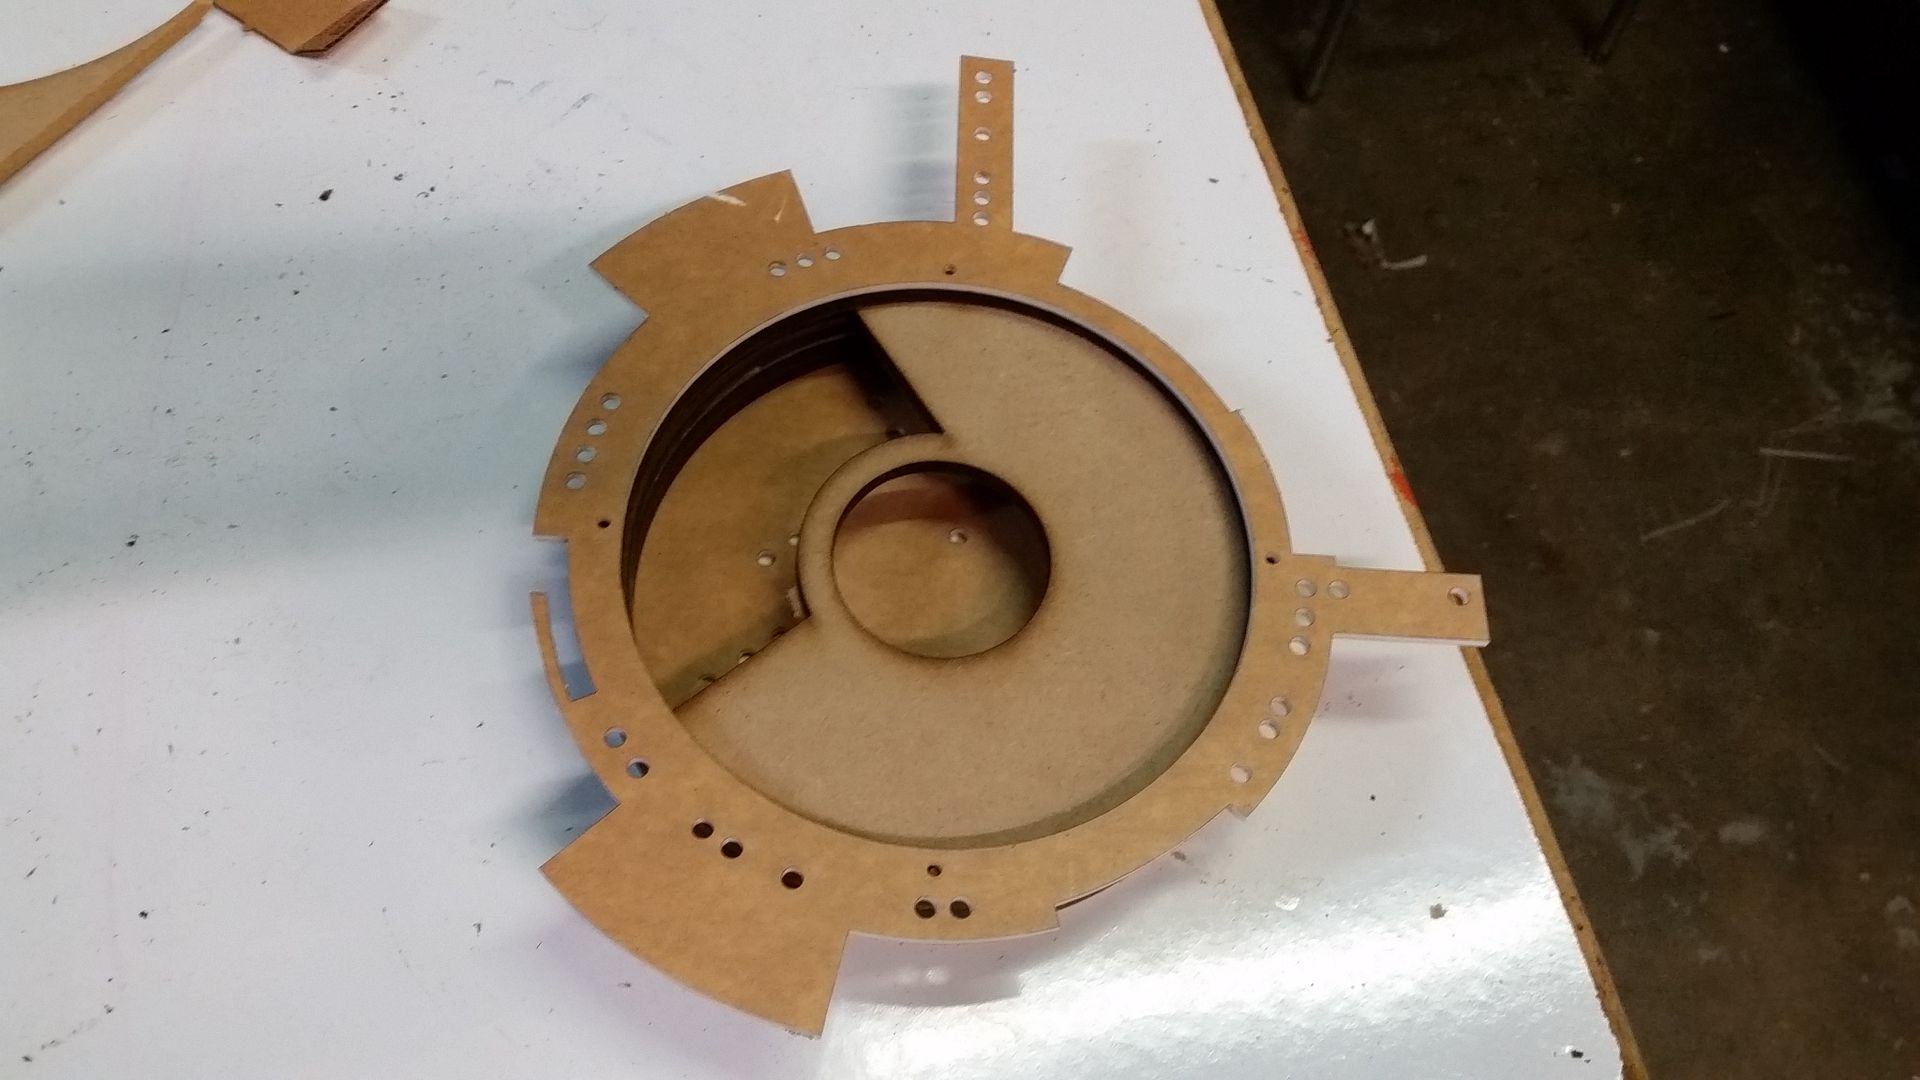
Drilled the mounting holes

Roughing it in
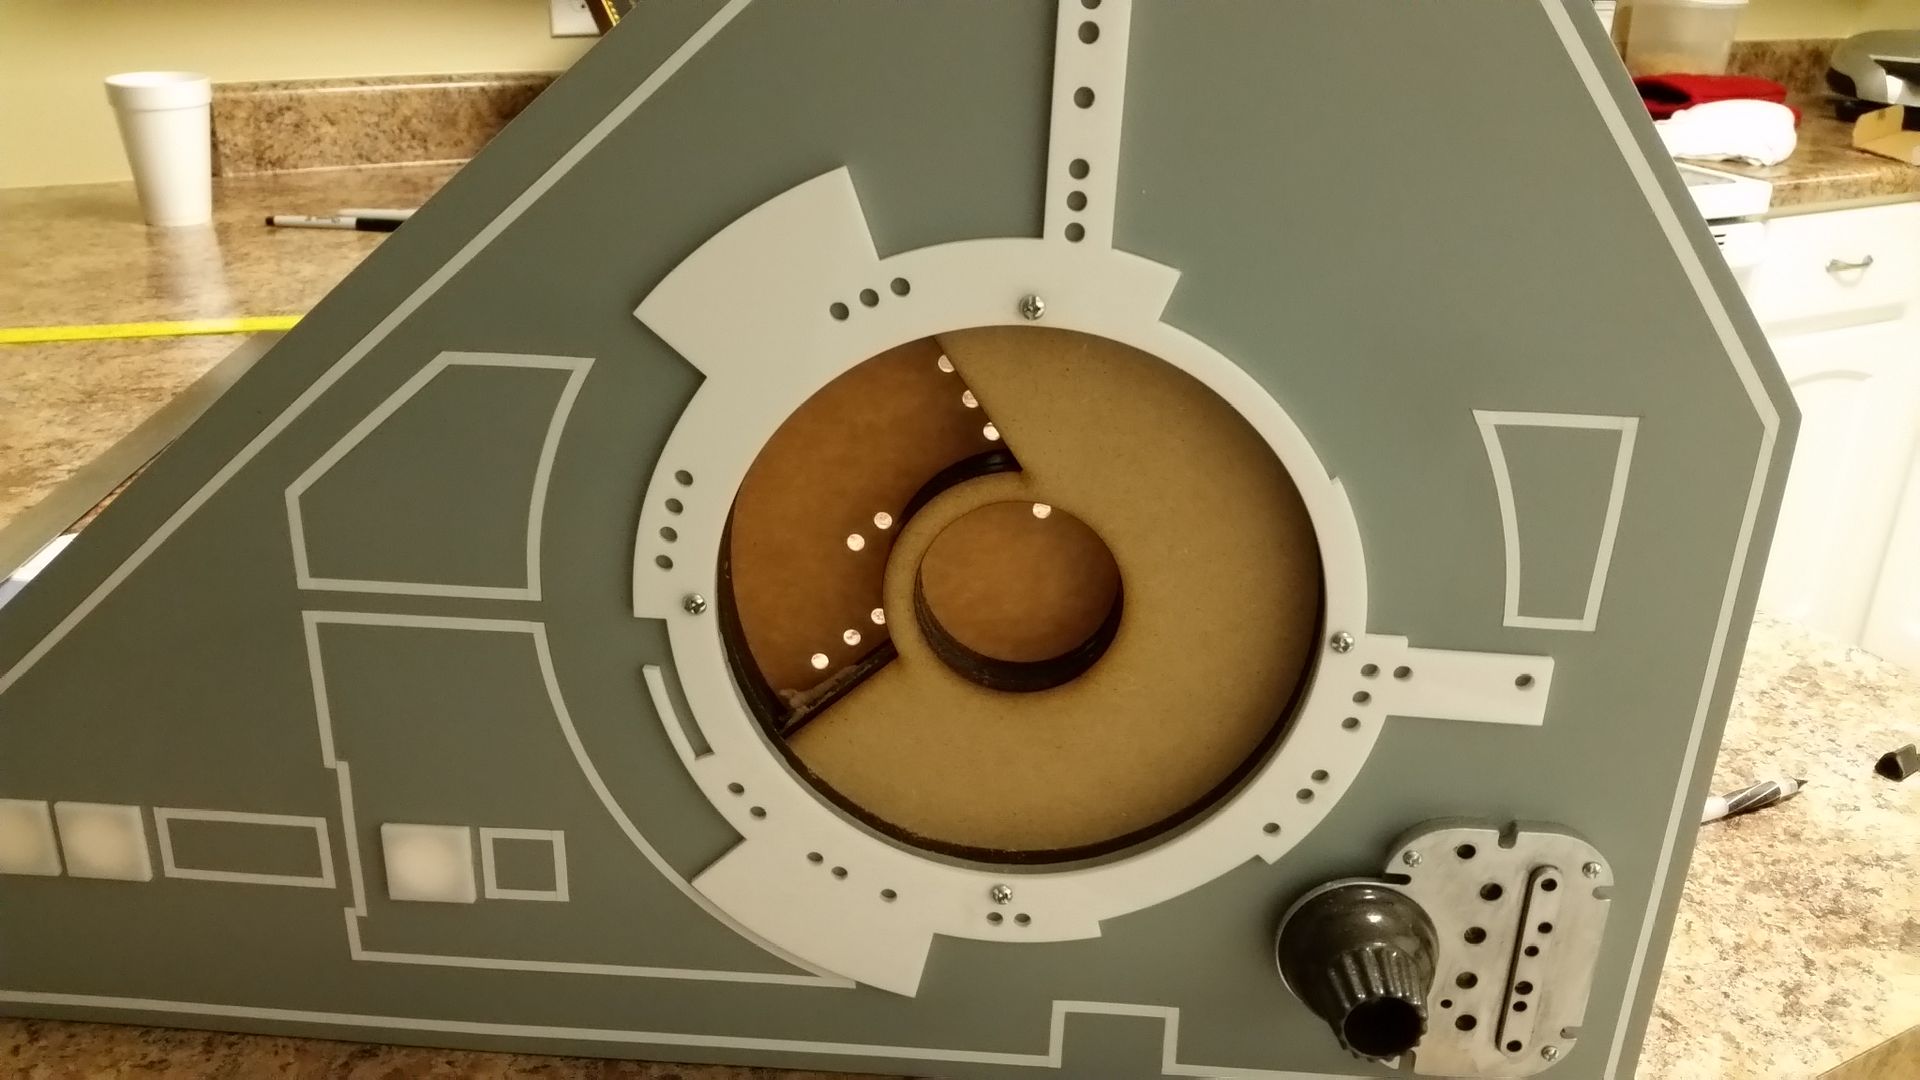
The MDF housing will be glued together, painted black (along with the exterior trim piece)

I still have to drill the numerous holes for the LEDs that grace the trim piece and then adhere all the numerous greeblies

Back side shows the interior LED holes


I also have to cut a smoked cover plate (from acrylic) to hide the interior housing

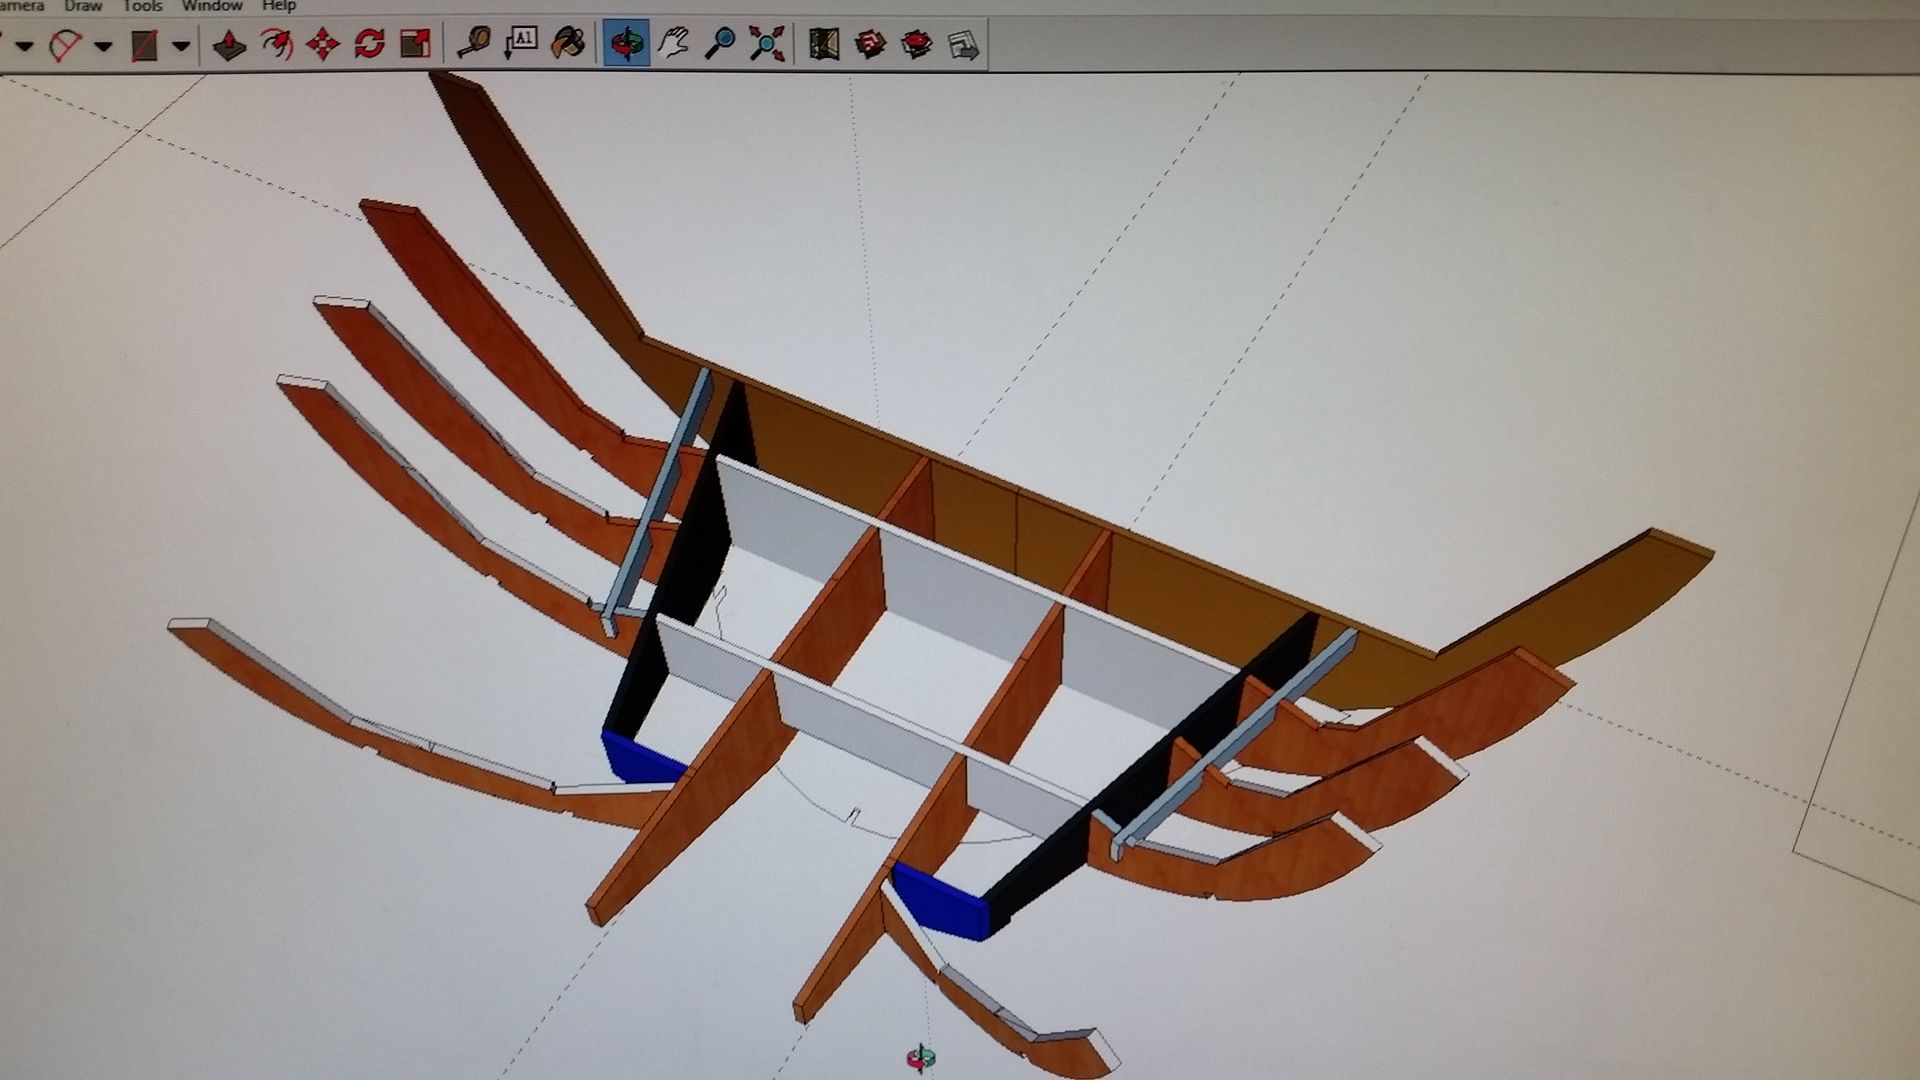
Last but not least - OperaScot has been working his magic on helping me design a new front nose section that will mount both the lower interior panels AND exterior skin! Scot has a LOT of experience designing large scale transportable props - this was a walk through the park for him!
We finally have a forward path to get this pesky nose panel looking the way it's supposed to!
More to Follow!
Early Morning Update!
Rain kept me from working on the door so I headed over to the makers to use the laser cutter. The first few cuts were a hit or miss! Luckily - HIT 3/4" acrylic!

After seeing a few new images of the cockpit this greeblie had some considerable depth to it


Look familiar?

I'll join these two pieces, lightly sand and mount

One of two pieces that fit atop the "ejection" tube on the ejection seats

All the work I've done on the ejection seat frame has been for not... The seat panels and all the greeblies are based on Maruska's 3D model. The original frame doesn't match up so I have to recut 4 new "hockey stick" frame pieces from 3/4" ply. But this time I'm going to get them finished and not let them sit for a year...

The second set of cuts - the new radar housing

Backside - all together

Front - DEF needs paint!

Drilled the mounting holes

Roughing it in

The MDF housing will be glued together, painted black (along with the exterior trim piece)

I still have to drill the numerous holes for the LEDs that grace the trim piece and then adhere all the numerous greeblies

Back side shows the interior LED holes


I also have to cut a smoked cover plate (from acrylic) to hide the interior housing

Last but not least - OperaScot has been working his magic on helping me design a new front nose section that will mount both the lower interior panels AND exterior skin! Scot has a LOT of experience designing large scale transportable props - this was a walk through the park for him!
We finally have a forward path to get this pesky nose panel looking the way it's supposed to!

More to Follow!
Last edited:
Looks like a productive weekend to me. I feel lazy compared to what you did.
Thanks! I got frustrated when 2 pieces of the 1x3 didn't match up and I was unable to finish the basic door shell. I dont feel I got as far as I should.
- - - Updated - - -
Nice R2 kit...
Here's my 1:2 (Half scale)
Great intricate work on the falcon...
View attachment 515614
Thanks! I'm trying... Your R2 is fantastic! The weathering is nothing short of beautiful.
- - - Updated - - -
Thanks for the nod SK, much appreciated. Really glad you like them.
Killer job on the door too man, WOW!!!!!!
I'm not going to take anything away from the Falcon group's thread here talking R2, but quickly the kit is 2/3rd scale with roughly 85% of everything you need to build this little guy. Feel free to PM me and I will be happy to talk shop on it, or if you would like one let me know.
And now back to the Falcon Build . . .
Thanks! But... You've always been a shameless self promoter!
- - - Updated - - -
I know you hate the word, SK, but I have to say it- Art, man it's all a piece of art. Amazing
Thank you, Sir! I'll take it anyway I can.
Hey SK... maybe it's me but isn't that door a little on the thick side? I thought it looked alot thinner in the movie like maybe 1 or 2 inches wide inside of 4. Maybe it's me. I'll have to check my refs.
Hey L,
It is a bit thicker. We think the door is approx 2 - 2.5" but because I'm doing both sides I needed room for both the electronics and the dual sided upper recessed greeblie panel. So, from outward appearances it looks the same, but I had to give the electronics guys a little bit of room to work and run the wiring.
I know... shame on me for veering away from screen accuracy!
Hey, that tends to happen when you are working something up as 'practical' vice 'facade'.
Fascinating project, "guys".
Regards, Robert
Hi R,
Thanks! I really struggled with going from 2" to 3" but it made sense to give us more room - especially with the door being double sided. When all is said and done I dont think there will be much difference. However, I know people like Fuzz, Wavey and LrdSatyr8 and especially Jessie... and maybe even Starkiller would call me out and complain!
Thanks! I really struggled with going from 2" to 3" but it made sense to give us more room - especially with the door being double sided. When all is said and done I dont think there will be much difference. However, I know people like Fuzz, Wavey and LrdSatyr8 and especially Jessie... and maybe even Starkiller would call me out and complain!
I'm not complaining mind you... I just know you and your extreme attention to detail! I was just pointing out something that I thought that maybe you had overlooked. It makes sense to have it that thick for the electronics, but I don't think the middle indent would require that much space for the electronics. All you need really is just about maybe 1/4 an inch or less to stick the LED that would shine thru from both sides. For that matter, if you had a piece of tinted plexi, on both sides, you could just sandwich the led between them and viola! Thin door! But then again, the back side of the door has never been seen... what if it's just blank on the backside at the top? Could make it as thin as you wanted then!
I'm not complaining mind you... I just know you and your extreme attention to detail! I was just pointing out something that I thought that maybe you had overlooked. It makes sense to have it that thick for the electronics, but I don't think the middle indent would require that much space for the electronics. All you need really is just about maybe 1/4 an inch or less to stick the LED that would shine thru from both sides. For that matter, if you had a piece of tinted plexi, on both sides, you could just sandwich the led between them and viola! Thin door! But then again, the back side of the door has never been seen... what if it's just blank on the backside at the top? Could make it as thin as you wanted then!Just throwin stuff out there for ya to ponder and drive ya a little crazy in the process! It's what I do!

I know you were poking fun
Actually there is a small electronic box with flashing LEDs that DarthChromer put together for us some time ago - how sad we're NOW just getting around to showcasing his work! Shame on me! Anywho, this is why I need the room. I'm not sure whether there is enough room for the greeblie to flash on both sides
Greeblie from DarthChromer
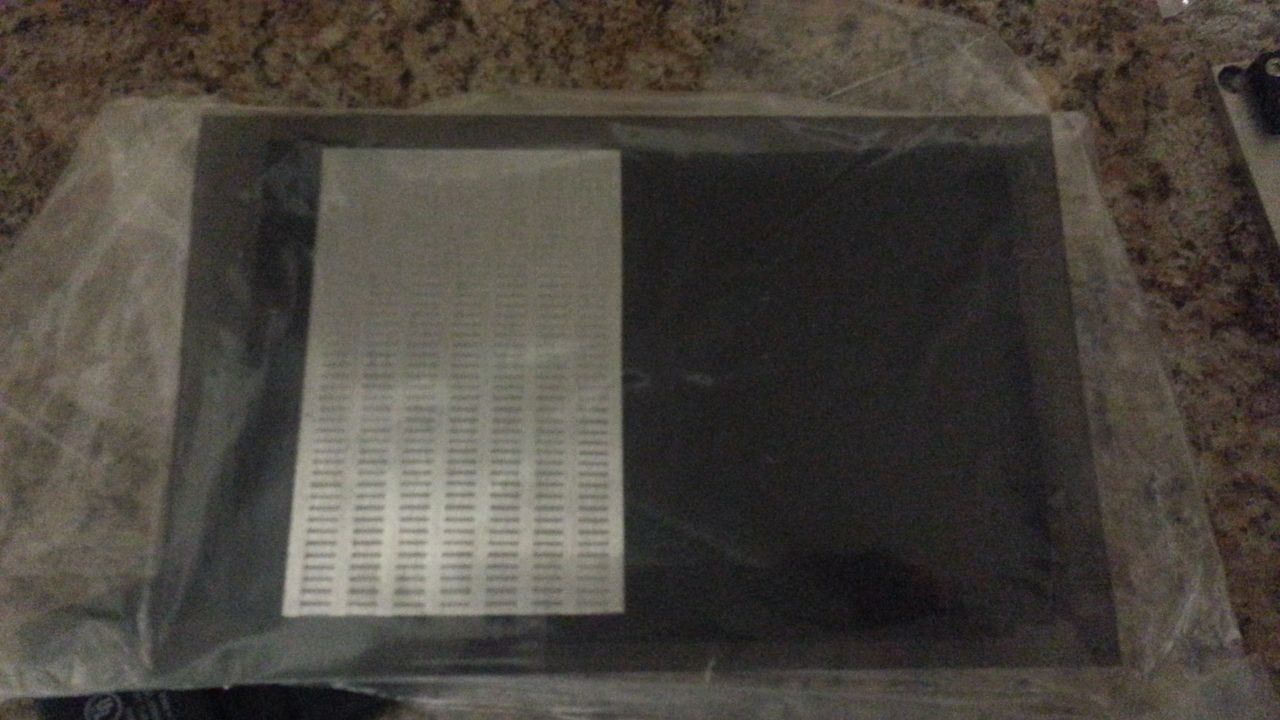
Vid - I hope the link works
http://i778.photobucket.com/albums/...ild/MF Videos/20140413_120258_zpsb9473a2b.mp4
Nice... but is it accurate? LOL
LOL! I dunno... I'm making it up as I go
Ok... let's take a look here:


From those pics it looks like they are just 4 red lights, but of course on closer examination...


It appears as if there are 3 rows of 4 lights that flash independently of each other. So all in all I would say it's pretty darn good... but it also appears there might be a couple of greeblies underneath them but that could also just be a reflection...

But if they are just reflections I doubt they would show up again in this shot:

And just as a side note... In ANH they really didn't close the door vary often, it was mostly left open. In ESB they seemed to close it everytime someone walked into the cabin! But as a personal note... Greg... you're doing such a wonderful job on this guy! Seriously... I love watching you work... its like watching Picaso or Da Vinci... just simply remarkable! I know what it's like wanting everything to be perfect and I'm here for ya man!
From those pics it looks like they are just 4 red lights, but of course on closer examination...
It appears as if there are 3 rows of 4 lights that flash independently of each other. So all in all I would say it's pretty darn good... but it also appears there might be a couple of greeblies underneath them but that could also just be a reflection...
But if they are just reflections I doubt they would show up again in this shot:
And just as a side note... In ANH they really didn't close the door vary often, it was mostly left open. In ESB they seemed to close it everytime someone walked into the cabin! But as a personal note... Greg... you're doing such a wonderful job on this guy! Seriously... I love watching you work... its like watching Picaso or Da Vinci... just simply remarkable! I know what it's like wanting everything to be perfect and I'm here for ya man!
Last edited:
Hi Gang,
Quick Morning Update...
Gluing the new interior radar parts together


Bolts help keep the individual pieces in place


Later today will either be a trip to the laser cutter for more misc cutting or sanding and painting the new radar parts
Stay Tuned!
Quick Morning Update...
Gluing the new interior radar parts together


Bolts help keep the individual pieces in place


Later today will either be a trip to the laser cutter for more misc cutting or sanding and painting the new radar parts
Stay Tuned!
...And just as a side note... In ANH they really didn't close the door vary often, it was mostly left open. In ESB they seemed to close it everytime someone walked into the cabin! But as a personal note... Greg... you're doing such a wonderful job on this guy! Seriously... I love watching you work... its like watching Picaso or Da Vinci... just simply remarkable! I know what it's like wanting everything to be perfect and I'm here for ya man!
Thank you so much! I wouldn't go so far as to compare me to the masters... well... OK!
Thank you again!
Fuzzual
Sr Member
One other thing about the cockpit door: it would (in a 'real' sense) be a pressure door, so thick is to be expected! I like 'thick' it provides a sense of reality and robustness.
Regards, Robert
100% Agreed!
OK OK OK... you guys found me out. That's why I really added the extra .5" 
Similar threads
- Replies
- 11
- Views
- 1,169
- Replies
- 2
- Views
- 960
- Replies
- 2
- Views
- 983
- Replies
- 13
- Views
- 2,295

