1:1 Millennium Falcon Cockpit Replica - Group Build

What an update! Lots to digest:) First: love the way the risers are making those buttons pop-out of that panel. The dark acrylic facing those buttons is the bomb and finally, I must say that your paint skills have grown exponentially since the beginning of this build. Just looking at those lights with that transparent glass finish is a beautiful sight to see:cool

Thank you so much! Working with the translucent paint is not easy. I was really worried it wouldn't adhere to the plastic. I applied 3 layers of color to those magnet surrounds and although they looked really good, there wasn't enough light coming though. So I'm thinking 2 layers should be enough. I've already ordered a few more packs of magnets.

It sure feels nice to have a little forward movement. :)

- - - Updated - - -

Great update SK! Just think of how productive you'll be when the weather breaks ;)

Thanks SB! It really is amazing how some people flourish in the heat and humidity. I'm more a cold weather guy. This little break in the weather was a nice recharger. :)
 
Ah, cool. Smoked perspex and chrome silver paint - as 70s as Cinzano Bianco and Santana. A nice detail there.
 
Ah, cool. Smoked perspex and chrome silver paint - as 70s as Cinzano Bianco and Santana. A nice detail there.

Thank you, Sir! I'm looking forward to seeing the button panel all finished up. Still need to drill the holes for the LEDs. It never ends... ;)
 
Hi Gang,

Early Morning Update!

I finally got around to designing and fabricating a critical part of one of the cockpit greeblies. I designed a simple 2D object and then laser cut 1/4" acrylic to match this latch I purchased a few years back (another huge thanks to Wavey). I was going to use the originals in the cockpit but quickly found out that these latches are going for almost 150-200 each! I have two of them and have no intention of destroying them

Side by Side Comparo
20150804_193841_zps4gie14gn.jpg


20150804_193853_zpstdjztxxc.jpg


Once I adhered all the acrylic pieces together I slip a small bolt and nut into place
20150804_211259_zpsgd3evkxv.jpg


20150804_211316_zpsmgsv9a1p.jpg


Its NOT perfect. Aligning acrylic is very difficult without the pieces sliding around. Also, laser cutters have a tendency to cut a very fine beveled edge - not on purpose. I wasn't sure what settings to use to get a perfect cut. But that's ok. I would still have to add filler and sand. :)
20150804_211331_zpsgjjh6uhi.jpg


20150804_211355_zpsxlwlyauz.jpg


I then adhered the pieces of the second latch together - Firefly anybody?
20150804_212020_zpsopdag4ku.jpg


I might have Daniel 3D print a version as well to see how it looks
20150804_212101_zpsibrfw0ha.jpg


I have lots of sanding and filler ahead of me. I'm really happy with how they tuned out!
20150804_212113_zpsbv1unjru.jpg


Once sanded, they will be painted silver to match the original. They will then be bolted to this greeblie box and then to the slider panel
20150805_045016_zpsjbh40slx.jpg


20150805_045025_zpsv6rcdtk9.jpg


20150805_045034_zpsxq4dd85h.jpg


This is going to be a fun week! We have a date with the CNC for a new door, door frame, etc. and I'll be mod'ing the center console / nose platforms. Although the arches are fine, after many years there is significant warping / bending with the lower panels - the addition of the shelf and the nav chair riser platforms is becoming an issue. I've got to address this and we've found a 90% solution.

Stay Tuned! :)
 
Latches are A+ for sure! Eager to see the door come together also...heck, I would love to see that cockpit coming together:D
 
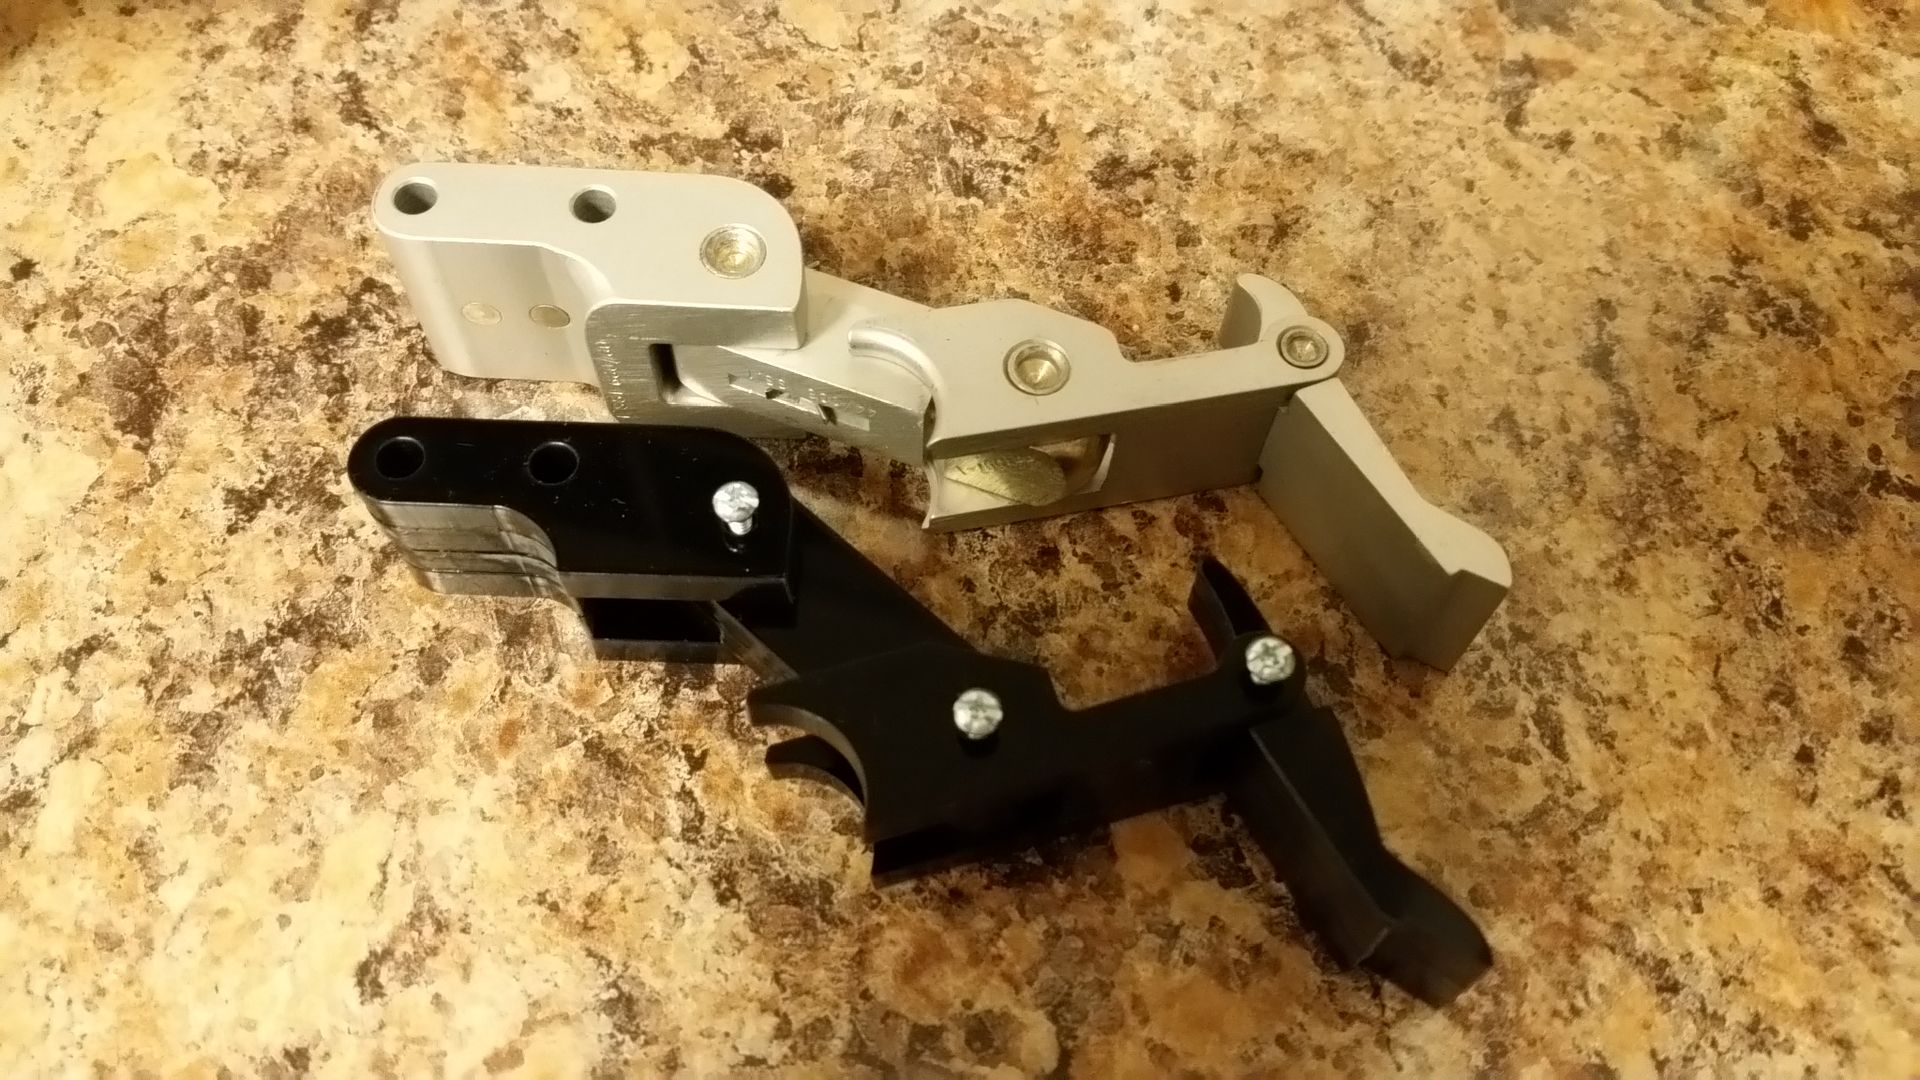
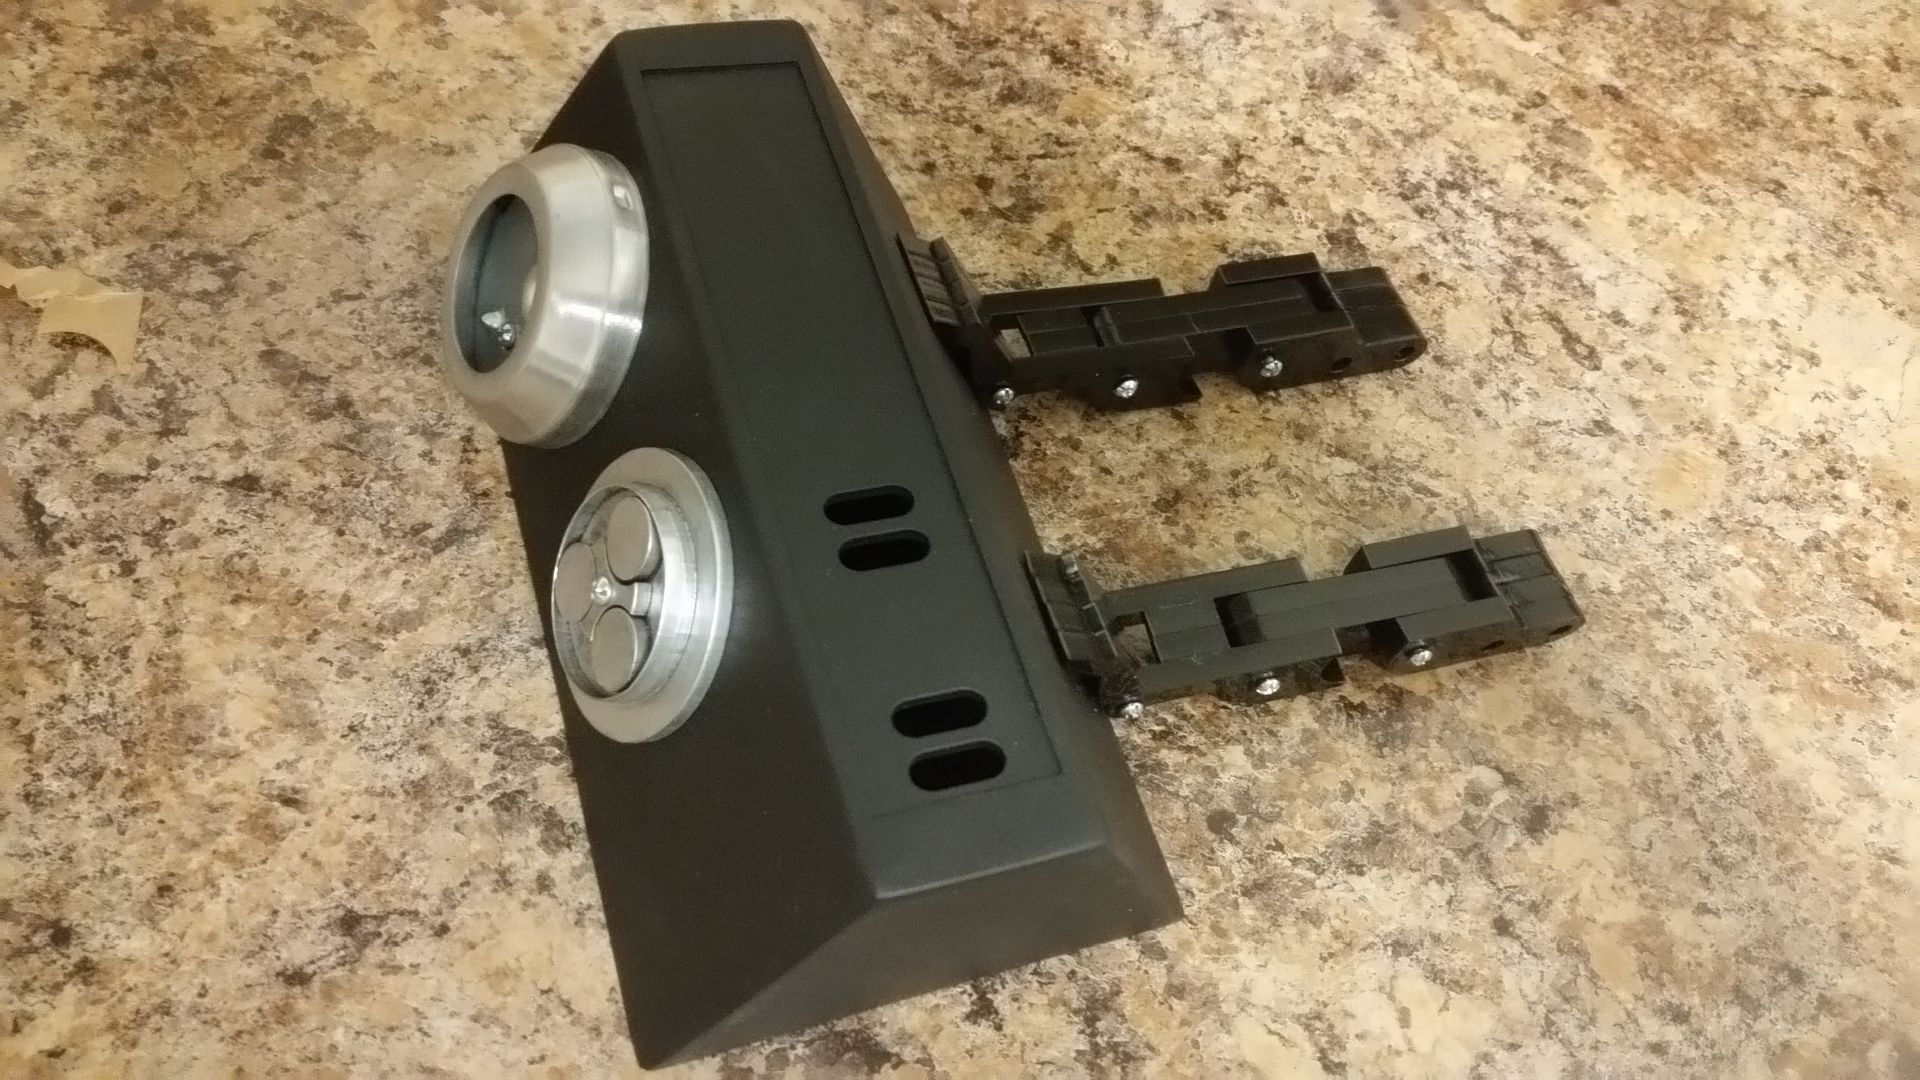
Great update, the latches came out fantastic!

Thanks, SB! Let's hope the filler & sanding take it across the finish line. :)

- - - Updated - - -

Latches are A+ for sure! Eager to see the door come together also...heck, I would love to see that cockpit coming together:D

Thanks, J! The next phase of the build should prove very interesting. We've been having lots of discussions how we're going to move forward and get her back together!
 
Them latches are great!!! Much easier to fix than drilling through the alloy versions.

Thank you, Sir! I'm really excited to get back on them. As I mentioned, after seeing the going prices I wasn't about to mod the originals. I was on a GT40 Replica forum a few weeks back and similar units are being sold for $800+ for 4 of them. So, I think I found my retirement fund. ;)

There is the concern about the part being bumped into or accidently pulled to hard... but that's the nature of the beast.
 
WOW!! You folks are certifiably crazy! The amount of time, effort and detail you are putting into this is just insane. Can't wait until it is finished and once more whipping through the galaxy. Doesn't even have to be one far, far away. Ours will do just nicely.
 
SK, you need to assemble a greeblie book, "You Say Junk, I Say Treasure . . . A Greeblie Tale" Sounds like a perfect title to me. Seriously though, this thread is a great record, but you really should think of documenting this as a book. The hunt, and work for all these items you are re-creating and finding is outstanding!
 
Well, I for one (and, perhaps on behalf of all the regular visitors to this thread) would like to thank you for all your hard work, Jessie. Your contributions to this project have allowed it to grow and expand in ways that I'm sure even SK himself hadn't anticipated, and we're all the beneficiaries. So from all of us who enjoy every update that includes some of your labor, thank you.

... toots.

:D
Thank you,

Sweet cheeks.
 
WOW!! You folks are certifiably crazy! The amount of time, effort and detail you are putting into this is just insane. Can't wait until it is finished and once more whipping through the galaxy. Doesn't even have to be one far, far away. Ours will do just nicely.

LOL! Hi A,

Thanks so much! We're definately out there. But I think we lapped crazy a couple of times at this point! We're all excited to see her finished. Whenever that may be. ;)
 
SK, you need to assemble a greeblie book, "You Say Junk, I Say Treasure . . . A Greeblie Tale" Sounds like a perfect title to me. Seriously though, this thread is a great record, but you really should think of documenting this as a book. The hunt, and work for all these items you are re-creating and finding is outstanding!

Hey Fuzz,

Thanks so much! As you know greeblies are both a joy and a pain! A joy to see when it's finally finished, painted up and in place... a PAIN having to design and execute - with limited ref images. And every now and then a new photo pops up and forces me to go back and redo "something". I'm keeping a detailed list of people who keep posting new images - they'll pay! ;)

Daniel and I have been tossing around a similar idea but centered more around the actual build. I've saved almost all the sketches I've done over the years - it's literally a pile of paper. Focusing on the greeblies would be 3/4s of the book! I LIKE IT! :)

Of course you would have to write a forward to Chuck Norris... because without his inspiration (or fear of dying from his intimidation) none of it would be possible! :)
 
Hi Gang,

Quick Update: All the panels have been removed down just past the shelves. I discovered some serious bowing the other morning and wanted to get those panels off and away from the build. The weight from the upper panels and shelves have caused the lower panels to bow out from the center by more than an inch. I have figured out a temp to perm solution by creating a vertical support brace that extends the entire width of the cockpit thus connecting the lower panels together, at their weakest point, where the nose panels meet. And, the way I'm designing it, there will be ZERO modification to the overall look and feel to the cockpit. As a result, the center console platform will be heavily mod'd (if not scraped all together) in favor of the new cross brace.

Stay Tuned!
 
Last edited:
Hi Gang,

Quick Update: All the panels have been removed down just past the shelves. I discovered some serious bowing the other morning and wanted to get those panels off and away from the build. The weight from the upper panels and shelves have caused the lower panels to bow out from the center by more than an inch. I have figured out a temp to perm solution by creating a vertical support brace that extends the entire width of the cockpit thus connecting the lower panels together, at their weakest point, where the nose panels meet. And, the way I'm designing it, there will be ZERO modification to the overall look and feel to the cockpit. As a result, the center console platform will be heavily mod'd (if not scraped all together) in favor of the new cross brace.

Stay Tuned!

I was just gonna post something along the lines of... "By the time this thing is finished, the first MDF panels will be warped all to heck" but in a good-natured ribbing sort of way. You know, cause I spread sunshine like that. :p Glad to see you came up with a fix.
 
Last edited:
Back
Top