You are using an out of date browser. It may not display this or other websites correctly.
You should upgrade or use an alternative browser.
You should upgrade or use an alternative browser.
1:1 Millennium Falcon Cockpit Replica - Group Build
- Thread starter SteveStarkiller
- Start date
Hi Gang,
Not much of an update but I did spend time at the lab. They are getting ready to rearrange the lab so we started moving a few things. Also, Scott, Mike and I got started on another arcade machine. I wonder what this is going to be?")
Mike and Scott playing shuffle board on the table I brought in

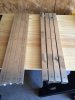
This is what folks will now see when they walk by... Cockpit included!

We the started this awesome project!


More to Follow!
Not much of an update but I did spend time at the lab. They are getting ready to rearrange the lab so we started moving a few things. Also, Scott, Mike and I got started on another arcade machine. I wonder what this is going to be?
Mike and Scott playing shuffle board on the table I brought in
This is what folks will now see when they walk by... Cockpit included!
We the started this awesome project!
More to Follow!
SK, this build is so epic that you've made even holes drilled in a board into something we can get excited about!
LOL Thanks so much, SR! With all these holes being drilled I'm beginning to see that light at the end of the tunnel. I just hope it's not a train!
I have been watching this thread nearly since it's beginning(as a dirty lurker lol) and it really has come a long way:thumbsup.
The amount of talent and patience you and your crew have going here is nothing short of amazing and as others have said it is truely epic(and I hate using that word)! I love watching the progress and hope to one day sit in it and to hopefully explore the completed full size Falcon. Hats off you guys!
Hi Solos,
Thank you for the very the kind words and encouragement! I can't begin to tell you how thankful I am to have surrounded myself with such talent. If these guys can make me look good, they deserve MUCH more credit! Things are really about to pick up. The guys have a few more Cons to get ready for then they switch focus. It should be an interesting but exciting Fall/Winter!
- - - Updated - - -
I cannot wait to see the cockpit built and ready to fly! The anticipation is killing me:lol
You and me both, my friend! Seeing those 1" tiles backlit for the first time is going to be insane!
Good stuff once again! Any news about the NAV chairs?
Hey J,
Thank you thank you! The Nav Chairs are just sitting in the garage right now waiting for me to show them a little attention. I'm focusing everything on the panels (as you can tell) and then I'm switching gears to the 12" extension. If I'm able to get everything finished before the sound and light guys take over, I really want to get those chairs finished! They are still on the radar...
Operascot
Active Member
Hey all,
It has been a while since I posted about the quad v2, but since Sofaking has been sort of coaching me, I'd been sending him pics. He says I should post, so here goes:
Way back I started this build with steel for the framework of the reciprocating barrels. It got heavy, even before the addition of PVC (see Sofa's Quad build earlier- it is amazing) I decided to learn how to weld aluminum and work from there. I finally got a good stretch to play and started putting spark to stick
First the steel one (45 pounds, yeesh), followed by some of the in progress work on the aluminum
Attachments
-
 IMG_2436.JPG2.1 MB · Views: 122
 -
 1281D582-DFD1-44D1-8777-ADF2B965419D_zpsvptsz4ul.JPG500.9 KB · Views: 107
 -
 ADE54B94-EBF0-47E3-98E9-B7C6310942FA_zpsjakk5zva.JPG1.8 MB · Views: 119
 -
 IMG_2530.JPG1.9 MB · Views: 108
 -
 IMG_2619.JPG834.2 KB · Views: 104
 -
 IMG_2620.JPG788.5 KB · Views: 114
 -
 IMG_2624.JPG1.9 MB · Views: 112
Last edited:
Operascot
Active Member
One of the problems with the steel version was that I'd been using a 2" inner diameter tube as a slide for the 1 1/2" reciprocating barrel. There's about 1/8" of tolerance between the two, and as the barrel slid, it would droop. I fixed that by putting some segments of "Openbeam" extrusion as an interior track for the barrels to slide on. NO DROOP!
Operascot
Active Member
I also started work on the side armor for the gun. Also framed in aluminum (and really thin wall, too- that was annoying for a while), it is going to get skinned on the inside with 1/8" plexi and on the outside with some 3d printed ABS panels (which have some greeblies printed on them already). I made the panels so they have beveled edges, and once they are in place, I plan on making some friction welds between them. Fingers crossed


Attachments


Last edited:
Operascot
Active Member
I also worked a bit on the front of the gun body. Sofaking gave me this shot of the 5' model

and I tried printing the cone-like front. It ended up as 2 pieces. Shown here with my first attempt at the muzzle

and I tried printing the cone-like front. It ended up as 2 pieces. Shown here with my first attempt at the muzzle
Attachments

Last edited:
Operascot
Active Member
More shots of the (blast chamber?) front. The first of the two pieces. I've since printed a newer, cleaner version of it

The cone has a slot inside to gather rain that wight get in once it is attached to the Full Scale Falcon in the future, and the hole is the evacuation spot. Ideally, it will be on the underside of the gunbarrels. Below that is a version of the Corellian Engineering Corporation logo I found somewhere online.

I've tried printing a half piece. Thge outside turned out nicely, but the bed temperature was set too high and, well, you can see what happened.


That green spot is a chunk of the PET film from the printer bed. Less than happy about that.
The muzzle tips have been a pain; I'm still not happy with them, although the most recent version didn't have as many problems. Eventually, there will be a print worth molding and making casts from, and then there will be LEDs inside the tip which will light up briefly as the gun "fires", triggered with the same signal that triggers the piston valves.


The cone has a slot inside to gather rain that wight get in once it is attached to the Full Scale Falcon in the future, and the hole is the evacuation spot. Ideally, it will be on the underside of the gunbarrels. Below that is a version of the Corellian Engineering Corporation logo I found somewhere online.
I've tried printing a half piece. Thge outside turned out nicely, but the bed temperature was set too high and, well, you can see what happened.
That green spot is a chunk of the PET film from the printer bed. Less than happy about that.
The muzzle tips have been a pain; I'm still not happy with them, although the most recent version didn't have as many problems. Eventually, there will be a print worth molding and making casts from, and then there will be LEDs inside the tip which will light up briefly as the gun "fires", triggered with the same signal that triggers the piston valves.
Last edited:


Hey all,
It has been a while since I posted about the quad v2, but since Sofaking has been sort of coaching me, I'd been sending him pics. He says I should post...
I never said he "should" post, guys. I only INSISTED that he post!
This quad is amazing! I cannot wait to see everything together and in action! There is a HUGE part of me that really enjoys looking at the mechanical inner workings of the prop. It would be shame to cover it up with all those panels, details, greeblies, oil streaks and other awesomeness!sooner37
New Member
Hi everyone! I'm a new member here and I stumbled upon this thread a few days ago. All I can say is WOW!!! I'm amazed at the talent that is on this site!!! I have a few questions. How many people are working on this? What is the Maker Fair thing? How do you have access to a laser cutter?
God Bless
God Bless
Holy crap, I stepped out for a week and look what you guys did! :thumbsup Thanks I needed to see that, made my day.
Hey BD,
That just tells us that you're no longer allowed to go anywhere.
Similar threads
- Replies
- 11
- Views
- 1,101
- Replies
- 2
- Views
- 921
- Replies
- 2
- Views
- 961
- Replies
- 13
- Views
- 2,240