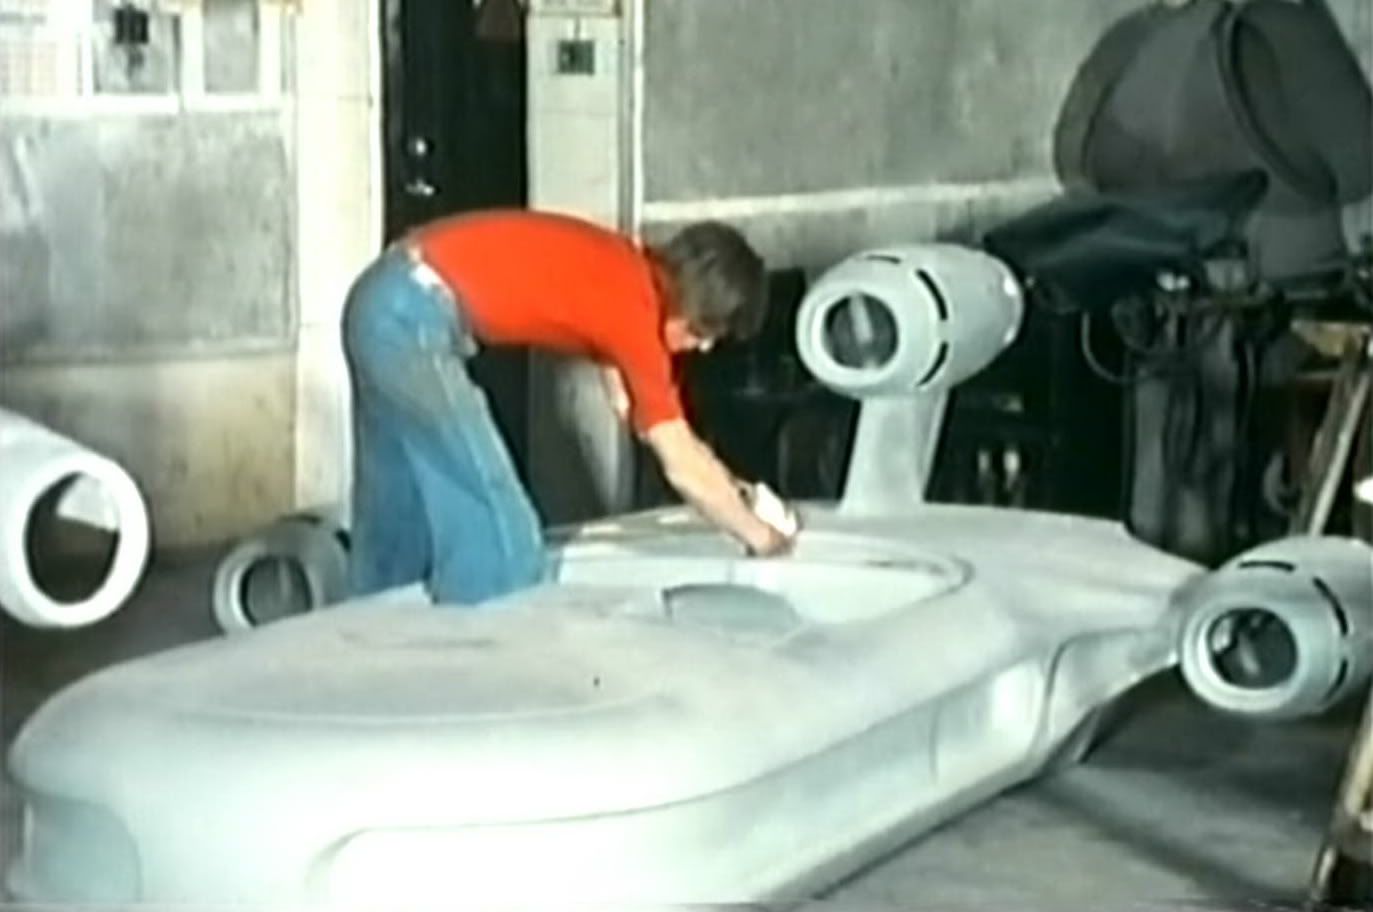
1:1 Landspeeder Project - Completed!

Re: New Landspeeder Project...

Utterly, utterly speechless.
If I was to make one in the UK, for the screen I would use 'Talbot Designs'
www.talbotdesigns.co.uk

Not sure how their prices would compare to the US, BUT it would give you a new 'vocabulary' to go searching for an affordable dome to use. They do a lot of blow moulding..............
I'm VERY jealous, btw !!
 
Re: 1:1 Landspeeder Project...NEW PICS 10/5/07!!!

Thanks for the tip CC...I'll definitely drop them a line and see what their price would be on a dome as I am still trying to find the best way to tackle that...

Last night was the first time that I actually had a chance to stand back and look at it from a distance...Overall I was pretty happy with the results up to this point...Especially given the fact that I have never done anything like this before.

I actually scraped every one of those damage areas by hand using a razor blade...Very tedious work, but I liked the results as it gave the damage a little more character and kept them from looking like grey "dots" that had simply been painted on :)

Jason
 
Re: 1:1 Landspeeder Project...NEW PICS 10/5/07!!!

Wow - the weathering is looking great!

Can I ask where you plan to store it when you're done? Garage? Storage facility?

.
 
Re: 1:1 Landspeeder Project...NEW PICS 10/5/07!!!

Beautiful! Is it still going on a golf cart?

If you do debut this locally, let us know where. I'd love to see it. Too bad you missed the museum exhibit dates.
 
Re: 1:1 Landspeeder Project...NEW PICS 10/5/07!!!

Thanks for the positive comments...

I am still planning on mounting it to my 3 wheel EZ go cart...however, its looking like I am going to have to stretch the frame by about 18 inches.

As far as storing it is concerned, it will most likely go in my garage.:)

I will definitely let you local folks know when u get it running...right now I am shooting for Halloween, but its going to be close.

Jason
 
Re: 1:1 Landspeeder Project...NEW PICS 10/5/07!!!

Here's a couple of screencaps - bit late I know but could be helpful...

PDVD_002-1.jpg

PDVD_001-1.jpg
 
Re: 1:1 Landspeeder Project...NEW PICS 10/5/07!!!

I've just caught up with this thread and boy that's incredible work, just brilliant. Can't wait to see it finished.
 
Re: 1:1 Landspeeder Project...NEW PICS 10/5/07!!!

Wish I had those pics during sculpting. Wouldn't have change anything but I didn't have any good reference pics of the underside. I see the center console
is part of the floor pan not a separate piece. We made it separate to accommodate anyone over 5'8" and 130lbs. It is a tight fit with it in there so
we made it removable.

I could use some help with the windscreen. I'm going to attempt a droop mold
heating up acrylic over an oval mold. The oval hole will be over a giant metal box 4x4x8. In the box there will be heat from something to be determined.

If anyone has messed with acrylic or has a better clear plastic to work with could you let me know. Temps techniques ECT. :eek

OH and Jason when you coming over and painting mine?:lol


XREB
 
Re: 1:1 Landspeeder Project...NEW PICS 10/5/07!!!

The shots on page one -- is that in your garage? Ilike the banked flourescent light bays.

You have absolutely nailed the colors on the speeder! Awesome job!

Now of course you you know that if you ever have to sell it that this model speeder just isn't getting as much as it used to! ;)
 
Re: 1:1 Landspeeder Project...NEW PICS 10/5/07!!!

Hehehe...

Well luckily I don't see this one going up for sale anytime soon...Rumor has it that they are just not in demand ;)

The shots in the first post were taken at the shop that helped us with the fiberglass work.

I'm really happy with the way the colors turned out, as that was something I really toiled over for some time...I was able to get an early viewing in fort worth before the traveling exhibit opened, and I just HAPPENED to have a pantone color chart with me that day...I then compared that info against the movie and other pics before ultimately deciding on these colors.

And Xreb, you know I will be glad to paint your speeder for you...All you have to do is pay for the airfare :)

Jason
 
Re: 1:1 Landspeeder Project...NEW PICS 10/5/07!!!

I could use some help with the windscreen. I'm going to attempt a droop mold
heating up acrylic over an oval mold. The oval hole will be over a giant metal box 4x4x8. In the box there will be heat from something to be determined.

If anyone has messed with acrylic or has a better clear plastic to work with could you let me know. Temps techniques ECT. :eek


XREB


HI- This is do-able but I would allow a few sheets for trial and error.:rolleyes

http://www.lucitel.com/literature.asp

will give you a pdf of temp ranges. in 'Fabrication Guide'

http://www.crclarke.co.uk/Support/dataSheets.htm

will give you some cool ideas and more info too!

Once lucite/perspex sags, it sags- so you need to make sure that the weight of the perspex (lucite to you i think) doesnt pull it down right to the bottom of the 'tank' before you have a chance to introduce cooling.But this method would ensure pretty even curves -so long as your choice of heating is even all round.Remember to make a ruler/depth guage up to use from the top down- the reflections you will see on the plastic make it impossible to visually see how deep your dish is becoming. Plastic stays hot for a while so make sure you can remove the heartsource asap.............

Othewrwise, What I think will work is if you made up a large frame to clamp/screw a sheet of your plastic to.Allow 12 inches all round extra - or more the better really- to allow for the stretching (and will result in less forcing to shape).
Use/borrow/hire a garage jet/Parrafin space heater to heat the plastic up till saggy (not the BBQ patio type- the jet engine looking ones on wheels)- you will prob have to move it around a bit to even the heat out, and make sure you dont blister the plastic by being too close etc.(This is probably dodgy to say the least :eek) Once the plastic is saggy/bouncy, you have about a minute to:
plunge the frame/plastic over a solid/strong mould of the shape you want, + let the plastic sag to the floor over your former.
if needed- then use a second frame- with a cut out of the outside shape in it, so a heavy sheet of 25mm MDF or such like with an oval hole in it-to then press it over the heated plastic/ former and it'll help pull down the excess plastic around the sides, if this makes sense.:wacko. (The hole needs to be to size plus an inch all around or so, to allow for the thickness of plastic.).Your mould should be taller than needed unless you are happy with a flange/lip.
If you put LOADS of release agent over the mould- vaseline works a treat here- you can normally keep the plastic protection sheet on the plastic during the process. This will ensure you still have a glass clear finish to the plastic, although your former has to be very smooth to not pick up textures.
I'd avoid using any kind of painting/filler on the mould as it can react with the heat (over time).
Lucite is quite brittle and if you want a thick screen, it will be quite 'stiff' to work with- even at the pliable stage itll be like softish rubber- but very springy
Styrene or PETG are much easier to shape with thermoforming, but I think you might struggle to find something more than 3mm thick- but I cant say for the US market.

Hope this helps:love
 
Last edited:
Re: 1:1 Landspeeder Project...NEW PICS 10/5/07!!!

Yes that really helps!!!!!

I've done some reading and I was heading down that path. It was great for you to confirm what I was thinking including the heat source. Going to build a big metal box with heat ducts running through the bottom with little holes in them pointing down. Putting one of those torpedo heaters outside the box pointing into the hole for the duct. Making a few holes at the middle of the box to let some air out for circulation. I was also having the duct exit the box with a trap on it to regulate the amount of heat. Close it for max and open it for minimum heat. Stick a thermometer in the side of the box plus have one of those laser thermometers. First test to see if it will just droop on it's own.
If that doesn't work I'm going to seal the top and pressurize it blowing a bubble down into the box. I'll have more control if I presurize it but want to see what will happen with nothing first.

Thanks for the info

XREB
 
Re: 1:1 Landspeeder Project...NEW PICS 10/5/07!!!

Awesome!

Hey XREB...Go get cracking on that windshield...I'm going to need one in about 3 weeks :)

Jason
 
Re: 1:1 Landspeeder Project...NEW PICS 10/5/07!!!

Quick update...

Nose damage is done...Engine mounts are done...

Should be working on frame and body mounting for the next few days...

Still hoping to wind up everything by Halloween...It won't be COMPLETELY done...But close enough to drive around and show off :)

More pics this weekend...

Jason
 
Re: 1:1 Landspeeder Project...NEW PICS 10/5/07!!!

Morning :)

That is yet to be determined, as I am awaiting a couple of quotes from local shops that I expect to get back today. I should know for certain by this afternoon.

They will either be plastic or wood...

I'm pretty confident that the grills currently on the original are painted plywood...But I have not been able to get 100% confirmation of that.

Jason
 

Your message may be considered spam for the following reasons:

If you wish to reply despite these issues, check the box below before replying.
Be aware that malicious compliance may result in more severe penalties.
Back
Top